When you create a role, you specify values for the set of profile properties defined for the role in your system. Two default sets of properties are provided with the Business Control Center—one for global roles and one for organizational roles. If the properties do not meet your business requirements, you can extend the profiles to include different or additional properties. For information on how to do this, refer to Working with the Dynamo User Directory in the ATG Personalization Programming Guide. This step is optional.
It is important to consider the following information about role names before you start adding roles:
The names you give global roles must be unique within their folder. However, if you want to use global roles to define membership of a user segment (so that you can then use a person’s role as a basis for content targeting, for example), all global roles names must be unique within the profile repository.
The names you give organizational roles need to be unique only within their organization, even if you plan to use them to define a user segment.
For more information on using roles within a segment or to perform content targeting, see the targeting chapters in the ATG Business Control Center User's Guide.
To create a role, complete the following steps:
Display the Home page.
Expand the Personalization item and select the appropriate Users option. Caution: If you choose External Users, be aware that you will be viewing live profiles on your production server.
From the Show menu, select Organizations and Roles.
In the left pane, select the position where you want the new role to be located. For a global role, select any folder under the Global Roles root folder. For an organizational role, select the organization to which this role applies. Note: To select the item, click its name, not the checkbox next to it. The selection is indicated by blue highlighting.
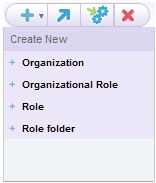
Click the Create New icon and select the appropriate option (for a global role, select Role).
In the General tab, fill in all required properties, which are shown with an asterisk. By default, the Name property is required. Role names can include spaces.
For organizational roles, the Function property is also required. See Organizational Roles at the beginning of this chapter.
The Members tab is read only—you do not need to specify any information here when you are creating a new role.
Click Create. The new role is added to the system and appears in the list on the left. (You may have to refresh the browser window and expand the appropriate folder to see it.)
Note: If you did not select a location in the list on the left, an error message appears when you click Create. Use the Select Parent button to choose a parent folder or organization.
