9 Year-End Reporting
After you build the year-end workfiles and review the corresponding reports, you can print year-end forms. You print year-end forms to supply your employees and the Canada Revenue Agency (CRA) with wage and earnings statements for the year.
You can use the XML format to report year-end information to the CRA and Revenue Québec.
This chapter contains the following topics:
9.1 Printing Year-End Forms
After you build the year-end workfile, you can print year-end forms. You print year-end forms to supply your employees and the government with wage and earnings statements for the year.
If you use window envelopes to mail T4 forms, you can set the Cheque Route Code field on the Employee Entry program (P070101) to display the employee name and address in a window envelope. You must also set the Cheque Route Code processing option to 1 for the T4 Print Special Forms program (P077321). Ensure that you set up UDC 07/CR for the Cheque Route Code field.
After you print year-end forms, you can print an individual T4, T4A, Relevé 1, Relevé 2, or NR4 form. You might print an individual year-end form to replace one that an employee has lost.
You can only print laser forms.
Note:
If the employer is in the United States, the word Canada is in the employee's address on printed forms.Printing year-end forms includes the following tasks:
-
Printing multiple year-end forms
-
Resetting laser forms
-
Adjusting laser forms
-
Printing individual year-end forms
9.1.1 Printing Multiple Year-End Forms
After you build the year-end workfile, you can print year-end forms. You print year-end forms to supply your employees and the government with wage and earnings statements for the year.
The system requires you to print T4 forms, but allows you to bypass other forms. To archive and save year-end information to history, you must either print or bypass printing of each form type.
Depending on which form type you print, the form print program executes one of the following DREAM Writer programs:
| Form | Description |
|---|---|
| T4 Print Special Forms | Uses the T4 Workfile (T07730) and T4 Adjustments Workfile (T07740). |
| T4A Print Special Forms | Uses the T4A Workfile (T07732) and T4A Adjustment Workfile (T07742). |
| Relevé 1 Print Special Forms | Uses the Relevé 1 Workfile (T07731 and Relevé 1 Adjustment Workfile (T07741). |
| Relevé 2 Print Special Forms | Uses the Relevé 2 Workfile (T07733) and Relevé 2 Adjustment Workfile (T07743). |
| NR4 Print Special Forms | Uses the NR4 Workfile (T07734) and NR4 Adjustment Workfile (T07744). |
The print procedure for year-end forms generates the spool files interactively. You can reprint any of the form types, if necessary.
To avoid wasting forms, print returns on plain paper and verify that the data is correct before you use the preprinted forms that are required by the government. Make corrections if necessary, and then print the returns on form paper.
The system prints only the first three lines from the employee's address book record on year-end forms. Also, the system prints one line of the company name and two lines of the company address.
For T4 forms, system parameters are preset to calculate a subtotal after 200 forms to comply with government regulations. The system also calculates a subtotal when the company or tax ID changes. The system also generates a grand total.
The program prints up to six special handling codes on the first T4 form in the Other Information boxes. The program prints the remaining special handling codes on additional T4 forms in the Other Information boxes.
To print multiple year-end forms
From Print Year End Forms (G772477), choose Print Laser Forms
-
Read the informational message and press F6 to continue.
-
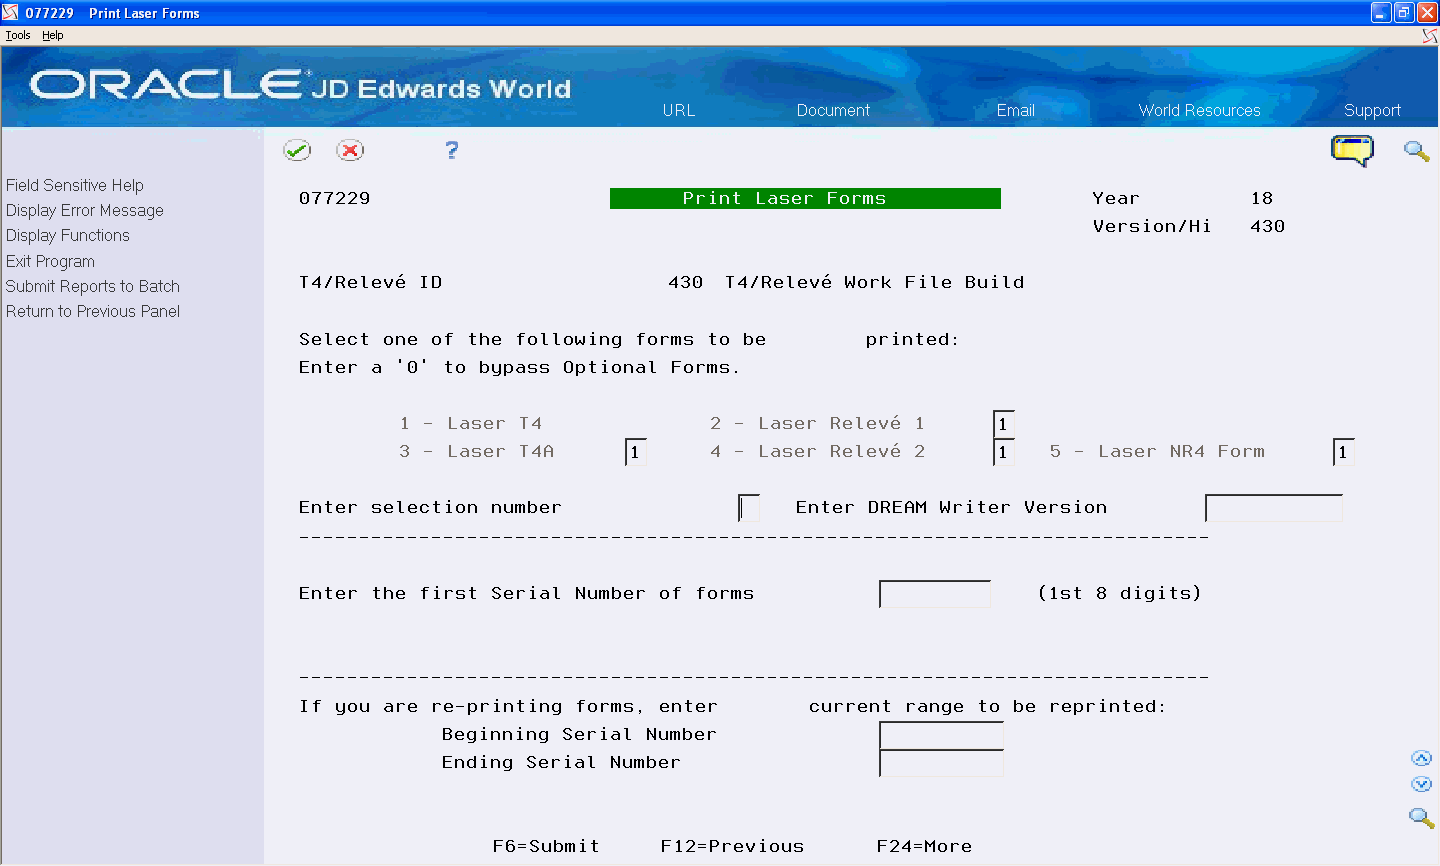
On the first Print Laser Forms screen, complete the T4/Relevé ID field and click Enter twice:
-
On the second Print Laser Forms screen, review the following fields:
-
Laser T4
-
Laser T4A
-
Laser Relevé 1
-
Laser Relevé 2
-
Laser NR4 Form
-
-
Complete the following fields:
-
Enter Selection Number
-
Enter DREAM Writer Version
If you do not enter a DREAM Writer version, the system enters the default version XJDE0001.
-
-
Complete the Enter the First Serial Number of Forms field.
You do not need to enter a serial number for T4, T4A, and NR forms. If you do not enter a serial number, the system automatically assigns a number using the next numbers feature.
-
Choose Submit Reports to Batch (F6).
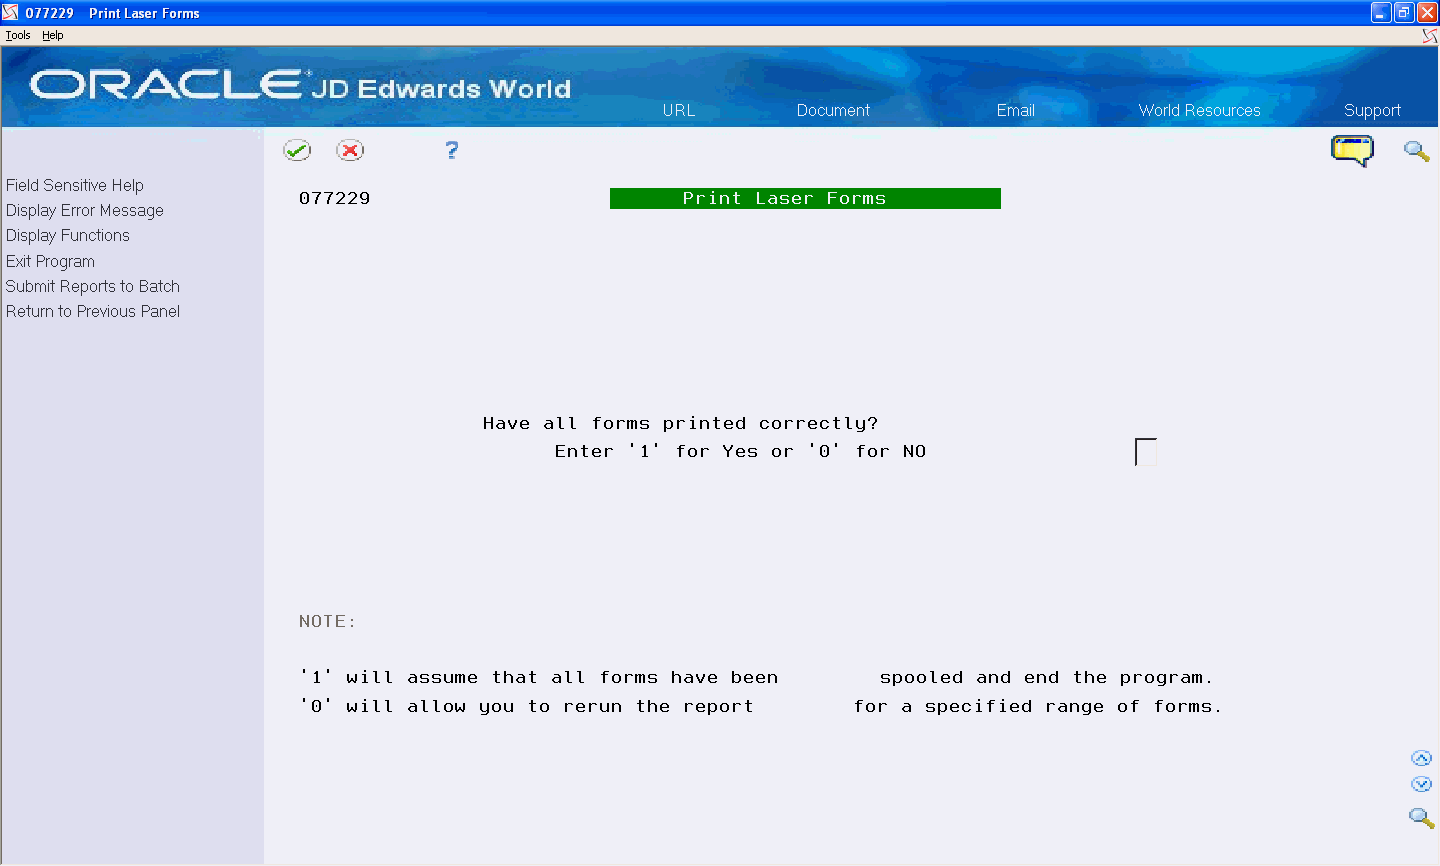
The program asks you to verify reports submission.
-
Choose Submit Job (F6).
-
On the third Print Laser Forms screen, complete the Enter 1 for Yes or 0 for No field and click Enter.
If you enter 0 (No), the previous screen displays for you to make your selections again before rerunning the print procedure.
| Field | Explanation |
|---|---|
| 2 - Relevé 1 | A code that specifies whether the system prints optional forms.
Valid values are: 1 – Yes, this version includes Relevé 1 forms. 0 – No, this version does not include Relevé 1 forms. Do not show this option again. |
| 3 - T4A | A code that specifies whether the system prints optional forms.
Valid values are: 1 – Yes, this version includes T4A forms. 0 – No, this version does not include T4A forms. Do not show this option again. |
| 4 - Relevé 2 | A code that specifies whether the system prints optional forms.
Valid values are: 1 – Yes, this version includes Relevé 2 forms. 0 – No, this version does not include Relevé 2 forms. Do not show this option again. |
| 5 - NR4 Form | A code that specifies whether the system prints optional forms.
Valid values are: 1 – Yes, this version includes NR4 forms. 0 – No, this version does not include NR4 forms. Do not show this option again. |
| Enter selection number | A return value entered by the user.
Screen-specific information A value that specifies the type of form to print. Valid values are: 1 – T4 forms 2 – Relevé 1 forms 3 – T4A forms 4 – Relevé 2 forms 5 – NR4 forms |
| Enter the first Serial Number of forms | The serial number of the first form on which you will print. The serial number is required for Relevé 1, Relevé 2 forms. Beginning in 1998, T4 forms do not include serial numbers.
Screen-specific information Enter only the first 8 digits; the system calculates the check digit. |
| Enter Beginning Serial Number | The serial number of the first form to be reprinted.
Screen-specific information If you are reprinting forms, enter the first serial number that you want to re-print. This must be a number greater than zero and represents the beginning of the range of forms the user wants to reprint. You must enter all 9 digits of the serial number, including the check digit. |
| Enter Ending Serial Number | The serial number on the last form to be reprinted.
Screen-specific information If you are reprinting forms, enter the last serial number that you want to reprint. This must be a number greater than zero, it can be the same as the beginning serial number (if you want to reprint only one form), and represents the end of the range of forms to reprint. You must enter all 9 digits of the serial number, including the check digit. |
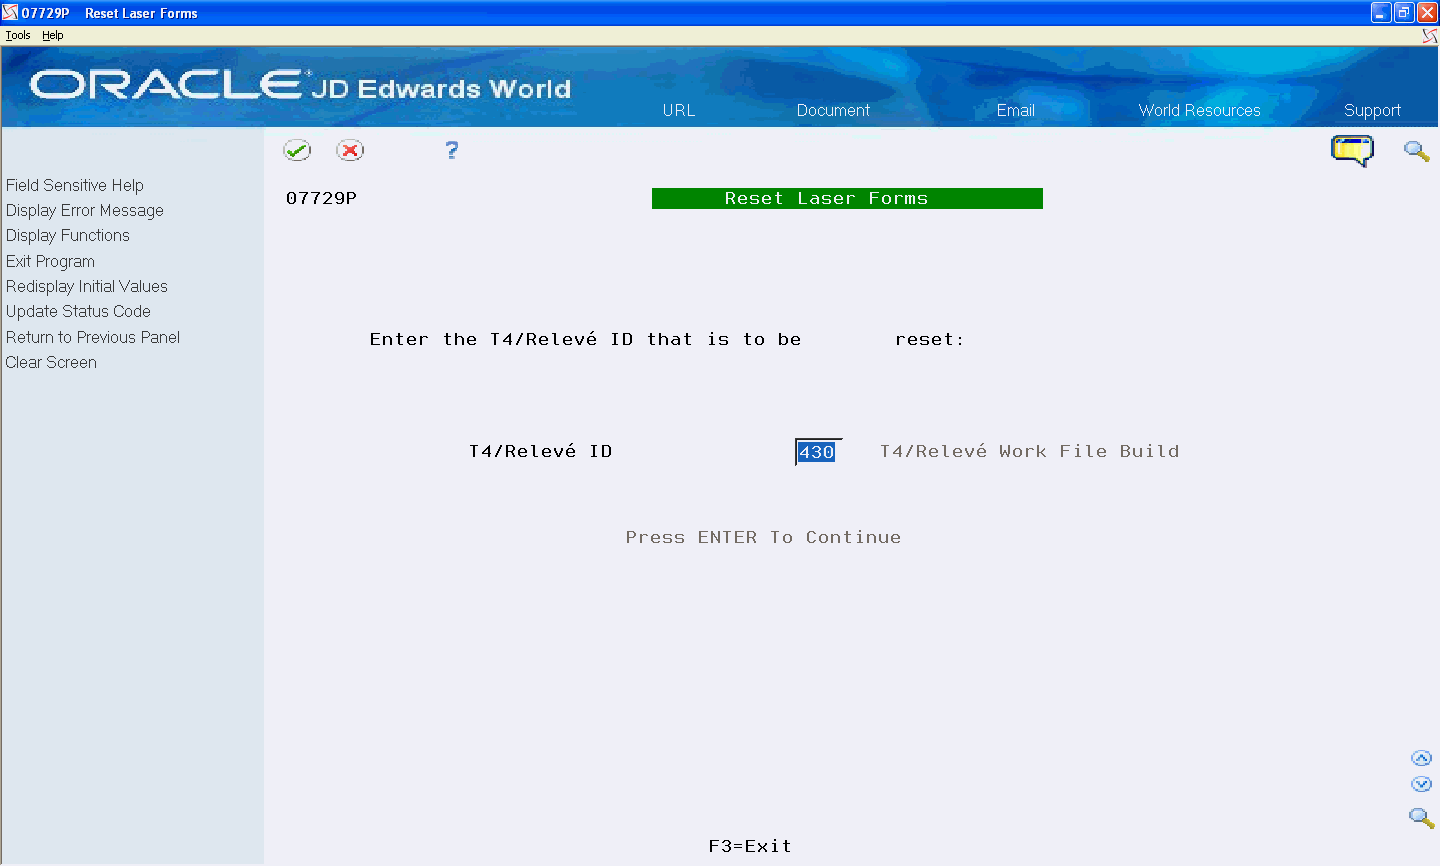
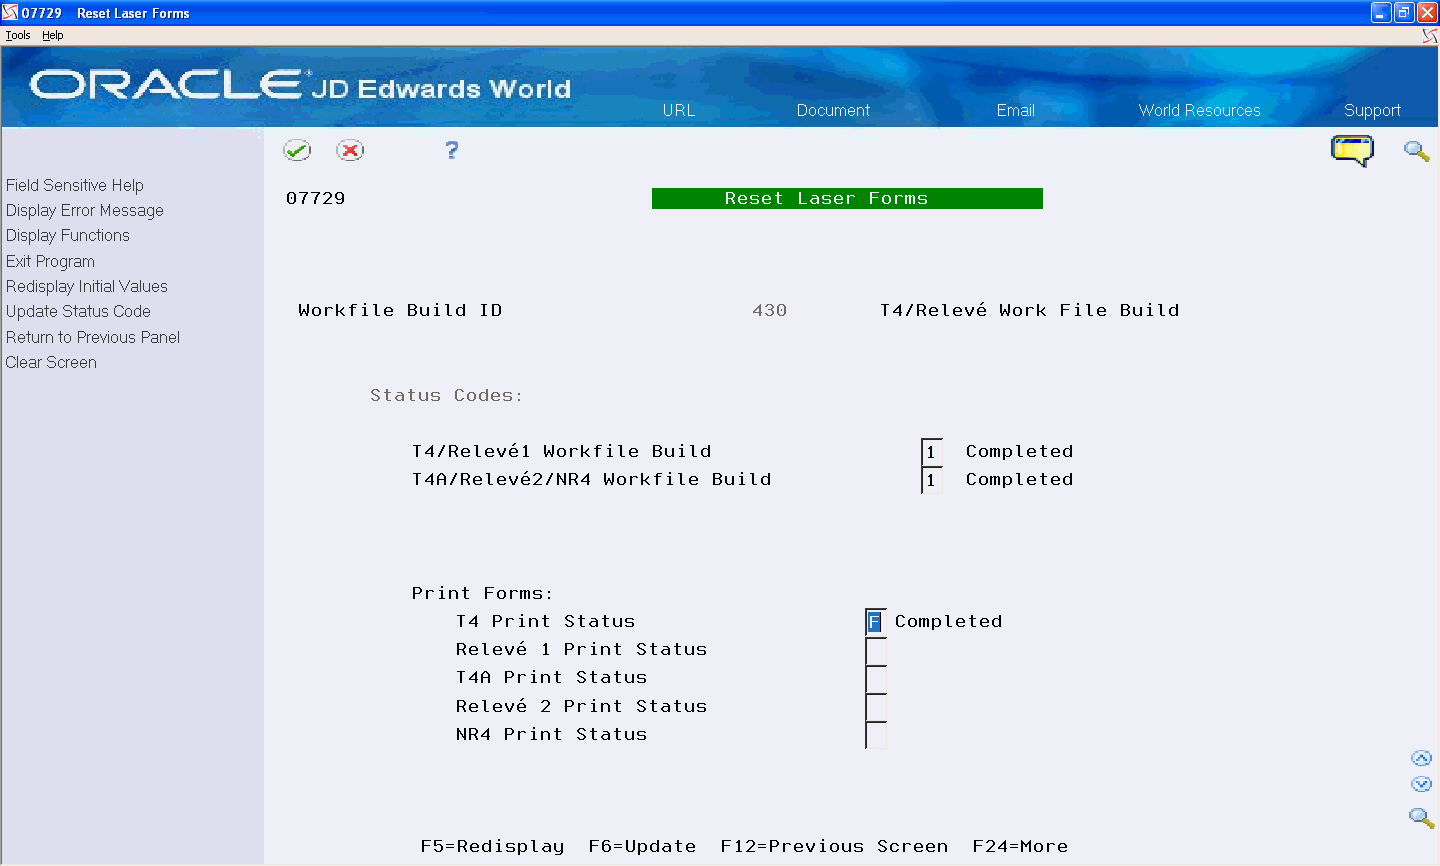
9.1.2 Resetting Laser Forms
If you print laser forms and then need to reprint the forms, you must first reset the laser forms. For example, if you discover an error with the current forms, you need to reset laser forms and then reprint the forms.
From Print Year End Forms (G772477), choose Reset Laser Forms
-
On the first Reset Laser Forms screen, complete the T4/Relevé ID field and click Enter twice.
-
On the second Reset Laser Forms screen, reset the print status for the forms that you want to print by removing the value in any of the following fields:
-
T4 Print Status
-
Relevé 1 Print Status
-
T4A Print Status
-
Relevé 2 Print Status
-
NR4 Print Status
-
-
Choose Update (F6).
The program prompts you to verify the status code update.
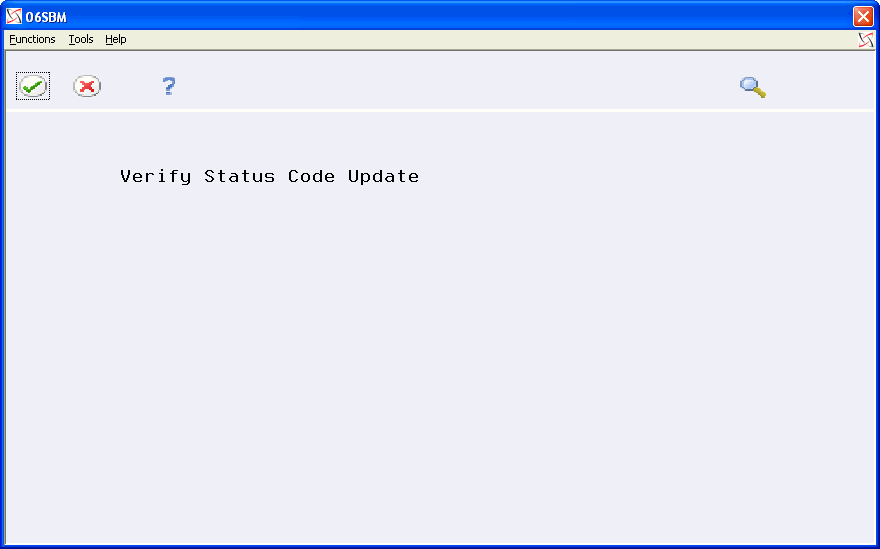
Description of the illustration ''verfy_stus_code_updat.gif''
-
Choose Submit Job (F6) from the Functions menu.
9.1.3 Adjusting Laser Forms
The system allows you to adjust the printing of laser forms if the text is not lining up correctly on the forms. You can adjust employee or employer forms. The system administrator most commonly performs this task.
JD Edwards World strongly recommends that you create a source library and a custom object library.
When you create a custom object library, you must include the source physical table JDESRC. If you do not have authority to add a new library to your library list, contact your system administrator. If you use a custom object library, it must appear at the top of the library list.
If you are using the JDFSRC library, the system adds each change to the last change because you are altering the original source.
From Print Year End Forms (G772477), choose Align Employee Copy or Align Employer Copy
9.1.4 Printing Individual Year-End Forms
After you print multiple year-end forms, you can print an individual T4, T4A, Relevé 1, Relevé 2, or NR4 form. You might print an individual year-end form to replace one that an employee has lost.
Note:
You must print multiple forms from the Print Year End Forms menu (G772477), choosing the appropriate Print Laser Forms program before you print individual forms.This program prints information from the workfile build for the form that you choose.
You can print individual forms, per government regulations, for prior years, but the system prints the information using the current format.
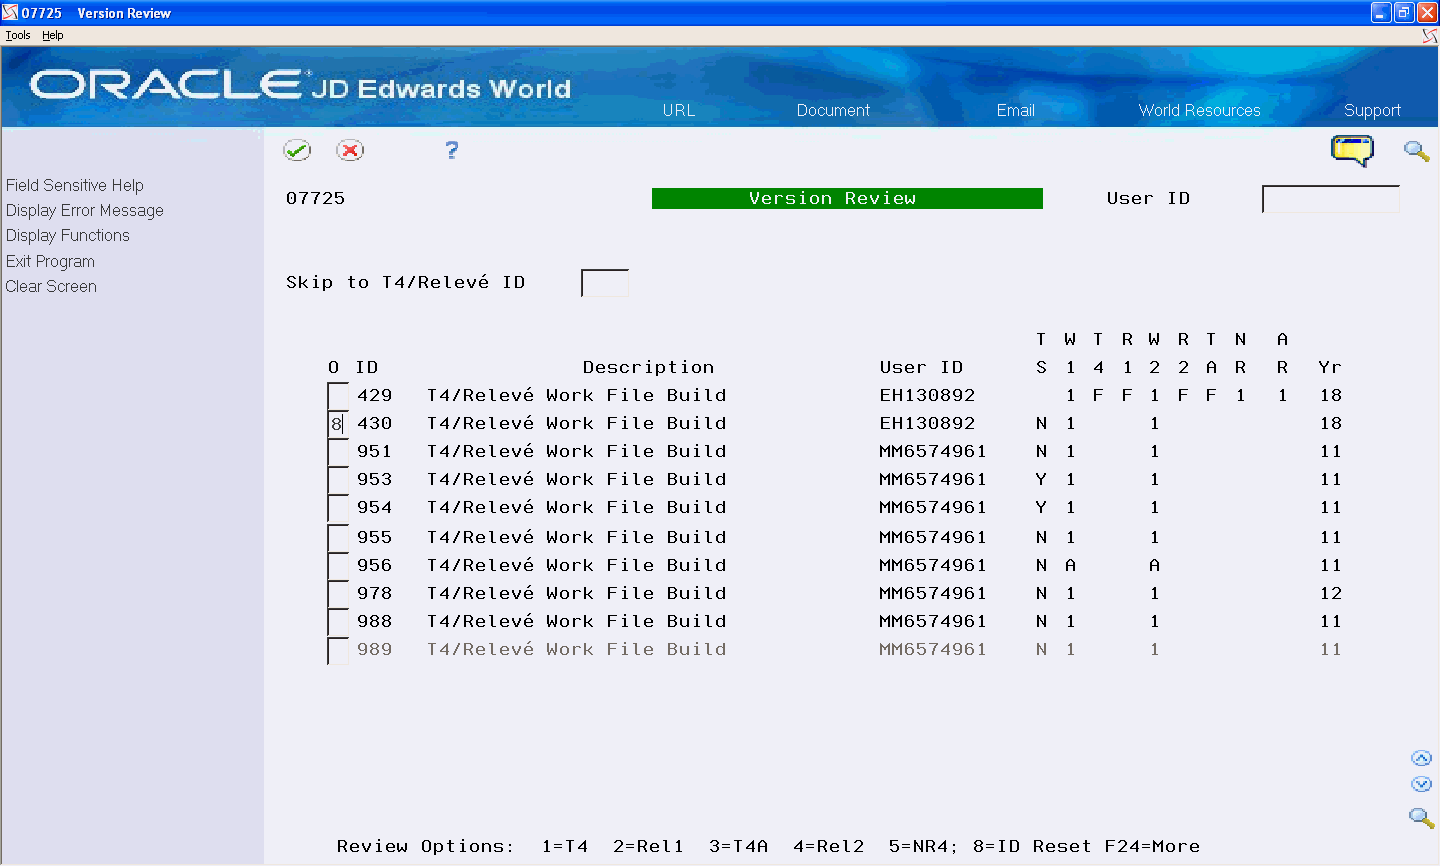
To print individual year-end forms
From Canadian Year End Processing (G77247), choose Version Review
The following is an example using Relevé 1 forms, to print other forms, use the same steps but choose the corresponding options. The system does not require a serial number for T4, T4A, and NR forms.
-
On Version Review, enter 2 in the Option field next to the workfile build that you want to review, and click Enter.
-
On Employee Relevé 1 Summary Rev., enter 8 in the Option field for the employee for whom you want to print the form, and click Enter.
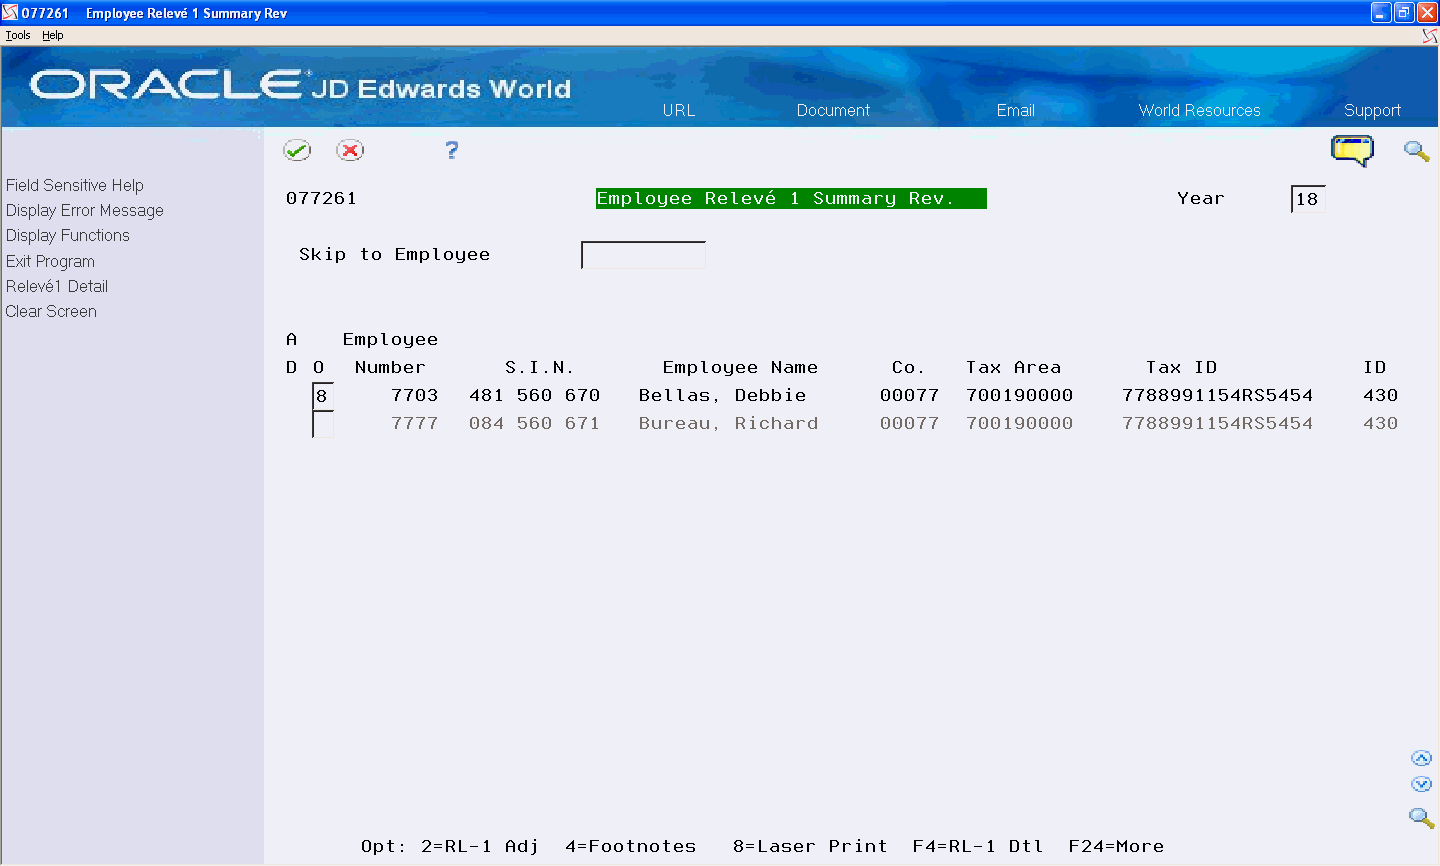
Description of the illustration ''emp_releve1_sumry_rev.gif''
-
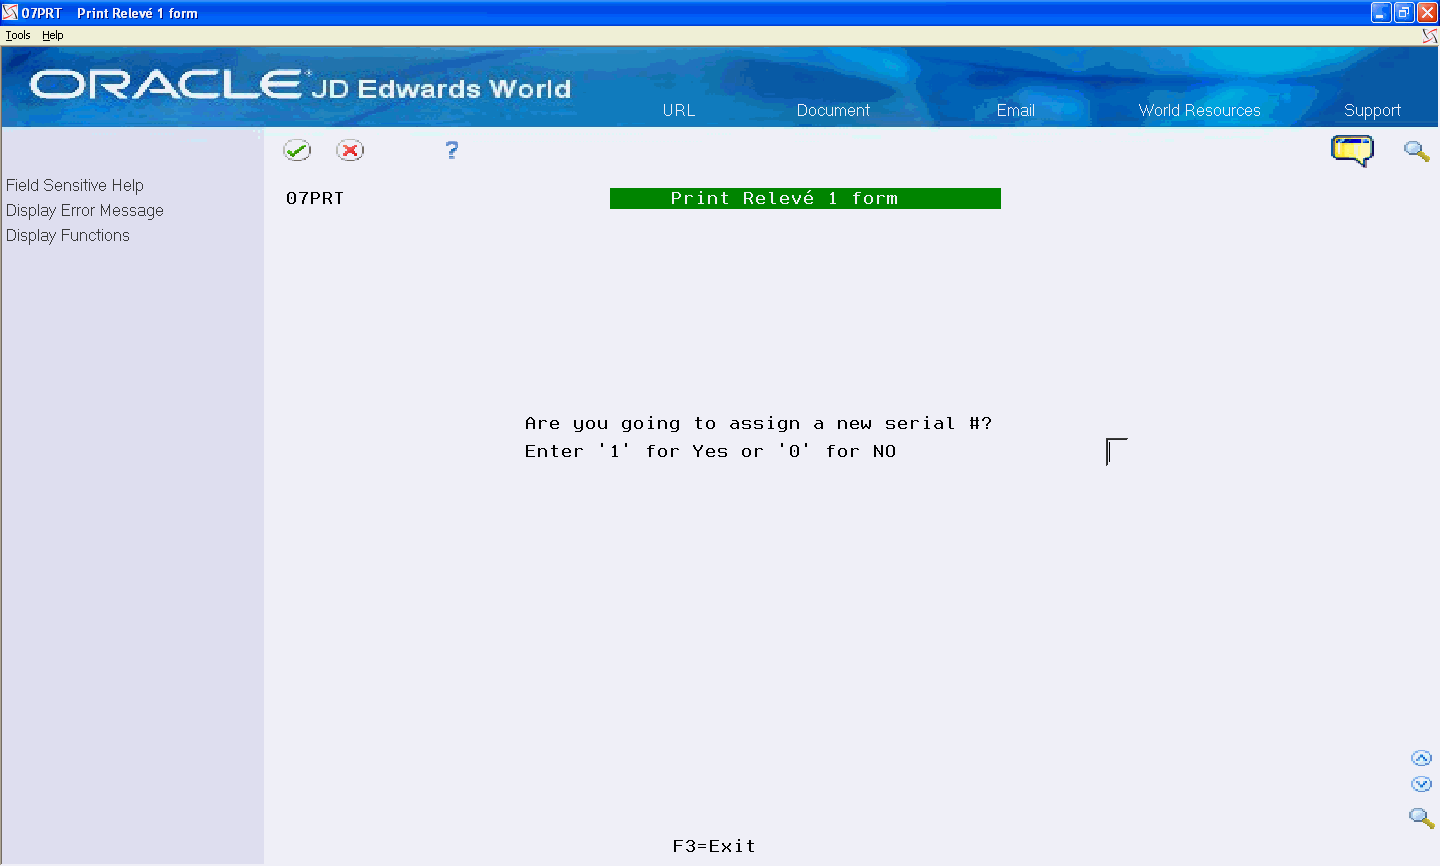
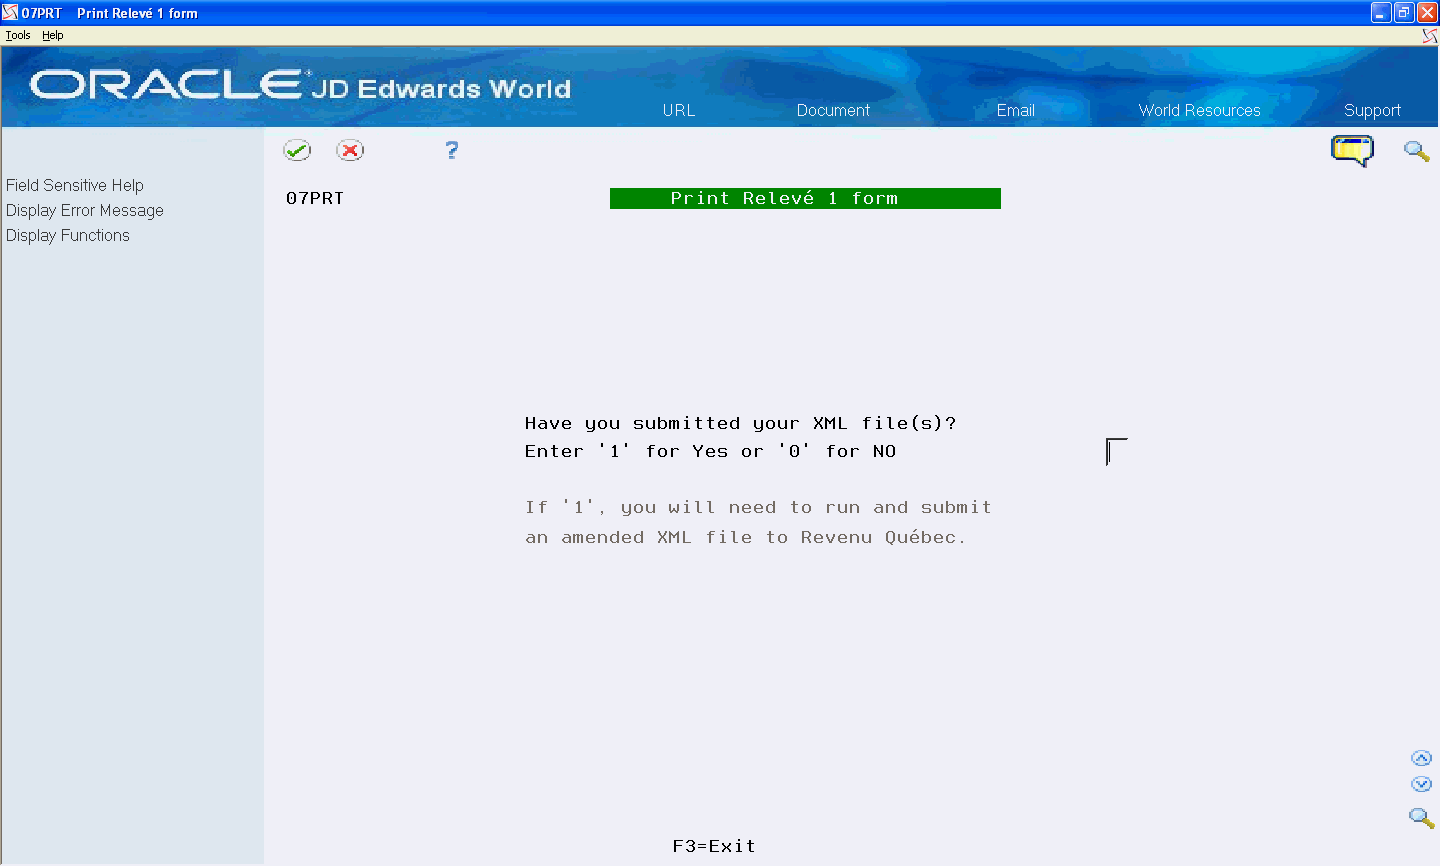
On Print Relevé 1 form, complete the Are you going to assign a new serial #? Enter 1 for Yes or 0 for NO field.
-
On Print Relevé 1 form screen, complete the Have you submitted your XML file(s)? field.
-
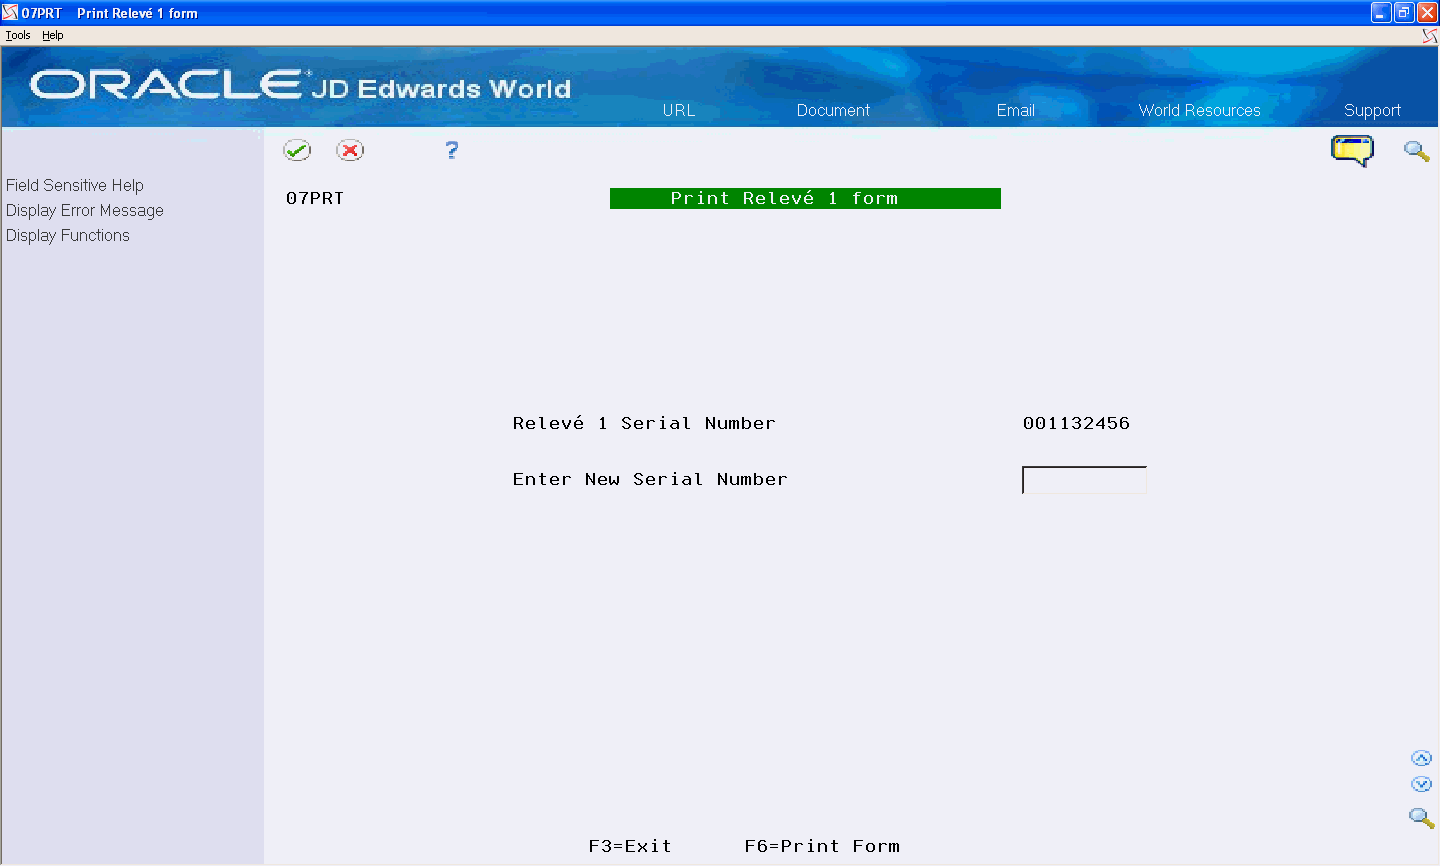
On Print Relevé 1 Form, complete the Enter replacement serial number field.
-
Choose Print Form (F6).
Description of the illustration ''prnt_releve1_form_2.gif''
| Field | Explanation |
|---|---|
| Are you going to assign a new serial #? | The Yes or No Entry field is a common single character entry field for simple yes or no responses on prompt screens. For International purposes, No = '0' and Yes = '1'.
Screen-specific information Enter 1 for Yes or 0 for No. If you enter 0 (No), the form reprints using the existing serial number the system assigns to that record. You can return to the menu when you enter 0. If you enter 1 (Yes), the next Print Relevé 1 form screen displays. |
| Have you submitted your XML file(s)? | The Yes or No Entry field is a common single character entry field for simple yes or no responses on prompt screens. For International purposes, No = '0' and Yes = '1'.
Screen-specific information Enter 1 for Yes or 0 for No. If you enter 0 (No), you replace the existing serial number in the record by entering a new serial number. If you enter 1 (Yes), the system saves the existing serial number and the new serial number you enter. Entering 1 indicates you have already submitted your files to Revenue Québec and you need to run an XML build for the amended slips and submit the file to Revenu Québec. Revenu Québec requires both serial numbers in the XML file. |
| Enter replacement serial number | The T4 number assigned to this amended record.
Screen-specific information Enter all 9 digits of the new serial number that you want to assign to the form, including the check digit. |
9.2 Creating the XML File
You can use the XML format of the following forms to report year-end information to the CRA and Revenu Québec:
-
T4
-
T4A
-
Relevé 1
-
Relevé 2
Note:
The system generates an integrity report during the XML build process. The integrity report validates the data the system enters in the XML file to ensure that the data conforms to the XML schema from the CRA. For example, the CRA requires that Canadian Postal Codes be in the XML file in the following format: A1A1A1 (alpha, numeric, alpha, numeric, alpha, numeric). If the postal code in the Address By Date table (F0116) is not in this format, the system prints an error on the integrity report.After you build the XML file, you need to review the integrity report. If any errors exist, make all necessary corrections and run the XML & Audit File Build program again.
The XML file is successful if the integrity report contains the following message: ** XML File Contains No Errors **.
You can run these programs as a standalone audit report to validate the data the system creates in the workfile. You do not have to wait until you are ready to submit your XML file to run these.
Creating the XML file includes the following tasks:
-
Working with the T4 XML Files
-
Working with the T4A XML Files
-
Working with the Relevé 1 XML Files
-
Working with the Relevé 2 XML Files
See Also:
-
The CRA website for more information, including the XML specifications, schemas, Employer Guides, and General Filing information.
-
The Revenu Québec website for Relevé information, including XML specifications.
-
Section 8.3, "Reviewing the XML Integrity Reports" for more information.
Note:
Specifications for the Relevé XML format (all RL Slips) are available from Revenu Québec only if you are a registered partner with Revenu Québec. See Section 9.3, "Transferring and Submitting the XML Workfile" for more information.9.2.1 Working with the T4 XML Files
Create a workfile for T4 XML so you can transfer this workfile to your PC and submit the data to the CRA.
Working with the T4 XML files includes the following tasks:
-
Creating the T4 XML and Audit Files
-
Verifying the T4 XML File
9.2.1.1 Creating the T4 XML and Audit Files
This program reads information from the T4 Workfile (T07730) and the T4 Adjustment Workfile (T07740). The system saves the information in the T4 XML Workfile (T07760X), using the XML syntax and schema that the CRA requires. The system also saves the records in the T4 XML Audit Workfile (T07761), so that you can print an audit report of the information you send to the government.
From XML Processing (G772475), choose Build T4 Files
9.2.1.2 Verifying the T4 XML File
After you create the XML and audit files, verify that the information it contains is the information that you intend to submit to the government.
The T4 XML Integrity and Audit reports assist you in verifying this information. The integrity report lists any errors the system encounters when creating the T4 XML Workfile (T07760X) and the audit report lists the information from the T4 XML Audit Workfile (T07761).
Note:
The Other Information area at the bottom of the T4 form includes several Box- Case and Amount boxes for the various types of additional income. There are numerous codes for additional income defined by the Canadian government. When you generate T4's, the system prints one primary slip and can print up to five "overflow" slips with additional income amounts, depending on how many amounts need to be special handled for the additional income.The T4 XML Audit Report (P07761X) reflects the total number of detail records in the XML file including the detail records for any overflow slips. The T4 Summary Report (P07746) reflects only the total number of T4's the employee receives for each company and tax ID. That is, one slip per employee regardless of how many overflow slips print. It does not include overflow slips in the slip count.
The slip count on the XML Audit Report never matches the T4 Summary Report if an employee has more additional information amounts than the primary slip can accommodate. The totals on these reports accommodate two different numbers: XML detail records vs. slip counts.
During the XML & Audit File build, the system saves the information in the T4 XML Workfile (T07760X), using the XML syntax the CRA requires. The system also saves the records in the T4 XML Audit Workfile (T07761), using sequential formatting.
From XML Processing (G772475), choose T4 XML Audit Report
See T4 XML Audit Report (P07761X)
Do not change the data selection for this program. There is only one field in the T4 XML Audit Workfile (T07761) and the file contains all the records the system saves during the XML build.
Changing the data selection does not accurately reflect the data that you submit to the government.
Do not change the data sequence for this program. There is only one field in the T4 XML Audit Workfile (T07761) and it is in the same order that the system saves the records during the XML build.
Changing the data sequence does not accurately reflect the data that you submit to the government.
Do not attempt to correct the data in the T4 XML Workfile (T07760X) or in the T4 XML Audit Workfile (T07761). The information in these two files is an exact match. The T07760X stores the information using XML syntax and the T07761 stores the information using sequential formatting.
Changing the information in either of these files causes the information to be out-of-sync.
Grand totals exist in this report; however, grand totals are not in the XML file as they are not part of the XML schema the CRA issues. The grand totals are only in the report to assist you in associating this data to other reports.
9.2.2 Working with the T4A XML Files
Create a workfile for T4A XML so you can transfer this workfile to your PC and submit the data to the CRA.
Working with the T4A XML files includes the following tasks:
-
Creating the T4A XML Files
-
Verifying the T4A XML File
9.2.2.1 Creating the T4A XML Files
The program reads information from the T4A Workfile (T07732) and the T4A Adjustment Workfile (T07742). The system saves the information in the T4A XML Workfile (T07765X), using the XML syntax and schema that the CRA requires. The system also saves the records in the T4A XML Audit File (T07766), so that you can print an audit report of the information you send to the government.
From XML Processing (G772475), choose Build T4A Files
9.2.2.2 Verifying the T4A XML Files
After you create the XML and audit files, verify that the information it contains is the information that you intend to submit to the government.
The T4A XML Integrity and Audit reports assist you in verifying this information. The integrity report lists any errors the system encounters when creating the T4A XML Workfile (T07765X) and the audit report lists the information from the T4A XML Audit Workfile (T07766).
During the XML & Audit File build, the system saves the information in the T4A XML Workfile (T07765X), using the XML syntax the CRA requires. The system also saves the records in the T4A XML Audit Workfile (T07766), using sequential formatting.
This report contains three parts:
-
Transmission record
-
Supplementary (detail) records
-
Summary records
From XML Processing (G772475), choose T4A XML Audit Report
See T4A XML Audit Report (P07766X)
Do not change the data selection for this program. There is only one field in the T4A XML Audit Workfile (T07766) and the file contains all the records the system saves during the XML build.
Changing the data selection does not accurately reflect the data that you submit to the government.
Do not change the data sequence for this program. There is only one field in the T4A XML Audit Workfile (T07766) and it is in the same order that the system saves the records during the XML build.
Changing the data sequence does not accurately reflect the data that you submit to the government.
Do not attempt to correct the data in the T4A XML Workfile (T07765X) or in the T4A XML Audit Workfile (T07766). The information in these two files is an exact match. The T07765X stores the information using XML syntax and the T07766 stores the information using sequential formatting.
Changing the information in either of these files causes the information to be out-of-sync.
Grand totals exist in this report; however, grand totals are not in the XML file as they are not part of the XML schema the CRA issues. The grand totals are only in the report to assist you in associating this data to other reports.
JD Edwards World includes summary and grand totals for box 46. However, box 46 is not in the XML file as it is not part of the XML schema that the CRA issues. The totals are only in the report to assist you in associating the totals to the detail and other reports.
9.2.3 Working with the Relevé 1 XML Files
Create a workfile for Relevé 1 XML so you can transfer this workfile to your PC and submit the data to Revenu Québec.
Working with the Relevé 1 XML files includes the following tasks:
-
Creating the Relevé 1 XML Files
-
Verifying the Relevé 1 XML File
9.2.3.1 Creating the Relevé 1 XML Files
This program reads information from the RL-1Workfile (T07731) and the Relevé 1 Adjustment Workfile (T07741). The system saves the information in the Relevé 1 XML Workfile (T07770X), using the XML syntax and schema that Revenu Québec requires. The system also saves the records in the Relevé 1 XML Audit Workfile (T07771), so that you can print an audit report of the information you send to the government.
In addition to error messages, you might also receive a warning message. JD Edwards World recommends that you investigate the message to ensure the file's data accuracy. The warning message states: Warning-All Employees have both CPP/QPP.
The system successfully validates the XML file if the integrity report contains the following message: XML File Contains No Errors.
You only need to create and send an amended file, if you sent the original file to Revenu Québec and you need to change some of the information that you transmitted.
You only need to create and send a canceled file, if you sent an original file to Revenu Québec and you need to cancel some of the information that you transmitted.
Note:
If you run this program as a standalone audit report prior to printing the Relevé forms, the system displays errors for the Serial Number field because the Print Laser Form program assigns the serial numbers to the Relevé forms. You can disregard these errors until you print the forms, however, you must print the forms to assign serial numbers before you run this program to create the file you send to Québec. If records are missing serial numbers, Québec rejects your file.From XML Processing (G772475), choose Build Relevé 1 Files
See Relevé 1 XML and Audit File Build (P07770X)
-
For the original build, do not change the data selection. All records in the RL-1 workfile should be from the original files.
-
For an amended build, select only those employees from the RL-1 workfile to which you made changes.
-
For a canceled build, select only those employees from the RL-1 workfile for which you want to cancel an RL-1.
Do not change the data sequence.
9.2.3.2 Verifying the Relevé 1 XML File
After you create the XML and audit files, verify that the information it contains is the information that you intend to submit to the government.
The Relevé 1 Integrity and Audit reports assist you in verifying this information. The integrity report lists any errors the system encounters when creating the Relevé 1 XML Workfile (T07770X) and the audit report lists the information from the Relevé 1 XML Audit Workfile (T07771).
During the XML & Audit File build, the system saves the information in the Relevé 1 XML Workfile (T07770X), using the XML syntax Revenu Québec requires. The system also saves the records in the Relevé 1 XML Audit Workfile (T07771), using sequential formatting.
The report contains three parts:
-
Transmission record
-
Supplementary (detail) record
-
Summary record
From XML Processing (G772475), choose Relevé 1 XML Audit Report
See Relevé 1 XML Audit Report (P07771X)
Do not change the data selection for this program. There is only one field in the Relevé 1 XML Audit Workfile (T07771) and the file contains all the records the system saves during the XML build.
Changing the data selection does not accurately reflect the data that you submit to the government.
Do not change the data sequence for this program. There is only one field in the Relevé 1 XML Audit Workfile (T07771) and it is in the same order that the system saves the records during the XML build.
Changing the data sequence does not accurately reflect the data that you submit to the government.
Do not attempt to correct the data in the Relevé 1 XML Workfile (T07770X) or in the Relevé 1 XML Audit Workfile (T07771). The information in these two files is an exact match. The T07770X stores the information using XML syntax and the T07771 stores the information using sequential formatting.
Changing the information in either of these files causes the information to be out-of-sync.
9.2.4 Working with the Relevé 2 XML Files
Create a workfile for Relevé 2 XML so you can transfer this workfile to your PC and submit the data to Revenu Québec.
Working with the Relevé 2 XML files includes the following tasks:
-
Creating the Relevé 2 XML files
-
Verifying the Relevé 2 XML Files
9.2.4.1 Creating the Relevé 2 XML Files
This program reads information from the Relevé 2 Workfile (T07733) and the Relevé 2 Adjustment Workfile (T07743). The system saves the information in the Relevé 2 XML Workfile (T07775X), using the XML syntax and schema that Revenu Québec requires. The system also saves the records in the Relevé 2 XML Audit Workfile (T07776), so that you can print an audit report of the information you send to the government.
Note:
If you run this program as a standalone audit report prior to printing the Relevé forms, the system displays errors for the Serial Number field because the Print Laser Form program assigns the serial numbers to the Relevé forms. You can disregard these errors until you print the forms, however, you must print the forms to assign serial numbers before you run this program to create the file you send to Québec. If records are missing serial numbers, Québec rejects your file.From XML Processing (G772475), choose Build Relevé 2 Files
9.2.4.2 Verifying the Relevé 2 XML File
After you run the XML & Audit File build, verify that the information it contains is the information that you intend to submit to the government.
The Relevé 2 XML Integrity and Audit reports allow you to verify this information. The integrity report lists any errors the system encounters when it creates the Relevé 2 XML Workfile (T07775X) and the audit report lists the information from the Relevé 2 XML Audit Workfile (T07776).
During the XML & Audit File Build, the system saves the information in the Relevé 2 XML Workfile (T07775X), using the XML syntax Revenu Québec requires. The system also save the same information in the Relevé 2 XML Audit Workfile (T07776), using sequential formatting.
The report contains three parts:
-
Transmission record
-
Supplementary (detail) record
-
Summary record
From XML Processing (G772475), choose Relevé 2 XML Audit Report
See Relevé 2 XML Audit Report (P07776X)
Do not change the data selection for this program. There is only one field in the Relevé 2 XML Audit Workfile (T07776) and the file contains all the records the system saves during the XML build.
Changing the data selection does not accurately reflect the data that you submit to the government.
Do not change the data sequence for this program. There is only one field in the Relevé 2 XML Audit Workfile (T07776) and it is in the same order that the system saves the records during the XML build.
Changing the data sequence does not accurately reflect the data that you submit to the government.
Do not attempt to correct the data in the Relevé 2 XML Workfile (T07775X) or in the Relevé 2 XML Audit Workfile (T07776). The information in these two files is an exact match. The T07775X stores the information using XML syntax and the T07776 stores the information using sequential formatting.
Changing the information in either of these files causes the information to be out-of-sync.
9.3 Transferring and Submitting the XML Workfile
After you create the XML file on the AS/400, you transfer the file to your PC as an XML file so you can then submit it to the appropriate government authority. You can use the Integrated File System (IFS) or File Transfer Protocol (FTP) to copy the XML file to a PC. JD Edwards World recommends that you validate your T4 and T4A XML files against the schema from the CRA, if you have a parser. This allows you to correct any data errors in the files before you electronically submit them to CRA.
If you do not have a parser or access to the schemas, you need to verify the information on the XML Integrity reports.
As of December 2006, Revenu Québec only provides schema information to partners that register with Revenu Québec. Therefore, you are not able to validate the data yourself, unless you are a registered partner. For all correspondence, requests for technical information pertaining to filing data files, or to request the ability to send a test file for validation, contact Revenu Québec.
For more information regarding the submission of Relevé files, refer to the Guide for Transmitting RL-Slip Data: General and Technical Information (IN-800-V) which is available on Revenue Québec's website.
Transferring and submitting the XML workfile includes the following tasks:
-
Transferring using IFS
-
Transferring using FTP
-
Submitting the File to the Government
9.3.1 Transferring Using IFS
If you plan to use IFS to transfer your files, ensure your IFS directories exist before continuing. See Section 6.10, "Setting Up Integrated File System (IFS) Directories" for more information.
When you transfer the XML file using IFS, ensure that you perform the following:
-
Enter the name of the IFS directory in the IFS Path processing option for the following T4 XML programs. For example, enter: /home/userid or /home/t4xml.
-
Enter the name of the XML file that you create in the XML File Name processing option. If this processing option is blank and the IFS Path processing option contains an IFS path, the system derives the XML file name as follows: yy999999sss where
yy = the tax year from the Control Parameter File.
999999 = the 6-digit portion of the Transmitter Number from the processing option.
sss = 001 (as the sequence number) for T4 (002 for T4A, 003 for RL-1, and 004 for RL-2)
-
Transmit the file to the Canada Revenue Agency or Revenu Québec using Windows Explorer to locate the file.
9.3.2 Transferring Using FTP
The following tasks include examples of a file transfer for an AS/400 named JDED, using the library name T4LIB429 and the XML file name 18123456001.xml for a T4. You must:
-
Use the name of your AS/400
-
Change the library name to your year-end T4 library name
-
Locate the file number for the form you are submitting
-
Use the correct naming convention of the XML file you are submitting to the government
Following is a list of the file names for the XML files that reside on the AS/400:
-
T4 is T07760X.
-
T4A is T07765X
-
Relevé 1 is T07770X
-
Relevé 2 is T07775X
The CRA and Revenue Québec use an XML file format of aappppppsss.xml. for XML files. You change the format as follows:
-
aa = last two digits of the taxation year
-
pppppp = the digits of your transmitter number
-
sss = the sequence number of your file submission
-
.xml = the file format identifier
For example, if you submit two files for the 2019 tax year and your transmitter number is NP123456, the file names are 18123456001.xml for the first submission and 18123456002.xml for the second submission.
Transferring using FTP includes the following tasks:
-
To start the FTP utility
-
To initiate an AS/400 session
-
To copy the year-end file from the AS/400 to the PC
-
To exit the FTP utility
-
To locate the file on your PC
-
To validate the T4 and T4A XML file (optional)
-
Locate the workfile and ensure that the file on your AS/400 contains data. View the file using FEU, SQL, or another method. The files reside in your T4 library. The library name is T4LIBxxx, where xxx is the three-digit workfile ID that you chose for the XML and Audit File build. Verify the workfile number with your payroll department or review the workfile IDs from the Version Review program on the Canadian Year End Processing menu (G77247).
-
Locate the name of your AS/400. The name displays in the upper right corner of any menu within the JD Edwards World software.
-
Ensure you have access to FTP on their AS/400. Check with your IT staff to ensure that your user profile on the AS/400 allows access to FTP.
-
Install a 3rd party software package, such as Altova's XMLSpy to validate the transferred workfile against the XML schema from the CRA (optional).
-
On your PC Desktop, click the Windows Start button.
-
Click Run, the Run window displays.
-
Enter ftp and click OK to execute.
Description of the illustration ''ftp_window.gif''
The following is an example of the ftp> window to initiate an AS/400 session.
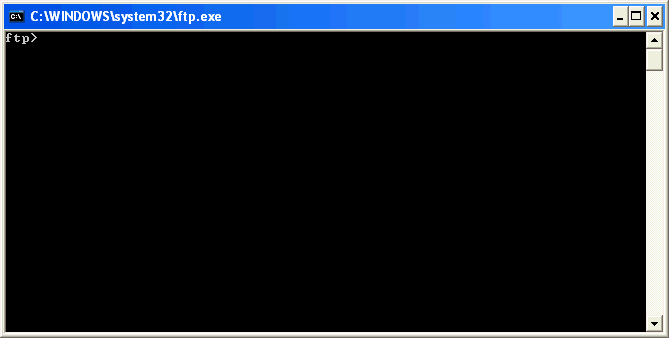
Description of the illustration ''ftp_exe_window.gif''
-
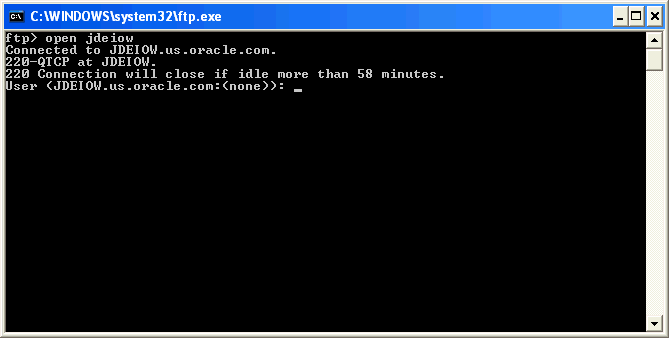
At the ftp> prompt, enter the word open, a space, the name of the AS/400 where the XML workfile resides and then press Enter.
The following is an example of a session with an AS/400 named JDED.
The system displays a message that you are connected.
Description of the illustration ''ftp_exe_comnd_window.gif''
-
Enter your AS/400 sign on.
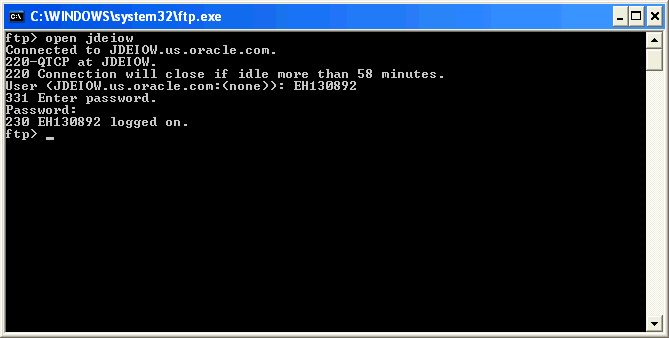
Description of the illustration ''ftp_exe_comnd_window_1.gif''
The system displays a message that you are logged on.
Note:
If your logon attempt is unsuccessful, perhaps because of a typing error in your User ID or password or in both, it is best to exit the FTP utility and start over. Enter quit at the ftp> prompt and press Enter. Re-start the FTP utility.
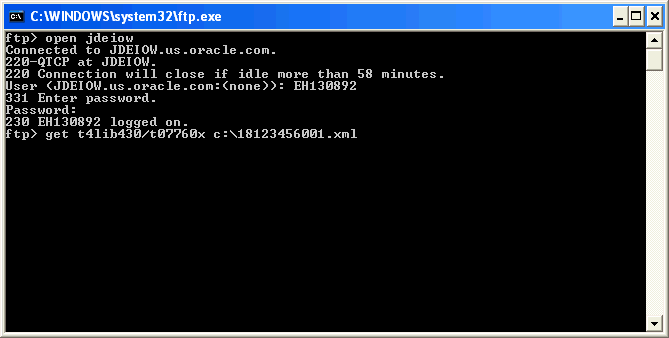
To copy the year-end file from the AS/400 to the PC
-
Enter the following command at the ftp> prompt, ensuring that you replace the Xs for the appropriate year-end T4 library, file number for the appropriate form, and that you use the correct format for submitting the XML file to the government:
get t4libXXX/t077XXX c:\aappppppsss.xml
Following are the file numbers for the forms:
-
T4 is T07760X
-
T4A is T07765X
-
Relevé 1 is T07770X
-
Relevé 2 is T07775X
The CRA and Revenue Québec require the following format for submitting files:
-
aa = last two digits of the taxation year
-
pppppp = the digits of your transmitter number
-
sss = the sequence number of your file submission
-
.xml = the file format identifier
For example, if you submit two files for the 2019 tax year and your transmitter number is NP123456, the file names are 18123456001.xml for the first submission and 18123456002.xml for the second submission.
The following is an example for a T4 form using the year 2019, library name T4LIB430, and the XML file name 18123456001.xml.
-
-
Press Enter to copy the file.
Description of the illustration ''ftp_exe_comnd_window_2.gif''
When the FTP process is successful in locating and transferring the file, FTP displays a message indicating how many bytes were received. If you do not receive this message, it is likely that the file on the AS/400 is empty or you need to check the spelling of the file and the library in the get command.
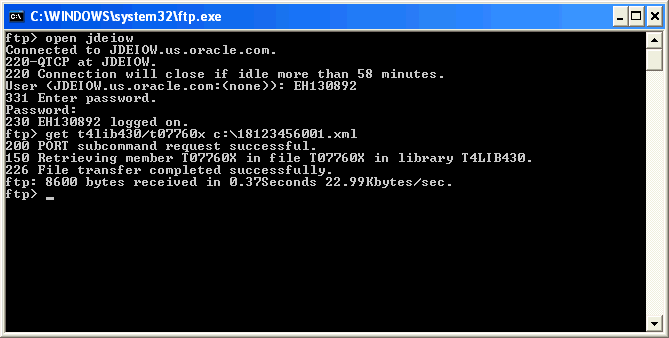
Description of the illustration ''ftp_exe_comnd_window_3.gif''
Enter the word quit at the ftp> prompt to end the FTP session.

Description of the illustration ''ftp_exe_comnd_window_4.gif''
-
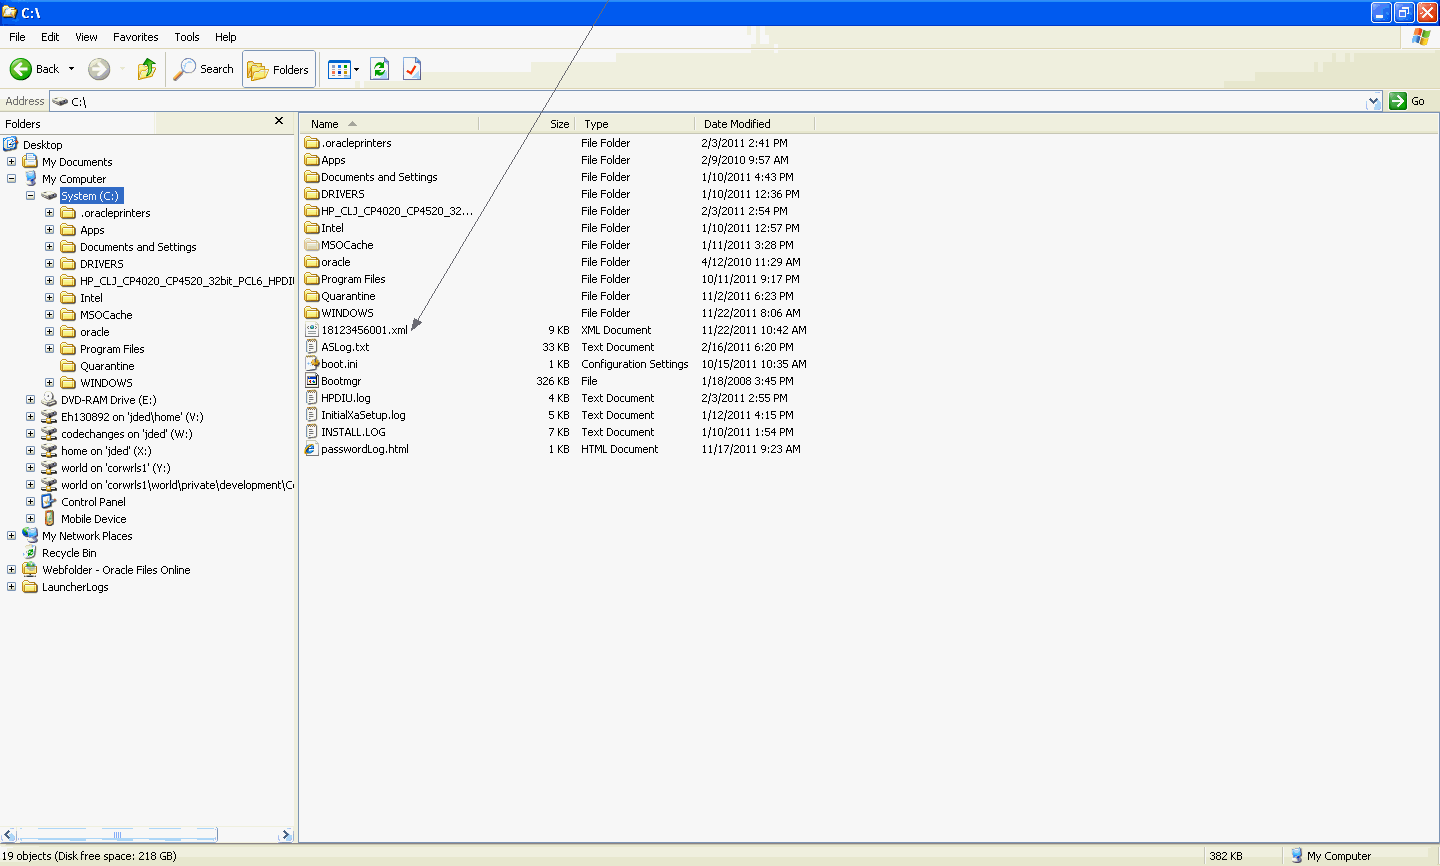
Access the Local Disk C: on your PC and locate the XML icon for the file you transferred.
-
Create a folder on your PC to store objects for the validation process.
-
Copy and paste or move the XML file to the new folder (for the validation process).
To validate the T4 and T4A XML file (optional)
JD Edwards recommends that you validate the T4 and T4A XML file before submitting it to the government.
Relevé 1 and Relevé 2 schema are only available to partners registered with Revenu Québec as of 2006.
-
Download the XML schema from the CRA website to your PC.
Schemas are in zip files.
-
Unzip the contents of the zip file into the same folder with the XML file.
-
Start the 3rd party software and open the XML file to validate your company's data against the XML schema from the government.
If the system displays errors, you should make corrections to the data before submitting the file to the government.
Note:
There can be conflicts between these software packages and the acceptable XML formats described previously. A file might fail validation because of issues in the 3rd party software that you use to validate the XML file.