Setting Up
This chapter provides information about setting up Oracle Work in Process and other integrated Oracle Applications.
This chapter covers the following topics:
- Overview of Setting Up
- Setup Steps
- WIP Parameters
- Defining WIP Parameters
- WIP Accounting Classes
- WIP Accounting Class Defaults
- Defining WIP Accounting Classes
- Shop Floor Statuses
- Defining Schedule Groups
- Defining Labor Rates
- Production Lines
- Profile Options
- Profile Option Descriptions
- Security Functions
- Setting Up Oracle Time and Labor Integration
Overview of Setting Up
This section contains an overview of the tasks that you need to complete to set up Oracle Work in Process, including related product setup steps. Before beginning, consider the following:
Set up underlying Oracle Applications Technology
You need to complete several other setup steps, including:
-
Performing system-wide setup tasks such as configuring concurrent managers and printers.
-
Managing data security, which includes setting up responsibilities to allow access to a specific set of business data and complete a specific set of transactions, and assigning individual users to one or more of these responsibilities.
-
Setting up Oracle Workflow.
Set up Work in Process
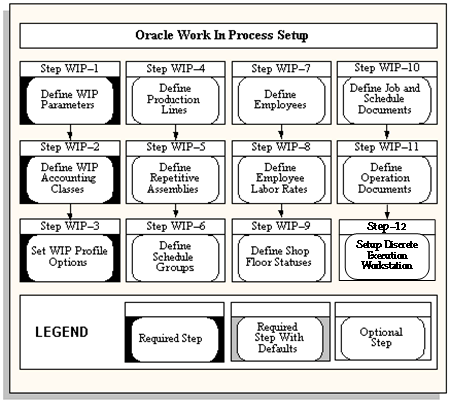
There are 12 steps to set up Work in Process, three of which are required. All of the steps are visually depicted on the Work in Process Setup Flowchart, see: Setup Flowchart
Related Product Setup Steps
You may need to perform some or all of the following steps to set up Work in Process. These steps are discussed in detail in the Setting Up sections of the related Oracle product user's guides.
Oracle Inventory Setup Steps
Set up Inventory as described in the Setup Steps, Oracle Inventory User's GuideEnsure that all of the following steps are completed:
| Step | Reference |
|---|---|
| Create your organizations | Common Manufacturing |
| Define your organization parameters | Common Manufacturing |
| Define your items and item costs | Common Manufacturing |
| Launch your transaction managers | Common Manufacturing |
| Define your account aliases (optional) | Common Manufacturing |
| Define your transaction reason codes (optional) | Common Manufacturing |
| Define your units of measure (UOMs) | Common Manufacturing |
| Define your subinventories | Common Manufacturing |
| Define your stock locators | Common Manufacturing |
Oracle Bills of Material
Set up Bills of Material as described in Setup Steps, Oracle Bills of Material User's Guide. Ensure that all of the following steps have been completed:
Oracle Engineering
Set the set up steps in the Oracle Engineering User's Guide.
| Step | Reference |
|---|---|
| Define your Engineering change orders (optional) | Common Manufacturing |
| Define your Engineering bills of material and routings (optional) | Common Manufacturing |
Oracle Cost Management (Optional)
Set up Cost Management as described in Setup Steps, Oracle Cost Management User's Guide.
| Step | Reference |
|---|---|
| Define your cost types | Common Manufacturing |
| Define your resource activities and activity costs | Common Manufacturing |
| Define your default WIP accounting classes for categories (optional) | Common Manufacturing |
| Define resources, material sub-elements, overheads, and overhead defaults. | Common Manufacturing |
Oracle Planning Products
Set up Oracle planning products. Optionally, define your demand classes.
Oracle Project Manufacturing (Optional)
Set up Project Manufacturing as described in the Oracle Project Manufacturing Implementation Manual..
Oracle Workflow (Optional)
In order to initiate workflows that send notifications during outside processing operations, or to customize workflows to include your own notification recipients, you must have Oracle Workflow installed. See: Setting Up Oracle Workflow, Oracle Workflow User's Guide.
Oracle Supplier Management Portal (Optional)
You must have Supplier Management Portal installed in order to set up a user ID for your suppliers so that they can view their purchase orders on the Oracle Self-Service Web Applications web site. Set up Oracle Supplier Management Portal as described in the Oracle Supplier Management Portal Implementation Manual.
Setup Flowchart
The following flowchart diagrams the steps that you need to perform to set up work in Process. Some of the steps outlined in this flowchart and in the setup checklist are Required and some are Optional. “Required Step with Defaults" refers to setup functionality that comes with pre-seeded, default values. You should review the defaults and decide whether or not to change them to suit your business needs. If you change the defaults, you should perform the setup step. You need to perform Optional steps only if you plan to use the related feature or complete certain business functions.
Setup Check List
The following table lists setup steps and a reference to their location within Oracle Applications. After you log on to Oracle Applications, complete the required steps to implement Work in Process:
| Step | Description | Discrete | Repetitive | Projects | Reference |
|---|---|---|---|---|---|
| 1 | Define Work in Process Parameters | Required | Required | Required | Oracle Work in Process |
| 2 | Define Work in Process Accounting Classes | Required | Required | Required | Oracle Work in Process |
| 3 | Set Work in Process Profile Options | Required | Required | Required | Oracle Work in Process |
| 4 | Define Production Lines | Optional | Required | Optional | Oracle Work in Process |
| 5 | Define Repetitive Assemblies | N/A | Required | N/A | Oracle Work in Process |
| 6 | Define Schedule Groups | Optional | N/A | Optional | Oracle Work in Process |
| 7 | Define Employees (optional if using resources) | Optional | Optional | Optional | Oracle Work in Process |
| 8 | Define Labor Rates (optional if using resources) | Optional | Optional | Optional | Oracle Work in Process |
| 9 | Define Shop Floor Statuses (optional if using resources) | Optional | Optional | Optional | Oracle Work in Process |
| 10 | Define Job and Schedule Documents | Optional | Optional | Optional | Oracle Work in Process |
| 11 | Define Operation Documents | Optional | Optional | Optional | Oracle Work in Process |
| 12 | Setup Discrete Execution Workstation | Optional | Optional | Optional | Oracle Work in Process |
Setup Steps
You must complete the following steps to set up Work in Process. Each step includes a Context section that indicates whether you need to repeat the step for each set of books, set of tasks, inventory organization, HR organization, or other operating unit under Multiple Organizations.
Step 1: Define Your Work in Process Parameters (Required with Defaults)
System Requirements: The following parameters define modes of operation and default values that affect Work in Process: Discrete Manufacturing Parameters, Repetitive Manufacturing Parameters, Move Transaction Parameters, Material Parameters, Intraoperation Steps Parameters, Outside Processing Parameters, Scheduling Parameters, and Other Parameters.
To define WIP parameters, you must change the control level for the Costing Enabled and Inventory Asset Value item attributes in the Item Attribute Controls window in Oracle Inventory. This change requires that costs be defined for all organizations that point to other organizations for their costs.
Note: You cannot define Work in Process parameters when the costing organization is different from the current organization.
You must define modes of operation that affect other functions in Oracle Work in Process and assign default values before you can perform any transactions in your organization. You must also enable the intraoperation steps that you want to use in your routings to allow detailed tracking within operations on the shop floor. Work in Process always enables Queue for each operation and To Move for the final operation in a routing.
-
Define Bills of Material Parameters for Phantom Routing (Required)
There are two Bills of Material (BOM) parameters that you need to define in order to use phantom routing: Use Phantom Routings (choose whether or not to charge phantom routing cost); and Inherit Phantom OP Seq (choose whether or not phantom components inherit the operation sequence of the parent operation or maintain their own phantom routing sequence).
-
Define Parameters for Project Manufacturing (Optional)
If you are using Project Manufacturing, several parameters are defined for Work in Process transactions: In the Oracle Project Manufacturing Parameters window:
-
Enable Project Reference and Project Control Level parameters enable you to assign project and task references to planned orders, jobs, purchase orders, sales orders, miscellaneous transaction and other entities within Oracle Manufacturing.
-
Allow Cross Product Issues enables components with a different unit number from your assemblies to be issued to work in process.
In the Organization Parameters window in Oracle Inventory
-
Project Cost Collection Enabled parameter associates an expenditure type with each subelement.
-
Enable Model/Unit Number Effectivity enables model/unit number effectivity for an organization;
-
-
Define Item Tolerance Type (Optional)
You need to enter an overcompletion tolerance type and tolerance value if you will be overcompleting assemblies on jobs or schedules. On the Master Items form, navigate to the Work in Process tab. Select the tolerance type percent or amount from the list of values, then enter the corresponding tolerance value.
Context: You need to perform this step once for each applicable item in the master organization where that item is defined.
See:
Defining Items, Oracle Inventory User's Guide.
Work in Process Attribute Group, Oracle Inventory User's Guide.
Step 2: Define your WIP Accounting Classes (Required)
You must define Work in Process accounting classes before you can define discrete jobs and repetitive assemblies. You must define separate accounting classes for standard discrete jobs, non-standard expense jobs, non-standard asset jobs, and repetitive assemblies. Accounting classes include the elemental valuation and variance accounts you use to cost discrete and repetitive production.
System Requirements: you can define any number of accounting classes. Accounting classes define which valuation and variance accounts are charged and when they are charged. Every discrete job and repetitive schedule that you define must be assigned one of the following types of accounting classes: Discrete, Standard Discrete Expense, Non-standard Asset, Non-standard Repetitive, or Lot Based Standard Discrete.
Note: The Lot Based Standard Discrete type is available only if Oracle Shop Floor Management is installed.
Default: If you skip this step, Discrete will be used as the default value.
Context: Perform this step for each inventory organization in which you use Work in Process.
See: Defining WIP Accounting Classes.
Step 3: Set your Work in Process Profile Options (Required)
Profile options specify how Work in Process controls access to and processes data. In general, profile options can be set at one or more of the following levels: site, application, responsibility, and user.
System Requirements: the system administrator sets and updates profile values. The Oracle E-Business Suite System Administration Reference Manual contains a list of all profile options available to every Oracle Application. At this step, select the profile options related to the Work in Process (WIP) module. These system profiles must be set in order to have an operational system. See: Profile Option Descriptions
Step 4: Define Production Lines (Optional)
You can associate production lines with repetitive assemblies, discrete jobs, and work order-less completions. A production line describes a unique set of operations, departments, and manufacturing cells that produce one or more of your products. You can define and update, but not delete production lines.
You must associate production lines with the assemblies that you plan to manufacture repetitively. You can build different repetitive assemblies on the same production line, which allows you to use production lines to aggregate material requirements for a number of assemblies by production line. You also can build the same assembly on different production lines.
Production lines can optionally be used to identify where and how your discrete jobs are built; however, Discrete job production lines are only used for informational purposes.
See: Defining Production Lines
Step 5: Define your Repetitive Line and Assembly Associations (Optional)
If you manufacture assemblies repetitively, you must define your repetitive assemblies and associate them with production lines before you can define repetitive schedules. When you define repetitive schedules, you must specify the line on which you plan to produce the repetitive assembly and the quantity that you plan to build. Repetitive line scheduling then uses the line start and stop times, production rate, and lead time, along with the workday calendar to schedule your repetitive schedules.
See: Associating Lines and Assemblies
Step 6: Define Schedule Groups (Optional)
You can define schedule groups then assign them to jobs or work order-less completion transactions. For example, you can define a schedule group then assign that schedule group to a group of jobs that are being built on a specific production line and that must be completed on a specific date for a planned departure.
See: Defining Schedule Groups.
Step 7: Define your Employees (Optional)
If you do not install Oracle Human Resource Management Systems with Oracle Work in Process, you use the Enter Employees form to define employees whose labor rates you want to charge.
See: Employee Management, Oracle Human Resources.
Step 8: Define your Employee Labor Rates (Optional)
If you want to charge employee labor for employees that you defined in Step 7, you must define the hourly labor rate of your employees. Oracle Work in Process uses employee rates when you manually charge person-type resources to jobs or repetitive schedules that do not charge at the standard rate, and when you associate an employee number with the resource you are charging.
You can add, delete, and update the effective date of the hourly labor rates for person-type resources (employees). You can define multiple hourly labor rates for the same employee, as long as each rate has a different effective date. If you use actual costing, the hourly labor rate rather than the standard rate is used to compute the actual cost of person-type resources charged to discrete jobs and repetitive schedules. You can enter an employee number when performing a person-type resource transaction in the Resource Transactions window or the Resource Transaction Open Interface Process. The employee's most current hourly labor rate is used to compute the actual cost of the transaction.
See: Defining Labor Rates.
Step 9: Define your Shop Floor Statuses (Optional)
You have the option to prevent move transactions from steps within an operation by defining shop floor statuses that prevent moves, and assigning them to operations and intraoperation steps within discrete jobs or repetitive schedules. You can also use these statuses to record more detailed information regarding assemblies at a particular step within an operation.
You can assign shop floor statuses to any intraoperation step associated with a job or repetitive line or assembly. You also can assign multiple statuses to an intraoperation step; however, you cannot assign the same shop floor status to more than one intraoperation step within the same operation. Shop floor statuses that are assigned to a repetitive line or assembly are valid for all repetitive schedules being built on that production line.
See: Defining Shop Floor Statuses.
Step 10: Define Job and Schedule Documents (Optional)
You can define standard job and schedule documents and then attach them to jobs and repetitive schedules.
See: Defining Job and Schedule Documents.
Step 11: Defining Operation Documents (Optional)
You can define operation documents then attach them to work in process routing operations.
See: Defining Operation Documents.
Step 12: Setup Discrete Execution Workstation
The Discrete Execution Workstation provides a Manufacturing Execution System interface to perform multiple shop floor functions for viewing the jobs assigned to specific work centers, viewing requirements and instructions for performing work, and monitoring progress and problems. The workstation provides three functional roles.
See: Overview of the Discrete Execution Workstation, Oracle Manufacturing Execution System for Discrete Manufacturing.
WIP Parameters
You can use WIP parameters to define modes of operation and to assign default values for various work in process functions. You can only define one set of WIP parameters per organization. The following summarizes WIP parameters and their defaults:
| Discrete | Required? | Default Value |
|---|---|---|
| Default Discrete Class | Optional | Null |
| Default Lot Number Type | Required | Job Name |
| Respond to Sales Order Changes | Required | Always |
| Repetitive | Required? | Default Value |
|---|---|---|
| Recognize Period Variances | Optional | All Schedules |
| Autorelease Days | Optional | 0 |
| Costing | Required? | Default Value |
|---|---|---|
| Default Completion Cost Source | Required | System Calculated |
| System Option | Cond. Required | Use Predefined Resources |
| Cost Type | Cond. Required | Null |
| Auto Compute Final Completion | Optional | No |
| Move Transactions | Required? | Default Value |
|---|---|---|
| Require Scrap Account | Optional | Disabled |
| Allow Creation of New Operations | Optional | Disabled |
| Allow Moves Over No Move Shop Floor Statuses | Optional | Enabled |
| Material | Required? | Default Value |
|---|---|---|
| Include Component Yield | Optional | Enabled |
| Recompute Required Quantity | Optional | Overcompletion Only |
| Supply Subinventory | Required | Null |
| Supply Locator | Optional | Null |
| Lot Selection Method | Optional | Expiration Date |
| Alternate Lot Selection Method | Optional | Null |
| Lot Verification | Optional | All |
| Release Backflush Components | Optional | Disabled |
| Allow Quantity Changes During Backflush | Optional | Disabled |
| Automatic Reservation | Optional | None |
| Reservation time Fence Days | Optional | Null |
| Supply Type | Optional | Null |
| Intraoperation Steps | Required? | Default Value |
|---|---|---|
| Intraoperation Steps | Optional | All are enabled |
| Outside Processing | Required? | Default Value |
|---|---|---|
| Shop Floor Status for PO Move Resources | Optional | Null |
| Requisition Creation Time | Optional | At OSP operation |
| Requisition Status at Creation | Optional | Approved |
| Production Scheduler | Optional | Null |
| Shipping Manager | Optional | Null |
| Propagate Job Changes to Purchasing | Required | Automatic |
| Days Early | Required | 1000 |
| Days Late | Required | 1000 |
| Scheduling | Required? | Default Value |
|---|---|---|
| Include Resource Efficiency | Optional | Disabled |
| Include Resource Utilization | Optional | Disabled |
| Simulation Set | Optional | Null |
| Mobile | Required? | Default Value |
|---|---|---|
| Default Scrap Account | Optional | Null |
| Transaction Processing | Optional | Background |
| Serial | Required? | Default Value |
|---|---|---|
| Default Serialization Start Operation | Optional | Disabled |
| Auto Associate Serial Numbers | Optional | Never |
| Auto Reserve Serial Numbers on Job Completion | Optional | Null |
| Default Intraoperation Step for Assembly Moves | Optional | Null |
| Other | Required? | Default Value |
|---|---|---|
| Component ATP Rule | Optional | Null |
| Default Overcompletion Tolerance % | Optional | Null |
| Default Pick Slip Grouping Rule | Optional | Null |
| Default Plan Tasks | Optional | Disabled |
Discrete Parameters
The following parameters affect discrete manufacturing.
If Category Default WIP Classes are not set up and you are defining a standard, non-project discrete job or performing a work order-less completion, this parameter determines which accounting class is used as the default. See: Default WIP Classes and Associating WIP Accounting Classes with Categories, Oracle Cost Management User's Guide.
You can only select an active, standard discrete accounting class when defining this parameter. See: Discrete Accounting Classes, Defining Discrete Jobs Manually, and Autocreating Final Assembly Orders.
Default Lot Number Type Parameter
Determines how lot numbers are assigned to discrete jobs. The options are as follows:
-
Job Name
Base job lot numbers on the job name you enter when you define the job. This is the default.
-
Based on Inventory Rules
Base job lot numbers on the lot number rules you defined in Oracle Inventory. This restricts you to the one specific lot generated for the job, and will not enable new lots to be created. See: Lot Control, Oracle Inventory User's Guide and. Defining Revision, Lot, LPN Serial Parameters, Oracle Inventory User's Guide
-
No Default
There will be no default of any lot if the parameter is set to this value. This also gives the ability to generate the lot number repeatedly for each assembly if multiple lot number creation is required for a job.
Respond to Sales Order Changes
Determines the status of a work order reserved and linked to a sales order: if a configured item is de-linked from a sales order or sales order line placed on hold, you can set the following options:
-
Never: The work order will not be placed on hold if you de-link the configured item from the sales order, or if the sales order is placed on hold.
-
Always: The work order will be placed on hold if you de-link the configured item from the sales order, or if the sales order is placed on hold.
-
When Linked 1 to 1:
The work order will be placed on hold if it is the only work order reserved to that sales order.
Important: When cancelling sales order lines with ATO items, this parameter, is ignored by the system. See: Linking Sales Orders and Discrete Jobs
Repetitive Parameters
The following parameters affect repetitive manufacturing.
-
Determines which repetitive schedule variances are posted to the general ledger when an accounting period is closed. The options are as follows:
-
All Schedules; Post variances for all repetitive schedules.
-
Cancelled and Complete-No Charges Only: Post variances for repetitive schedules with statuses of Cancelled or Complete-No Charges.
-
-
Autorelease Days
Determines the time period within which the system automatically releases the next Unreleased schedule.
When you complete a repetitive schedule, the system searches within the autorelease time frame for an Unreleased schedule, or for a schedule with a status of Released, Complete, or On Hold. If one exists, the status of the newly completed schedule changes to Complete-No Charges and the future schedule is automatically released. If no such schedule exists, the status of the schedule changes to Complete. If more than one schedule exists within the autorelease time frame, only one schedule is released.
Costing Parameters
These parameters affect how WIP assembly completion transactions are costed. The Default Completion Cost Source, Cost Type, and System Option parameters are defaulted when you define standard and non-standard accounting classes in the WIP Accounting Classes window.
The Auto Compute Final Completion parameter is defaulted when you complete jobs. This parameter can be set for both average and standard costing organizations. The other parameters are used only for average costing organizations defined in the Oracle Inventory Organization Parameters window. See: Organization Parameters Window, Oracle Inventory User's Guide and Defining Costing Information, Oracle Inventory User's Guide.
-
Default Completion Cost Source
This parameter determines how resource costs are determined as assemblies are completed from jobs into inventory.
-
System Calculated
If this option is set, resources can be costed at either the actual resource costs or at the resource predefined cost depending on how the System Option parameter is subsequently set.
When completing assemblies from a non-standard job with no routing, the resource rate associated with the Average Rates cost type is used.
-
User-Defined
If the option is set, you must choose a user-defined cost type using the Cost Type Parameter. This cost type is then used to determine the resource cost for the assemblies being completed.
Note: If there are uncleared costs left in the job, they are posted to the job variance accounts when the job is closed. Residual costs could be left in the job if: 1) the Auto Compute Final Completion option is set, but not all assemblies are completed or scrapped or 2) the job earns costs between the last final completion and the close transaction.
-
System Option
If you select the System Calculated completion cost source, you must select a System Option. The available options are as follows:
-
Use Actual Resources
Resources costs are determined based on the actual costs that have been charged to the job.
-
Use Predefined Resources
Resources costs are determined using the predefined resource cost.
Note: If you have chosen the Use Predefined Resources system option and are overcompleting assemblies that are associated with lot based resources and overheads, these resources and overheads are over-relieved from Work in Process. You can avoid this problem by selecting the Use Actual Resources system option. See: Assembly Over-completions and Over-returns and Move Completion/Return Transactions.
-
Cost Type
Determines which cost type to use as the default when the Default Completion Cost Source is User-Defined. You can only select a Cost Type if the Default Completion Cost Source parameter is set to User Defined. See: Defining a Cost Type, Oracle Cost Management User's Guide.
-
Determines whether the Final Completion in the Completion Transaction window defaults to enabled or disabled. If this parameter is enabled, the system automatically calculates completion costs when a transaction completes a job.
-
Move Transaction Parameters
The following parameters affect move transactions.
-
Determines whether a scrap account is required when you use the Move Transactions window to move job and repetitive assemblies into and out of the Scrap intraoperation step of an operation. It also determines whether a scrap account is required when flow schedule assemblies are scrapped or returned from scrap through the Work Order-less Completions window. If you do not specify that a scrap account is required, it is optional.
This parameter also determines how scrap transactions are processed. If you enter a scrap account, the system debits this account and credits the job or schedule elemental accounts through the operation at which the assemblies are scrapped. If you enter a reversing scrap transaction, the system credits this account and debits the job or schedule elemental accounts through the operation at which the assemblies are returned. If you do not provide a scrap account, the cost of scrap remains in the job or schedule until job or period close and is then written off as a variance.
-
Allow Creation of New Operations
Determines whether you can or cannot add an operation to a discrete job work in process routing during a move transaction. For example, you may want to add an operation to keep track of rework you were not expecting.
Note: In Oracle Manufacturing Execution System for Discrete Manufacturing, this parameter is not supported and the behavior in MES would function as if it was disabled.
-
Allow Moves Over No Move Shop Floor Statuses
Determines whether moves are disallowed if an intraoperation step that disallows moves exists at an autocharge operation and intraoperation step between the From and To operations or at intervening intraoperation step at the From and To operations if they are direct charge. If an intraoperation step that disallows moves is found, a warning message is displayed and the move is disallowed.
Note: The Move Transactions: Allow Skipping Over No Move Statuses security function can be set to override no move shop floor statuses. See: Security Functions.
Direct charge operations between the From and To Operations are not considered when the system checks for no move shop floor statuses. Scrap and Reject intraoperation steps at autocharge operations are also not considered. See: Shop Floor Statuses.
Material Parameters
The following parameters are used for material transactions.
-
Include Component Yield
Controls if component yield is factored into component quantities during material transactions. You can disable this parameter to avoid rounding decimal quantities. Rounding can inflate transaction quantities, and requirements are then not accurately represented. See: Component Yield and Shrinkage
-
Recompute Required Quantity
Provides the ability to over complete and scrap material without changing the material requirements. Choices are:
-
Overcompletion Only: Required quantities of material are recalculated by considering the over completion quantity at the current operation. This is the default value.
-
Overcompletion or Scrap: Required material quantities are recalculated by considering the over completion quantity at the current operation, and cumulative scrap quantity at the current operation. The material required quantities are inflated or reduced according to this recalculation.
-
None: Material required quantities are not updated based on the assembly move transactions.
-
-
Determines which supply subinventory and, if required by the subinventory, locator are used when backflushing Operation Pull and Assembly Pull components that do not have defaults defined at the bill of material component or at the inventory item level.
You can select an expense subinventory, if the Oracle Inventory Allow Expense to Asset Transfer profile option is set to Yes. See: Inventory Profile Options, Oracle Inventory User's Guide.
-
Determines which supply subinventory, and if required by the subinventory, which locator is used when backflushing Operation Pull and Assembly Pull components that do not have defaults defined at the bill of material component or at the inventory item level.
Note: If a supply locator for the component is not named on the bill of material, it will default to the machine locator when the job is created.
-
Determines how lot controlled Assembly Pull and Component Pull component items are selected during backflush transactions. The options are as follows:
-
Expiration Date
Backflush lots are automatically selected based on their expiration date and the first in-first out (FIFO) method or, if the lot is not under shelf life control, the receipt date and the first in-first out (FIFO) method.
-
Manual
Backflush lots must be manually selected.
-
Receipt Date
Backflush lots are automatically selected based on their inventory receipt date using the first in-first out (FIFO) method.
-
Transaction History
Backflush lots are automatically selected based on the previous transaction, for the same component, on the same job.
Note: This parameter does not apply to components that are under both lot and serial control. When you backflush a component under both lot and serial control, you must enter both the lot and the serial number.
-
-
Alternate Lot Selection Method
This parameter is only enabled if the Lot Selection Method is set to Transaction History. It is used when previous transactions—for the same component, on the same job—do not exist for defaulting. The options are:
-
Expiration Date
Backflush lots are automatically selected based on their expiration date and the first in-first out (FIFO) method or, if the lot is not under shelf life control, the receipt date and the first in-first out (FIFO) method.
-
Manual
Backflush lots must be manually selected.
-
Receipt Date
Backflush lots are automatically selected based on their inventory receipt date using the first in-first out (FIFO) method.
-
-
Determines how lots that are automatically selected, based on whether the Lot Selection Method parameter is set to Receipt Date or Expiration Date, are verified during backflush transactions. When the Lot Selection Method parameter is set to Manual, manually selected lots are verified as if the All option has been specified. The lot verification options are as follows:
-
All
Verifies that the lots automatically selected were the ones consumed by the assemblies.
-
Exceptions Only
Verifies exceptions only. If the lot requirement for the component cannot be filled automatically using the FIFO method, you can assign lots to components manually.
-
-
Release Backflush Components
The Component Pick Release program only considers supply type push components in processing, unless this parameter is enabled. If enabled, operation pull and assembly pull supply type components are included in the pick release process.
Note: The Discrete Job Pick List Report does not consider this parameter in processing.
Kanban Components—the system assumes that supply type pull components are used for backflush transactions, that is, for consumption and you are not picking these components for a job. Kanban items are not typically considered in a pick release, but they are often defined as assembly pull components. Appropriate for kanban items, the following behavior occurs for the Release Backflush Components parameter setting:
-
If Release Backflush Components is enabled:
-
Supply type push components are considered in the pick release and not backflushed
-
Supply type pull components are considered in the pick release and are backflushed
-
-
If Release Backflush Components is disabled:
-
Supply type push components are considered in the pick release and not backflushed
-
Supply type pull components are not considered in the pick release, but are backflushed
See: Component Picking, and Supply Types
-
-
-
Allow Quantity Changes During Backflush
Enables changes to the transaction quantity—therefore Bill of Material required quantity default is not used. This provides the ability to over or under issue pull components when lot or serial entry is required for assembly moves and completions. This functionality is also available for work order-less completions when using Oracle Mobile Supply Chain Applications. See: Backflush Supply Subinventories and Locators
Material Reservations
-
Automatic Reservation: Initiates reservations at the time of job creation or job release.
-
None—Reservations are not automatically created, this is the default value.
-
Job Creation—Reservations triggered at the time of creation of the work order based on the Reservation Time Fence value.
-
Job Release—Reservations triggered at the time of release of the work order, Reservation Time Fence days are not used in this option.
-
-
Reservation Time Fence—This field is enabled when the Job Creation value is selected. Reservations are created when the Date Required field on the Material Requirements window is within the value entered. Decimal values are supported. For example, if the value is set as 10 days:
-
Components required that fall within the next 10 days of the Date Required value are picked and reservations applied.
-
If the Date Required is beyond 10 days, component are not reserved. When material required date in the work order operations falls beyond time fence days, components are not reserved.
-
-
Supply Type—These are the choices applicable for automatic reservations:
-
Push
-
Pull
-
Both
Note: The following supply types support manual reservations: Push, Assembly Pull, Operation Pull, supplier, and Bulk. The Phantom type is not supported.
Reserved quantity calculations are based on the component supply type:
-
For Pull supply types, the reserved quantity is the quantity per assembly —multiplied by the job quantity. The required quantity is not considered. If you reduce the required quantity, there will be an excess in the reservation quantity that needs to be manually deleted.
-
For Push supply type, the required quantity is always the reserved quantity.
-
Note that item reservations in discrete manufacturing is also supported for Oracle Warehouse Management (WMS) enabled organizations. You can use automatic and manual high level reservation, detailed level reservation, and also update and delete reservations for WMS organizations using the available user interfaces.
Intraoperation Steps Parameter
Determines which intraoperation steps are enabled in your WIP routing operations. The options are Queue, Run, To Move, Reject and Scrap. See: Intraoperation Steps.
The Queue intraoperation step is automatically enabled for all operations and cannot be disabled. The To Move intraoperation step, even if disabled here, is automatically enabled for the final operations in routings so that assemblies can be completed into inventory.
Outside Processing Parameters
An outside processing operation is an operation that contains an outside resource linked to an outside processing item. The following parameters affect outside processing functionality:
-
Shop Floor Status for PO Move Resources
Determines which shop floor status is assigned to the Queue intraoperation step of an outside processing operation when you create discrete jobs and repetitive schedules. You first define the status on the Shop Floor Statuses window, and it then appears on the list of values for this parameter. See: Defining Shop Floor Statuses You then can assign the status to operations that have PO Move resources assigned to them (but not those assigned PO Receipt). Only no move statuses, those statuses which are not Allow Moves enabled, can be selected. See: Assigning and Viewing Shop Floor Statuses
This status ensures that assembly moves from an outside processing resource operation can only be launched by the receipt of a purchase order in Oracle Purchasing. This ensures that the same number of assemblies are moved into and out of an outside processing resource operation. Problems in tracking work in process and cost variances are thus avoided. See: Requisitioning Outside Processing Items
-
Determines whether purchase requisitions are created for outside processing operations automatically or manually, and when in the manufacturing process they are created.
-
At Job/Schedule Release
Automatically creates purchase requisitions for all outside processing operations on a job or schedule (except non-countpoint/non- autocharge operations), when the job or schedule is released. Creating requisitions at job and schedule release makes it possible to create and release purchase orders to suppliers in advance.
-
At OSP Operation: Automatically creates purchase requisitions when you move assemblies into the Queue intraoperation step of an outside processing operation. This is the parameter's default value. If the outside processing operation is the first operation of the job or repetitive schedule, a requisition is created at that operation when the status of the job or schedule is changed to Released.
-
Manual
Requires you to manually create purchase requisitions in Oracle Purchasing. This option allows you to automatically charge outside processing resources at an operation, but does not link the creation of the requisition to either the creation or processing of the job or schedule.
Note: For lot based jobs in Oracle Shop Floor Management, set this is parameter to At OSP Operation. Multiple paths are available in a network routing, and the outside processing operation can change for each manufacturing run.
-
-
Requisition Status at Creation
This parameter controls the status type inserted into the PO Requisition interface table.
-
Approved: The PO Requisition interface table is populated with the status Approved. No matter whether approval process is automatically initiated or not, the requisition is approved.
-
Incomplete: Requisitions are created with initial status of Incomplete and depending on other settings, approval process can automatically be initiated which changes the requisition status to In-Process, Pre-aprpoved, or Approved
-
-
Job Roles for Notifications
-
Associates an employee with the Production Scheduler job role on outside processing workflow notifications. The production scheduler receives notifications when there are no purchase orders for outside processing items, when outside processing assemblies have been shipped, or when they will not be shipped.
-
Associates an employee with the Shipping Manager job role on outside processing workflow notifications. The shipping manager receives a notification when intermediate assemblies are ready to be shipped to a supplier for outside services. The employee associated with this role receives all notifications for all jobs that have an outside processing operation.
-
-
Job Change Controls for Purchasing Documents
-
Propagate Job Change to Purchasing
Sets how quantity changes are forwarded to purchasing documents, and initiates cancellation of these documents under certain conditions. Your choices are:
-
Automatic–Changes are passed routinely through the workflow. You can choose to have them propagated as fully automatic, or subject to approval.
If this parameter is set to Automatic, the requisition and purchase order documents are cancelled if the following conditions exist: The job status is changed to Cancel, Complete No Charge, or Closed.
-
Manual–You must update changes directly in the purchasing documents.
-
-
-
Need-By Date Tolerance
Controls Need-By date using an early and late day tolerance value. These values are used by the Update OSP Need-by Date concurrent program. If the concurrent program is not submitted, these values are ignored. The concurrent program initiates the workflow for automatic job date changes when the number of days set in the Days Early field and Days Late field is exceeded. See: Changing the Need By Date
Scheduling Parameters
This parameter is used to include resource factors in scheduling calculations.
-
Include Resource Efficiency (check box)
This check box provides the option to use resource efficiency in scheduling calculations; it affects both constraint-based and infinite scheduling. This factor influences resource elapsed time calculated during scheduling. Values of less than 100 percent elongate lead time. Resource efficiency is always considered in lead time calculations.
-
Include Resource Utilization (check box)
This check box provides the option to use resource utilization in scheduling calculations; it affects both constraint-based and infinite scheduling. This factor influences resource elapsed time calculated during scheduling. Values of less than 100 percent elongate lead time. Resource utilization is always considered in lead time calculations.
-
The Simulation Set field enables you to adjust resource capacity. Simulation sets are used to link resource changes to available resource capacity for scheduling and planning. They are defined on the Simulation Sets window. If the Use in Scheduling field is checked for particular simulation sets, capacity moderations associated with that set are used when scheduling jobs.
When you assign resources to departments, you can use simulation sets for capacity modifications by defining them on the Capacity Changes window in Oracle Bills of Material.
See:
Assigning Resources to a Department, Oracle Bills of Material User's Guide
Overview of Resource Requirements
Calculating Manufacturing Lead Times, Oracle Bills of Material User's Guide
Manufacturing Lead Time Computations, Oracle Bills of Material User's Guide.
Mobile Parameters
The following parameter is set only if you are using Oracle Mobile Supply Chain Applications. This value must be set if you are entering scrap transactions.
-
The Default Scrap Account value is used for scrap transactions. You can either enter an account number, or select an alias from the list of values. An alias is an easily recognized name or label representing an account.
Note: This account number is only used in Oracle Mobile Supply Chain Application scrap transactions. It is not used in standard Work in Process scrap transactions.
Used to control mobile processing, your choices are either:
-
Online: Transactions are processed while you wait, and control is returned when the transaction processing is completed.
-
Background: Transactions are processed on a periodic basis, and control is returned immediately.
-
-
Resource, LPN, and serial tracking transactions ignore this parameter:
-
Resource transactions are always processed in Background mode
-
LPN transactions (including LPN completions, LPN work order-less completions, and LPN flow transactions) are always processed in Online mode
-
Mobile serialized transactions are always processed in the Online mode
-
Serial Parameters
The following parameter is used to set features for serial number control tracking throughout manufacturing. Serial control includes control beginning at the routing, association of serial numbers to jobs before their production, serial based transaction entry, generation of serial numbers, and serial label printing. See: Serial Number Tracking Throughout Manufacturing, and Associating and Modifying Serial Number Job Information
-
Default Serialization Start Operation
Determines the job operation where tracking of the serial number begins. Choices are:
-
Enabled: If the serialization start operation is defined on the bill of material item routing, it is copied to the job routing. If this value is not defined on the item routing, the first operation is defaulted to be the serialization start operation on the job routing.
-
Disabled: The serialization start operation on the job routing is blank.
-
-
Determines if serial numbers are automatically generated and associated with a job is created and released. The job start quantity determines the number of serial numbers created. The values are:
-
On Job Release: Serial numbers are automatically generated and associated with a job when it is released.
-
Never: Serial numbers are not automatically generated and associated with a job at release. Use parameter Auto Reserve Serial Numbers on Job Completion for another option for associating serial numbers.
-
-
Auto Reserve Serial Numbers on Job Completion
Enables you to reserve serial numbers after job completion. If this parameter is checked; you would then manually enter the serial number for the serialized assembly. Completed serialized assemblies can be reserved as supply sources using the Item Reservation window in Oracle Inventory. A reservation record is created by selecting and reserving specific serialized assemblies against a sales order line.
You have the ability to create detailed reservations for items by subinventory, locator, lot, and serial number from the Item Reservation window after the job is created or released. In the Discrete Jobs window for a specific record, select Maintain Component Reservations from the Tools menu to access the Item Reservation window. See: Item Reservations, Oracle Inventory User's Guide
-
Default Intraoperation Step for Assembly Moves
This parameter is used for move transactions on a serialized job. It defines a default value for the intraoperation step where you are moving assemblies - the To step. Your choices are Queue, Run, To move, and null.
For example, when moving assemblies, if this value is set to:
-
Queue - the default intraoperation To step for the next move transaction is the next Queue step in the routing.
-
Run - the default intraoperation To step for the next move transactions is the next Run step in the routing.
-
To move - the default intraoperation To step for the next move transaction is the next To move in the routing.
-
Null - a default is not set, you must specify the step in your move transaction.
-
Other Parameters
The following parameter is used to set features for material availability checking, overcompletions, and component pick release.
-
Determines which ATP Rule is used as the default when checking the material availability of component requirements. You can enter any user-defined ATP rule. See: Viewing Component ATP Information and See: Defining ATP Rules, Oracle Inventory User's Guide.
-
Default Overcompletion Tolerance % (percent)
Determines the percentage of assemblies that you can over-complete on all jobs and schedules.
-
Default Pick Slip Grouping Rule
This field sets the default Pick Slip Grouping Rule displaying on the Component Pick Release window. Grouping rules are used each time you run component pick release; resulting tasks are grouped based on the rule. The grouping rules are defined on the Pick Slip Grouping Rules window in Oracle Inventory. See: Using the Component Pick Release Window
-
This parameter is used only by Oracle Warehouse Management enabled organizations. It determines the default Plan Tasks value displaying on the Component Pick Release window. The choices are:
-
Enabled: Pick tasks are created, you can choose the time to release the tasks using the concurrent program.
-
Disabled: Pick tasks are created and released when you choose Release on the Component Pick Release window.
-
Defining WIP Parameters
WIP parameters define modes of operation and default values that affect Work in Process.
Tip: You cannot define WIP parameters if the current organization shares costs with another organization. If the current organization does share costs, you must change the organization's control level for the Costing Enabled and Inventory Asset Value item attributes (Costing Group) to Item/Organization. This can be done using the Item Attribute Controls window in Oracle Inventory. Before changing these attributes, however, you must confirm that item costs have been defined in the current organization. See: Cost Organizations and Shared Costs, Oracle Cost Management User's Guide and Defining Item Attribute Controls, Oracle Inventory User's Guide.
To define and update Work in Process parameters
-
Navigate to the Work in Process Parameters window. See: WIP Parameters.
-
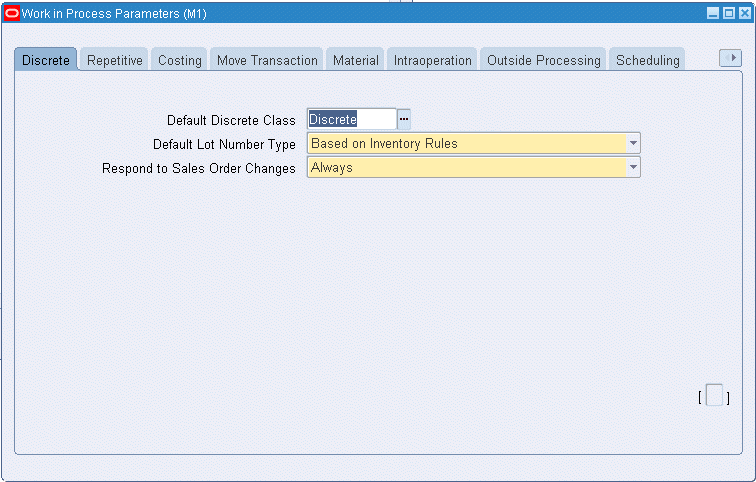
In the Discrete tabbed region, enter the Default Discrete Class. See: Default WIP Classes.
-
Select the Default Lot Number Type.
Determines how lot numbers are assigned to discrete jobs.
-
Select one of the Respond to Sales Order Changes options.
Determines whether and how the system responds to changes to configure-to-order (CTO) sales orders and their related discrete jobs.
-
In the Repetitive tabbed region, select the Recognize Period Variances option.
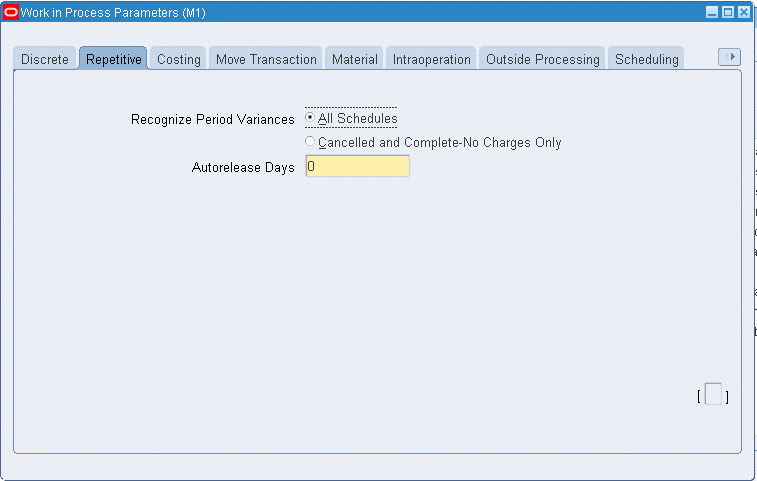
Determines which repetitive schedule variances are posted to the general ledger when an accounting period is closed.
-
Enter the number of repetitive Autorelease Days.
Determines the time period within which the system automatically releases the next Unreleased schedule.
-
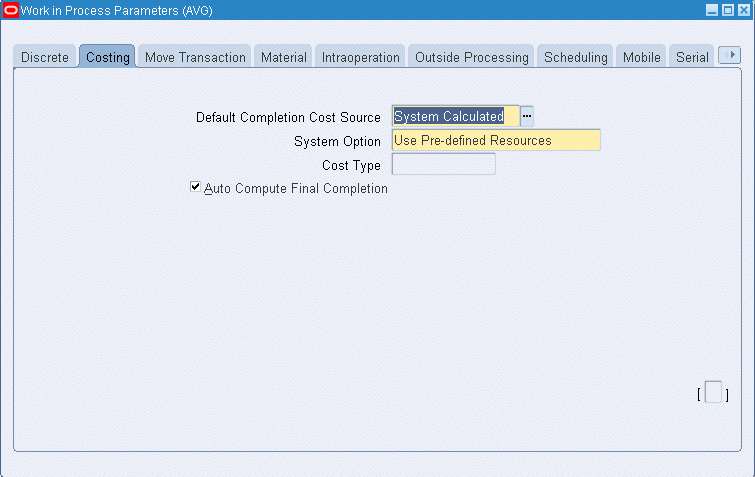
In the Costing tabbed region, select a Default Completion Cost Source. The options are System Calculated and User Defined. See: Costing Parameters.
Note: You can only set parameters in the Average Costing tabbed region if your current organization has been defined as an average cost organization in the Oracle Inventory Organization Parameters window. See: Organization Parameters Window, Oracle Inventory User's Guide and .Defining Costing Information, Oracle Inventory User's Guide
-
If you select the System Calculated as your default completion cost source, you must select a System Option. The options are Use Actual Resources and Use Predefined Resources.
-
Select a Cost Type.
Determines which Cost Type is defaulted for when completing jobs. You must select a cost type if the Default Completion Cost Source parameter is User Defined.
-
Check the Auto Compute Final Completions check box to indicate whether the system should automatically determine when a completion transaction completes a job (quantity complete + scrap quantity = job quantity). The system calculates completion costs by taking the incurred job costs and dividing them by the completion quantity.
-
In the Move Transactions tabbed region, select or deselect the Require Scrap Account check box.
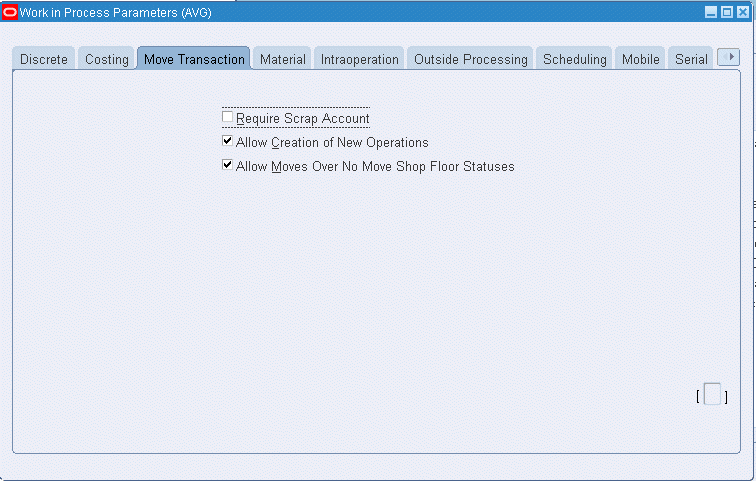
Determines whether a scrap account is required when you move assemblies into and out of the Scrap intraoperation step of an operation.
-
Select or deselect the Allow Creation of New Operations check box.
Determines whether you can or cannot add an operation to a discrete job work in process routing during a move transaction.
-
Select or deselect the Allow Moves Over No Move Shop Floor Statuses.
Determines whether moves are disallowed if an intraoperation step that disallows moves exists at an autocharge operation and intraoperation step between the From and To operations and intraoperation steps.
-
In the Material tabbed region, choose the defaults for material backflushing. The Include Component Yield check box controls if component yield is factored into component quantities during material transactions. You can disable this parameter to avoid rounding transaction quantities. See: Component Yield and Shrinkage
-
The Recompute Required Quantity drop box gives you the option to recalculate material requirements when overcompleting and scrapping material. Choices are:
-
Overcompletion Only: For over-completion transactions, required material is recalculated by considering the over completion quantity at the current operation.
-
Overcompletion or Scrap: For over-completion transactions, required material is recalculated by considering the quantity at the current operation. For scrap transactions, the cumulative scrap quantity at the current operation is used. The material required quantities are inflated or reduced according to this recalculation.
-
None: Required material is not updated based on the assembly move transactions.
-
-
In the Backflush Controls region, select a backflush Supply Subinventory and, if required, a Supply Locator.
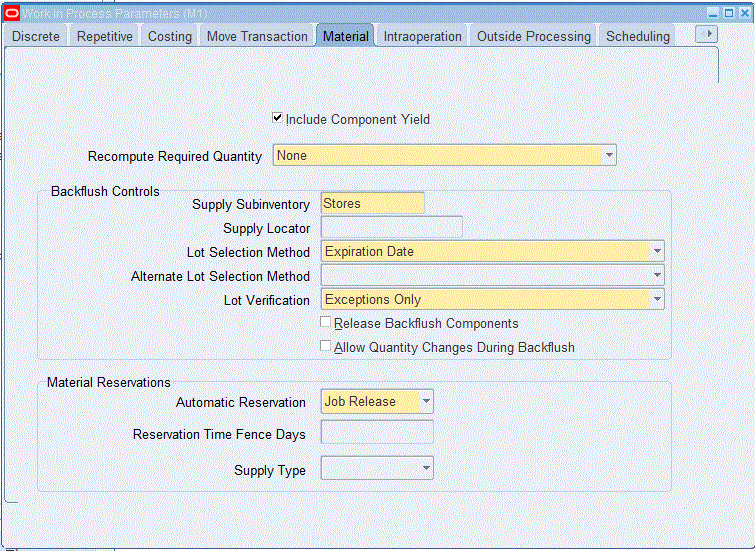
These two parameters determine which supply subinventory/locator is used when backflushing Operation Pull and Assembly Pull components that do not have defaults defined at the bill of material component level or at the item level.
You can select an expense subinventory, if the Oracle Inventory Allow Expense to Asset Transfer profile option is set to Yes. See: Inventory Profile Options, Oracle Inventory User's Guide.
-
Select a backflush Lot Selection Method.
Determines how lot controlled Assembly Pull and Component Pull component items are selected during backflush transactions.
-
If you choose Transaction History for the Lot Selection Method, select a value for the Alternate Lot Selection Method. These two parameters are used in combination with lot number defaulting. If there is no transaction history for defaulting, this value is used for lot selection. This occurs in instances such as the initial backflush transaction, or the lots defaulted from the previous backflush do not have sufficient on-hand quantity.
-
Select a backflush Lot Verification Method.
Determines how lots are verified during backflush transactions.
-
Check the Release Backflush Components check box to indicate if operation pull and assembly pull supply type components are included in the Component Pick Release window.
-
Check the Allow Quantity Changes During Backflush to make changes to the transaction quantity—therefore Bill of Material required quantity default is not used—for assembly move and completion transactions. This provides the ability to over or under issue pull components for assembly moves, completions; and mobile work order-less completions requiring lot and serial information.
-
In the Material Reservations region, you can set parameters for automatic material reservations for jobs. Select Automatic Reservation to initiate reservations at the time of job creation or job release. Choices are:
-
None—Reservations are not automatically created, this is the default value.
-
Job Creation—Reservations are initiated at the time of creation of the work order, based on the Reservation Time Fence value.
-
Job Release—Reservations are initiated at the time of the release of the work order, Reservation Time Fence days are not used in this option.
-
-
If the Job Creation value is selected for Automatic Reservation, you can enter a Reservation Time Fence value in days. This field uses the Date Required field on the Material Requirements window for determining if reservations are created. Decimal values are supported.
For example, if the Reservation Time Fence value is set as 10 days:
-
Components required that fall within 10 days of the Date Required value are picked and reservations applied.
-
If the Date Required is beyond 10 days of the time fence days, components are not reserved.
-
-
Select a value in the Supply Type field for Bills of Material supply types used for automatic reservations. Choices are: Push, Pull, or Both.
Note: The following supply types support manual reservations: Push, Assembly Pull, Operation Pull, Supplier, and Bulk. The Phantom type is not supported.
-
In the Interoperation Steps tabbed region, enable Intraoperation Steps as required.
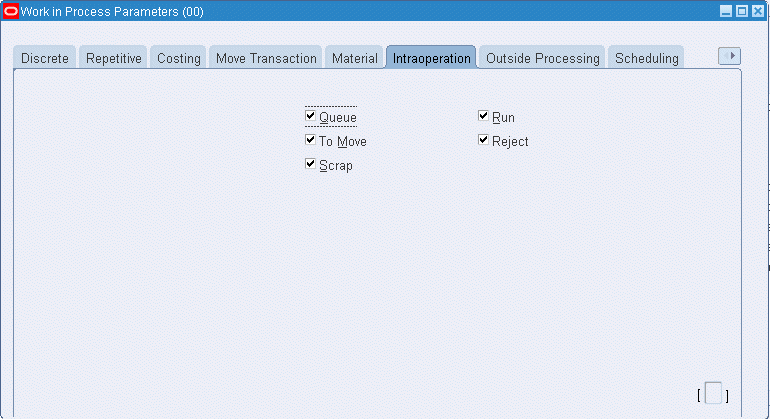
Determines which intraoperation steps are enabled in your WIP routing operations.
-
In the Outside Processing tabbed region, select which status is assigned to the Shop Floor Status for PO Move Resources parameter.
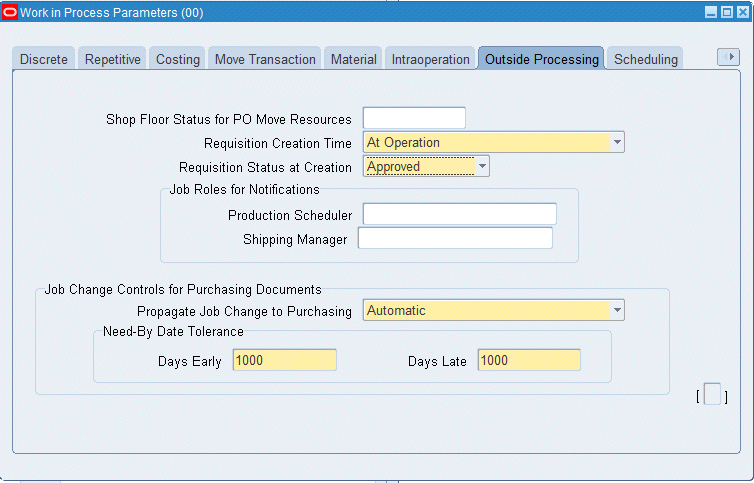
This parameter determines which shop floor status is assigned to the Queue intraoperation steps of outside processing operations when you create discrete jobs and repetitive schedules.
-
Select a Requisition Creation Time option.
Determines whether or not requisitions for outside processing resources operations are created, and when in the outside processing process they will be created (At Job/Schedule Release, At Operation, or Manual).
-
The Requisition Status at Creation sets the status for requisitions created in the outside processing step:
-
Approved: Requisitions created are set as approved, and depending on other settings, the approval process can automatically be initiated.
-
Incomplete: Requisitions are set as incomplete until approval is granted.
-
-
If you have outside processing operations, and you have set the WIP:Enable Outside Processing Workflows profile option to Yes, select the employees that you want to associate with the Production Scheduler and the Shipping Manager job roles.
The employee associated with either of these roles receives all notifications for all jobs that have an outside processing operation.
-
The Job Change Controls for Purchasing Documents region is used to set parameters when the Purchase Order Approval and Requisition workflows are launched. In the Propagate job Change to Purchasing field, set how quantity and date changes are forwarded to purchasing documents. Your choices are:
-
Automatic–Changes are passed routinely through the workflow. You can choose to have them propagated as fully automatic, or subject to approval.
-
Manual–You must update changes directly in the purchasing documents.
-
-
In the Need-By Date Tolerance fields, set values used to initiate the workflow for automatic job date changes. The workflow is initiated when the number of days either in the Days Early or Days Late fields is exceeded.
-
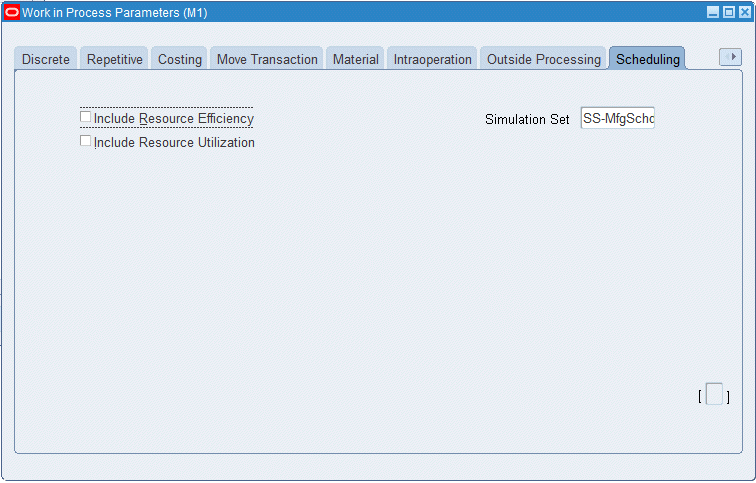
Select the Scheduling tabbed region to include resource factors in scheduling jobs.
-
Check the Include Resource Efficiency box if you want job scheduling to consider resource efficiency.
Efficiency effects resource loading and is always considered in lead time calculations.
-
Check the Include Resource Utilization box if you want job scheduling to consider resource utilization.
Utilization is always considered in lead time calculations. Resource availability is divided by the utilization percentage for capacity.
-
Select a simulation set in the Simulation Set field to enable the adjust resource capacity capability.
Simulation sets are used to link resource changes to available resource capacity for scheduling and planning.
-
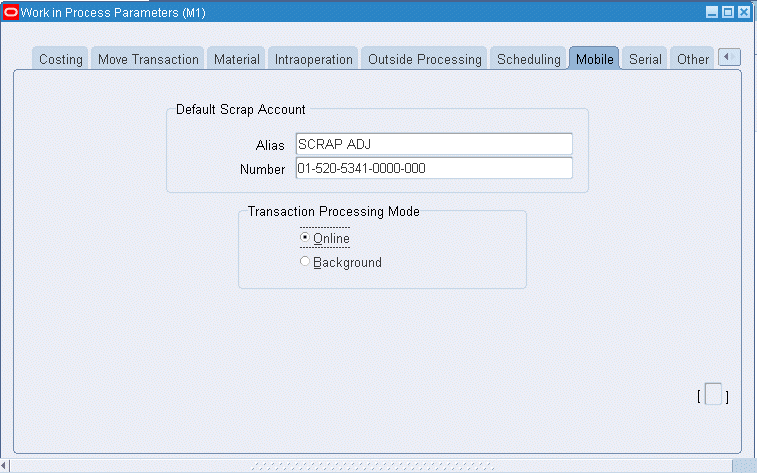
The Mobile tabbed region is used if you are using Oracle Mobile Supply Chain Applications. Select a Default Scrap Account value for scrap transactions, entering either an account number, or selecting an alias from the list of values.
Note: This account number is only used in Oracle Mobile Supply Chain Application scrap transactions. It is not used in standard Work in Process scrap transactions.
-
Select a Transaction Processing Mode.
Your choices are Online, for immediate processing-or Background for periodic processing.
-
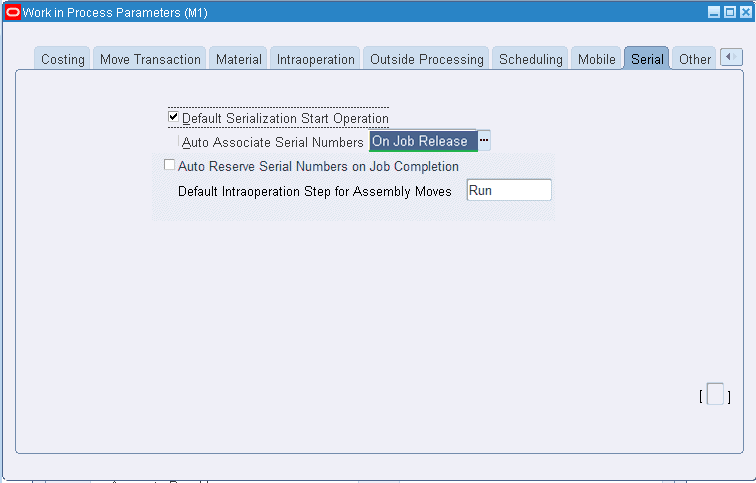
Use the Serial tabbed region to select parameters for serial number control tracking. See: Serial Number Tracking Throughout Manufacturing
-
Use the Default Serialization Start Operation box to determine the job operation where tracking of the serial number begins. The choices are:
-
Enabled: If the serialization start operation is defined on the bill of material item routing, it is copied to the job routing. If this value is not defined on the item routing, the first operation is defaulted to be the serialization start operation on the job routing.
-
Disabled: The serialization start operation on the job routing is blank.
-
-
Use the Auto Associate Serial Numbers parameter to determine if serial numbers are automatically generated and associated with a job when the job is released. The job start quantity determines the number of serial numbers created. Choices are:
-
On Job Release: Serial numbers are automatically generated and associated with a job when it is created and released.
-
Never: Serial numbers are not automatically generated and associated with a job. Use parameter Auto Reserve Serial Numbers on Job Completion for another option for associating serial numbers.
-
-
Enable the Auto Reserve Serial Numbers on Job Completion check box if you want to reserve serial numbers for completed serialized assemblies. The Item Reservation window in Oracle Inventory is used to create a reservation record for specific serialized assemblies associated to a sales order line. You have the ability to create detailed reservations for items by subinventory, locator, lot, and serial number from the Item Reservation window after the job is created or released. In the Discrete Jobs window for a specific record, select Maintain Component Reservations from the Tools menu to access the Item Reservation window.
See: Item Reservations, Oracle Inventory User's Guide
-
Select a value in the Default Intraoperation Step for Assembly Moves field. This value is used when the move quantity is at the intraoperation step, your choices are Queue, Run, To move, and null.
For example, when moving assemblies, if this value is set to Queue - the default intraoperation To step for the next move transaction is the next Queue step in the routing.
If the value is set to Run - the default intraoperation To step for the next move transactions is the next Run step in the routing.
If set to To move - the default intraoperation To step for the next move transaction is the next To move in the routing.
However, if this value is set to null - a default is not set and you must specify the step in your move transaction.
-
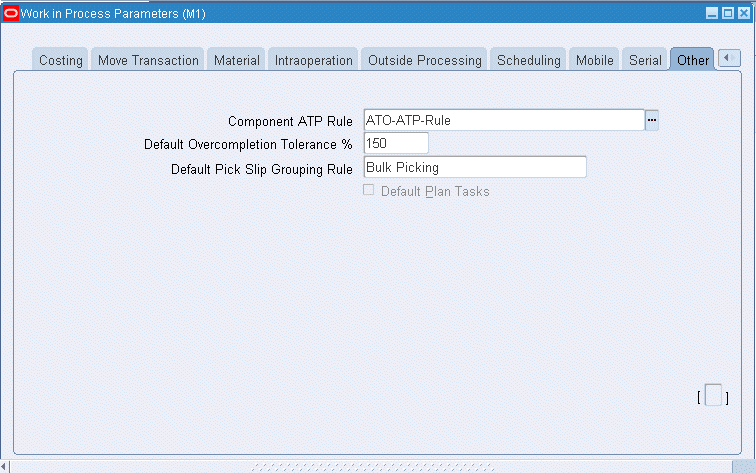
In the Other tabbed region, select a Component ATP Rule. See: ATP Parameter
-
Enter the Default Overcompletion Tolerance % (percent) of assemblies that can be over-completed on all jobs or schedules.
-
Select a Default Pick Slip Grouping Rule.
This value displays on the Component Pick Release window for this organization, but can be changed during requirement picking. It is used to group tasks based on the pick method such as order pick or bulk pick. See: Using the Component Pick Release Window
-
If you are setting up an Oracle Warehouse Management organization, use the Default Plan Tasks to determine the default value displaying on the Component Pick Release window. Your choices are:
-
Enabled: Pick tasks are created, you can choose the time to release the tasks using the concurrent program.
-
Disabled: Pick tasks are created and released when you choose Release on the Component Pick Release window.
-
WIP Accounting Classes
You can define any number of accounting classes. The valuation and variance accounts that are associated with these accounting classes determine which accounts are charged and when.
Discrete Accounting Classes
You can define accounting classes for each type of discrete production you use: standard discrete, asset non-standard discrete and expense non-standard discrete. You must assign an accounting class all your discrete jobs.
Standard Discrete
Standard discrete accounting classes can be used to group job costs. For example, if you build subassemblies and finished goods, you can define your accounting classes so that you can separately value and report the costs associated with subassembly and finished goods production. Standard discrete accounting classes can be automatically defaulted when you create discrete jobs. See: WIP Accounting Class Defaults, Product Line Accounting Setup, Oracle Cost Management User's Guide, and Discrete Parameters.
When you define an accounting class, you must assign valuation and variance accounts to it. When you issue materials to a job that uses this accounting class, the appropriate valuation accounts are charged. When the job is closed, final costs and variances are calculated and posted to the variance and valuation accounts. When the accounting period is closed, these journal entries are automatically posted to the general ledger.
Note: You can update the accounting information based on updates in the WIP accounting class for a standard discrete job in the Unreleased status. Note that you can update the WIP accounting class for standard discrete jobs only. The changed WIP accounting class will reflect in the existing standard discrete jobs that are in the Unreleased status.
Use the WIP:Allow WIP Accounting Class Changes profile option to use this feature. This profile allows you to update existing work orders in the Unreleased status with changed WIP accounting class definition.
Non-Standard Discrete
Non-standard discrete accounting classes can be used to group and report various types of non-standard production costs, such as field service repair or engineering projects.
For example to track recurring expenses - machine maintenance or engineering projects - with non-standard jobs, you can define and assign an accounting class with a type of expense non-standard to these jobs. The valuation accounts carry the costs incurred on these expense jobs as an asset during the period and automatically writes them off to the variance accounts at period close.
On the other hand, if you use non-standard discrete jobs to track production costs as assets, you can define and assign an accounting class with a type of asset non-standard. Asset non-standard discrete jobs are costed the same as standard discrete jobs. Valuation accounts are charged when material is issued to a job and final costs and variances are calculated and posted to the appropriate variance and valuation accounts when the job is closed.
Repetitive Accounting Classes
Repetitive accounting classes are used to group production costs and must be assigned to each repetitive line/assembly association that is created. Every schedule for that assembly on that line uses these accounts. The accounts are charged whenever you transact against the line/assembly association. Repetitive accounting classes can be automatically defaulted when you associate repetitive assemblies with production lines. See: WIP Accounting Class DefaultsProduct Line Accounting Setup, Oracle Cost Management User's Guide.
You can analyze repetitive manufacturing costs by assembly regardless of the line on which it was manufactured by using the same accounting class for all lines that build that assembly. You can use the same class for all assemblies on a line to do line based cost reporting or you can use a different accounting class for every line/assembly association.
Lot Based Job Accounting Classes
Oracle Shop Floor Management extends work in process functionality using network routings, lot based transactions, and yield based operational costing. If you have Oracle Shop Floor Management installed, you can define accounting classes for standard production and expense non-standard jobs.
Standard Lot Based
Standard jobs control the material, resources, and operations required to build an assembly and collect costs. When you build lot based jobs, the standard lot based accounting class is used to separately value and report costs associated with yielded production at each individual operation on the routing.
You must assign valuation and variance accounts to it. When you issue materials to a job that uses this accounting class, the appropriate valuation accounts are charged. When the job is closed, final costs and variances are calculated and posted to the variance and valuation accounts. When the accounting period is closed, these journal entries are automatically posted to the general ledger. If Estimated Scrap Accounting is enabled, both Estimated Scrap accounts are required. If this feature is not enabled, the Estimated Scrap account fields are disabled.
Expense Non-standard Lot Based
Non-standard jobs control material and collects costs for miscellaneous activity. These jobs are used for expense work orders for testing, prototypes, and rework where operation yield costing is not considered. You can perform all transactions (moves, jumps, scrap, splits, and update assemblies or routings) with the exception of job merge.
Maintenance Account Class
Maintenance accounting classes are used to group costs for work orders used in Oracle Enterprise Asset Management (eAM). For example, if you are creating work orders for plant maintenance activities, you can define your accounting classes to separately value and report the costs related to asset. Maintenance accounting classes are automatically defaulted when you create eAM work orders.
When you define an accounting class, you must assign valuation and variance accounts to it. When you issue materials to a work order that uses this accounting class, the appropriate valuation accounts are charged. When the work order is closed, final costs and variances are calculated and posted to the variance and valuation accounts. When the accounting period is closed, these journal entries are automatically posted to the general ledger.
Valuation and Variance Accounts
WIP accounting class valuation accounts are charged when you issue components, move assemblies, complete assemblies, and charge resources.
Variance accounts associated with Standard Discrete and Non-standard Asset accounting classes are charged when jobs are closed. Variance accounts associated with Expense Non-standard Discrete, and optionally Repetitive accounting classes, are charged when accounting periods are closed.
As noted in the following table, different valuation and variance accounts are required under standard versus average costing.
| Account | Valuation | Variance |
|---|---|---|
| Material | Standard and Average | Standard and Average |
| Material Overhead | Standard and Average | Standard and Average |
| Resource | Standard and Average | Standard and *Average |
| Outside processing | Standard and Average | Standard and *Average |
| Overhead | Standard and Average | Standard and *Average |
| Standard Cost | Standard Only | Variance not applicable |
| Bridging | Average Only | Variance not applicable |
| Expense | Average Only | Variance not applicable |
Valuation Accounts
WIP accounting class valuation accounts are defined as follows:
| Variable | Description |
|---|---|
| Material | Normally an asset account this account tracks material costs. Under standard costing, it is debited at standard when you issue material to a job or schedule and credited at standard when you complete assemblies from a job or schedule, close a job, or close an accounting period. Under average costing, this account is debited at the average cost in effect at the time of the issue transaction and is credited when you complete assemblies from a job. |
| Material Overhead | Normally an asset account this account tracks material overhead (burden) costs. Under standard costing, it is charged/debited at standard when you issue material with material overhead to a job or schedule and relieved at standard when you complete assemblies from a job or schedule, close a job, or close an accounting period. Under average costing, this account is debited at the average cost in effect at the time of the issue transaction. Note: When a job is completed and material overhead is earned, this account is not charged /credited. Instead, the material overhead account for the completion subinventory is debited. |
| Resource | An asset account that account tracks resource costs. Under standard costing, it is charged/debited at standard when resources are charged to a job or schedule and relieved/credited at standard when you complete assemblies from a job or schedule, close a job, or close an accounting period. Under average costing, this account is debited and credited at the resource rate in effect at the time the resource is charged. |
| Outside Processing | An asset account that tracks outside processing costs. Under standard costing it is debited at the standard or purchase order cost when you receive items for a job or schedule in Oracle Purchasing. It is credited at standard when you complete assemblies from a job or schedule, close a job, or close an accounting period. Under average costing when you move job or repetitive schedule assemblies through an outside processing operation, it is debited at the resource's predefined rate or at the purchase order cost. See: Performing Move Transactions. |
| Overhead | Normally an asset account this account tracks resource or department overhead cost. Under standard costing it is debited at standard when resources are charged to a job or schedule. It is relieved at standard when you complete assemblies from a job or schedule, close a job, or close an accounting period. For additional information about how elemental accounts are charged under standard and average costing see: Manufacturing Average Cost Transactions in the Oracle Cost Management User's Guide, and Work in Process Standard Cost Transactions, Oracle Cost Management User's Guide. |
Variance Accounts
WIP accounting class variance accounts are defined as follows:
Related Topics
Defining WIP Accounting Classes
WIP Accounting Class Defaults
You can set up default WIP accounting classes at several levels:
-
Category account level for discrete jobs, and repetitive line and assembly associations
-
Default Discrete Class parameter class level for standard discrete jobs
-
Project cost group level for project jobs
Non - Project Standard Discrete Jobs
The default discrete accounting classes that you have associated with categories in the Default WIP Accounting Classes for Categories window are used when you create standard discrete jobs for items that belong to categories that belong to the product line category set. For example, if you create a job to build Item A, and Item A belongs to a category that belongs to the product line category set, then the WIP accounting class associated with Item A's category is defaulted. This defaulting logic is applied no matter how jobs are created. See: Overview of Creating Discrete Jobs.
Note: If default discrete WIP accounting classes do not exist, the accounting class specified for the Default Discrete Class parameter is used. See Discrete Parameters.
Non - Project Referenced Work Order-less Completions
When you perform work order-less completions, discrete accounting classes that are associated with categories are defaulted if the item being completed belongs to a category that belongs to the product line category set. For example, if you are performing a work order-less completion for Item A, and Item A belongs to a category that belongs to the product line category set, then the WIP accounting class associated with Item A's category is defaulted.
Repetitive Assemblies
When you associate repetitive assemblies with production lines, the repetitive accounting classes that you have associated with categories are defaulted if the assembly item being associated belongs to a category that belongs to the product line category set. For example if you create a repetitive line/assembly association for an assembly Item B, and Item B belongs to a category that belongs to the product line category set, then the WIP accounting class associated with Item B's category is defaulted.
Project Related Defaults
Discrete accounting classes can also be defaulted when you define project referenced jobs and perform project referenced work order-less completions. If the assembly item belongs to a category that belongs to the product line category set, then the WIP accounting class associated with the item's category is defaulted.
However, if a default discrete class cannot be found for a project job or work order-less completion based on the assembly item's category set, the system does not default the accounting class specified for the Default Discrete Class parameter. Instead it uses the WIP accounting class that is associated with the project as defined in the Project Parameters window. Like other accounting class defaults it can be overridden but only with an accounting class that was associated with the project's cost group in the WIP Accounting Classes for Cost Groups window. See: Assigning Project Parameters, Oracle Project Manufacturing User's Guide, and Defining Cost Groups, Oracle Cost Management User's Guide.
Note: If you create a project referenced job or perform a project referenced work order-less completion, and the system can find neither a default accounting class nor a project WIP accounting class, the accounting class is not defaulted and one must be selected.
Accounting Class Defaults on the Discrete Jobs Window
When selecting a WIP Accounting Class on the Discrete Jobs window, the list of values defaults in the following manner for your costing organization setup.
-
Standard costing organization for jobs associated to a project or task:
-
If Cost Group is enabled on the Project Parameters window, only the accounting classes associated with the project's cost group are displayed.
-
If Cost Group is disabled, all valid accounting classes are displayed.
-
-
Non-Standard costing organization for jobs associated to a project or task—only the accounting classes for the project's cost group are displayed.
-
Standard costing organization for jobs not associated to a project or task:
-
If Cost Group is enabled on the Project Parameters window, only the accounting classes associated with the project's cost group are displayed.
-
If Cost Group is disabled, all valid accounting classes are displayed.
-
Defining WIP Accounting Classes
Accounting classes are assigned and used when jobs, work orders, and repetitive assemblies associated with production lines are defined.
-
Navigate to the WIP Accounting Classes window.
If you are using an average costing organization, the Costing region displays for entering average costing information. Otherwise, if using a standard costing organization, this region does not appear.
-
Enter a unique accounting class name and description in the Class and Description fields.
You cannot update the class name after you save your changes.
-
Select an accounting class Type.
The options are Standard Discrete, Repetitive Assembly, Asset Non-standard, Expense Non-standard, Standard Lot Based, Maintenance, and Expense Non-standard Lot Based. Production costs and variances are tracked in the valuation and variance accounts associated with these classes.
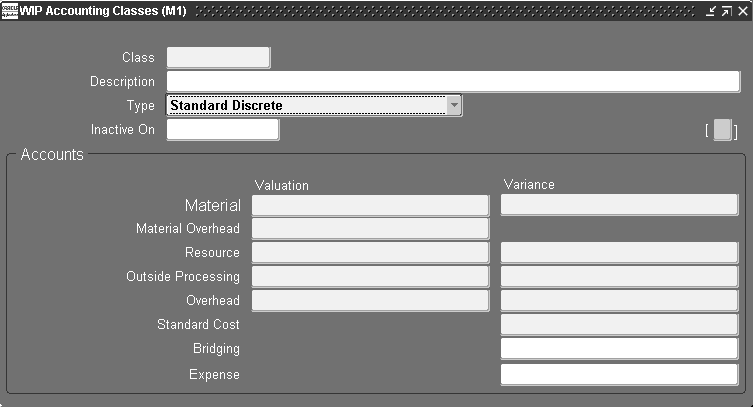
-
As of this date, you can no longer use this accounting class. The Inactive On date can be greater than or equal to the current date. If you do not enter an Inactive On date, the accounting class is active indefinitely.
-
In the Accounts region, select the general ledger accounts each required Valuation and Variance account. See: Valuation and Variance Accounts.
-
If you are defining an accounting class for an average costing organization, in the Costing region, select a Default Completion Cost Source.
Note: This region displays only when you are using an average costing inventory organization.
The default completion cost source defined in the WIP Parameters window is defaulted but can be overridden. The options are System Calculated and User Defined.
-
If you select the System Calculated as your default completion cost source, you must select a System Option. The options are Use Actual Resources and Use Predefined Resources.
-
Select a Cost Type.
Determines which Cost Type is defaulted for when completing jobs. You must choose a cost type if the Default Completion Cost Source parameter is User Defined.
-
Save your work.
Related Topics
Shop Floor Statuses
Shop floor statuses can be used to control shop floor move transactions. You can define as many shop floor statuses as are required.
Shop floor statuses can be assigned to the intraoperation steps of work in process routing operations. When assigned to an intraoperation step of an operation that is associated with a particular repetitive line and assembly, the status applies to all repetitive schedules building that assembly on that line.
Defining Shop Floor Statuses
Shop floor statuses can be used to control shop floor movement transactions. You can define as many shop floor statuses as are required.
Shop floor statuses can be assigned to the intraoperation steps of work in process routing operations. When assigned to an intraoperation step of an operation that is associated with a particular repetitive line and assembly, the status applies to all repetitive schedules building that assembly on that line.
To define shop floor statuses
-
Navigate to the Shop Floor Statuses window.
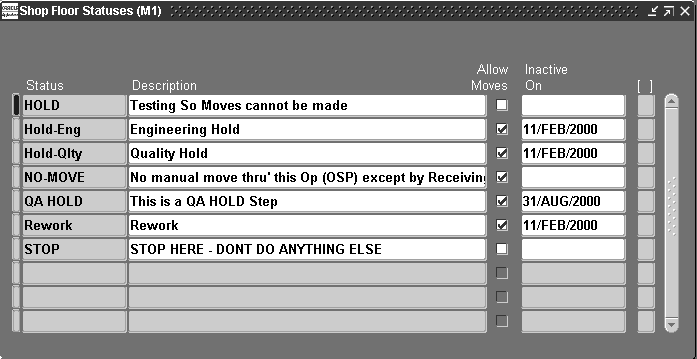
-
Enter an alphanumeric Status name
For example, enter WIPHold to signify that shop floor assemblies are on WIP hold or, QAHold to signify that the shop floor assemblies are on quality assurance hold.
-
Enter a Status description.
Descriptions can be used to identify shop floor statuses on standard reports. They can be up to 240 characters of alpha numeric text.
-
Uncheck Allow Moves so that you can use this status to control move transactions. Allow Moves defaults to checked.
-
As of this date, you can no longer use this status.
-
Save your work.
Related Topics
Overview of Shop Floor Control
Assigning and Viewing Shop Floor Statuses
Defining Schedule Groups
You can assign flow schedules and discrete jobs to the schedule groups you define. Jobs and flow schedules within a given schedule group can be sequenced. Sequencing jobs and flow schedules within a schedule group makes it possible to prioritize, for example, by customer.
You can update schedule groups. You cannot delete schedule groups that are assigned to jobs and flow schedules.
To define a schedule group
-
Navigate to the Schedule Groups window.
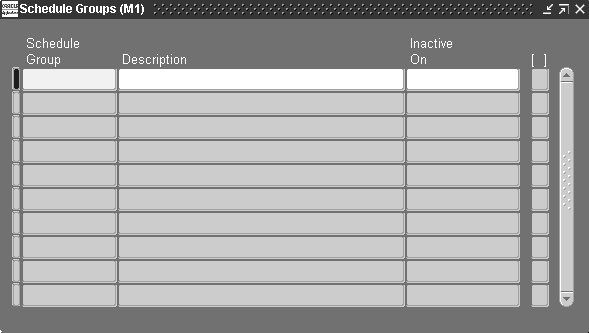
-
Enter an alphanumeric name to identify the Schedule Group.
Schedule groups are used to group discrete jobs and flow schedules. For example, you can create a Week01 schedule group to identify which jobs are to be released and built during the first week of your current production cycle. Schedule group names can be up to 30 characters and must be unique within the organization.
-
Enter a schedule group Description. Descriptions can be up to 240 characters of alphanumeric text.
-
Enter an Inactive On date.
As of this date, you can no longer use this schedule group.
Related Topics
Defining Labor Rates
You can add, delete, and update the effective date of the hourly labor rates for person-type resources (employees). You also can define multiple hourly labor rates for the same employee, as long as each rate has a different effective date.
If you use actual costing, the hourly labor rate rather than the standard rate is used to compute the actual cost of person-type resources charged to discrete jobs and repetitive schedules. You can enter an employee number when performing a person-type resource transaction in the Resource Transactions window or the Resource Transaction Open Interface process. The employee's most current hourly labor rate is used to compute the actual cost of the transaction.
Prerequisites
- Enter at least one employee. See: Employee Management, Managing People Using Oracle HRMS.
To define or update the hourly labor rate of an employee
-
Navigate to the Employee Labor Rates window.
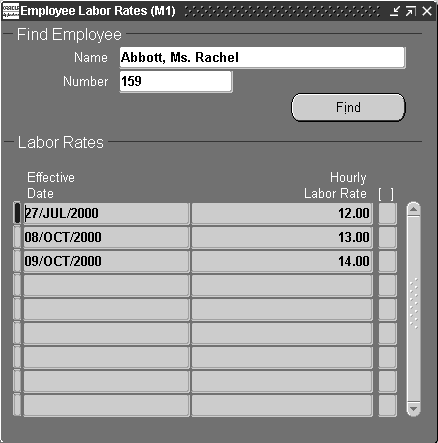
-
Select the Effective Date for each hourly labor rate.
The hourly rate remains effective until the next effective date or until the inactive date of the employee. You can only update or delete future effective dates.
-
Enter the Hourly Labor Rate for the employee.
You can define multiple hourly labor rates for the same employee as long as they have different effective dates. You can define a labor rate to the smallest currency denomination. For example, you can define a US dollar rate to the penny. You can only update or delete future labor rates.
-
Save your work.
Related Topics
Overview of Resource Requirements
Production Lines
You can define and update, but not delete, production lines. A production line describes a unique set of operations, departments, and/or manufacturing cells that produce one or more of your products. You can associate production lines with repetitive assemblies, discrete jobs, and work order-less completions.
Defining Production Lines
You can define and update, but not delete, production lines. A production line describes a unique set of operations, departments, and/or manufacturing cells that produce one or more of your products. You can associate production lines with repetitive assemblies, discrete jobs, and work order-less completions.
To define a production line
-
Navigate to the Production Lines window.
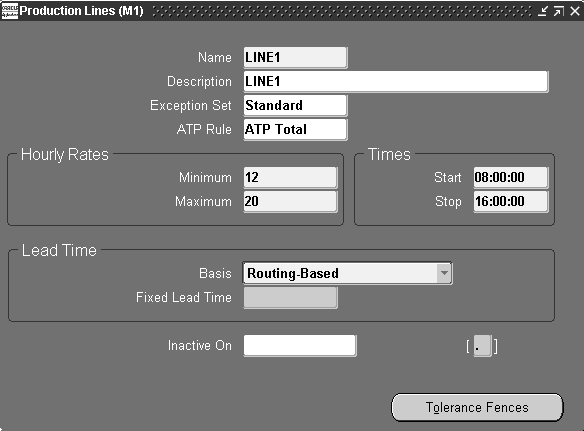
-
Enter the production line Name.
For example, enter LINE1 to signify production line number 1, or BOARD to signify the PC board assembly line.
-
Enter the production line Description.
-
Optionally, select an Exception Set.
Production lines are rate-based resources. The exception sets that you assign to them help you identify capacity problems. .
-
Optionally, select an ATP Rule. See: Defining ATP Rules, Oracle Inventory User's Guide
You can select any user-defined ATP rule. The ATP rule that you assign to the production line is used when determining the capable to promise status of the line resource. See: Capable to Promise, Oracle MRP User's Guide..
-
This represents the minimum number of assemblies the line can produce per hour. The minimum hourly rate must be greater than or equal to 0 and less than or equal to the maximum rate.
-
Enter the Maximum Hourly Rate.
This represents the maximum number of assemblies the line can produce per hour. The maximum hourly rate must be greater than or equal to the minimum rate.
-
Enter the production line Start time.
This is the time at which your production line starts running every day. You can update this field at any time.
-
Enter the production line Stop time.
This is the time at which your production line stops running every day. You can update this field at any time.
The difference between the Start and Stop times represents the amount of time per day a line is available. If the Start and Stop times are the same, the production line is considered to be available 24 hours per day.
-
Select the Lead Time Basis.
If the lead time varies by assembly, you can schedule the repetitive production time based on the routing of the assembly the line is building. You can set a fixed lead time if the lead time is determined by the production line and does not vary by assembly. You can update this field at any time.
Fixed: The system schedules the first unit completion date and the operations of all repetitive schedules on this production line based on the fixed lead time hours you enter for the production line. Scheduling is done regardless of actual capacity or the lead time of the routing of the repetitive assembly.
Routing-Based: The system schedules the first unit completion date and the operations of all repetitive schedules on this production line using the detailed shop floor scheduling algorithm, the routing of the assembly, and a quantity of 1.
-
If the lead time basis is fixed, you must enter the Fixed Lead Time, in hours per assembly, for the production line. This is the amount of time it takes to produce the first assembly, from start to finish on the production line. The daily quantity from that point on is set when you define individual repetitive schedules and must be less than or equal to the maximum hourly rate. The fixed lead time entered here is used to schedule repetitive schedules produced on this production line. You can update this field at any time. You cannot enter a value in this field for a routing-based production line.
Note: For lines with a lead time basis of Routing-based, the lead time is calculated by applying the detailed shop floor scheduling algorithm to the routing of the assembly.
-
The Inactive On date is greater than the current date. If you do not enter an Inactive On date, the production line is active indefinitely. You cannot update any repetitive schedule that uses this production line, nor can you assign this production line to a new repetitive schedule as of this date.
-
Save your work.
Defining Tolerance Fences
Tolerance fences provide temporary increases to capacity above the standard operating rate to handle increases in orders. Oracle Flow Manufacturing uses flexible tolerance fences during line scheduling to temporarily alter the line rate, that is the capacity of the line.
This feature is activated by checking the Flex Tolerance check box on the Line Scheduling Workbench.
To define tolerance fences
-
Choose Tolerance Fences from the Production Lines window.
The Tolerance Fences window displays.
-
In the Days in Advance field, enter the number of days of notice needed before increasing the line capacity.
The Days in Advance value should be equal to or greater than the fixed lead time value.
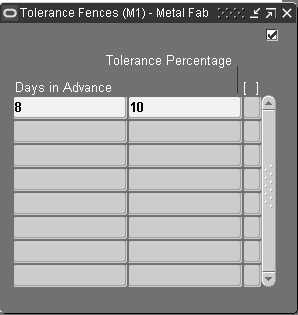
-
In the Tolerance Percent field, enter the percentage you want to increase the line capacity.
For example, the lead time for an assembly is 3 days on a line, and you know you can increase your capacity by 5 percent if given 5 days notice. Set Days in Advance at 8 days (the lead time plus number of days required for notice), and the tolerance percentage at 5.
The line rate is adjusted by the tolerance fence before scheduling rules are applied.
-
Save your work.
Related Topics
Associating Lines and Assemblies
Defining Discrete Jobs Manually
Performing Work Order-less Completions
Defining Repetitive Schedules Manually
Line Scheduling Workbench Options Window, Oracle Flow Manufacturing User's Guide.
Profile Options
During implementation, you set a value for each user profile option to specify how Work in Process controls access to and processes data.
Generally, the system administrator sets and updates profile values. See: Setting User Profile Options, Oracle E-Business Suite Setup Guide.
Setup Profile Options Summary
The table below indicates whether you can view or update the profile option, and at which System Administrator levels the profile options can be updated: User, Responsibility, Application, or Site. For a detailed description of each profile option, see: Profile Option Descriptions.
Oracle Applications has an extensive list of profile options, and profile options are defined in category types. The categories are used to control how the profile options are viewed in the interface, enabling you to view only those profile options pertaining to specific products or functions you are maintaining. See: Profile Categories, Oracle E-Business Suite Setup Guide
You are required to provide a value for a Required profile option. An Optional profile option provides a default value, which you only need to change if you do not want to accept the default. The key to the following chart is as follows:
-
+
You can update the profile option.
-
-
You can view the profile option value but you cannot change it.
-
0
You cannot view or change the profile option value.
Profile Option Descriptions
The following information provides you with a description of each Work in Process profile option and its values.
Additional Information: Processing for move related transactions (that is: move, scrap, reject, move and complete, and return and move) enable the parent assembly record to process even if backflush records fail.
In background processing for standard completion and return transactions, once the move completion manager picks up a record for processing, backflushing occurs in the same commit cycle. This prevents the possibility of processing transactions if backflushing fails.
TP:WIP:Completion Material Processing
Controls material processing of assembly completion, assembly return, and assembly completion backflush transactions initiated using the Completion Transactions window. Available values are listed below:
| Variable | Description |
|---|---|
| Background processing | When you save a completion transaction, control is returned to you immediately. Assembly completions and returns and their associated backflush transactions are processed on a periodic basis. |
| Concurrent processing | When you save a completion transaction, a concurrent process is spawned and control is returned to you immediately. The concurrent request number, representing the concurrent process executing the material transaction for the job or repetitive schedule, is displayed. |
| Online processing | When you save a completion transaction, the transaction is processed while you wait and control is returned once transaction processing is completed. If you set TP:WIP:Completion Transactions Form profile option to Background processing, this profile option is disregarded. If you are using average costing, and the TP:INV: Transaction Processing Mode profile option in Oracle Inventory is set to Form level processing, you must set this profile option to Online to ensure that transactions are processed in the proper sequence. |
TP:WIP:Completion Transaction Form
Determines whether completion transactions are processed online or in the background when transacting assembly completions using the Completion Transactions window. A completion transaction includes updating the completion quantity of a job or repetitive schedule, identifying the component items and quantities to be backflushed, and transferring reservations from the final assembly order to appropriate sales order lines and deliveries. This profile is only used if the Inventory profile option, TP:INV:Transaction Processing Mode, is set to From Level Processing. Available values are:
| Variable | Description |
|---|---|
| Background processing | When you save a completion transaction, control is returned to you immediately. Completion transactions are then processed on a periodic basis. |
| Online processing | When you save a completion transaction, it is processed while you wait and control is returned once transaction processing is completed. If you are using average costing, and the TP:INV:Transaction Processing Mode profile option in Oracle Inventory is set to Form level processing, you must set this profile option to Online to ensure that transactions are processed in the proper sequence. |
TP:WIP:Completion Transactions First Field
Determines which field the cursor defaults to when you first enter the Completion Transactions window. Set this option based on your predominant manufacturing environment: assemble-to-order, project or discrete job, or repetitive.
The available first field values are Line, Assembly, Job, or Sales Order. You can navigate to another field to override the default.
You can only enter a Sales Order name if you have an ATO sales order linked to a job.
TP:WIP:Material Transaction Form
Controls the processing of component issue and return transactions entered in the WIP Material Transactions window. This profile is only used if the Inventory profile option, TP:INV:Transaction Processing Mode, is set to From Level Processing. Available values are:
| Variable | Description |
|---|---|
| Background processing | When you save a material transaction, control is returned to you immediately. Transactions are then processed on a periodic basis. |
| Concurrent processing | When you save a material transaction, a concurrent process is spawned and control is returned to you immediately. The concurrent request number representing the concurrent process executing the issue or return transactions for the job or repetitive schedule is displayed. |
| Online processing | When you save a material transaction, the transaction is processed while you wait and control is returned once transaction processing is completed. If you are using average costing, and the TP:INV: Transaction Processing Mode profile option in Oracle Inventory is set to Form level processing, you must set this profile option to Online to ensure that transactions are processed in the proper sequence. |
TP:WIP:Material Transactions First Field
Determines which field the cursor defaults to when you first enter the WIP Material Transactions window. Set this option based on your predominant manufacturing environment: assemble-to-order, project or discrete job, or repetitive.
The available first field values are Line, Assembly, Job, or Sales Order. You can navigate to another field to override the default.
You can only enter a Sales Order name if you have an ATO sales order linked to a job.
TP:WIP:Move Transaction
Determines whether move transactions performed using the Move Transactions window are processed online or in the background. Available values are listed below:
| Variable | Description |
|---|---|
| Background processing | When you save a move transaction, control is returned to you immediately. Transactions are then processed on a periodic basis. |
| Online processing | When you save a move transaction, the transaction is processed while you wait and control is returned once transaction processing is completed. If you have this option set to Online processing, you cannot move more assemblies than are waiting at an operation step. However, if you have this option set to Background processing, you can move any number of assemblies, but validation of the quantity takes place in the background. You can correct and resubmit transactions that have errors using the Pending Move Transactions window. If you are using average costing, and the TP:INV: Transaction Processing Mode profile option in Oracle Inventory is set to Form level processing, you must set this profile option to Online to ensure that transactions are processed in the proper sequence. |
TP:WIP Move Transactions Date Updatable
This profile option enables the functionality to restrict updating the transaction date field on the Move Transactions window:
-
Yes: Move transaction dates can be edited, enabling the transaction to be backward compatible. This is the default value.
-
No: The Date field on the Transaction section of the Move Transaction window cannot be changed from system date of the transaction.
See: Performing Move Transactions
TP:WIP:Move Transactions First Field
Determines which field the cursor defaults to when you first enter the Move Transactions window. Set this option based on your predominant manufacturing environment: assemble-to-order, project or discrete job, or repetitive.
The available first field values are Line, Assembly, Job, or Sales Order. You can navigate to another field to override the default.
You can only enter a Sales Order name if you have an ATO sales order linked to a job.
TP:WIP:Move Transaction Quantity Default
Indicates if and how move transaction quantities are defaulted. Available values are listed below:
| Variable | Description |
|---|---|
| None | No transaction quantity is defaulted. |
| Minimum Transfer Quantity | When you perform a move transaction, the transaction quantity defaults to the minimum transfer quantity if the minimum transfer quantity is less than or equal to the available quantity. If the minimum transfer quantity is greater that the available quantity, and the available quantity is not zero, then the available quantity is defaulted. |
| Available Quantity | When you perform a move transaction, if the available quantity is not zero, the transaction quantity defaults to the available quantity. |
TP:WIP:Resource Transactions First Field
Determines which navigation field is defaulted when you the Resource Transactions window is opened. Set this option based on your predominant manufacturing environment: assemble-to-order, project or discrete job, or repetitive.
The available first field values are Line, Assembly, Job, or Sales Order. You can navigate to another field to override the default.
You can only enter a Sales Order name if you have an ATO sales order linked to a job.
TP:WIP:Move Material Processing
Controls processing mode for backflush transactions, assembly scrap, move completion, and move return transactions from the Move Transactions window:
| Variable | Description |
|---|---|
| Background processing | When you save a move transaction, control is returned to you immediately. The operation and assembly pull backflush, assembly scrap, move completion, and move return transactions are then processed on a periodic basis. Do not use background processing if you are backflushing lot controlled components that require manual entry of lot numbers either because of insufficient inventory or because the WIP Backflush Lot Selection parameter is set to Manual. See: Lot and Serial Number Backflushing. |
| Concurrent processing | When you save a move transaction, a concurrent process to process the material port of the move transaction is spawned and control is returned to you immediately. The concurrent request number representing the concurrent process executing the move transactions for the job or repetitive schedule is displayed. |
| Online processing | When you save a move transaction, operation and assembly pull backflush, assembly scrap, move completion, and move return transactions are processed while you wait and control is returned once transaction processing is completed. If you set the TP:WIP:Move Transactions profile option to Background processing, the Move Transactions window disregards this profile option for operation pull backflush, assembly scrap, and move completion transactions and performs the material portion of the move transaction in the background. |
TP:WIP:Work Order-less Completion Form
Sets processing mode for the Work Order-less Completions window.
| Variable | Description |
|---|---|
| Background processing | When you create a completion transaction, control is returned to you immediately. The transactions are then processed on a periodic basis. |
| Online processing | When you create a work order-less completion, transactions are processed while you wait and control is returned once transaction processing is completed. |
TP:WIP:Work Order-less Default Completion
Determines the default for the Scheduled flag in the Work Order-less Completions window.
| Variable | Description |
|---|---|
| Scheduled | The Schedule flag defaults to checked. Use this option if most of your work order-less completions are based upon flow schedules. |
| Unscheduled | The Scheduled flag defaults to unchecked. Use this option if most of your work order-less completions are manually entered and not based upon flow schedules. |
WIP:Allow Cancel Jobs with Pending OSP Requisition
In outside processing, jobs are created from blanket purchase order requisitions. This profile gives you the choice of deleting a job even when there are existing purchasing requisitions.
| Variable | Description |
|---|---|
| No | A job created from a blanket purchase agreement requisition can not be cancelled. This is the default. |
| Variable | Description |
|---|---|
| Yes | Enables you to cancel a job created from a blanket purchase agreement requisition. |
WIP:Allow transactions when pending transactions exist
Enables the option of performing move and completion transactions when pending transactions exist.
| Variable | Description |
|---|---|
| No | You cannot perform transactions when pending transactions exist. |
| Variable | Description |
|---|---|
| Yes | Transactions are allowed with existing pending transactions. A warning message appears to notify you that pending transactions exist. This is the default |
WIP: Allow WIP Accounting Class Changes
Provides the ability to update standard discrete jobs in the Unreleased status with changed WIP accounting class definition.
| Variable | Description |
|---|---|
| Yes | WIP accounting class changes reflect in the existing standard discrete jobs that are in the Unreleased status. |
| Variable | Description |
|---|---|
| No | This is the default value. WIP accounting class changes will not update the WIP accounting class definition in the existing discrete jobs. |
WIP:Configuration Reservation Level
Indicates the level the completed configuration needs to be reserved. Available values are:
| Variable | Description |
|---|---|
| Item | The reservation transferred to Inventory does not include subinventory and locator information. This is organization level reservation. |
| Variable | Description |
|---|---|
| Item/Subinventory | The reservation transferred to Inventory includes subinventory and locator information This is Detail reservation. |
WIP: Days for Archiving Mass Load Interface Records
Sets the number of days for the automatic deletion of records with the completed, errored, pending, and warning statuses when you run the WIP Mass Load program, depending on the last update date of the record in the WIP_JOB_SCHEDULE_INTERFACE and WIP_JOB_DLS_INTERFACE tables.
Record retention functionality for the WIP Mass Load program is also based on the MRP: Debug Mode profile option value. If the MRP: Debug mode is set to No, completed, errored, pending, and warning records are deleted after the WIP Mass Load runs. If the MRP: Debug mode is set to Yes, the records with the completed, errored, pending, and warning statuses are permanently retained.
WIP: Days for Archiving Mass Load Interface Records is a site-level only profile option that supports scenarios wherein the cyclic sequence values and old record sequence values may clash with recycled values. This profile option provides the option to purge the old records in the interface tables. Set the following values:
-
Number of Days: When you set the profile value as 365 days and then run the WIP Mass Load program, records with the last update date that is more than 365 days are automatically deleted after the WIP Mass Load program runs. Records with the completed, errored, pending, and warning statuses are purged depending on the last update date.
-
Null: This is the default value. Old records are not purged when you run the WIP Mass Load program. Records that complete successfully are deleted or retained based on the MRP: Debug Mode profile option value.
WIP:Default Job Start Date
Determines whether the start dates for jobs default to the current date and time or not at all when defining jobs in the Discrete Jobs window. The choice is Yes or No.
WIP:Default Quantity for Move
The work in process quantity for transactions defaults to the available quantity. This profile option enables you to change the move default quantity by setting it to No. The choice is Yes or No.
WIP:Define Discrete Job Form
Sets job creation and update mode when defining jobs in the Discrete Jobs window. Available values are listed below:
| Variable | Description |
|---|---|
| Concurrent definition | When you save a job, a concurrent process is spawned and control is returned to you immediately. The concurrent request number representing the concurrent process is displayed. You can view the status of the process in the Concurrent Requests window. The concurrent process updates the job status to Pending Bill Load, and if the bill of materials load succeeds, updates the job status to Pending Routing Load. The process then loads the routing information (if you defined a routing for the bill). If the routing load succeeds, the job status is updated to the choice you specified for the job (Unreleased, Released, or On Hold), and then loads the costing information. When all costing information is loaded, you can update the discrete job information and transact against it. Concurrent definition produces an output report that indicates the job, assembly, relevant dates, and successful completion of each step (bill of materials load, routing load, and costing load). If the concurrent process fails, the status of the discrete job indicates the source of the problem (Failed bill of material load or Failed routing load). If the bill of material or routing load fails you can resubmit the job once you change the job status to Unreleased, Released, or On Hold. |
| Interactive definition | When you save a job, job definition occurs immediately. The bill of material and routing are loaded while you wait and control is returned when the definition process is completed. If you have complex bills of material and long routings, concurrent processing is recommended. |
WIP: Display Scrap and Reject Quantity in Discrete Workstation
Enables display of job operations with quantities only in the Scrap and Reject intraoperation step in the Discrete Workstation.
| Variable | Description |
|---|---|
| No | If all the job operations are completed and there is no quantity remaining in the Queue, Run and To Move steps—the work order will not appear in the Discrete Workstation, even if there is existing quantity in the Reject or Scrap step. |
| Variable | Description |
|---|---|
| Yes | If all the job operations are completed, and the only quantities remaining are in the Reject or Scrap step, they will appear on the Discrete Workstation. |
WIP:Discrete Job Prefix
Specifies the job prefix to use when autogenerating job names in the Discrete Jobs, Simulate Discrete Jobs, Import Jobs and Schedules, and AutoCreate windows in Work in Process, and in the Planner Workbench window in Oracle planning products. It is also used when autogenerating the numbers for flow schedules created in the Work Order-less Completions window.
Work in Process concatenates this prefix with a value from the sequence WIP_JOB_NUMBER_S to create a default discrete job name.
WIP: Enable MRP Net for Non-standard Job Requirements
Indicates whether the MRP Net check box is enabled on the Material Requirements window by default when creating non-standard jobs. This profile applies to jobs that have the following values:
-
Job Type is Non-standard.
-
There is a valid value in the bill of material Reference field on the Bill tabbed region of the Discrete Jobs window.
| Variable | Description |
|---|---|
| No | The MRP Net check box is not enabled on the Material Requirements window when creating non-standard jobs, or when components are added to material requirements. |
| Variable | Description |
|---|---|
| Yes | The MRP Net check box is enabled on the Material Requirements windows when creating non-standard jobs, or when components are added to material requirements. |
WIP:Enable Outside Processing Workflows
Determines whether or not outside processing workflows are enabled and runs the Requisition Import program automatically for purchase order move transactions.
| Variable | Description |
|---|---|
| Yes | All outside processing workflows are enabled and the Requisition Import program automatically runs for purchase order move transactions. |
| No | No outside processing workflows are enabled and the Requisition Import program is not launched automatically for purchase order move transactions. |
WIP:Exclude ECOs
Controls which engineering change orders (ECOs) are included when you define jobs and schedules. This profile option also controls whether you can select revisions associated with open ECOs in the WIP Material Transactions window. See: ECO Statuses in the Oracle Engineering User's Guide.
Choices include:
-
Open: ECOs with statuses of Release, Schedule, and Implement are considered when you choose a bill of material revision or revision date, and the bill of material is exploded. Open is the default value.
-
None: Open ECOs are included with the statuses of Release, Schedule and Implement when you choose a bill of material revision or revision date. This enables you to explode item revisions on the bill of material.
-
All: Only revised item lines with a status of Implemented are considered.
Work Order-less Completions do not consider this profile option.
WIP: Ignore Completed Operations in Backward Scheduling
Enables the backward scheduling of in-progress and yet to start operations only, without operations which are fully completed. This is also applicable for mid-point scheduling of operations that are earlier than the mid-point operation. Use the following values:
-
Yes: Only in-progress and yet to start operations are selected for backward scheduling. The completed operations are ignored and are not rescheduled.
-
No: This is the default value.
Note: Whether you set this profile option to Yes or No, forward scheduling is not affected and reschedules all the operations including the completed operations.
WIP:Ignore Issued Quantity for Pick Release
Provides the flexibility regarding the quantity already issued during a pick release transaction:
-
No: The quantity already issued is not considered for pick release and move order creation. This is the default.
-
Yes: No definitions will be reversed.
WIP: Ignore Zero Quantity Backflush
Provides flexibility to choose whether to create errors or ignore errors and process the transactions when the backflush quantity is less than the quantity of .000005. Choices include:
-
No: A backflush quantity transaction of less than the quantity of .000005 will create errors and will not be processed.
-
Yes: A backflush quantity transaction of less than the quantity of .000005 will be ignored and omitted.
Note: Inventory transactions are not generated for quantities rounded to zero (0).
WIP:Initiate Approval Process after Requisition Import
Controls whether the Requisition Import program triggers the approval process after requisition creation. Values are:
-
Null or Yes: Requisitions are created in the status of Approved. Another approval process is then launched to automatically approve the newly created purchase order.
-
No: Requisitions are created in the status of Incomplete. The approval process is not automatically launched to approve a purchase order.
This profile works in combination with the Requisition Creation Time parameter. Regardless of the value selected for this profile, if the parameter is not set to Manual, records are picked up from the Requisition Import interface.
WIP:Job Name Updatable
Determines whether you can update the names of existing jobs in the Discrete Jobs window.
WIP:Launch Requisition Import for PO Move
Controls whether or not to run the Requisition Import program automatically for purchase order move resources. To run the Requisition Import program automatically for purchase order move transactions but stop outside processing workflow notifications, set the “WIP:Enable Outside Processing Workflows” profile option to No.
-
Yes: The Requisition Import program is automatically launched for PO Move transactions.
-
No: The Requisition Import program is not automatically launched for PO Move transactions.
WIP:Launch Requisition Import for PO Receipt
Controls whether or not to run the Requisition Import program automatically for purchase order receipt resources. Values are:
-
Yes: The Requisition Import program is automatically launched for PO Receipt transactions.
-
No: The Requisition Import program is not automatically launched for PO Receipt transactions.
WIP:Move Completion Default
Determines the default transaction type for the Move Transactions window. If you specify Yes, the transaction type defaults to Complete. Otherwise, the transaction type defaults to Move. Note that you cannot specify that the Return transaction type be used as the default. See: Move Transaction Types.
WIP:Raise Completion Business Event
Raises business events during completion, move and complete, and move and scrap transactions. The business event, oracle.apps.wip.job.AssyCompletion, is configured in the Oracle Integration Repository in the Integrated SOA Gateway responsibility. The values are Yes and No (default value). See: Completing and Returning Assemblies
WIP: Raise Move Business Event
Raises business events during move transactions and WIP move and complete transactions. The business event, oracle.apps.wip.job.AssyMove, is configured in the Oracle Integration Repository in the Integrated SOA Gateway responsibility. The values are Yes and No (default value). See: Performing Move Transactions
WIP:Requirement Nettable Option
Determines which subinventories to include when displaying on-hand quantities in the Material Requirements and View Material Requirements windows. Available values are listed below:
| Variable | Description |
|---|---|
| View only nettable subinventories | Include only nettable subinventories when displaying on-hand quantities. |
| View all subinventories | Include all subinventories (nettable and non-nettable) when displaying on-hand quantities. |
WIP: Round Off Resource Usage to Minutes in Lead Time Calculations
Sets rounding for resource usage calculation values. When entry of resource usage values of a routing resource is less than a minute value, this profile enables the value to be rounded to the next minute. This enables resource usage values to be compatible with Advanced Supply Chain Planning calculations.
| Variable | Description |
|---|---|
| Yes | Indicates that resource usage is rounded to the next minute. For example, if resource usage equals 36 seconds, it is rounded to one minute. The lead time calculation is then based on 1 minute instead of 36 seconds. |
| Variable | Description |
|---|---|
| No | Indicates that resource usage is not rounded. |
See:
-
Calculating Manufacturing Lead Times, Oracle Bills of Material User's Guide
WIP:See Engineering Items
Determines whether you can define jobs and schedules for engineering items and if engineering items as visible as material requirements.
WIP: Schedule Phantom Resources
Provides the ability to inherit phantom resources with their own scheduling flag and include scheduled resources in the work order scheduling.
| Variable | Description |
|---|---|
| Yes | Phantom Resources are inherited with their own scheduling flag and scheduled resources are included in the work order scheduling. |
| Variable | Description |
|---|---|
| No | Phantom Resources are inherited with scheduling flag as No and hence the resources are not scheduled. |
WIP:Validate Push Components at WIP Completion
Provides the ability to stop completion transactions if all the push type components have not been issued to the job or schedule. This includes completion transactions for assemblies and operations using:
-
Move Transactions window
-
Completion Transaction window
-
MES for Discrete pages
-
Repetitive schedule completion windows
-
Flow Manufacturing completion windows
| Variable | Description |
|---|---|
| Yes | Completion transactions will only occur when all push components have been issued to the job or schedule. If components are missing, a warning message appears: Work Orders/Discrete Jobs cannot be completed without issuing push items to the job. |
| Variable | Description |
|---|---|
| No | This is the default value, completion transactions are performed even if all components have not been issued to the job or schedule. |
WIP: Validate Open OSP Documents at Job Close
Provides the ability to validate whether or not the receiving is complete or closed for outside processing (OSP) jobs that may have purchase requisitions or purchase orders, before you close the discrete job.
| Variable | Description |
|---|---|
| Yes | Closing discrete jobs for outside processing will only be allowed after validating that there are no open purchase requisitions or purchase orders existing for the work order. Setting this profile to Yes will ensure an error message appears to prevent the closing of the work order if there are any associated open purchase requisitions or purchase orders. |
| Variable | Description |
|---|---|
| No | This is the default value. If you set this profile to No, when you close a discrete job for OSP, only an informational warning message displays and allows you to close the discrete job when there are open purchase orders or requisitions for the operations. |
Related Topics
Oracle Inventory Profile Options, Oracle Inventory User's Guide
Overview of User Profiles, Oracle E-Business Suite User's Guide
Setting Your Personal User Profile, Oracle E-Business Suite User's Guide
Security Functions
Function security is the mechanism by which user access to applications functionality is controlled. System administrators administer function security.
Access to Work in Process functionality is controlled either by menus and form functions/subfunctions or by form function parameters.
Related Topics
Overview of Function Security, Oracle E-Business Suite User's Guide
Form Function Parameters
Some Work in Process forms are coded to accept particular parameters. Parameters can be used to limit access to form elements such as:
-
Window options
-
Tools menu options
-
Buttons
The syntax for entering form function parameters is:
PARAMETER = VALUE
For example, to enter a negative Boolean parameter value for the WIP_WIPDJMDF_CLOSE function, you would enter the following in the Parameters field in the Form Functions window:
UNCLOSE = N
The following table describes the Work in Process form function parameters. All values are either Yes or No.
| Function | User Function Name | Parameter |
|---|---|---|
| WIP_WIPDJMDF_CLOSE | Define Discrete Jobs: Close Discrete Jobs | UNCLOSE |
| WIP_WIPTXCMP | WIP Completion Transaction: Filter Serial | P_FILTER_SERIAL |
| WIP_WIPTXMAT | WIP Material Transaction: Filter Serial | P_FILTER_SERIAL |
| WIP_WIPTXSFM_OVERRIDE_NO_MOVE | Move Transactions: Allow Skipping Over No Move Statuses | OVERRIDE_NO_ MOVE_NO_SKIP |
| WIP_WIPTXSFM_NO_CMP | Move Transactions: No Completion Transactions | ALLOW_CMP |
| WIP_WIPTXSFM_NO_RSC | Move Transactions: No Resource Transactions | RESOURCE_TXNS |
| ALLOW_FINAL_COMPLETIONS | Completion Transactions: No Final Completions | ALLOW_FINAL_ COMPLETIONS |
| WMA_WOL_COMPLETE | Mobile Work Order-less Completion Transactions: Show Sales Order | SHOW_SO |
Define Discrete Jobs: Close Discrete Jobs
Determines whether you can unclose jobs using the Close Discrete Jobs window. When this function security parameter (UNCLOSE) is added and set to No, the Unclose option does not appear in the Tools menu. See: Closing Discrete Jobs.
The default for this option is Yes.
WIP Completion Transaction: Filter Serial
Determines whether the serial number list of values, in the Serial Number Entry window accessed from WIP Completion window, is enabled. If set to Yes, the program filters serial number records and displays only the applicable record. If set to No, the program query displays all serial numbers.
WIP Material Transaction: Filter Serial
Determines whether the serial number list of values, in the Serial Number Entry window accessed from the WIP Material Transaction window, is enabled. If set to Yes, the program filters serial number records and displays only the applicable record. Is set to No, the program query displays all serial numbers.
Move Transactions: Allow Skipping Over No Move Statuses
Determines whether you can override `no move' shop floor statuses when performing a move transaction. If the WIP Allow Moves Over No Move Shop Floor Statuses parameter is set to No and this function security parameter (OVERRIDE_NO_MOVE_NO_SKIP) is set to Yes, you can move assemblies over no move shop floor statuses. See: Move Transaction Parameters.
The default for this option is No.
Move Transactions: No Completion Transactions
Determines whether you can perform assembly completion and return move transactions using the Move Transactions window. When this function security parameter (ALLOW_CMP) is set to No, the Complete and Return options do not appear in the Transaction Type region of the Move Transactions window. See: Move Transaction Types.
The default for this option is Yes.
Move Transactions: No Resource Transactions
Determines whether you can initiate a manual resource transaction from the Move Transactions window. When this function security parameter (RESOURCE_TXNS) is set to No, the Resources button does not appear in the Move Transactions window. See: Charging Resources with Move Transactions.
The default for this option is Yes.
Completion Transactions: No Final Completions
Determines whether you can perform WIP final completions in an average costing organization. When this function security parameter (ALLOW_FINAL_ COMPLETIONS) is set to No, the Final Complete check box does not appear in the Completion Transactions window. See: Completing and Returning Assemblies.
The default for this option is Yes.
Mobile Work Order-less Completion Transactions: Show Sales Order
Determines whether the Sales Order field displays on the Mobile Supply Chain Application Work Order-less Completion screen. If set to Yes, the Sales Order field displays on the screen, and a reservation is created for the sales order when a value is scanned. If set to No, the field does not display and is skipped in the scanned completion transaction.
Function Security
A form function invokes an Oracle Forms form. A non-form function (subfunction) is a securable subset of a form's functionality: in other words, a function executed from within a form. When the subfunction associated with a certain functionality is included in a menu, that functionality is enabled. See: Menus Window, Oracle E-Business Suite User's Guide .
The following table describes the subfunction used in Work in Process. A detailed description of each function (subfunction) follows the table:
| Menu | Function (Subfunction) | Functionality |
|---|---|---|
| WIP_TXN_MATERIAL | Allow Overcompletions | Overcompletions from Completion Transactions window |
| WIP_TXN_MOVE | Allow Overcompletions | Overcompletions from Move Transactions window |
Allow Overcompletions
You can complete more assemblies than have been defined for discrete jobs and repetitive schedule.
See: Assembly Over-completions and Over-returns and Move Completion/Return Transactions.
Setting Up Oracle Time and Labor Integration
Oracle Time and Labor (OTL) is the repository in which personnel, including contingent workers, working in a particular organization, enter time. Integrating with OTL allows personnel working on Oracle Work in Process (WIP) work orders to enter their time using OTL Self-Service. The collected information is stored in OTL Time Store, and is composed of a series of business rules and processes. WIP then extracts this information from the Time Store and charges WIP discrete jobs for the time spent by personnel who work on them.
Note: The WIP and OTL integration feature can be used only if both the Work in Process and Human Resources code levels are at Release 12.2.11.
To set up this integration, you must:
-
Assign personnel defined as persons in Oracle Human Resources as users within Work in Process.
-
Define preferences and preference values in OTL, and link these values to eligibility criteria.
You can also review the preferences and default values for the WIP and OTL integration in the topic, Work in Process Preferences in Oracle Time and Labor.
To use the integration with Oracle Time and Labor, see:
Defining Persons as Users
To integrate WIP with OTL, you must define the persons or employees in Oracle Human Resources using the People window (See: People Management, Oracle HRMS Workforce Sourcing, Deployment, and Talent Management Guide). You can then assign these persons as users within Oracle Work in Process (WIP).
To define persons as users within WIP:
-
Navigate to the Users window.
From the System Administrator responsibility, click Define, and then Users.
-
In the Users window, provide information in the following fields to associate a person as a user:
-
User Name: Enter a user name.
-
Person: Enter a person defined in Oracle Human Resources.
-
Password: Enter a password.
Alternatively, run a query to find an existing user and person to whom you want to assign the WIP Self Service Time and Expenses responsibility. The Users window will display the details of the user you queried.
-
-
Within the Direct Responsibilities tab, click the New icon in the Menu bar.
-
In the Responsibility field, select the WIP Self Service Time and Expenses responsibility from the list of values.
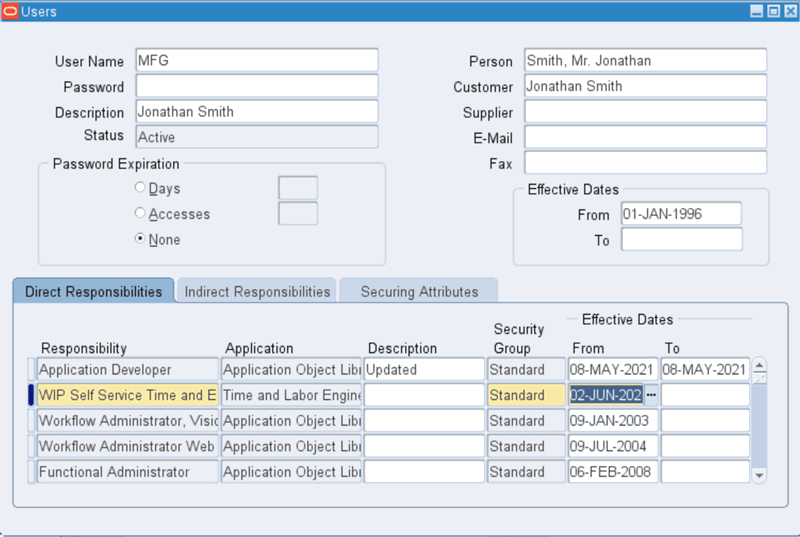
Note that while WIP Self Service Time and Expenses responsibility is seeded, the administrator must manually assign it to the user.
-
Click Save.
Defining Preferences and Eligibility
Preferences lets you to assign rules and options to workers. You must define preferences, preference values, and then link those values to eligibility criteria using the Preferences window. Use Preferences window to also define rules about how individual workers or groups of workers in WIP can use the OTL application. You can select to use the default preferences for WIP. You can also customize preferences and add new preferences but you must assign them to eligibility criteria.
See: Preferences, Oracle Time and Labor Implementation and User Guide
To define preferences and eligibility criteria:
-
Navigate to the Preferences window.
From the OTL Application Developer responsibility, click Preferences.
-
The Preferences window has three tabs, namely Preferences, Eligibility Criteria, and People. Use these tabs to create and maintain preference hierarchies, assign the preferences to eligibility criteria, and view preferences that exist for an employee, or organization, or location.
-
In the Preferences tab, select and expand the Default Preference-Wip Tree node to view the seeded WIP preferences that can be used for WIP workers to use the OTL application.
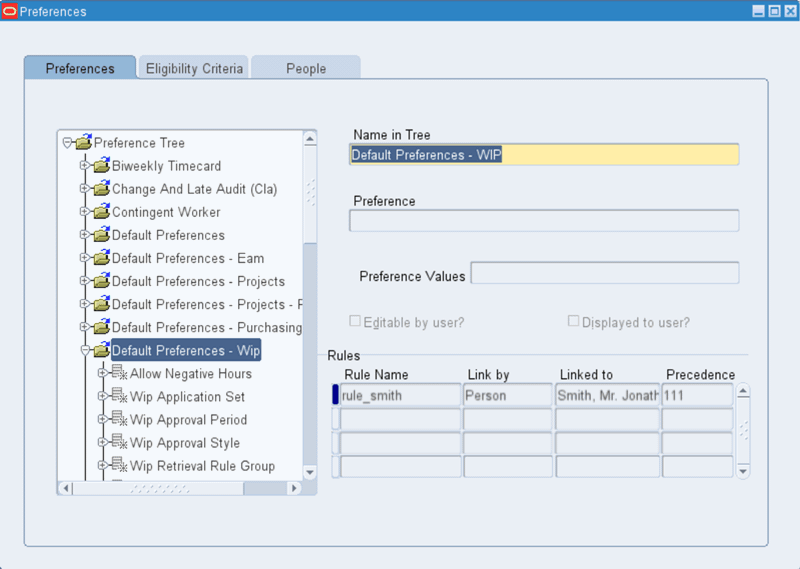
-
This step describes some of the WIP preferences and values that can be used for WIP-OTL integration:
The WIP Application Set default preference, has the following values:
-
Preference field: Time Store Application Set
-
Preference Values: Work in Process
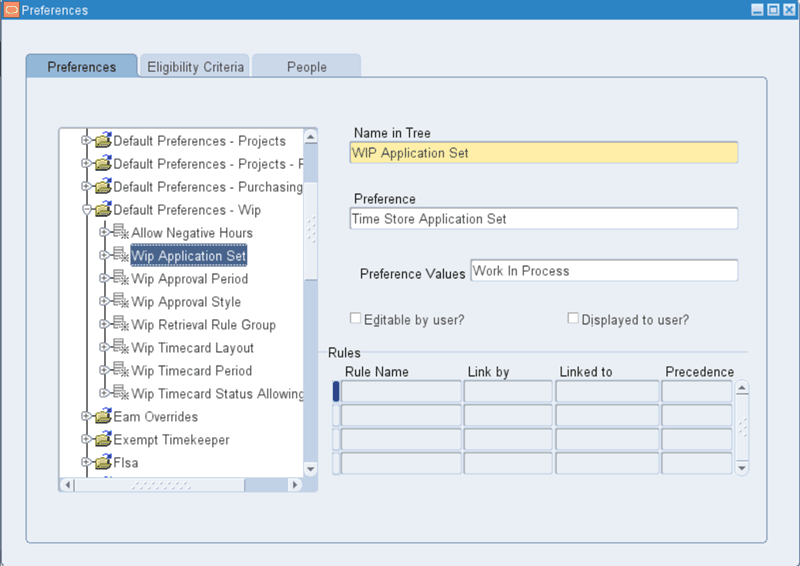
The WIP Timecard Period default preference, has the following values:
-
Preference field: Self Service Timecard Period for Worker
-
Preference Values field: Weekly - Starts Sunday
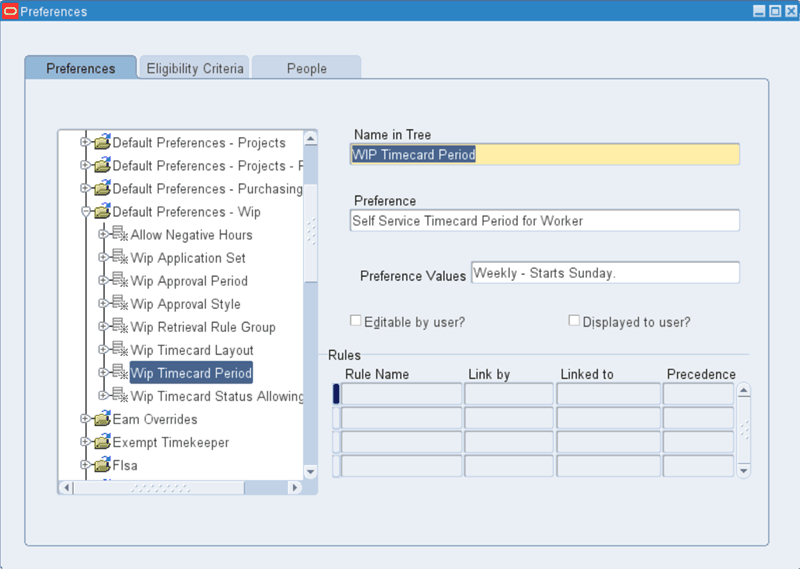
Note: Confirm that the values are available for registering the WIP Application Sets and WIP Approval Period. See: Work in Process Preferences in Oracle Time and Labor
The WIP Timecard Layout default preference, has the following values:
-
Preference field: Self Service Timecard, Review and Confirmation Layout Pages
-
Preference Values that default for the following fields are:
-
Timecard Layout - WIP Timecard Layout
-
Review Layout - WIP Review Layout
-
Confirmation Layout - WIP Confirmation Layout
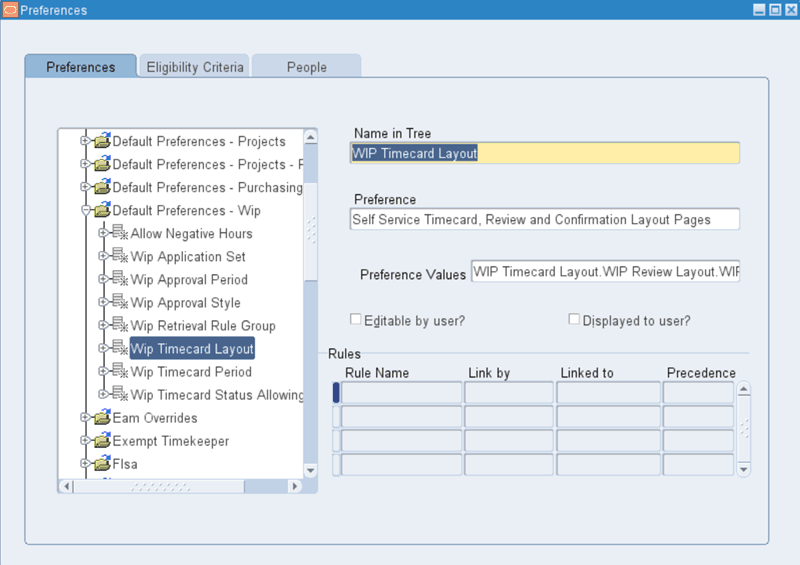
-
The WIP Retrieval Rule Group default preference, has the following values:
-
Preference field: Time Store Retrieval Rule Groups
-
Preference Values field: WIP Retrieval Rule Group
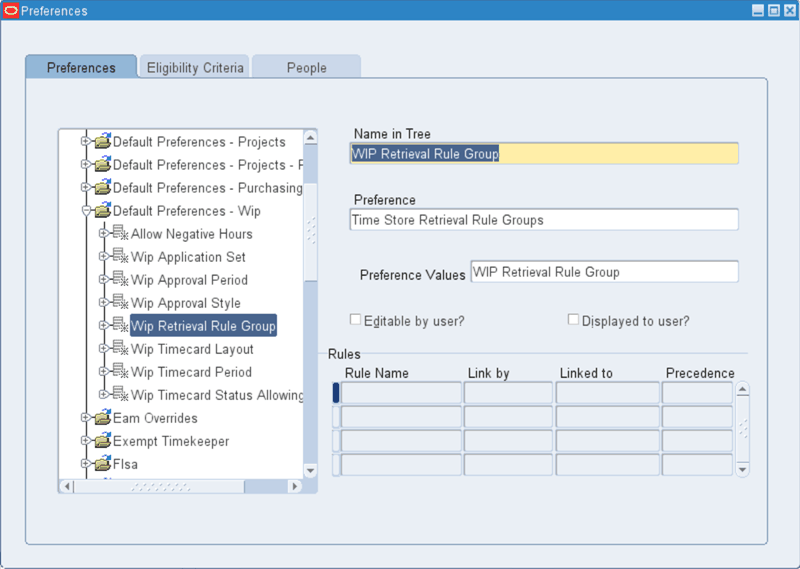
The WIP Approval Style default preference, has the following values:
-
Preference field: Time Store Approval Style
Preference Values field: Supervisor Approval
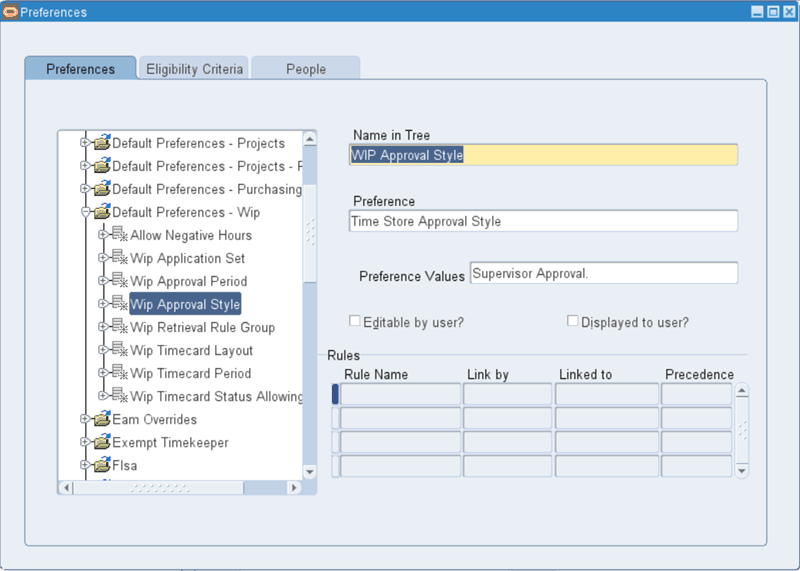
-
-
You can override the default values by:
-
Creating a new preference tree.
-
Adding a new preference branch on the existing tree.
-
Selecting different preferences and preference values for an existing branch.
See: Preferences, Oracle Time and Labor Implementation and User Guide.
-
-
Click Save after modifying preferences. Note that the Rules region displays the rules for each branch only after you have defined the eligibility criteria.
-
Select the Eligibility Criteria tab to assign the preference hierarchies to eligibility criteria by linking the preferences to locations, organizations, all people, and individual people. See: Defining Eligibility Criteria for Preferences, Oracle Time and Labor Implementation and User Guide.
-
On the Eligibility Criteria tab, enter information in the following fields:
-
Name of rule: Enter the name of the rule.
-
Name for Branch: Select a branch from the preference tree. For example, select Default Preferences-WIP from the list of values.
-
Link By: Select from the list of values. For example, you can select the following:
-
Person, if you are creating the rule for a person.
-
Organization, if you are creating the rule for an organization.
-
All People, if you are creating a rule for all users.
-
-
Precedence: Enter a value for precedence. Note that the precedence value you enter should be higher than the precedence that already exists for other hierarchies assigned to this person.
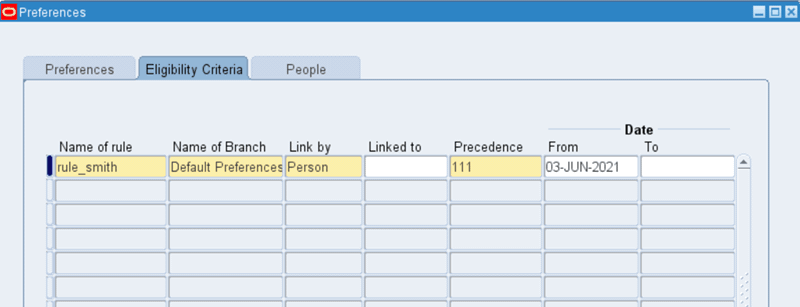
-
-
Click Save. This rule will now appear for the branch in the Rules region.
-
Select the People tab to view the employee's preferences. This is a view only tab. See: Using People Preferences, Oracle Time and Labor Implementation and User's Guide. Select the People tree and click Find on the menu bar.
-
In the Find Person window, select a value in the Full Name field, and click Find.
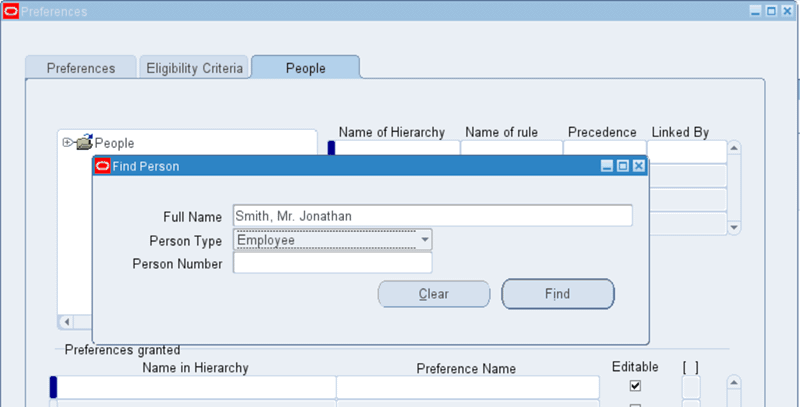
-
You can now view the preferences granted to the employee.
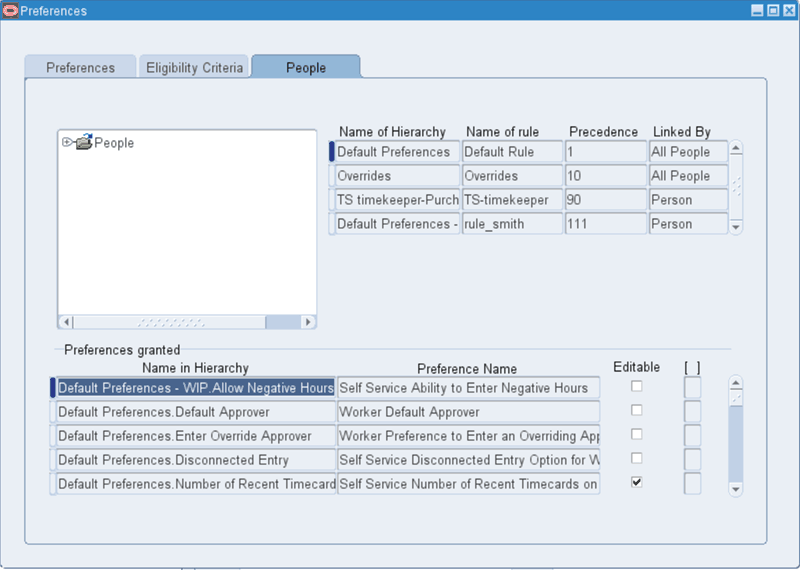
To use the integration with Oracle Time and Labor, see:
Work in Process Preferences in Oracle Time and Labor
The following table describes the time store hierarchy that contains the WIP preferences relating to the functionality of Oracle Time Store and the WIP applications:
| Preference | Description | Default Value |
| WIP Application Set (Time Store Application Set) | Determines that the WIP application can retrieve workers' timecards - you must define at least one application set. | Oracle Work in Process |
| WIP Approval Periods (Time Store Approval Periods) | Determines the approval time periods for the WIP application. | Weekly Periods - Starts Sunday |
| WIP Approval Style (Time Store Approval Style) | Determines the approval rules and method for the WIP application. | Supervisor Approval |
| Auditing Requirements (Time Store Audit Requirements) | Determines whether entries will be audited using Change and Late Audit. If Change and Late Audit is selected, you must enter your Change and Late Audit rules. | None |
| Entry Level Processing Rule Groups | Defines the entry level processing time entry rules required to validate the worker's timecard. | None |
| WIP Retrieval Rule Group (Time Store Retrieval Rule Groups) | Determines the retrieval rules for the WIP application's retrieval process. The retrieval rules define the approval status required to retrieve the timecard data. You must define a Retrieval Rule Group.
Note: Ensure that a worker's retrieval rule group does not contain rules for applications that are not in the application set. |
WIP Retrieval Rule Group |
| Timecard Required (Time Store Time Required for Worker) | Lists any applications that do not require a timecard. | No applications |
| Time Entry Rule Groups (Time Store Time Entry Rules) | Defines the time entry rules required to validate the worker's timecards | None |