 Defining Personnel Actions and Reasons
This chapter discusses how to:
Define personnel actions and reasons.
(USF) Define award actions.
Set up SmartHire (template-based hires).
Define roles for hire notifications.
Define employee identification.
Set up military rank structure.
Set up military rank change notification and documentation.
Define additional employment data.
Create checklists.
Set up workforce contracts.
Set up the Org Chart Viewer.
Defining Personnel Actions and Reasons
To set up the Personnel Actions and Reasons tables, use the Actions (ACTION_TBL), FPS Action (FPMACTION_PNL2), Action Reasons (ACTION_REASON_TBL), and Action Reason Report (RUN_PER710) components.
This section provides an overview of personnel action reasons and discusses how to:
Define or review personnel actions.
Define personnel action reasons.
 Understanding Personnel Action Reasons
In the course of maintaining information in the Administer Workforce business process, you'll enter changes to worker data resulting from such activities as promotions, transfers, terminations, salary increases, and leaves of absence. Each of these activities is called a personnel action, and you use them to enter and update employee data on the Job Data - Work Location page and the Data Control page. The codes classifying the types of personnel actions that you'll perform are stored in the Actions table.
You'll often have different reasons for performing the same type of personnel action for workers. For example, you could enter the action leave of absence for one person for maternity or paternity leave, for another person because of military service obligations, and for yet another person for health reasons.
So that you can easily identify the causes of changes made to worker data, you can designate reasons for taking personnel actions. The Human Resources system already contains some reasons for actions, but you'll probably want to add others that apply specifically to your company. To do so, use the Action Reasons page.
Note. The PeopleSoft application delivers various actions and action reason codes. You should be familiar with the rules associated with the action and take into consideration the benefit statuses associated with in the action reasons when determining which action and reason codes are best for your organization.
Note. To view a complete list of all actions and reasons already defined within the system, generate the Action Reason Table report (PER710).
If you're driving part or all of PeopleSoft Human Resources by position, you'll want to enter reasons for changes to position data also (on the Position Data 1 page). For example, you might enter a personnel action of Position Change because of a reorganization of your company; a change in position title; a job reclassification; or, when you transfer employees to other positions, you need to change the position numbers (and related data) assigned to them.
To add action reasons pertaining to position change actions, use the action code POS (position change).
Global Assignments and Action Reasons
If you send workers on global assignments, you'll probably want to identify reasons for the assignments (on the Home/Host Data page). For example, you might process some assignments that are due to a transfer of skills and others due to a local shortage of skilled personnel. To track assignment types more easily, you'll find it helpful to specify reasons for them.
To set up reasons specific to global assignments, use the action codes ASG (assignment) and ASC (assignment completion).
Pages Used to Define Personnel Actions and Personnel Action Reasons|
Page Name |
Definition Name |
Navigation |
Usage |
|
ACTION_TBL_GBL |
Set Up HRMS, Product Related, Workforce Administration, Actions, Actions |
Define or review a personnel action code and its values |
|
|
ACTION_TBL2 |
Set Up HRMS, Product Related, Workforce Administration, Actions, Reason Summary |
Display the list of reasons for a specific action code |
|
|
FPMACTION_PNL2 |
Set Up HRMS, Product Related, Workforce Administration, Actions, FPS Action |
(French Public Sector). This page displays if you have French Public Sector selected on the Installation table. Use this page to assign the FPS components that can use the action code. This page is discussed in the PeopleSoft HR PeopleBook: Manage French Public Sector. See Setting Up Actions. |
|
|
ACTRSN_TBL_GBL |
Set Up HRMS, Product Related, Workforce Administration, Action Reasons, Action Reasons |
Define personnel action reasons or modify existing action reasons. |
|
|
RUN_PER710 |
Set Up HRMS, Product Related, Workforce Administration, Action Reason Report, Action Reason Table |
Run the Action Reason Table report (PER710). This report lists the reason codes for each personnel action code and arranges them alphabetically by action. |
See Also
Entering Temporary Assignments
Defining or Reviewing Personnel Actions
Access the Actions page (Set Up HRMS, Product Related, Workforce Administration, Actions, Actions).
Set Status Fields
|
Action sets Status Fields |
Select this check box to identify actions that cause changes to Status and Date fields for the person receiving this action. When this check box is selected, the Set Organizational Instance Dt and Set Assignment Dates regions, as well as the other fields in the Set Status Fields region, are displayed. |
|
Payroll Status |
Select the payroll status (EMPL_STATUS) of the person receiving this action. Values are: Active, Deceased, Leave With Pay, Leave of Absence, Retired, Retired With Pay, Retired-Pension Administration, Short Work Break, Suspended, Terminated, Terminated Pension Pay Out, and Terminated With Pay. |
|
HR Status |
Identifies the status of the person receiving this action for HR purposes. |
Set Organizational Instance Dt (Set Organizational Instance Date)
|
First Start Date andLatest Start Date |
Select the action table value to use when this action causes the job record for a person to be updated. The First Start Date is the first date that this instance is active for a person receiving this action. For example, in an employee relationship, this is the Hire Date. The Latest Start Date is the latest date that this instance was renewed. For example, in an employee relationship, this is the re-hire date. The HIR or ADD actions modifies both the First Start Date and the Latest Start Date to the effective date of the Job row. On a Rehire or Renew action, only the Latest Start Date is changed. These dates are only captured on the organizational instance level, not for additional assignments. The values are: JOB.EFFDT and No Action. |
|
Termination Date |
Select the action table value used to determine how to set the termination date for an assignment. The values are: Clear, JOB.EFFDT-1, and No Action. |
Set Assignment Dates
|
Start Date |
Select the action table value used to determine how to set the date on which an individual assignment starts. The Hire (HIR), Add Contingent Worker (ADD), and Add Person of Interest (POI) actions, as well as the Additional Job (ADL) and Assignment (ASG) actions, set this value The values are: JOB.EFFDT and No Action. |
|
Latest Start Date |
Select the action table value used to determine how to set the date on which an individual assignment is restarted. The Rehire (REH) and Renewal (RNW) actions, as well as all the actions that set the start date, set this value. The values are: JOB.EFFDT and No Action. |
|
End Date |
Select the action table value used to determine when an assignment is stopped. The values are: Clear, JOB.EFFDT-1, and No Action. |
|
Last Date Worked |
Select the action table value used to determine the last date that the person was actively working prior to a termination or a leave action. The values are: Clear, JOB.EFFDT-1, and No Action. |
|
Expected End |
Select whether or not to clear the expected end date on the job record. The values are: Clear and No Action. |
|
Expected Return Date |
Select whether or not to clear the expected return date on the job record. For example, when a person goes on temporary leave. When the person returns from leave, the expected return date should be cleared. The values are: Clear and No Action. |
Organizational Relationship
|
Valid if PER_ORG is |
Indicate whether this action is valid only for certain organizational relationships. Values are: Contingent Worker Only, Contingent Worker or POI, EMP, CWR, or POI, Employee Only, Employee or Contingent Worker, or Person of Interest Only. |
|
Valid if Previous HR Status is: |
Indicate that this action is only valid if the job assignment is in the selected HR status. For example, an action of HIR cannot be entered if the prior HR Status is Active. The values are: Activeand Inactive. |
|
Valid if Prev Pay Status is (Valid if Previous Pay Status is): |
Indicate that this action is only valid if the job assignment is in the selected status. For example, a return from leave action can only be entered if the previous pay status in a Leave status. The values are: P/L – Any Leave, P/L – Disability Leave, S – Suspended, and W – Short Work Break. |
|
Message Set/Number |
Choose the Message Set Number and Message Number to determine the error message used for the Valid if Previous HR Status is or Valid if Prev Pay Status is settings. |
Defining Personnel Action Reasons
Access the Action Reasons page (Set Up HRMS, Product Related, Workforce Administration, Action Reasons, Action Reasons).
Note. Effective-dated fields include the description and status as well as country-specific sections for Canada, USA, Brazil, and Spain. Other fields on this page, including the comments and the sections for Australia, Germany, and Mexico are not effective dated.
|
Canadian ROE Reason (Canadian record of employment reason) |
Select a Canadian ROE reason, such as Return to School or Pregnancy. Valid values are defined by the Canadian government. |
|
Benefits Employee Status |
Select the status associated with this action. |
|
Benefits Administration Action |
If a particular action and reason code combination affects benefits in some way, enter the PeopleSoft Benefits Administration event classification for that combination in the Benefits Administration Action field. The Benefits Administration process will use this information to determine what rules to apply when evaluating eligibility for, and availability of, benefit option changes in response to this personnel action. |
|
Benefits Employee Status |
Select the status associated with this action. |
|
Benefits Administration Action |
If a particular action and reason code combination affects benefits in some way, enter the PeopleSoft Benefits Administration event classification for that combination in the Benefits Administration Action field. The Benefits Administration process will use this information to determine what rules to apply when evaluating eligibility for, and availability of, benefit option changes in response to this personnel action. |
(BRA) Brazil
|
CAGED Action / Reason (Cadastro Geral de Empregados e Desempregados action/reason) |
Enter the type of CAGED entry to report for actions with this reason. |
|
RAIS Action / Reason (Relação Anual de Informações Sociais action/reason) |
Enter the type of action to report to RAIS for actions with this reason. |
|
Social Security Action |
Select the social security action associated with this action reason. |
|
Movement Code |
Select the appropriate Public Service Merit Protection Commission (PSMPC) movement code for the employment status change. |
|
Spokesmen Committee Approval |
Select this check box as an action reason, if applicable. |
|
Company Doctor's Approval |
Select this check box, if relevant, for this action reason. |
IMSS requires a notification for every hire, termination, and salary rate change. Once you've defined the details, these notifications are generated automatically by the system.
|
IMSS Term |
Select the reason for termination. Values are: Agreement, Collective Termination, Employee Death, Employee Transfer, Inability, Lay-off, Leave, Mental or Physical Disability, N/A, Pension-Off, Retirement, Voluntary Renounce, and Work Risk Disability. |
|
INFONAVIT Reason |
Select a reason to indicate to INFONAVIT why the INFONAVIT loan payments will stop. Values are: Death, Disability, Disengage, Never Work, Other, Retirement, and Transfer. |
|
Maintain Variable SDI |
Select this check box to maintain variable SDI. |
|
Inter-Company Transfer |
Select this check box to indicate that the action and reason code combination is valid for processing of inter-company transfers in Global Payroll for Mexico. The Inter-Company Transfer Application Engine process (GPMX_INTERC) triggers for processing only the action and reason code combinations that you indicate by selecting this check box. |
|
IMSS Print Form |
Select the reason for a change in a worker's information. This is done to notify IMSS when an person is hired, rehired, terminated, or has a salary change. Values are: Employee Register, Employee Termination, Salary Change, and N/A (not applicable). |
|
SUA Reason |
Select the reason that gets printed on the SUA notification. Values are: Employee Register, Employee Termination, Salary Change, Re-enter, and N/A (not applicable). |
See Also
Setting Up Labor Administration Data
(USF) Defining Award Actions
To set up the (USF) Award Actions tables, use the Award Actions (GVT_AWD_ACTN), and Award Type Table (RUN_FGPER810) components.
This section discusses how to set up award actions.
Pages Used to Define Award Actions|
Page Name |
Definition Name |
Navigation |
Usage |
|
GVT_AWD_ACTN |
Set Up HRMS, Product Related, Workforce Administration, Workforce Data USF, Award Actions, Award Actions |
Define award codes for monetary and nonmonetary awards types. |
|
|
PRCSRUNCNTL |
Workforce Administration, Job Information, Reports, Award Action (USF), Award Type Table |
Run the Award Type table report (FGPER810). |
Defining Award Codes
Access the Award Actions page (Set Up HRMS, Product Related, Workforce Administration, Workforce Data USF, Award Actions, Award Actions).
|
Nature of Action Code |
Enter the reason associated with this award action. |
|
Award Classification |
Select the award classification, either Award or Bonus. |
|
Award Code |
Enter the NFC-defined code that identifies the bonus or award. The entry in this field becomes the default value on the Award Data page for this action reason and is read only. |
Payroll Data
|
Earnings Code |
Select an earnings code to associate with this award action. |
|
Combination Code andEdit ChartFields |
Displays the key that defines a combination of ChartFields. Click the Edit ChartFields link to access the ChartFields Details page. |
|
GL Pay Type (general ledger pay type) |
Select the pay type to associate with this award action. |
|
Pay in Separate Paycheck? |
Select if this award action should be paid in a separate check. |
|
Gross-Up |
Select to indicate the award or bonus amount must be grossed-up for payroll purposes. |
|
Not Applicable or Populate Amount |
The default selection is Not Applicable. Select Populate Amount to define a relocation or recruiting bonus that is granted to an employee though a personnel action:
Note. These fields are not visible to the user. |
See Also
Setting Up SmartHire (Template-Based Hires)
To set up SmartHire templates, use the Template Record/Field (HR_TBH_RECDEFN), Template Section (HR_TBH_SECDEFN), Template Creation (HR_TBH_CREATION), Copy Template (HR_TBH_COPY), and Template Category Table (HR_TBH_CTG_TBL) components.
This section provides an overview of the SmartHire (template-based hire) process, common elements in this section, and discusses how to:
Define template records and fields.
Set up template sections.
Define template section field configurations.
Define hire template categories.
Create a hire template.
Configure a hire template.
Set up the hire template pages.
Identify the Template-Based Hire page names.
Set up hire template sections.
Configure the fields for a section.
Set up hire template person rules.
Copy a hire template.
Understanding the SmartHire (Template-Based Hire) ProcessSmartHire, or template-based hiring, is a simplified and streamlined approach to completing the hiring process. Hiring templates are created and configured by a template administrator, someone who is very familiar with your organization's hiring process. After the template administrator has created and tested templates, line managers or human resources (HR) representatives can use these templates for hiring, based on the security rules that you establish.
The template administrator determines the following aspects of each hiring template:
The sections, or logical groupings of fields, that are included in a template, and their sequence.
The sequence of fields within a section.
Default values for fields.
Hidden fields.
Display-only fields.
If data entered by the end user can be directly submitted for processing or must be reviewed by an HR administrator.
The template administrator can test a template by performing a mock hire without actually hiring a person into the system.
This diagram shows the integration between the SmartHire (template-based hire) process and other products. Administrators create the template so that users can then enter person and job data. This data populates the person and job records in the core HR and federal HR systems, and it provides default values for the PeopleSoft Benefits, Global Payroll, Payroll for North America, and Time and Labor applications:
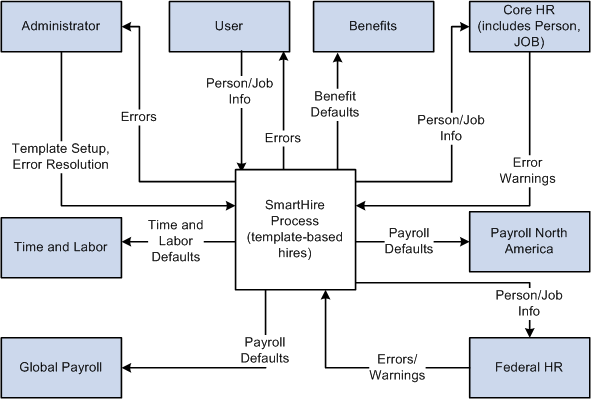
The SmartHire process collects data and provides data to other PeopleSoft HCM applications
Template-Based Hire Template Security
Implement security for the template-based hire components using PeopleTools permission lists and roles. This table lists the role, permission list, and components:
|
Role |
Permission List |
Components |
|
HR Template Setup |
HCCPHR3321 |
HR_TBH_RECDEFN HR_TBH_SECDEFN |
Note. The template setup components have no row-level security.
Implement security for using the SmartHire templates through the existing Human Capital Management row-level security. SmartHires, or template-based hires, use the following fields for security: Template ID, Organizational Relationship (Employee or Contingent Worker), Country, and Category.
See Understanding SmartHires (Template-Based Hires).
See Setting Up and Administering HCM Security.
Delivered Template-Based Hire Sections
The fields available for templates are grouped into sections, like group boxes. For example, you may have a Work Location - Job Fields section that includes fields to enter a company, department, and location code. You can determine which sections and the order in which the sections should be presented to the end user when creating a SmartHire template. Sections and their fields are delivered as system data. Sections are maintained in the Template Section component (Set Up HRMS, Product Related, Workforce Administration, Template-Based Hires, Template Section). These delivered sections can be modified within your templates to suit your organization's needs for hiring.
The following table lists the delivered Personal Data sections used for template creation:
|
Section Number |
Section Name |
Countries with Country Specific Sections |
|
10 |
Name |
BEL, BRA, CHE, CHN, DEU, ENG, ESP, FRA, HKG, ITA, JPN, MEX, and NLD |
|
20 |
Birth Information |
|
|
40 |
Data Protection |
|
|
50 |
Gender |
|
|
60 |
Education |
|
|
70 |
Person Marital Status |
|
|
80 |
Language |
|
|
85 |
Person Student Status |
|
|
90 |
Alternate ID |
|
|
100 – 108 |
National ID |
AUS, BEL, BRA, CAN, CHE, CHN, DEU, ESP, FRA, GBR, HKG, IND, IRL, ITA, JPN, MEX, MYS, NLD, SGP, THA, and USA |
|
120 – 121 |
Address |
AUS, BEL, BRA, CAN, CHE, CHN, DEU, ESP, FRA, GBR, HKG, IND, ITA, JPN, MEX, MYS, NLD, NZL, SGP, and USA GBL (global address) |
|
125–128 |
IM Chat |
|
|
130 – 133 |
Personal Phone |
|
|
135 – 136 |
E-mail Address |
|
|
140 |
Ethnic Group |
AUS, CHN, MYS, NZL, SGP, and THA |
|
145 |
Religion |
AUS, CHN, MYS, NZL, SGP, and THA |
|
147 |
Person Hukou Data – China |
CHN |
|
148 |
Person Working Life – China |
CHN |
|
150 |
Person Smoker Status |
CAN, JPN, and USA |
|
210 |
General Registration – Brazil (Registro Geral) |
BRA |
|
211 |
CTPS – Carteira de Trabalho e Previdencia Social |
BRA |
|
212 |
Voter Registration – Brazil |
BRA |
|
213 |
Military Registration – Brazil |
BRA |
|
214 |
PIS/PASEP |
BRA |
|
220 |
Diversity |
CAN |
|
221 |
Health Care |
CAN |
|
230 |
Guardianship |
CHE |
|
231 |
Place of Origin |
CHE |
|
240 |
HR Responsibility |
DEU |
|
241 |
Military Status |
DEU |
|
242 |
Nationality |
DEU |
|
260 |
Personal Data – France |
FRA |
|
270 |
Diversity |
GBR |
|
280 |
Diversity |
IND |
|
290 |
Military Status |
ITA |
|
300 |
Honseki Prefecture |
JPN |
|
310 |
Personal Data – Mexico |
MEX |
|
320 |
Diversity |
USA |
|
330 |
Personal Data – United States |
USA |
The following table lists the delivered Job Data sections used for template creation:
|
Section Number |
Section Name |
Countries with Country Specific Sections |
|
400 |
Work Location – Job Indicator |
|
|
410 |
Work Location – Position Data |
|
|
420 |
Work Location – Expected Job End Date |
|
|
430 |
Work Location – Job Fields |
|
|
431 |
Work Location – Spain |
ESP |
|
432 |
Work Location – Japan |
JPN |
|
435 |
Work Location – Military |
|
|
440 |
Job Information – Job Code |
|
|
450 |
Job Information – Reporting Information |
|
|
460 |
Job Information – Status |
|
|
470 |
Job Information – Employee Classification |
|
|
480 |
Job Information – Shifts |
|
|
490 |
Job Information – Standard Hours |
|
|
500 |
Job Information – Contract |
|
|
505 |
Job Information – Military |
|
|
510 |
Job Information |
AUS, BEL, BRA, DEU, ESP, FRA, GBR, ITA, MEX, MYS, NLD, and USA |
|
511 |
Job Information – Australian Higher Education |
AUS |
|
520 |
Job Labor – Bargaining Unit and Labor Agreement |
|
|
530 |
Job Labor – Employee Categories |
|
|
540 |
Job Labor – Union Code |
|
|
550 |
Job Labor – Exemptions |
|
|
560 |
Job Labor |
DEU, ESP, FRA, IND, and ITA |
|
570 |
Payroll – Payroll System |
|
|
580 |
Job – Absence System (Payroll) |
|
|
590 |
Payroll – Payroll Information |
|
|
600 |
Job – Global Payroll/Absence Information |
|
|
610 |
Payroll – Balance Group Number |
AUS, HKG, MYS, NZL, and SGP |
|
620 |
Job – Salary Plan |
|
|
625 |
Military (Salary Plan) |
|
|
630 |
Job Compensation – Payroll Currency and Frequency |
|
|
640 |
Job Compensation – Auto Calc Premium |
|
|
650 |
Job Compensation – Pay Components |
|
|
655 |
Oracle Workforce Scheduling – Job Flag |
|
|
660 |
Employment Information – Original Start Date |
|
|
670 |
Employment Information – Organizational Assignment Data |
|
|
675 |
Employment Information – Military |
|
|
680 |
Employment Information – Additional Data |
|
|
690 |
Employment Information |
BEL, BRA, CAN, JPN, NLD, and USA |
|
690 |
Festive Advance |
MYS and SGP |
|
691 |
Employment Information – E & G |
CAN and USA |
|
700 |
Benefit Program – Benefit Record Number |
|
|
710 |
Benefit Program – Benefit Status |
|
|
720 |
Benefit Program – Ben Admin Eligibility |
|
|
730 |
Benefit Program – Participation |
|
|
740 |
Time Reporter Status |
|
|
750 |
Time Reporter Type |
|
|
760 |
Time Reporter IDs |
|
|
770 |
Time Reporter Type – Rule Elements |
(USF) The following table lists the delivered Federal sections used for template creation:
|
Section Number |
Section Name |
Industry Specific Section Type |
|
10 |
Data Control Dates & Action |
Federal |
|
20 |
Data Control Codes |
Federal |
|
30 |
Data Control PAR Request |
Federal |
|
40 |
Data Control PAR Remarks |
Federal |
|
41 |
Data Control PAR Remarks |
Federal |
|
42 |
Data Control PAR Remarks |
Federal |
|
43 |
Data Control PAR Remarks |
Federal |
|
44 |
Data Control PAR Remarks |
Federal |
|
50 |
Tracking Data |
Federal |
|
60 |
Name |
Federal |
|
70 |
Gender and Other Personal Data |
Federal |
|
80 |
Citizenship Status |
Federal |
|
90 |
National ID |
Federal |
|
100 |
Additional Birth Information |
Federal |
|
110 |
Home Address |
Federal |
|
111 |
Mailing Address |
Federal |
|
121 |
Personal Phone Number 01 |
Federal |
|
122 |
Personal Phone Number 02 |
Federal |
|
123 |
Personal Phone Number 03 |
Federal |
|
124 |
Personal Phone Number 04 |
Federal |
|
130 |
Veterans Information |
Federal |
|
140 |
Marital Information |
Federal |
|
150 |
Education Details |
Federal |
|
160 |
Position Number |
Federal |
|
170 |
Job Data |
Federal |
|
180 |
Position Data |
Federal |
|
190 |
Compensation |
Federal |
|
200 |
Compensation - Quoted Pay |
Federal |
|
210 |
Other Pay Information |
Federal |
|
220 |
Accounting Information |
Federal |
|
230 |
Dates |
Federal |
|
240 |
Expiration Dates |
Federal |
|
250 |
Appointment Data |
Federal |
|
260 |
Service Computation Dates |
Federal |
|
270 |
Service Conversion Dates |
Federal |
|
280 |
Within-Grade Increase Data |
Federal |
|
290 |
Union Data |
Federal |
|
300 |
Permanent Data RIF |
Federal |
|
310 |
Probation Dates |
Federal |
|
320 |
Retained Grade Expires |
Federal |
|
330 |
Non-Pay Data |
Federal |
|
340 |
Security Information |
Federal |
|
350 |
Benefits System |
Federal |
|
360 |
Benefits Control |
Federal |
|
370 |
Benefits Administration Eligibility |
Federal |
|
380 |
FEHB Eligibility |
Federal |
|
390 |
FEHB Date |
Federal |
|
400 |
NFC Benefits Coverage |
Federal |
|
410 |
FEGLI Data |
Federal |
|
420 |
Retirement Data |
Federal |
|
430 |
FICA Status |
Federal |
|
440 |
NFC Military Service Deposit |
Federal |
|
450 |
Time and Labor - Reporter Status |
Federal |
|
460 |
Time and Labor - Reporter Type |
Federal |
|
470 |
Time and Labor - Reporter Ids |
Federal |
|
480 |
Time and Labor - Rule Elements |
Federal |
As the template administrator, you can use the section label name listed, or create a text catalog entry for those fields in which you want to change the label.
Required and Recommended Sections within a Template
These sections are required when creating a template:
NAME_01_xxx (Names) - where xxx is the country code.
BIRTH_INFO (Birth Information)
GENDER (Gender)
JOB_PAYROLL_SYSTEM (Payroll System)
Note. The Name, Birth Information, and Gender sections are sequentially listed before the National ID section. Oracle highly recommends that you keep this order in the PeopleSoft SmartHire template for the National ID validations to work properly for certain countries.
Oracle recommends that these sections be included in the PeopleSoft SmartHire template:
WORK_LOC_JOB_FLDS (Work Location - Job fields)
JOB_ABSENCE_SYSTEM (Absence System)
JOB_PAYROLL_INFO (Payroll Information)
JOB_COMP_PAY_CMPNT (Job Compensation - Pay Components) or JOB_SALARY_PLAN (Job - Salary Plan)
BEN_PROG_BEN_STAT (Benefit Status)
Multiple Instances of an Element in a Template
The Template Record Setup table contains one row for each table currently included in the core hire process with at least one enterable field. However, there are some tables with multiple instances, such as phone numbers, email, addresses, and so forth, where more than one row exists. The system supports the use of these multiple elements in hiring templates. This way you are able to maintain more than one address section in a hiring template for different countries or multiple pay elements.
Note. If you need to have multiple instances of information
in a template, such as names, addresses, or compensation, you need to specify
a unique record alias for each additional instance.
For example, to add multiple pay components, rather than adding multiple
copies of the same compensation section in a template, you must first create
a new record and record alias, such as COMPENSATION1, and then add the fields
from the original compensation record to your newly created record.
In addition, each template section must use a unique record alias. For
example, if you need two address sections in your hiring template, one for
addresses in Australia and another section for addresses in Brazil, selecting
ADDRESS_01_AUS and ADDRESS_01_BRA can cause errors since both template sections
use the ADDRESSES_01 record alias. In this example you should use a different
address alias selection, such as ADDRESS_01_AUS and ADDRESS_02_BRA.
Troubleshooting Templates
During a template-based hire, if a person is hired with a past effective date and the hire fails, check the Default Benefit Program and default Pay Group values for the organization and make sure they are the correct. When the benefit system is Base Benefits or Benefits Administration, the benefits code invoked during a hire requires a default benefit program to be set on the Pay Group Table.
Check the Default Benefit Program value on the Pay Group table and make sure it has the correct value.
Check the Pay Group value on the Company table and make sure it has the correct default Pay Group value.
Common Elements Used in this Section|
Hiring template (or template) |
A pre-configured template that enables end users to enter a subset of the data required for a hire. Other data is pre-entered by the template administrator during the template creation process. |
|
End user |
For the template-based hire process, the end user is typically a line manager or HR (Human Resources) representative in the field. This person is usually not familiar with the details of the hiring process. Whenever complex issues arise, the process is handed over to a centralized HR administrator. |
|
HR administrator |
The HR administrator is somebody who knows the hiring process very well and can easily deal with any level of complexity. This person reviews the data entered by end users and takes over the hiring process whenever errors occur or issues arise. |
|
The person in your organization who knows the hiring process very well (may be an HR administrator). The person assigned this role sets up and maintains hiring templates to be made available to end users. |
|
|
Implementer |
For the template-based hire process, the implementer is typically an IT (Information Technology) specialist who works closely with the HR administrator and template administrator to review the delivered template records/fields and sections and modifies them, if necessary. |
|
Template section (or section) |
The fields available for the templates will be grouped into sections. For example, the Work Location section will include the following fields (all on the Job record): Regulatory Region, Company, Business Unit, Department, Department Entry Date, Location, and Establishment ID. Sections are the building blocks for creating templates, not the individual records/fields. PeopleSoft delivers these sections as system data, but the implementer can modify them, delete them, or add new sections. |
|
Template page (or pages) |
The dynamically generated data entry page visible to the end user, consisting of one or more template sections. The template administrator decides whether the sections are displayed in one long page or divided into smaller pages. |
|
Template category |
The template administrator assigns each template to a category. The category provides row-level security for a template and can be used to group templates. A category may represent a specific department, location, business unit, region, and so forth. |
|
Auto-updates |
Determines whether data entered by the end user can be directly submitted for processing (auto-updating is turned on) or will need to be reviewed by an HR administrator (auto-updating is turned off). This auto-update functionality is set by the template administrator (the end user is not able to change it). |
|
Search match parameters |
The template administrator can associate a search match rule with a template to determine if the person to be hired already exists in the system. This search is done in the background and the results are displayed using the Search Match Results page. |
Pages Used to Set Up SmartHire Templates|
Page Name |
Definition Name |
Navigation |
Usage |
|
HR_TBH_RECDEFN |
Set Up HRMS, Product Related, Workforce Administration, Template-Based Hire, Template Record/Field, Template Record/Field |
Set up and maintain the records and fields to be used in the hire template. The records/fields that should be available to be included in the templates will be stored in the Template Record Setup Table (HR_TBH_RECDEFN) and Template Field Setup Table (HR_TBH_RECDTL). The Template Record Setup Table contains one row for each table currently included in the core Hire process with at least one enterable field (except for tables with multiple instances, such as phone numbers, email addresses, and so forth, where more than one row exists). |
|
|
HR_TBH_SECDEFN |
Set Up HRMS, Product Related, Workforce Administration, Template-Based Hire, Template Section, Template Section |
Identify and configure sections, and list and configure the fields contained in a section. |
|
|
HR_TBH_SECDTL |
Click the Field Configuration link on the Template Section page. |
Add additional user exit information for field changes and field prompts. |
|
|
HR_TBH_CTG_TBL |
Set Up HRMS, Product Related, Workforce Administration, Template-Based Hire, Template Category Table, Template Category Table |
Set up template categories for grouping templates and for row-level security. |
|
|
HR_TBH_TMPL_HDR |
Set Up HRMS, Product Related, Workforce Administration, Template-Based Hire, Template Creation, Template Creation |
Create and modify templates. |
|
|
HR_TBH_TMPL_CFG |
Set Up HRMS, Product Related, Workforce Administration, Template-Based Hire, Template Creation, Configuration |
Set up general options and the search page configuration for a template. |
|
|
HR_TBH_TMPL_FLDL |
|
Change a field label by selecting another text ID for the field. |
|
|
HR_TBH_TMPL_FLDC |
|
Identify a default value for the field that will appear for the end user to assist with data entry for fields that would often use the same value. |
|
|
HR_SSTEXT_TEXT |
|
Define text catalog entries, and define the values for context-sensitive keys. |
|
|
HR_TBH_TMPL_PAG |
Set Up HRMS, Product Related, Workforce Administration, Template-Based Hire, Template Creation, Pages |
Set up the page number order and tab names that should appear on the Template-Based Hire pages. |
|
|
HR_TBHTAB_DTL_SEC |
Click the Change Title link on the Pages page. |
Identify the page names on the Template-Based Hire pages. |
|
|
HR_TBH_TMPL_SEC |
Set Up HRMS, Product Related, Workforce Administration, Template-Based Hire, Template Creation, Sections |
Add and configure template sections. |
|
|
HR_TBH_TMPL_FLDS |
Click the Section Configuration link on the Sections page. |
Configure the fields for a section within the template. |
|
|
HR_TBH_TMPL_PER |
Set Up HRMS, Product Related, Workforce Administration, Template-Based Hire, Template Creation, Person Rules |
Enable or disable Search Match functionality for a template and define options for handling existing person data and employment instances in the database. |
|
|
HR_TBH_COPY |
Set Up HRMS, Product Related, Workforce Administration, Template-Based Hire, Copy Template, Copy Template |
Copy a hire template and make modifications to the new template. |
Defining Template Records and Fields
Access the Template Record/Field page (Set Up HRMS, Product Related, Workforce Administration, Template-Based Hire, Template Record/Field, Template Record/Field).
|
Record Name |
Indicate the name of the table to be included. (Prompted from the same field in the PeopleTools Record Definition table.) |
|
Record Instance |
Displays the instance number of the record. Defaults to 1. Use for records with more than one instance, such as phone numbers, email addresses, and so forth. |
|
Record Name Alias |
Enter the alternative name of the table to be included. Defaults to the Record Name value. This field enables the implementer to differentiate between two different instances of the same record. For example, business address (ADDRESSES_1) from mailing address (ADDRESSES_2). This is the prompt shown for the record when adding a new record/field to a section. |
|
Internal Use Only |
Select this check box to designate fields that are used in the SmartHire process but are not passed to the Services/CI. |
|
Key Field |
This check box is selected (in PeopleCode) if the field is defined as a key field at the system level (in the PeopleTools Record Field table PSRECFIELD). This field cannot be changed by the Implementer (display-only). |
|
Required |
This check box is selected by default (in PeopleCode) and is based on the PeopleTools Record Field table PSRECFIELD. This field cannot be changed by the implementer (display-only). |
Setting Up Template Sections
Access the Template Section page (Set Up HRMS, Product Related, Workforce Administration, Template-Based Hire, Template Section, Template Section).
|
Sequence Number |
Enter the number to determine the order of sections on the end user data entry page. |
|
Section Type |
Specify a type that defines the section. Valid values are General, Country, Name, Address, and Federal. Note. (USF) U.S. Federal customers will only see National Finance Center (NFC) interface fields if the database is federalized and Payroll Interface is selected on the HR Installation table. |
|
Section Type Value |
Enter the value for the section type you specified. For Name sections, this field stores the name format code. For the Country and Address sections, this field stores the appropriate country code. The field is empty for Federal and General sections. |
|
Add Field |
Click this button to add additional fields in the Section Fields grid area. |
Section Validation App Class
A user-exit is provided for each section for validation that might be required by your organization. These are implemented as application class methods routines and appear in the App Class ID, App Class Path, and Method Name fields. There are three section validation methods delivered as system data: National IDs, Addresses, and Names.
Defining Template Section Field Configurations
Access the Template Section Field Configuration page (click the Field Configuration link on the Template Section page).
Section Field Configuration
|
Display Type, DropDown List Display, Prompt Table, and Prompt Field |
Select how a field type should appear on the template to an end user and from which table it should retrieve valid values. The Display Type value options depend upon the field selected. For example, a field may or may not require a prompt table, it may use a date field, require a yes and no response, or needs to display a push button. The prompt table fields are disabled for all but the fields with a prompt table. |
Field Change App Class
The Field Change App Class provides a user exit for field change code to be added. Some delivered section fields include field change code. For example, the Company field on the Work Location - Job Fields section has field change code that builds prompt lists for other fields in the section, such as Location and Establishment ID.
Note. Oracle recommends that any validation methods added to the PeopleSoft application at implementation be stored in a customer-created application class.
Defining Hire Template Categories
Access the Template Category Table page (Set Up HRMS, Product Related, Workforce Administration, Template-Based Hire, Template Category Table, Template Category Table).
When you create your templates, you will need to assign each template to a category. Template categories:
Groups templates.
Categories are helpful when a template administrator is trying to narrow their search results when looking for a particular template. On the Template Creation page, you can perform an advance search for existing templates by category, as well as by other defined fields.
Provide row-level security for a template.
End users will only see templates for which they have security access.
Note. To set up row-level security for end users, you will need to enable the security set (TBHTMPL) and security access types for template-based hires and set up security for the end user's permission list.
See Also
Setting Up and Administering HCM Security
Creating a Hire Template
Access the Template Creation page (Set Up HRMS, Product Related, Workforce Administration, Template-Based Hire, Template Creation, Template Creation).
|
Template |
Enter a template name that defines this template. |
|
Status |
Select a status. The default option for this field is Test when creating a new template. You can change the value to Active when it's time to be published, or Inactive when the template is no longer necessary. Only active templates are available to the end user. |
|
Effective Date |
Determine the effective date of a template. The default value for this field is today's date. |
Configuring a Hire Template
Access the Configuration page (Set Up HRMS, Product Related, Workforce Administration, Template-Based Hire, Template Creation, Configuration).
The system uses Template ID, Org Relationship, Country, and Category Code fields as part of row-level security. Use these fields to determine to which templates end users will have access.
|
Automatic Database Updates |
Select this check box to have the data entered by the end user automatically update the database. Deselect this check box to have the data entered by the end user sent to an HR administrator for final processing. |
|
Allow Submission to HR |
Select this check box if the end user does not have all the required data, such as a National ID, and needs to submit the hire request to HR to complete the hire. This check box is only available when the Automatic Database Updates check box is selected. If Automatic Database Updates is selected, the following applies:
|
|
Show Comments On All Pages |
Select to have a Comments edit box appear at the bottom of each page of the Template-Based Hire component when an end user performs a hire. Deselect to have the Comments edit box appear at the bottom of only the last page of the Template-Based Hire component when an end user performs a hire. If there is only a single page, the Comments box will appear on that page. |
|
Show Update Contracts Link |
Select to have the Update Contracts link to the Contracts component appear on the Confirmation page after performing a template-based hire. This enables users to update contract information for a new hire. This link appears on the Confirmation page when Automatic Database Updates is selected on the template and the hire is saved successfully. Note. Users of the template must have access to the Contract Data component. |
|
U.S. Federal Template |
(USF) Select this check box to see the standard U.S Federal (USF) sections. This check box is only available when the Federal check box has been enabled on the Installation table. Note. Do not select this check box when you are creating templates for U.S. Federal contingent workers. |
Search Page Configuration
Determine how you want to display these fields to the end user on the Enter Hire Details page of the Template-Based Hire component. Select the field label and select whether the end user should be able to override a default value, or if the field should be hidden from the user.
|
Template |
Displays the template ID you entered for this template. |
|
Organizational Relationship |
Select an organizational relationship of the worker. The default option for this field is Employee. The other available option is Contingent Worker. Note. Person of Interest is not an option. |
|
Country |
Enter a default country code for the template.
|
|
Category Code |
Select a category code for template grouping and as part of the row-level security for this template. A category may represent a specific department, location, business unit, region, and so forth. |
|
Empl ID (employee ID) |
Accept the default value of NEW to have the system automatically assign the next ID or leave the field blank to have the end user manually enter the ID. |
|
Job Effective Date |
Specify a default effective date of a hire, if applicable. Usually you will select the Override check box for this field and set the default value to blank so the end user provides the actual hire date. Some business processes require a fixed effective date, such as in the case of seasonal hiring. |
|
Action |
Enter the action of adding this employment instance. Values for an employee are Hire and Rehire. Values for a contingent worker are Add and Renewal. |
|
Reason Code |
Determine if you want to provide a default reason code, which is associated with the action. |
|
Name Format |
Specify a name format that may be used during the hire. The name format that you select impacts the actual hire page. You can hide this field from the end user if you do not want the end user to select a different name format. If you enable the end user to choose another name format, you must include at least two different name sections on the Sections page. |
|
Address Format |
Specify an country address format that may be used during the hire. The country address format that you select impacts the actual hire page. You may hide this field from the end user if you do not want the end user to select a different address format. If you enable the end user to choose another address format, you must include at least two different address sections on the Sections page. |
|
Change Label |
Click this link to open the Section Field Label Override page and use the Text Catalog to select another text ID to change the field label. |
|
Default Value and Change Value |
Click the Change Value link to open the Section Field Default Value page and define a default value for the field. The value you select displays in the Default Value field. |
|
Override |
Select this check box to enable the end user to change the default value when performing a template-based hire. Deselect this check box when the end user is not allowed to change the value. When you select this check box, the system deselects the Hide check box so the end user has access to the field to edit the value. |
|
Hide |
Select this check box to hide this field and the default value from the end user when performing a template-based hire. When you select this check box, the system deselects the Override check box. The end use will not be able to change the default value since the field is hidden. |
|
Maintain Text Catalog |
Click the Maintain Text Catalog link to open the Text Catalog - Maintain search page or Maintain Text Catalog page in a new browser window. Use the Maintain Text Catalog page to change the label sections. |
Setting Up Hire Template Pages
Access the Pages page (Set Up HRMS, Product Related, Workforce Administration, Template-Based Hire, Template Creation, Pages).
|
Page Number |
Enter a number that will define the page tab order on the Template-Based Hire - Enter Employee Information page. On the Sections page, you will assign sections to one of these page numbers. This will group sections together or separate them onto different tabbed pages. The system will display these tab names when the end user or HR administrator is performing a hire using the Template-Based Hire - Enter Employee Information page. For example, you may want to group all compensation and payroll information-related sections and fields within a page called Salary Data. You can have all the sections appear on one page, by entering only one page number and label, or you can group the sections on different pages, by creating numerous page numbers and labels. |
|
Change Title |
Click this link to access the Page Title Details page and define how the tab label should appear on the Enter Employee Information page during the template-based hire process. |
|
Maintain Text Catalog |
Click the Maintain Text Catalog link to open the Text Catalog - Maintain search page or Maintain Text Catalog page in a new browser window. Use the Maintain Text Catalog page to change the label name. |
Identifying the Template-Based Hire Page Names
Access the Page Title Details page (click the Change Title link on the Pages page).
|
Label Type |
Select the type of label that you will use. Values are Static Text and Text Catalog. |
|
Text ID |
Select the text ID from the Text Catalog if you have selected Text Catalog in the Label Type field. |
|
Static Text Page Title |
Enter the tab label name if you have selected Static Text in the Label Type field. |
|
Maintain Text Catalog |
Click the Maintain Text Catalog link to open the Text Catalog - Maintain search page or Maintain Text Catalog page in a new browser window. Use the Maintain Text Catalog page to change the label names. |
See Also
Setting Up Hire Template Sections
Access the Sections page (Set Up HRMS, Product Related, Workforce Administration, Template-Based Hire, Template Creation, Sections).
The template administrator uses the Sections page to determine which sections will appear in the template for the end user.
The template administrator has access to all commercial fields and U.S. Federal fields which can be entered as part of the hire process in the Personal Data and Job Data components. The administrator organizes the fields into sections, ranging from one field in a section to ten or more fields in a section, and determines which sections are hidden from the end user during the hire process for each template.
Note. If a position number is selected on the template definition it will not populate values from Position Management. The administrator must hide fields that are populated by position number because they are overridden at the time the position number is loaded in Job Data and defaults are automatically entered. See the Manage Positions PeopleBook for a list of fields that are provided by default into Job Data (from Position Data—this does not include what may also be defaulted in the job code).
|
Add Section |
Click this button to add a new row for another section. |
|
Load/Reload Sections |
Click this button to add all viable sections to the template. The system looks at the values that were entered for the country, name format, address format, and at the U.S. Federal flag to determine which sections to load. If a section is already present, it is not overwritten. If you change the country on a template, existing country-specfic sections are deleted and new country sections are loaded. If you change the name format or address format on a template, existing name and address format-specific sections are deleted and new sections are loaded. If the U.S. Federal flag changes, all existing sections are deleted and new ones are loaded. |
|
Select All and Deselect All |
Click the Select All button to easily select all the sections on this page for easy deletion or deselect all section rows to avoid deletion. |
|
Delete Selected Sections |
Click this button to have the system delete all selected section rows from this template. |
|
Preview Template |
Click this button to open a new browser window to preview the template. Preview mode displays each template page and the sections on those pages. |
|
Test Template |
Click this button to validate if the template is set up correctly. Note. The template administrator is able to test the template only if Automatic Database Updates is selected on the Configuration page. Test mode is not available if Automatic Database Updates is deselected since the CI/Service is not called. The Template Administrator clicks this button and the Template-Based Hire - Enter Hire Details pages displays in a new browser. The administrator then enters a person's data as an end-user would and then clicks the Test Template button on the last Template-Based Hire page. If the template is set up correctly, the Test Confirmation page appears stating that your template configuration is successful. If the template is not set up correctly, the Test Confirmation page appears with a link to view the errors that the template encountered. Note. Testing a template does not update Personal Data and Job Data. |
Template Sections
|
Seq Nbr (sequence number) |
Enter a sequential number to reorder sections. The lower numbered section will appear first on a page for the end user. The sequence number is defined on the Template Section page but can be overridden here. |
|
Section Configuration |
Click this link to open the Template Section Configuration page and use the Text Catalog to update fields values within a section. |
|
Page Nbr (page number) and Page Title |
Assign sections to a page number you defined on the Pages page. The Page Title will automatically display from either the Text Catalog value or static text you entered Page Title Details page. |
Configuring the Fields for a Section
Access the Template Section Configuration (click the Section Configuration link on the Sections page).
The template administrator uses the Section Configuration page to determine which fields will appear in a section and determine if the field should be required, have a default value provided, and if the end user can change any values.
|
Text ID and Section Name Override |
Enter a different text ID to if you want to change the group box header on the Template-Based Hire page. The new name displays in the Section Name Override field. |
|
Hide Entire Section |
Select this check box to hide this section from the end user during the hire. |
Section Fields
|
Seq Nbr (sequence number) |
Enter a sequential number to reorder the fields in this section. The sequence number is defined on the Template Section page in the Section Fields group box, but can be overridden here. |
|
Position |
Enter the location that the field should appear within the section. Values are Either, Left, and Right. By selecting Either, the system will place the field in the next logical order location, either left or right. |
|
Field Label and Change Label |
Click the Change Label this link to open the Section Field Label Override page and use the Text Catalog to select another text ID to change the field label. |
|
Default Value and Change Value |
Click the Change Value link to open the Section Field Default Value page and define a default value for the field. The system displays this value in the Default Value field. |
|
Required |
Select this check box if the end user is required to enter a value in the field. |
|
Override |
Select this check box to enable the end user to change the default value when performing a template-based hire. Deselect this check box when the end user is not allowed to change the value. When you select this check box, the system deselects the Hide check box so the end user has access to the field to edit the value. |
|
Hide |
Select this check box to hide this field and default value from the end user when performing a template-based hire. When you select this check box, the system deselects the Override check box. The end use will not be able to change the default value since the field is hidden. |
|
Maintain Text Catalog |
Click the Maintain Text Catalog link to open the Text Catalog - Maintain search page or Maintain Text Catalog page in a new browser window. Use the Maintain Text Catalog page to change the label sections. |
See Also
Understanding the SmartHire (Template-Based Hire) Process
Setting Up Hire Template Person Rules
Access the Person Rules page (Set Up HRMS, Product Related, Workforce Administration, Template-Based Hire, Template Creation, Person Rules).
Search for Existing Person
Use these fields to enable or disable Search Match.
|
Use Search Match To Find Existing Persons |
Select whether the SmartHire process should use the Search Match functionality. If you select:
|
|
Search Parameter |
This field appears when you select Yes in the Use Search Match To Find Existing Persons field. Enter a search parameter, which contains a set of one or more search rules. The search parameters are what the users select prior to performing a search to determine the search fields that they are permitted to search on. |
|
Search Result Code |
This field appears when you select Yes in the Use Search Match To Find Existing Persons field. Enter a search result code, which specifies the data that you want Search/Match to return in the grids on the Search Results page for the potential matching IDs that it finds. |
See Setting Up and Working with Search/Match.
Person Exists in the System
|
End-User Can Decide What Action to Take |
Determine whether the end user decides what action to take when Search/Match is activated. When you select Yes, the page displays the End-User Can Access the Person Organization Summary field and the Actions the End-User Can Take If No Active Organizational Instance Is Found group box. When you select No, the page displays the Action to Take if Only One Inactive Employment Instance Is Found and Action to Take if More than One Inactive Employment Instance (or None) is Found group boxes. |
|
End-User Can Access the Person Organization Summary |
Determine whether the end user can view more information about a person by selecting either Yes or No. When you select Yes, a Per Org Summary link is made available to the user to view organization details about a person. The End-User Can Access the Person Organization Summary field is available when you select Yes in the End-User Can Decide What Action to Take field. |
Note. Depending on the Organizational Relationship value defined on the Configuration page of the Template, the field text will vary. An Employee relationship displays the text Employment Instance, where as a Contingent Worker relationship displays the wording Contingent Worker Instance. This applies to every instance of this wording on the Person Rules page.
Actions the End-User Can Take If No Active Organizational Instance Is Found
When the template administrator selects Yes in the End-User Can Decide What Action to Take field, the page displays the Actions the End-User Can Take If No Active Organizational Instance Is Found group box.
Select one or more check boxes to enable functionality for the end user for the template. This group box appears when you select Yes in the End-User Can Decide What Action to Take field. Field selection options are:
Select an Existing Employment Instance as a Rehire.
Select an Existing Employment Instance as a Hire.
Create a New Employment Instance Using Hire as the Action.
Send the Request to an HR Administrator to Process.
Action to Take if Only One Inactive Employment Instance Is Found
When the template administrator selects No in the End-User Can Decide What Action to Take field, the page presents a set of different group boxes for inactive employment instance matches.
To define what action should occur if an inactive matching person is found during the hire, select one of the options in this group box. Values are:
Restart Employment Instance as a Rehire.
Restart Employment Instance as a Hire.
Create a New Employment Instance Using Hire as the Action.
Send the Request to an HR Administrator to Process.
This group box appears when you select No in the End-User Can Decide What Action to Take field.
Action to Take if More than One Inactive Employment Instance (or None) is Found
Select one option the end user can perform during a template hire when more than one inactive employment instance is found. This group box appears when you select No in the End-User Can Decide What Action to Take field. Values are:
Create a New Employment Instance Using Hire as the Action.
Send the Request to an HR Administrator to Process.
Copying a Hire Template
Access the Copy Template page (Set Up HRMS, Product Related, Workforce Administration, Template-Based Hire, Copy Template).
Enter the new template information and click Save. The system will open the Template Creation component where you can update the appropriate information.
Country Changes
If you copy a country template and save it for another country, only the related country sections appear on the page. The original country sections and their defaults do not display. For example, if a template for France (FRA) is copied and you change the country for the new template to Spain (ESP), the FRA sections are removed; the ESP sections appear, are blank, and ready for input.
Note. You will need to access the Sections page and select the Load/Reload Sections button to update the template with the related country sections and delete the original country sections and their defaults.
Defining Roles for Hire Notifications
To set up the hire notification roles table, use the Hire Notification (HR_HIRE_NOTIF) component.
This section provides an overview of hire notifications and discusses how to define which roles will receive hire notifications.
Understanding Hire NotificationsWhen a recruiter or user submits a hire request, the system uses the Hire Notification component to identify who should receive notification when someone is ready to be hired or there are errors in publishing the hire to HR.
Hire notification setup needs to be done for the administrator to receive email notifications that a person is ready to be hired or that errors occurred while processing the hire. The Hire Notifications page uses role queries to define who should receive notification of hire requests and errors. The delivered role query is ROLE_HIRE_NOTIF, however, you can define other role queries and add them on the Hire Notifications page.
The system enables hire notification emails:
Whenever a new hire request comes through the recruiting process.
Whenever there is an error in the push of profile data to HR once the applicant or person is hired.
The administrator can access the Manage Hires page to view pending hires and the status of each hire request to be processed.
Pages Used to Define Roles for Hire Related Notifications|
Page Name |
Definition Name |
Navigation |
Usage |
|
HR_HIRE_NOTIF |
Set Up HRMS, Product Related, Workforce Administration, Hire Notification, Hire Notifications |
Define which roles in Human Resources will receive hire related notifications. |
Defining Which Roles Will Receive Hire NotificationsAccess the Hire Notifications page (Set Up HRMS, Product Related, Workforce Administration, Hire Notification, Hire Notifications).
|
Ready To Hire Notifications |
Enter any role query names that should receive a notification that a person is ready to be hired. The system comes with the delivered role query ROLE_HIRE_NOTIF. |
|
Error Notifications |
Enter any role query names that should receive a notification when there is an error in the push of profile data to HR. The system comes with the delivered role query ROLE_HIRE_NOTIF. |
You can define a query by navigating to Reporting Tools, Query, Query Manager.
Defining Employee Identification
To set up the employee identification tables, use the Supporting Documents (SUPPORT_DOC_TABLE), Visa/Permits (VISA_PERMIT_TABLE), and Driver's License Type (DRIVE_LIC_TBL) components.
This section discusses how to:
Define visas and work permits.
Define driver's license data.
Pages Used to Define Employee Identification|
Page Name |
Definition Name |
Navigation |
Usage |
|
SUPPORT_DOC_TABLE |
Set Up HRMS, Common Definitions, Letters and Documents, Supporting Documents, Supporting Documents |
Set up codes for the types of documents required to obtain visas and permits for employees and their dependents, such as birth certificates, letters of employment, and marriage certificates. |
|
|
VISA_PERMIT_TABLE |
Set Up HRMS, Product Related, Workforce Administration, Visas/Permits, Visa/Permits |
Define visas, work permits, and associated supporting documents that governments require for noncitizens to work in the countries where your organization does business. |
|
|
DRIVE_LIC_TBL |
Set Up HRMS, Product Related, Workforce Administration, Driver's License Type, Driver's License Type |
Enter the types of licenses that you are tracking. |
Defining Visas and Work Permits
Access the Visa/Permits page (Set Up HRMS, Product Related, Workforce Administration, Visas/Permits, Visas/Permits).
You must have previously defined the visa or permit classifications on the Supporting Documents Table page.
|
Visa/Permit Classification |
Select the appropriate visa or permit classification, if applicable. |
|
Supporting Documents Needed |
Select the appropriate supporting documents needed to obtain the visa or permit. |
Setting Up Military Rank
StructureTo set up military rank structure tables, use the Service Components (MIL_SVC_COMPONENT), Component Categories (MIL_CMP_CAT_DEFN), Military Service (MIL_SERVICE_DEFN), Worn Rank Types (MIL_WRN_TYPE_DEFN), and Skill Grades (MIL_SKL_GRD_DEFN) components.
This section provides an overview of military ranking structure and discusses how to:
Enter military service types.
Create military component type categories.
Establish military service details.
Define service ranks.
Associate grades with ranks.
Understanding Military Ranking StructureIn a military organization, rank defines the hierarchy and organization of its personnel and represents seniority and command. Rank is also an attribute used to drive pay and is used in force planning, reporting, movement, and assignments. Once military functionality is enabled on the Installation table and the military tables set up in the PeopleSoft Human Resources system, you can associate military service and rank with jobs and positions or track the movement of service members between active (or inactive) duty, reserve call-ups, and so forth in Job Data.
PeopleSoft Human Resources provides the Military Service table to track the various services, ranks, and hierarchical structures for a country (for example, the U.S. has four services that have different ranks and structures). Within this table, military organizations can use sequence numbers and the National Atlantic Treaty Organization (NATO) rank codes to define a service structure's order for ranks. Rank structure is also broken down according to the following rank categories: Officers (OF), Other Ranks (OR), and Warrant Officers (WO). Within each of the three rank categories, ranks are graded numerically, as shown in this table:
|
Rank Category |
Numerical Grade |
Details |
|
Officers |
OF-01 to OF-10 |
|
|
Other Ranks |
OR–01 to OR–09 |
Other Ranks may include a sub-categorization of Non-Commissioned Officer or Enlisted personnel. These sub-categorizations vary by country. For NATO purposes, rank grades OR-05 to OR-09 inclusive are considered to be Non-Commissioned Officers. |
|
Warrant Officers |
1 to 4 |
Typically represent a hierarchy between non-commissioned officers and commissioned officers. |
Military organizations use the general salary plan tables to set up the general salary structures, for example Officers, Warrant Officers, Enlisted salary and other structures. Once salary plans and grades are established in the system, an organization can assign different salary grades to a rank for the purpose of calculating pay and seniority. When an individual is assigned a rank in Job Data, only those salary grades associated with their rank or worn rank are eligible pay structures.
Recording Rank Changes in Profile Management
PeopleSoft delivers the RANK content type to integrate a person's job with the Manage Profile feature. A profile integration update service, when set up accordingly in the Event Manager, updates a person's profile in Manage Profiles from Job Data when there's a rank change.
See Setting Up Profile Management.
Pages Used to Set Up Military Rank Structure|
Page Name |
Definition Name |
Navigation |
Usage |
|
MIL_SVC_CMP_DEFN |
Set Up HRMS, Product Related, Workforce Administration, Workforce Data MIL, Service Components, Service Components |
Enter military service types (Regular, Active Reserve, Inactive Reserve or Emergency Reserve, or Guard, for example). |
|
|
MIL_CMP_CAT_DEFN |
Set Up HRMS, Product Related, Workforce Administration, Workforce Data MIL, Component Categories, Component Categories |
Create military component type categories that further define service components (Supplemental, Weekend Training, or Permanent, for example). |
|
|
MIL_SERVICE_DEFN |
Set Up HRMS, Product Related, Workforce Administration, Workforce Data MIL, Military Service, Service Definition |
Define military service details by associating service components and categories to a military service and country. |
|
|
MIL_SERVICE_RANKS |
Set Up HRMS, Product Related, Workforce Administration, Workforce Data MIL, Military Service, Service Ranks |
Define service ranks that you will later associate with military service members. Identify the hierarchy and structure of the ranks within a specified military service. |
|
|
MIL_RANK_GRADE_SEC |
Select the Salary Grade link on the Service Ranks page. |
Select the salary plans and grades that fit the pay attributes of a rank. |
|
|
MIL_WRN_TYPE_DEFN |
Set Up HRMS, Product Related, Workforce Administration, Workforce Data MIL, Worn Rank Types, Worn Rank Types |
Identify rank insignias that a service member is allowed to wear on his uniform while serving in a particular post. |
|
|
MIL_SKL_GRD_DEFN |
Set Up HRMS, Product Related, Workforce Administration, Workforce Data MIL, Skill Grades, Skill Grades |
Create skill grade levels for which a service member can be evaluated. Skill grades, along with ranks, may be components of someone's pay and relevant in some payroll processing systems. |
Entering Military Service Types
Access the Service Components page (Set Up HRMS, Product Related, Workforce Administration, Workforce Data MIL, Service Components, Service Components).
|
Reserve Type |
Identify if this service component is part of a military reserve force. Valid values are Active, Inactive, or Not Applicable. |
Creating Military Component Type Categories
Access the Component Categories page (Set Up HRMS, Product Related, Workforce Administration, Workforce Data MIL, Component Categories, Component Categories).
|
Reserve Type |
Identify if this service component category is part of a military reserve force. Valid values are Active, Inactive, or Not Applicable. |
Defining Military Service Details
Access the Service Definition page (Set Up HRMS, Product Related, Workforce Administration, Workforce Data MIL, Military Service, Service Definition).
|
Country |
Enter the country to which this military service applies. |
|
Service Component |
Select one or multiple service components related to this military service. When a user associates a military service with a position or military service member, only those service components associated with that military service are available to the user. |
|
Component Category |
Associate service categories to service components. When a user associates a service component with a military service member, only those component categories associated with that service component are available to the user. |
Defining Service Ranks
Access the Service Ranks page (Set Up HRMS, Product Related, Workforce Administration, Workforce Data MIL, Military Service, Service Ranks).
|
Seq Nbr (sequence number) |
Specify the overall rank sort order to specify the military's hierarchical structure. This field enables users to sort rank codes where these service ranks have the same NATO ranks, such as the OF-1 (1st and 2nd Lieutenant ranks). This field also enables you to specify individual rank order sequences for military services that are not part of the NATO structure and hierarchy. |
|
Rank |
Define rank code designations specific to this military service. |
|
NATO Rank Code |
Select the NATO code associated with this rank, if available. Valid values are provided using translate values. This field is optional since it does not apply to all militaries, such as the US Warrant Officer rank categories. The system displays a warning message upon saving if the NATO rank code is blank and the Military Rank Category is Officer or Other Ranks. |
|
Rank Category |
Categorizing ranks based on NATO's definitions. Valid values are Officer, Other Ranks, and Warrant Officer. |
|
Content Type |
Enter the content type that defines the rank (for example, rank, competency, degree). The PeopleSoft system delivers the content type RANK to record ranks. When a military service member's rank is updated in Job Data, the system will update that person's profile, if an organization has set up the Event Manager accordingly. |
|
Content Item ID |
Select a content item that further defines the RANK content type. The system uses this information to manage a person's job profile. |
|
Salary Grade |
Click to access the Salary Grades - Military Ranks page and define which salary plans and grades fit the pay attributes of this respective rank code. |
Associating Grades with Ranks
Access the Salary Grades - Military Ranks page (select the Salary Grade link on the Service Ranks page).
When a rank is associated with a service member, the system returns only those salary plans and grades that are applicable to the rank, as defined on this page.
Setting Up Military Rank Change Notification and Documentation
To set up military rank change notification and documentation tables, use the Military Processing Definition (MIL_RANK_CHNG_PROC), Rank Change Status MIL (MIL_RANK_CHNG_STAT), Military Rank Change Template (MIL_RANK_CHNG_TMPL), and Clone Military Rank Template (MIL_RNK_CLONE_TMPL) components.
This section provides an overview of the military change rank and notification process and discusses how to:
Define military rank change processing rules.
Specifying allowable actions for rank change processing.
Create a military rank change template definition.
Enter military rank change control criteria.
Specify stakeholder notification details.
Clone a military rank change template.
Understanding the Military Change Rank and Notification ProcessThe Military Rank Change process enables you to track the various states of military service member rank changes, notify stakeholders that are involved in the process using Approval Framework, and generate official documentation. If your organization has elected to require approval processing using the Rank Change process, then upon completion of the last approval, and when the date of the rank change arrives, the system will insert a new row into the service member's Job Data to reflect the rank change using the component interface CI_JOB_DATA.
Since rank change requests often happen months in advance of the actual approval process, the system enables you to record military rank change requests, amendments, and cancellations without having enter this information in Job Data. When approval processing is enabled, the system will send out rank change transaction notifications on a predefined date to stakeholders; stakeholders can be identified as either reviewers or approvers. Approvers will then access the self service pages to approve or deny the request.
The PeopleSoft HR application delivers several setup tables to support the rank change approval and notification process. These tables are available through these components:
Military Processing Definition
Use this component to identify the method used to access the employee-manager reporting structure for determining the unit commander with final approval. Also, this is the location you can enable the approval and prenotification process. When the approval process is not enabled in this component, the rank changes will automatically be applied to Job Data without requiring approvals when the Rank Change Application Date arrives.
Rank Change Status MIL
Use this component to specify a subset of valid actions and related statuses that can be used in a rank change request, since the final rank change promotion or demotion will be written to Job Data and requires an Action value. You can also opt to include this action and status for prenotification or whether to apply it to Job Data. Here, the system can also calculate the Early Promotion Date that's written to the Job Data row. Only the actions specified in this component will appear as a rank change option.
Military Rank Change Template and Clone Military Rank Template
Use these components to create templates that enable users to default as much data as possible into the Rank Change MIL component for a service member rank change request. This ensures that entering data is a quick and easy process. Use the cloning component to copy an existing template to streamline the template creation process.
See Also
Managing Military Rank Change Requests
Pages Used to Set Up the Military Rank Change and Notification Process|
Page Name |
Definition Name |
Navigation |
Usage |
|
MIL_RANK_CHNG_PROC |
Set Up HRMS, Product Related, Workforce Administration, Workforce Data MIL, Military Processing Definition, Military Processing Definition |
Define military rank change processing rules. Determine the service member unit commander, who will be used as the final approver in the rank change approval process. Use this page to turn on the approval process and enable prenotification of a rank change. |
|
|
MIL_RANK_CHNG_STAT |
Set Up HRMS, Product Related, Workforce Administration, Workforce Data MIL, Rank Change Status MIL, Rank Change Status MIL |
Specify the allowable Action table values for change rank processing. Only those action and disposition status combinations defined here are available for military rank change templates and requests. |
|
|
MIL_TMPL_DEFN |
Set Up HRMS, Product Related, Workforce Administration, Workforce Data MIL, Military Rank Change Template, Template Definition |
Create a military rank change template definition. Define the template name, description, and any comments that will help to describe when this template should be used. |
|
|
MIL_TMPL_CHNG_CNTL |
Set Up HRMS, Product Related, Workforce Administration, Workforce Data MIL, Military Rank Change Template, Template Change Control |
Enter military rank change control criteria. This page enables you to define default specific personnel action and reason values as well as the rank change status values (New, Amendment, Cancel by Command, Cancel by Admin) to be associated with the template. Enter default values for the authorizing organization's business unit and department as well as the position or user role that should be used when determining the responsible career manager. The system will use these values to populate the Military Rank Change page fields in the Rank Change MIL component. |
|
|
MIL_TMPL_NOTIFY |
Set Up HRMS, Product Related, Workforce Administration, Workforce Data MIL, Military Rank Change Template, Template Notifications |
Specify the stakeholder notification details such as default roles that should be associated with a template and indicate when to start the approval and notification process. |
|
|
MIL_RNK_CLONE_TMPL |
Set Up HRMS, Product Related, Workforce Administration, Workforce Data MIL, Clone Military Rank Template, Clone Military Rank Template |
Clone a military rank change template by identifying an existing a rank change template to copy and entering the new template ID you wish to create. |
Defining Military Rank Change Processing Rules
Access the Military Processing Definition page (Set Up HRMS, Product Related, Workforce Administration, Workforce Data MIL, Military Processing Definition, Military Processing Definition).
Use this page to identify how the system will determine the unit commander role for the approval and workflow notification process. When using the approval process, the unit commander is the final approver. You will also use this page to identify if you want the system to require approvals for rank change or use the prenotification process.
|
Access Type |
Select the access type that best fits how the unit commander structure for your organization is determined. This is the final approver for a service member's rank change. Valid values are By Department Manager ID, By Dept Security Tree (by department security tree), By Group ID, By Part Posn Mgmt Dept Mgr ID (by partial position management department manager ID), By Part Posn Mgmt Supervisor (by partial position management supervisor), By Reports To Position, and By Supervisor ID. See Setting Up Access to Direct Reports Data, Configuring Direct Reports Functionality. |
|
Approval Process? |
Select this check box if the unit commander approval is needed to process a new or amended rank change and have the system apply these changes to Job Data. If approval is not required to process the rank change and update Job Data on the specified date, deselect this check box. |
|
Select this check box to enable the Prenotification process and have the system notify stakeholders in advance of a rank change being made to Job Data. This function provides stakeholders with another opportunity to review the service member's rank change before Job Data is updated. Coordination with the career manager and manual intervention would be required at this point to stop the system from processing the rank change. The actual prenotification date is defined on the Stakeholder page of the Rank Change MIL component for the person receiving the rank change.
Note. If the Application Date field
on the Military Rank Change page of the Rank Change MIL component is not populated,
the prenotification date on the Stakeholder page will not be populated and
therefore not picked up by the prenotification process. |
See Entering Military Rank Change Notification Information.
Specifying Allowable Actions for Rank Change Processing
Access the Rank Change Status MIL page (Set Up HRMS, Product Related, Workforce Administration, Workforce Data MIL, Rank Change Status MIL, Rank Change Status MIL).
|
Action |
Select a value from the Action table that can be used for military rank change requests. |
|
Disposition Status |
Enter the disposition statuses eligible for this action type. Only those action and rank change disposition status combinations defined here are available for selection in the Action and Disposition Status fields on the Template Change Control page for military rank change templates or Rank Change MIL page to record a service member's rank change request. Valid values are AMD (Amendment), CNA (Cancel by Administrator), CNC (Cancel by Command), and NEW (new). |
Change Action History
Identify the rank change status descriptions that the system will display to a user during the Rank Change process. You can also activate or inactivate a specific disposition status for the action.
Set Processing Field Selection
Use this section when configuring prenotification and the push of rank change requests to Job Data for an action and disposition status combination.
|
Include In Prenotification |
Select this check box to generate a prenotification for stakeholders when a person has this action and disposition status combination. If this check box is not selected, prenotification will not be generated for stakeholders. Note. Prenotification must be enabled on the Military Processing Definition page in order for prenotification to occur. |
|
Apply Row to Job Data |
Select this check box to have the system push the rank change request to Job Data. If this check box is not selected, the system will not apply the rank change to Job Data. For example, a cancellation of a rank change request would not need to be recorded in Job Data, and therefore would have this check box deselected. |
Set Earliest Review Date
Use this section to determine how the system should calculate the Early Promotion Date field value on the Job Data - Employment Information page use after the rank change row has been inserted into Job Data.
|
No Affect |
Select this if there is no impact to the earliest review date when the Job Data row is inserted. This is the default value selection. |
|
JOB.EFFDT + Number of Weeks (job effective date plus number of weeks) |
Select this option to calculate a review date using the effective-date of the rank change row in Job Data plus the number of weeks specified here. If this option is selected, you must also enter the number of weeks (up to a 3-digit number) in the edit box after this field. The system uses this date to populate the Early Promotion Date on the Job Data - Employment Information page. In the case of a demotion or reversal, you may need to enter a negative number. Note. To use this option, you must enter an Application Date value on the Military Rank Change page. |
|
Special Calculation Routine |
Select this option if your organization has created their own customized calculations. The PeopleSoft application does not deliver calculations for this field. |
Creating a Military Rank Change Template Definition
Access the Military Rank Change Template - Template Definition page (Set Up HRMS, Product Related, Workforce Administration, Workforce Data MIL, Military Rank Change Template, Template Definition).
|
Template ID |
Enter an ID (up to 15-characters) to uniquely identify this template. |
Entering Military Rank Change Control Criteria
Access the Template Change Control page (Set Up HRMS, Product Related, Workforce Administration, Workforce Data MIL, Military Rank Change Template, Template Change Control).
Use this page to define default values the system will use to populate fields in the Rank Change MIL component when creating a rank change request. The only required fields for defaulting are Action, Disposition Status, and the Responsible Career Manager selection.
|
Action |
Select a default action value. Valid actions for rank changes are defined on the Rank Change Status MIL page. |
|
Reason |
Select a default reason that will be associated with the action, if applicable. Valid reasons for actions are defined in the Action Reasons table. |
|
Disposition Status |
Select the disposition status that will be provided by default when using this template. Valid values are defined on the Rank Change Status MIL page for an action. |
|
Business Unit and Department |
Enter the authorizing organization's business unit and department for this template. |
Responsible Career Manager
Use this selection to specify how the default career manager is derived. The system uses this information for notification purposes.
|
Position Number andPosition Number |
Select this option if the career manager is decided by position. When you select this option, the Position Number field becomes available and you can enter the position number associated with the career manager for defaulting purposes or leave it blank. |
|
Role and Role Name |
Select this option if the career manager is decided by a role. When you select this option, the Role Name field becomes available and you can enter the name of the role associated with the career manager user ID for defaulting purposes or leave it blank. |
Specifying Stakeholder Notification Details
Access the Military Rank Change Template - Notifications page (Set Up HRMS, Product Related, Workforce Administration, Workforce Data MIL, Military Rank Change Template, Notifications).
Use this page of the template to configure for an immediate start of the approval process (when the rank change request is saved) or configure the approval process to start on a future date, to be calculated by the system. This page also enables the user to associate a prenotification date, which is essentially a final notification to stakeholder that the rank change is being applied to Job Data.
|
Immediately (Current Date) |
Select this method to have the system populate the Start Approvals On field in the Rank Change MIL component with the system date. This will start the approval process upon saving the request in the Rank Change MIL component. |
|
Future Date and Status Date + Days |
Select this method to have the system populate the Start Approvals On field in the Rank Change MIL component with a future date based on the Status Date field value in the Rank Change MIL component. When you select this option, the Status Date + Days field becomes available. Enter the number of days (up to two digits) the system should wait before sending out the approval notices. For example, you create a template indicating that approvals should be sent out on a future date. You enter 14 in the Status Date + Days field. Later, the HR manager enters a request for an employee rank using this template with a Status Date value of September 1. The system automatically populates the Start Approvals On field with the date of September 15 on the Stakeholder page of the Rank Change MIL component, 14 days after the status date of this request. The HR manager can accept this default value or override this value with another date. |
|
Prenotification Date = Effective Date - Days |
Enter the number of days prior to the rank change being applied to the person's Job Data record that the stakeholders should be notified of the change being made in the system. The system calculates the prenotification date using the Application Date value on the Military Rank Change page in the Rank Change MIL component minus the number of days entered in this field. The system then enters this date in the Prenotification Date field on the Stakeholder page of the Rank Change MIL component. The HR manager can accept this default value or override this value with another date when creating the rank change request. Note. Prenotification must be enabled on the Military Processing Definition page in order for prenotification to be performed. |
|
Role Name |
Identify the roles, or stakeholders, that should be notified in the rank change notification process. |
|
Participant Involvement |
Identify the level of involvement of the stakeholder. Values are Approver or Reviewer. |
Cloning a Military Rank Change Template
Access the Clone Military Rank Template page (Set Up HRMS, Product Related, Workforce Administration, Workforce Data MIL, Clone Military Rank Template Definition, Clone Military Rank Template)
Use this page to copy an existing military rank template by selecting the existing template and then enter the new template ID, action, and disposition status. After saving, the system will open the Military Rank Change Template component, where you can then update fields related to this template.
Defining Additional Employment Setup Data
To set up the additional employment setup data tables, use the Ethnic Groups (ETHNIC_GROUP_GBL), Non-Employee Provider (NEE_PROVIDER_TBL), Religions (RELIGION_TBL_GBL), Supervisor Levels (SUPVSR_LVL_TBL), Temporary Duties (TEMP_DUTIES_TBL), Volunteer Organizations (VOLUNTEER_ORG_TBL), and Employee Class (EMPL_CLASS_TABLE) components.
This section provides and overview of supervisor levels and discusses how to define ethnic groups.
Understanding Supervisor Levels
Supervisor levels are a class of position such as Division Manager and Section Chief. They represent levels of some managerial or supervisory significance that bear responsibility for work above a certain level in order to achieve the organization's management goals.
The concept of employees' supervisor level is a central one in some places, such as Japanese companies' human resources management. It may or may not be related to an employee's "job." Companies usually use supervisor level as another type of employee identifier. Companies that do not use capability grades (or Job Management) may still require the tracking of supervisor levels. Many companies pay employees a component of pay related to their supervisor level.
Supervisor levels usually combine with departments to define positions or posts within an organization, as shown in this sequence of three tables:
Table 1: Supervisor Levels
This table lists the supervisor levels and their descriptions.
|
Supervisor Level |
Description |
|
01 |
Director |
|
02 |
Senior Manager |
Table 2: Departments
This table lists the department IDs and their descriptions.
|
Department ID |
Description |
|
100 |
Development |
|
102 |
Development Section One |
|
200 |
Sales |
|
210 |
Sales - West Division |
Table 3: Position, Supervisor Level, and Departments
This table lists the positions or posts and their corresponding supervisor levels and department IDs.
|
Position or Post |
Supervisor Level |
Department ID |
|
Director of Development |
01 |
100 |
|
Senior Manager of Development Section One |
02 |
102 |
|
Director of Sales |
01 |
200 |
|
Senior Manager of Sales - West Division |
02 |
210 |
When you create or update employee Job records, you can enter the supervisor levels that you set up in the Supervisor Level table on the Job Information page. And, because supervisor level is an employee identifier just like job code, position, or manager level, it appears throughout the system. You can view it or enter it on many of the pages on which you can also view or enter job codes, positions, and manager levels. You can also view it on Job Summary and throughout the Plan Careers and Successions and Track Global Assignments business processes.
Pages Used to Define Additional Employment Data|
Page Name |
Definition Name |
Navigation |
Usage |
|
ETHNIC_GROUP_TBL |
Set Up HRMS, Product Related, Workforce Administration, Ethnic Groups, Ethnic Groups |
Define ethnic groups. Regulations in some countries require ethnic group tracking by employers. The system tables contain predetermined values for defining ethnic groups and religions. You can add or edit values and descriptions. |
|
|
NEE_PROVIDER_TBL |
Set Up HRMS, Product Related, Workforce Administration, Non-Employee Provider, Non-Employee Provider |
Define the provider, agency, or employer of a contingent worker. Link this information to a worker on the Employment Information page or Contract Data page. |
|
|
RELIGION_TBL |
Set Up HRMS, Product Related, Workforce Administration, Religions, Religions |
Define religions. |
|
|
SUPVSR_LVL_TBL |
Set Up HRMS, Product Related, Workforce Administration, Supervisor Levels, Supervisor Levels |
Add and modify supervisor level data. |
|
|
TEMP_DUTIES_TBL |
Set Up HRMS, Product Related, Workforce Administration, Temporary Duties, Temporary Duties |
Define or modify duty types for temporary assignments. This field only appears on the Job Code page of Job Data when the action is Temporary Assignment (TAS) and the Installation table has Auto Job Suspend selected. The value can indicate what type of duties are included in the assignment. |
|
|
VOLUNTEER_ORG_TABL |
Set Up HRMS, Product Related, Workforce Administration, Volunteer Organizations, Volunteer Organizations |
Add volunteer organization data that your company recognizes or sponsors. |
|
|
EMPL_CLASS_TABLE |
Set Up HRMS, Product Related, Workforce Administration, Labor Administration, Employee Class, Employee Class |
Set up employee classes to further categorize your workforce. Employee classes are assigned on the Job Data - Job Information page (JOB_DATA_JOBCODE). Note. (GBR) The Northern Ireland Fair Employment Monitoring report (UKNI001) uses the employee class to determine the classification for workers. If your organization submits this report, you must use the required employee classes for the report to work correctly. |
Defining Ethnic Groups
Access the Ethnic Groups page (Set Up HRMS, Product Related, Workforce Administration, Ethnic Groups, Ethnic Groups).
|
Regulatory Region |
Enter the country or region used to monitor diversity reporting for this ethnic group. |
|
EEO Ethnic Category |
(USA) Select the category for this ethnic group. You may select one or more categories for each ethnic group. Values include:
|
Setting Up Security Clearance TypesTo set up the security clearance types, use the Security Clearance Type (SEC_CLR_TYP_TBL) component.
This section discusses how to define security clearance types.
Page Used to Set Up Security Clearance Types|
Page Name |
Definition Name |
Navigation |
Usage |
|
SEC_CLR_TYP_TBL |
Set Up HRMS, Product Related, Workforce Administration, Security Clearance Type, Security Clearance Type |
Define security clearance types. |
Defining Security Clearance Types
Access the Security Clearance Type page (Set Up HRMS, Product Related, Workforce Administration, Security Clearance Type, Security Clearance Type).
|
Effective Date |
The date the security clearance type becomes effective. |
|
Status |
Provide the status of the security clearance. Valid values are Active or Inactive. |
|
Description |
Provide the long description of the security clearance type. |
|
Short Description |
Provide the short description of the security clearance type. |
Creating Checklists
To set up the checklists tables, use the Checklist Items (CHKLST_ITEM_TBL), Checklist (CHECKLIST_TABLE), and Dynamic Link (DL_LINK_TBL) components.
This section provides an overview of checklists and discusses how to set up standard checklists.
Understanding ChecklistsPeopleSoft HR enables you to make checklists to help you remember all the details associated with adding workers or handling other Administer Workforce tasks.
Use standard checklists as they are or use them as the basis for creating new checklists for particular workers. Make the items as general or specific as you want them to appear in checklists. For example, to gather health records, you could set up one code for all health data. Or, you might want to create separate items for all the elements of health records, such as physical exams, immunizations, and tests.
To make a checklist:
Define links to PeopleSoft pages that you may want to associate with a checklist item using the Dynamic Link page.
Create checklist items using the Checklist Items page.
Create a checklist by adding items to a checklist using the Checklist page.
Pages Used to Create Checklists|
Page Name |
Definition Name |
Navigation |
Usage |
|
CHKLST_ITEM_TABLE |
Set Up HRMS, Common Definitions, Checklists, Checklist Items, Checklist Items |
Create items to include in checklists. |
|
|
CHECKLIST_TABLE |
Set Up HRMS, Common Definitions, Checklists, Checklist |
Create checklists for the various types of processing you do in the Administer Workforce business process. |
|
|
DL_LINK_TBL |
Set Up HRMS, Common Definitions, Checklists, Dynamic Link, Dynamic Link |
Define dynamic links used in worklist items. |
Setting Up Standard Checklists
Access the Checklist page (Set Up HRMS, Common Definitions, Checklist, Checklist).
|
Checklist Type |
Select the type of checklist that you want to create. Values include Hiring, Transfer, Terminate, Org Instance, Training, Medical, and Other. |
|
Sequence and Item Code |
The system automatically sequences the item codes in multiples of 100. When you insert a data row for a new item, the system automatically assigns the next multiple of 100, such as 400. To rearrange the order in which the items appear, change the sequence numbers to the numerical order you want. For example, to reverse the order of Outline Office hours/holidays (100) and Outline job responsibilities (200), assign a lower number to Outline job responsibilities (such as 150) and a higher number to Outline Office hours/holidays (such as 175). When you save your changes, the system automatically displays the items in the new order. |
Setting Up Workforce Contracts
To set up contracts for your workforce, use the Define Contract Types (CONTRACT_TYPE_TBL), Contract Type Groups (CNTRCT_TYPE_GRP), Contract Clause Table (CNT_CLAUSE_TABLE), and Define Contract Templates (CNT_TEMPLATE_TABLE) components.
This section discusses how to:
Define contract types.
Set up standard contracts.
See Also
(E&G) Administering Contract Pay
Pages Used to Set Up Workforce Contracts|
Page Name |
Definition Name |
Navigation |
Usage |
|
CONTRACT_TYPE_TBL |
Workforce Administration, Job Information, Contract Administration, Define Contract Types, Define Contract Types |
Define contract types. |
|
|
CNTRCT_TYPE_GRP |
Set Up HRMS, Product Related, Workforce Administration, Contract Administration, Contract Type Groups, Contract Type Groups |
Group contract types together. |
|
|
CNT_CLAUSE_TABLE |
|
Define special languages and riders that can be added to the main body of a workforce contract. |
|
|
CNT_TEMPLATE_TABLE |
|
Set up all of your organization's standard workforce contracts. Use the information that you define here when you assign contracts to employees and contingent workers in your organization. |
Defining Contract Types
Access the Define Contract Types page (Workforce Administration, Job Information, Contract Administration, Define Contract Types, Define Contract Types).
(ESP) Spain
|
Contract Rule |
Enter the number of the law that governs this kind of contract. A typical law number includes the type of law, law number, and year—for example, RD 3290/1997 or Ley 22/1995. The system doesn't edit your entry. |
|
Allowed Extensions |
Select to permit extensions to be added to this type of contract. |
|
Min. Duration (minimum duration),Max Duration (maximum duration), andUnit |
Specify the minimum and maximum length that is allowed for this type of contract. Enter a quantity in the Min. Duration and Max Duration fields and use the Unit field to select a unit of time. For example, if the minimum contract duration is six months, enter 6 in the Min. Duration field, then select Months from the available options in the Unit field. |
|
Reduction ID |
This field is active only if PeopleSoft Global Payroll for Spain is installed. Select the reduction ID that corresponds to the contract type. The reduction ID identifies the specific reduction definition or rule that applies to an employer. In certain limited cases—such as when a company hires employees with disabilities, or hires workers older than 45 years of age—the employer may qualify for a reduction in the amount of social security contributions. |
|
Soc. Sec. Nbr. For Employer Type (social security number for employer type) |
Select a social security number type from the available options: none, Part Time, Regular, and Training. |
(ITA) Italy
|
Applicability |
Select whether this contract type is applicable to employees, contingent workers, or both. |
Setting Up Standard Contracts
Access the Define Contract Templates page (Set Up HRMS, Product Related, Workforce Administration, Contract Administration, Define Contract Templates, Define Contract Templates).
|
Contract Type |
Select the contract type for this template from the contract types you have set up on the Contract Type Table page. |
|
Contract Family |
Enables you to group a class of contracts. For example, you may have one contract family for regular employee contracts and another for contingent worker contracts. Tying contracts to a contract family helps you narrow your search criteria when you select a contract template. |
Contract Clauses
Use this group box to define any special contract clauses that should be attached as riders to this contract template.
|
Sequence |
Enter the order in which to add the contract clauses to the contract. |
|
Contract Clause |
Select a contract clause from among those you've defined on the Contract Clause Table page. For example, a contract for a limousine driver requires that the employee have a driver's license. |
|
Clause Status |
Indicate if the clause is Optional or Required. |
Setting Up the Org Chart Viewer
To set up the Org Chart Viewer tables, use the Job Tree Builder (HR_TREEBLD_RNCTL), Structure and Content (PORTAL_FLDR_ADM), Chart and Profile Field Map (HRCD_SETUP_FLD_MAP), Additional Contact Types (HRCD_ADDTL_CNTCT), Chart and Profile Settings (HRCD_SETUP), and Matrix Teams (HRMH_MATRIX_SETUP) components.
This section provides an overview of the Org Chart Viewer features and functionality, hierarchical reporting structures, related actions and self service transactions, permission lists and roles, Org Chart Viewer setup steps, lists common terms and elements, viewing matrix teams, and discusses how to:
Define hierarchal reporting structures using the Tree Builder process.
Update the portal folder definition for the Company Directory.
Define the org chart and profile field page mappings.
Define additional contact types for the org chart viewer.
Access the setup pages for each org chart view type.
Define general settings for the org chart view types.
Identify fields on the Company Directory - Profile page.
Identify fields on the Company Directory - Org Chart page.
Define matrix team details.
Associate Manager Self-Service transactions to a matrix.
Assign transaction access to matrix owners and leads.
Understanding the Org Chart Viewer Features and Functionality
The Org Chart Viewer enables your employees and managers to search for people across the organization, to see a visual representation of the organization based on your defined hierarchical structures, and to enable self service actions from the visualization. Users can collaborate with co-workers by selecting the communication methods available within the organization including email, instant messaging (IM), telephone options, links to social networks, and a free form text field to add additional personalized information.
This organizational visualization and navigation directory offers functionality beyond a typical organization chart by supporting worker collaboration, identifying direct-line and dotted-line reporting chains, and enabling users to initiate employee and manager self service transactions from the organizational view.
See Using the Org Chart Viewer.
The Org Chart Viewer Component Structure
The Org Chart Viewer component has three primary org view types, which display as folder tabs across the top of the component: Company Directory, Direct-Line Reports, and matrix report pages. Each of these top-level folder tabs are made up of two sub-pages (tabs) that correspond to the parent folder tab.
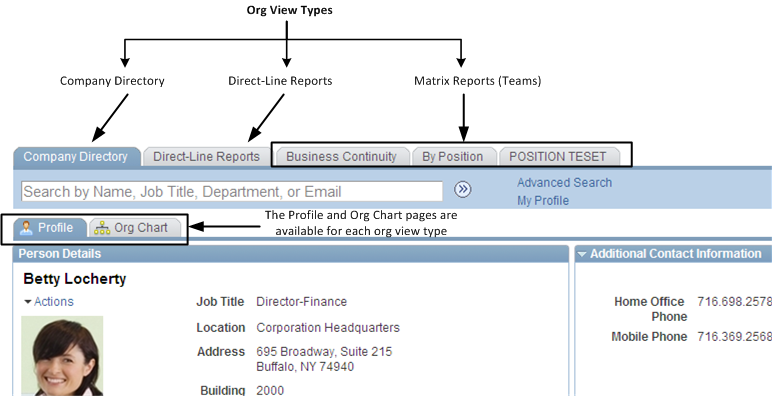
Org Chart Viewer folder tab and page structure
This table explains the different org view types:
|
Org View Type |
Usage |
|
Company Directory |
Includes the organization’s hierarchical structure. Use the Company Directory page of the Org Chart Viewer (first tab) to access this org view type information. This page is available to all employees and managers. |
|
Direct-Line Reports |
Includes employees that report up to the user. Use the Direct-Line Reports page of the Org Chart Viewer (typically the second tab, if available) to access this org view type information. This page displays content for managers with direct reports. This tab may not be available to a person without direct reports. |
|
Matrix Reports <matrix team name> |
Represents a reporting chain or hierarchy that is not a traditional direct-line reporting relationship and is sometimes referred to as dotted-line reporting or teams. Use the subsequent tabs that may display in the Org Chart Viewer component (typically the third and later tabs when all org view types are available) to access this org view type information. Each tab name reflects a matrix team name. A matrix team tab appears at the top of the Org Chart Viewer component for each matrix team with which a user is associated. If a user is not associated with any teams, matrix reports tabs will not display at the top of the Org Chart Viewer component. |
Note. Access to the Org Chart Viewer component must be granted to users in order to access these pages. The roles are Org Viewer User - Employee and Org Viewer User - Manager.
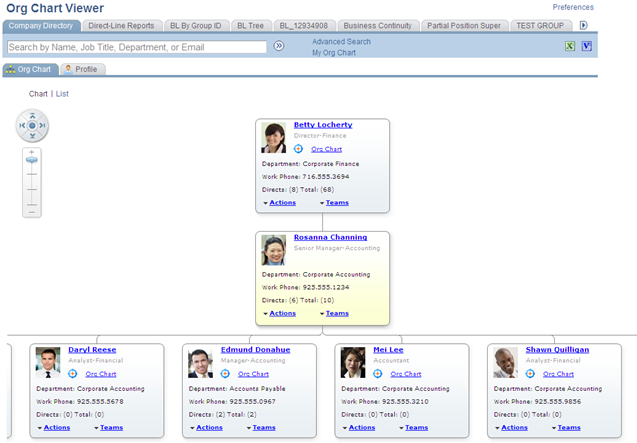
Example of the Org Chart Viewer component where the user has access to the Company Directory folder tab, Direct-Line Reports folder tab, and several team matrix folder tabs.
Within each org view type folder tab of the Org Chart Viewer there are also two page tab views:
|
Pages within Each Org View Type |
Usage |
|
Org Chart |
Displays a person within a three-tiered graphical representation of the reporting structure. The hierarchies rendered by the organization chart can be built manually, using access types, or trees. The chart focuses on a person and where he or she fits within the reporting structure. |
|
Profile |
Displays information about the focus person. The page shows up to five sections of information: two company related sections on the left side and three personalized sections on the right. The Profile page provides additional information about a person, such as his or her job details; links to other people with whom he or she is associated, such as direct reports, peers, and the manager; as well as personalized sections, which enable the employee to enter additional contact details, personal links, and free from text. |
Hierarchical Reporting StructuresThe Org Chart Viewer uses many methods for grouping individuals and creating hierarchical reporting structures. This table lists the ways the system enables you to create or view groups within the Org Chart Viewer pages:
|
Org View Type |
Grouping or Reporting Structure |
|
Company Directory |
Tree-based hierarchy (COMPANY_DIRECTORY tree structure) |
|
Direct-Line Reports |
Access Type (using the Direct Reports API) |
|
Matrix Reports (Teams) |
|
This section discusses:
Tree-based hierarchies.
Non-tree-based hierarchies.
Trees from Tree Manager provide the hierarchical structure for the Company Directory and for Matrix Teams configured using a tree. You can manually create a tree or use the Job Tree Builder, a delivered PeopleSoft batch process that leverages the Direct Reports API, to create a tree of persons based upon their job data.
This will enable you to:
Effective date each version of the hierarchy you want to expose via the Org Chart Viewer pages.
Enforce a very strict hierarchy that is predetermined through your tree setup.
Have improved performance at runtime and eliminate the necessity of fetching data from transactional tables (primarily PS_JOB) to derive the reporting relationships. With a Tree, the hierarchy will already exist in the database and not need to be derived at runtime from transactional data.
Note. The Company Directory use trees with the tree structure ID of COMPANY_DIRECTORY only. Matrix Teams use trees with the tree structure ID of MATRIX_BY_JOB only.
Non-Tree-Based Hierarchy
The Direct Reports UI/API determines the hierarchical structures of persons for the Direct-Line Reports org view type and for Matrix Teams defined by access type. The Direct Reports API also generates the SmartNavigation across the top of the page and the org chart.
The Direct Reports API is a common HCM data service used for obtaining a list of employees (including contingent workers and persons of interest) who report to a specific employee job or position number. This data service is primarily leveraged for determining a manager’s security to specific employee jobs and as the data source for rendering org charts based on a selected employee (Job).
For better performance, the PeopleSoft application provides the Direct Reports Table Build, a framework for creating flattened views of reporting structures so that they can be accessed easily. Each access type has its own table that carries the data needed to search and maintain it. These tables are kept up to date using Event Manager as well as a nightly process to update future dated rows that are now current.
See Also
PeopleTools PeopleBook: PeopleSoft Tree Manager
PeopleTools PeopleBook: Using PeopleSoft Applications, "Working With Browser-Based Applications," Using Drop-Down Menus
PeopleTools PeopleBook: PeopleTools Portal Technologies, “Developing and Configuring Related Content”.
Configuring Direct Reports Functionality
Setting Up Access to Direct Reports Data
Related Actions and Self Service TransactionsWhen an individual views his or her content, whether from the Org Chart tab or the Profile tab within the Org Chart Viewer pages, he or she can be granted the ability to access HCM related self service transactions using the Actions menu drop-down list. The manager can also be granted the ability to access HCM related manager self service transactions using the Actions menu link for his or her subordinates.
PeopleSoft delivers a number of related actions for Manager Self Service as well as Employee Self Service for different modules. All or a subset of these related actions are being initiated from Org Chart Viewer, Manager Dashboard, Talent Summary and Application Search.
See PeopleTools PeopleBook: PeopleTools Portal Technologies, “Developing and Configuring Related Content Services”.
This table lists the delivered actions for the Org Chart Viewer for the employees and managers:
|
Self Service Menu |
Employee Self Service Actions |
Manager Self Service Actions |
|
Time Management |
|
|
|
Job and Personal Information |
|
|
|
Compensation and Stock |
|
|
|
Payroll |
|
N/A |
|
Benefits |
|
N/A |
|
Development |
|
|
|
Performance Management |
|
|
|
Career Planning |
View My Career Progression Chart |
|
|
Succession Planning |
N/A |
|
Note. When security access is granted, managers can also select the View in Talent Summary list item when viewing actions for a direct or indirect report. Managers with access can also use the Manager Dashboard link at the top of the Direct-Line Reports org view type page to view a set of management related pagelets that enables managers to quickly and easily view and update human resource information as needed from one page.
Org Chart Viewer Permission Lists and Roles
The PeopleSoft HCM application delivers these permission lists in order to grant access to the Org Chart Viewer tab pages:
|
Permission List |
Usage |
|
HCCPSS2215 - Org Viewer Company Directory |
Provides the user access to Company Directory tab and pages within the Org Chart Viewer. |
|
HCCPSS2220 - Org Viewer Direct-Line |
Provides the user access to the Direct-Line Reports tab and pages within the Org Chart Viewer. Note. It is possible for a user to have security access and still not see the Direct-Line Reports tab. For example, this might occur when the user does not have direct-line reports for the access type as defined in Configure Direct Report UI for the component named HRCD_CO_DIRECTORY. |
|
HCCPSS2225 - Org Viewer Dotted-Line |
Provides the user access to Matrix tabs and pages within the Org Chart Viewer. Note. It is possible for a user to have security access and still not see a particular matrix tab folder. For example, the user may not be a member or owner of the matrix, the matrix definition may be inactive, or the matrix may not be available for viewing. |
The following content references are associated in the Related Content Framework, Manage Related Content Services component for the Org Chart Viewer:
PeopleTools 8.51: HC_HRCD_TREE_DTL_GBL (Company Directory Tree Detail)
PeopleTools 8.52 or higher: the related content is associated via the CREF HC_HRCD_CO_DIRECTORY_GBL (Company Directory).
Understanding the Org Chart Viewer Setup Steps
In order to use the Org Chart Viewer functionality, you need to perform these tasks:
Build a job tree.
The system administrator will needs to build trees, either manually or through the Job Build Tree Run Control page, using the proper tree structure. This will support the organizational charts that show the hierarchies of people according to their job information.
Note. If you build a tree manually, you still need to run the Job Tree Builder with a Build Action of Update Process Tables Only.
See Understanding the Steps to Building a Job Tree.
See Defining Hierarchical Reporting Structures Using the Tree Builder Process.
Update the Company Directory (HC_COMPANY_DIRECTORY) folder definition to ensure the tree name is equal to the tree created in step 1. This information is used for the Org Chart Viewer, Company Directory folder.
Note. This step needs to be performed any time the tree name is changed.
See Updating the Portal Folder Definition for the Company Directory.
Set up the Org Chart Viewer pages.
The system administrator will need to set up the rules for the organizational chart and profiles, both of which are presented in all of the Org Chart Viewer pages.
(Optional, since many fields are delivered) Map fields for the org chart and profile pages.
(Optional, since many contact types are delivered) Define additional contact types.
See Defining Additional Contact Types for the Org Chart Viewer.
Set up the org chart and profile settings for each org view type—Company Directory - 8.52, Direct-Line Reports, and Matrix Reports.
Establish the hierarchy for the Direct-Line Reports tab by configuring the Access Type value for the HRCD_CO_DIRECTORY component. Do this by navigating to Set Up HRMS, Common Definitions, Direct Reports for Managers, Configure Direct Reports UI.
Create matrix teams.
The combined setup pages enable you to configure the hierarchies and information you want to display on each of the pages.
Understanding the Steps to Building a Job Tree
This section lists the steps to build a Job tree.
Analyze Your Organization.
Determine the population.
The first step to building a job tree is to determine the population of employees who should be included in the tree. For example, do you want to include the entire company, or only a particular division? This is key to determining which person (job) should be the root, or top node, of your job tree.
Determine reporting relationships.
Next, you will need to understand the reporting structure, or hierarchy, of your organization. In other words, how do the jobs in the organization relate to each other? How are the reporting relationships defined? For example, your organization may use the reports to position in Position Management as your reporting structure, or maybe you enter the supervisor's ID directly into the person's Job Data record.
Determine the appropriate effective date.
Finally, determine the point in time you want to capture these job relationships. Should the hierarchy always be based on current information? Do you need to capture future relationships? Should the tree represent past job relationships?
Build the Tree.
Once you have a good understanding of the organization you want to represent in your job tree, it is time to build the tree. The approach you take for building the tree depends upon how closely the reporting structure of your organization matches one of these Build Method types:
- By Department Manager ID
- By Department Security Tree
- By Partial Position Management and Department Manager ID
- By Partial Position Management and Supervisor ID
- By Report To Position (Number)
- By Supervisor ID
If your organization's reporting structure exactly matches one of the types listed above, then you can use the Job Tree Builder to build your tree automatically.
If your organization's reporting structure mostly matches one of the types previously listed, then you can use the Job Tree Builder to build your initial version of the tree, then manually update the tree (by adding, moving, or deleting nodes) using Tree Manager. The Job Tree Builder also supports partial updates to existing trees using the build action Update Existing Tree-From Node. This allows a selected section of the tree to be created using a different Build Method value.
If your organization's reporting structure does not closely match one of the build methods, then you will build a job tree using the following two steps.
Populate the Source Tree Data
First you will need to populate a table with all current and future active Jobs as of the system date. As part of this step, the Job data is assigned a new key value that is compatible with Tree Manager. This step is performed by the Job Tree Builder using any of the Build Action values. If you only want to perform this step, select the Build Action option Update Process Tables Only.
Build the Tree and Tree Nodes
This step uses the data created in the previous step to build the tree. Depending on how closely your organization's reporting structure matches one of the delivered build methods determines if the Job Tree Builder is used for this step, or if this is a manual task in Tree Manager.
See Defining Hierarchical Reporting Structures Using the Tree Builder Process.
Review the Tree in Tree Manager.
After you have created any tree, you should review it using Tree Manager to ensure that the tree appropriately represents the organization's reporting structure. You can make changes directly to the tree in Tree Manager, if desired, or use the Job Tree Builder to refresh the tree or portions of the tree. Remember that trees in Tree Manager are effective dated and can also be saved as draft trees or made inactive.
See PeopleTools PeopleBook: PeopleSoft Tree Manager
Determine Update Frequency.
Trees in PeopleSoft are effective-dated and static. Your job tree will represent a reporting hierarchy as of a given point in time. Changes to employee job data will not automatically be reflected in a job tree. This means that your organization will need to determine how often and by which means the tree will be updated. For example, will your organization update the tree nightly by a scheduled run of the Job Tree Builder? Are manual updates required? Since the Job Tree Builder is a standard run control page, it can be used to schedule your tree refreshes or partial updates according to a defined frequency. If your tree contains a large number of manual updates, you will need to consider your plan for tree refreshes carefully.
Regardless of how often or by which means your job tree is updated, PeopleSoft recommends that your organization use a regularly scheduled process that performs the build action process of Update Process Tables Only. This will ensure that all newly active jobs (new hires, for example) are available in the tree's source data table.
See Also
Defining Hierarchical Reporting Structures Using the Tree Builder Process
Configuring Direct Reports Functionality
PeopleTools PeopleBook: PeopleTools Portal Technologies, "Working With Navigation Pages"
Understanding and Viewing Matrix TeamsYou will use the Matrix Teams component to define your matrix (dotted-line) hierarchies and teams. This includes specifying the employee reporting relationships and, optionally, assigning Manager Self-Service transaction permissions to managers and leads among these matrices. The matrix relationships can be automatically built using trees tied to existing direct reports access types (including sub-sets of these trees) or manually.
Matrix reports or teams may be available through two means within the Org Chart Viewer component. A matrix team may be visible to a user in either of the following formats:
A <matrix reports name> folder or tab
Appears at the top of the Org Chart Viewer or in the menu drop-down navigation for users associated with a matrix team and granted the appropriate access.
As a Teams or Other Teams drop-down menu link item
These links appear on the Profile page or an Org Chart page node and display the teams associated with a person, where enabled. These teams are viewable to all users.
Granting Access
To have a matrix available in the Org Chart Viewer pages, you will need to:
Change the matrix ID status to Active when creating a matrix team.
Select the appropriate Org View Type check boxes in the Display Options group box to make the matrix public within that particular feature.
Select the Display Matrix Teams check box on the General Settings page for each of the org view types that should display this matrix ID.
Displaying a Matrix Team Folder for the Owner Versus All Team Members
You will use the Show in View for Owner Only check box on the Matrix Team setup page to determine whether all team members and the owner have access to the matrix team folder or if just the owner has access to the team folder.
The Show in View for Owner Only check box selection determines who has access to a specific matrix team folder:
Selected - Just the owner of the matrix team you are defining can view the <matrix team name> folder tab and SmartNavigation.
Deselected - All team members and the owner of the matrix team you are defining can view the <matrix team name> folder tab and SmartNavigation.
See Defining Matrix Team Details.
Displaying a Person's Team Within the Org View Type Pages to All Users
This table indicates when and where a person’s matrix team is listed under the Teams or Other Teams menu link for all users based on the three Allow Display Across Features check box selections on the Matrix Team setup page:
|
Org View Type Pages That Display a Person's Team To All Users: |
Company Directory Check Box |
Direct-Line Reports Check Box |
Matrix Reports Check Box |
|
Not available on any of the Org Chart Viewer pages |
|||
|
Company Directory |
Selected |
||
|
Company Directory Direct-Line Reports. |
Selected |
Selected |
|
|
Company Directory Direct-Line Reports Matrix Reports |
Selected |
Selected |
Selected |
|
Company Directory Matrix Reports |
Selected |
Selected |
|
|
Direct-Line Reports |
Selected |
||
|
Direct-Line Reports Matrix Reports |
Selected |
Selected |
|
|
Matrix Reports |
Selected |
See Defining Matrix Team Details.
Common Terms and Elements Used in this Section|
access type |
Defines the reporting relationship used in the Org Chart Viewer for a user and is configured in the Direct Reports API. The Direct Reports API is a common HCM data service that obtains a list of employees (including contingent workers and persons of interest) who report to a specific employee job or position number. This data service determines a manager’s row-level security to individual employees and validates that the user has security access to the employee. |
|
org view type |
Denotes the type of organizational view the system will present to the user when in the Org Chart Viewer. These views are company directory, direct-line reports, and matrix teams. |
|
IM (Instant Messaging) |
A form of real-time direct text-based communication between people using shared clients. |
|
matrix reports or matrix team |
A reporting chain or hierarchy that is not a traditional direct-line reporting relationship. Sometimes referred to as dotted-line reporting relationships. |
|
matrix owner |
The person responsible for a matrix team. This may be the person in the top node of a team org chart or it may be a person that needs to administer the team. |
|
matrix managers orleads |
Employees that have dotted-line reports. These are defined when creating matrix teams. |
Pages Used to Set Up the Org Chart Viewer|
Page Name |
Definition Name |
Navigation |
Usage |
|
HR_TREEBLD_RNCTL |
|
Run the Job Tree Builder process to create or rebuild an entire tree, update a portion of a tree starting from a specific node, or update the tree's source data table without making any alterations to an existing tree. |
|
|
PORTAL_FLDR_ADM |
PeopleTools, Portal, Structure and Content Click the Edit link for the Company Directory folder. |
Update the portal folder definition for the Company Directory. |
|
|
Chart and Profile Field Map |
HRCD_SETUP_FLD_MAP |
Set Up HRMS, Common Definitions, Org Chart Viewer, Chart and Profile Field Map, Chart and Profile Field Map |
Define the org chart and profile field page mappings. Maintain or add additional fields that should be available on the Org Chart and Profile pages of the Org Chart Viewer. |
|
Org View Mapping |
HRCD_FLDMAP_SEC |
Click the Assign to Feature link on the Chart and Profile Field Map page, Mapping tab. |
Select the org view types that can use this field. |
|
Additional Contact Types |
HRCD_ADDTL_CNTCT |
Set Up HRMS, Common Definitions, Org Chart Viewer, Additional Contact Types, Additional Contact Types |
Define additional contact types that will be available to the user on the Profile, Edit Additional Contacts page of the Company Directory. |
|
HRCD_SETUP_GENERAL |
Set Up HRMS, Common Definitions, Org Chart Viewer, Chart and Profile Settings, General Settings |
Define default startup page content and layout settings for each org view type. |
|
|
HRCD_SETUP_PROFILE |
Set Up HRMS, Common Definitions, Org Chart Viewer, Chart and Profile Settings, Profile Content |
Select the contact information, company details, and employee personalization field options that should appear on the Profile page for each org view type. |
|
|
HRCD_SETUP_OC_NODE |
Set Up HRMS, Common Definitions, Org Chart Viewer, Chart and Profile Settings, Org Chart Content |
Select the organization chart field options that should appear on the Org Chart Content page for each org view type. |
|
|
HRMH_MATRIX_DEFN |
|
Define matrix team details such as the matrix ID, effective date, status, and description. Create your own or use an existing reporting relationship for the team. |
|
|
HRMH_TRAN_ASSIGN |
Set Up HRMS, Common Definitions, Org Chart Viewer, Matrix Teams, Action Assignment |
Associate Manager Self-Service transactions to a matrix owner or other managers or leads that are part of the matrix reporting relationship. |
|
|
HRMH_TRAN_LEAD_ASN |
Click the View/Edit Assign button on the Action Assignments page. |
Assign transaction access to matrix owners and leads. |
|
|
HRMH_TRN_ASN_MULT |
Click the Assign Same Access button on the Action Assignments page. |
Assign the same transaction access for multiple components to matrix owners and leads. This page setup is the same as the Assign Transaction Access page. Note. This page uses the same setup as the Assign Transaction Access page. See Assigning Transaction Access to Matrix Owners and Leads. |
Defining Hierarchical Reporting Structures Using the Tree Builder
ProcessAccess the Tree Builder Run Control page (Set Up HRMS, Common Definitions, Org Chart Viewer, Job Tree Builder, Tree Builder Run Control or Set Up HRMS, System Administration, Utilities, Job Tree Builder, Tree Builder Run Control).
Use the Job Tree Builder (HR_TREEBLD_RNCTL) component to create trees. You can use trees to define your reporting structures for the Company Directory and Matrix Teams configured to use a tree.
The Job Tree Builder Run Control page executes the HR_TREEBLD Application Engine process. This process creates trees of jobs using the selected Build Method option.
Warning! Certain characters are inappropriate for use in a URL and
should not be used in the names of trees that you use.
For a list of these characters, see PeopleTools PeopleBook:
PeopleSoft Tree Manager, "Creating Trees," Understanding Steps
to Create Trees, Characters Not Used in Tree Name, SetID, Set Control Value,
and Tree Branch
See Understanding the Steps to Building a Job Tree.
|
Build Action |
Indicate whether you want to create or rebuild an entire tree, update a portion of a tree starting from a specific node or location on a tree, or update the trees source data table without making any alterations to an existing tree. Valid values are:
|
The following table represents the fields within each group box that are available, depending on the Build Action value that is selected:
|
Group Box |
Create/Replace Tree |
Update Existing Tree-Form Node |
Update Process Tables Only |
|
Tree Definition |
|
|
N/A |
|
Hierarchy Source Information |
Build Method |
Build Method |
N/A |
|
Root Node Definition |
|
N/A |
N/A |
|
Start From Node |
N/A |
Start Node |
N/A |
Note. N/A indicates that a field availability is not applicable for this method and group box.
|
Tree Structure ID |
Select a tree structure ID. The value selected in Tree Structure ID field determines the fields that are required to uniquely identify a tree and it tells the process which type of tree it should build when the process is run. For example, Matrix Teams use the MATRIX_BY_JOB tree structure ID and Company Directory trees use the COMPANY_DIRECTORY tree structure ID. Note. If you are building a job tree for the Company Directory or Matrix Teams, you must enter the corresponding Tree Structure ID values. The system uses the HR_JOBTREE_META table to retrieve meta-data from the tree structure ID to auto-populate the following fields on this page: Set ID, Tree Name, Tree EffDt, Tree Description, Category, Target Record, and Exception Table. The tree structure ID also determines the fields that are required in the Tree Definition group box. |
Tree Definition
Many of the fields in this section are available when the Build Action values Create/Replace Tree and Update Existing Tree-From Node are selected.
|
Set ID and Set Control Value |
Enter the set ID and set control value of the tree, if applicable. Availability of this field depends on the configuration of the tree structure ID. For example, these fields are not available when using the COMPANY_DIRECTORY or MATRIX_BY_JOB tree structures required by the Org Chart Viewer, Company Directory or Matrix Teams features. |
|
Tree Name |
Enter the name of the tree. This field is available when the Create/Replace Tree and Update Existing Tree-From Node Build Action values are selected. Note. For the Company Directory to work properly, you need to update the portal definition to use the same tree name you have identified here. |
|
Tree EffDt (tree effective date) |
Enter an effective date for the tree. If a date is not provided, the process will use the system date when creating the tree. This enables you to leave this field blank and set up the run control as a recurring process. This field is required for the Update Existing Tree-From Node build action. When updating an existing tree, you must point the process to a unique tree, so an effective date is required. When you select the Update Existing Tree-From Node build action option, this field provides by default the current tree for the SetID, Set Control Value, and Tree Name field values you entered on this page. SetID and Set Control Value field values may not be required for all tree structure IDs. This field is available when the Build Action values Create/Replace Tree and Update Existing Tree-From Node are selected. |
|
Tree Description |
Enter the description of this tree. This field is available when the Build Action value Create/Replace Tree is selected. |
|
Category |
Enter the tree category for a tree. This field is available when the Build Action value Create/Replace Tree is selected. |
|
Save As Draft |
Select this check box when you want to save the tree in draft mode. To change the status of the tree, run the process again with the Save As Draft check box deselected or save the draft as a valid tree through Tree Manager. This field is available when the Build Action values Create/Replace Tree and Update Existing Tree-From Node are selected. |
Hierarchy Source Information
Use this section to specify how the system should define the hierarchical structure of the tree. The fields in this section are available when the Build Action values Create/Replace Tree and Update Existing Tree-From Node are selected.
|
Build Method |
Select the method the process will use for deriving reporting relationships based on Job Data. This field is available when the Build Action values Create/Replace Tree and Update Existing Tree-From Node are selected. Valid Build Method options are:
|
|
Dept Set ID (department set ID) and Department ID |
Enter the department set ID and department code when you select the Build Method option By Dept Security Tree. The batch process will start from this department in the Dept Security tree and work downwards from that node. When you enter or change the Dept Set ID value, the Department ID field provides the root node of the Dept Security tree as a default value and the Root Node Definition fields default the employee ID associated with the department of the root node. If the department is assigned to a manager position, the Employee ID field will provide by defaulted the lowest employee ID of the active incumbents of that position. |
|
Include Multiple Jobs |
Indicates if the tree is to include nodes for both primary and non-primary jobs. If this field is not selected, only nodes for active primary jobs will be included in the tree. For the tree structure ID COMPANY_DIRECTORY, this value comes from the Chart and Profile Settings - General Settings page and the check box is not available on this page. Note. For the tree structure ID COMPANY_DIRECTORY, if you have selected the Display Multiple Jobs check box on the Chart and Profile Settings - General Settings page, the system will allow additional jobs in the search only when these jobs are present in the tree. Therefore, if you change the Display Multiple Jobs setting on the Chart and Profile Settings - General Settings page, you should run the Job Tree Builder process to ensure that all jobs are captured on the tree. |
Root Node Definition
The fields in this section are available when the Build Action value Create/Replace Tree is selected.
|
Employee ID and Empl Record (employment record number) |
Enter the employee ID and his or her employment record number that should serve as the topmost node, or root node, of the tree. |
Start From Node
The field in this section is available when the Build Action value Update Existing Tree-From Node is selected.
|
Start Node |
Select a node from the tree specified in the Tree Definition section of the page. The Job Tree Builder process will delete any nodes reporting directly or indirectly to the start node specified. Then it will create nodes based on the Build Method value selected.
Note. Depending on how the existing tree was created, an
employee may have multiple nodes in the existing tree. For example, this can
occur when: |
Process Tables
The Target Record and Exceptions Table fields are always display only. These fields are populated based on the Tree Structure ID value. The target record refers to the table containing the source data for all trees created using the selected Tree Structure ID.
Identifying Company Directory Tree Node Queries
PeopleSoft delivers the following Company Directory queries that you can use to analyze the nodes and data for your tree:
|
Query Name |
Purpose |
|
Active Employees not in Tree (HRCD_ACTIVE_EMPS_NOT_IN_TREE) |
Lists active employees (by business unit) who are not in the tree name for which the query is being run. Note. Results depend on the user's row level security settings to employee data. |
|
Co. Directory Batch Exceptions (HRCD_BATCH_EXCEPTIONS) |
Reports the rows in the exceptions table populated by the Job Tree Builder utility for trees based on the COMPANY_DIRECTORY tree structure ID. The batch process populates the exceptions table with active jobs that were not added to the tree (by the batch process). The batch process requires a build hierarchy method and starting employee ID to determine the basis for the node structure in the tree. It is possible that not all employees fit within the structure set for the batch process. For example, if the build hierarchy method determines reporting relationships by (Job) supervisor ID, any active jobs without a supervisor ID will not be added to the tree during the batch process. This query will help identify employees that may need to be added to the tree manually or by an additional run of the batch process. Note. Results displayed depend on the user's row level security settings to employee data. |
|
Nodes reporting to secondary (HRCD_JOB_RPT_TO_NON_PRIM_JOBS) |
Returns a list of nodes representing jobs that report to non-primary (additional) job nodes in the Tree. |
|
Nodes for Inactive Jobs (HRCD_NODES_WITH_INACTIVE_JOBS) |
Returns nodes that represent currently inactive jobs for a given tree name and as of date. These nodes will remain in the tree until the tree is updated manually using Tree Manager or the tree is refreshed using the Job Tree Builder. Note. The nodes reported by this query may have other (child) nodes reporting to them. Note. Results displayed depend on the user's row level security settings to employee data. |
|
All non-primary job nodes (HRCD_NON_PRIMARY_JOBS_IN_TREE) |
Returns a list of all nodes representing non-primary (additional) jobs in the tree. |
Updating the Portal Folder Definition for the Company DirectoryThe portal folder HC_COMPANY_DIRECTORY is delivered to use the tree name COMPANY_DIRECTORY. If your organization uses another name, you will need to update the portal folder definition in order for the Company Directory to work properly to match the tree name you entered when creating your tree.
Access the Folder Administration page (PeopleTools, Portal, Structure and Content, then click the Edit link for the Company Directory folder).
|
Element Definition |
Enter the tree name you used when building the tree for the Company Directory. This tells the Company Directory where to find the structure for the portal breadcrumbs and org chart. For trees based on the tree structure ID of COMPANY_DIRECTORY, the system uses the required Tree Name field to uniquely identify a tree. The delivered field value is COMPANY_DIRECTORY, but the Company Directory will work with any tree name as long as you created the tree based on the COMPANY_DIRECTORY tree structure ID. |
|
Effective Date |
(Optional) Enter the effective date for the tree. If this field is populated, the Company Directory uses the effective date of the Tree Name value identified on the Folder Administration page. If this field is blank, the Company Directory uses the current effective dated tree identified in Tree Name field. Leaving this field blank enables you to run a nightly process that creates a new effective-dated version of the tree. If the Effective Date field is left blank, you do not need to make any changes to the Folder Administration page because the Company Directory will always use the current tree. |
For more information and details on setting up and working with the portal folders, see PeopleTools PeopleBook: PeopleTools Portal Technologies, "Administering Portals," Understanding Folder Administration, SmartNavigation.
Defining the Org Chart and Profile Page Field Mappings
Access the Chart and Profile Field Map page (Set Up HRMS, Common Definitions, Org Chart Viewer, Chart and Profile Field Map, Chart and Profile Field Map).
Use the Chart and Profile Field Map component to define the data elements that are configured in the Chart and Profile Settings pages as well as the Talent Summary setup pages. This component has four tabs that you use to define the rules for fetching and displaying each data element.
Use this tab to map the data elements.
The delivered data that appears on this tab cannot be modified except for Status, Description, and Short Description.
|
Section |
Enter the section that is located on the various pages to which this field should be mapped. Valid values are Company (for the Company Details section), Contact (for the Company Information section), General, and Node (for the Org Chart Node section). Note. The General field option is used for the Talent Summary feature. |
|
Assign to Feature |
Click this link to open the Org View Mapping page and identify which org view types will have access to use this field. If an org view type is not selected, this field will not be available in the Chart and Profile Settings component. |
|
Status |
Indicate if this field is Active or Inactive. Inactive fields will not be available for selection on the setup pages. |
|
Description and Short Description |
Enter the field description that should display in the drop-down list of the setup pages. You select which description to use on the Label tab. |
|
Display Type |
Specify the field format the system should use on the Org Chart Viewer pages. Values are:
The values are specific only to system data rows:
|
Use this tab to identify the source record information specific to the data element.
The delivered data in this tab cannot be modified.
|
Source Record |
Indicate the record from which the field element is derived. |
|
Source Fieldname |
Indicate the field name of the source record from which the field element value is derived. |
|
Parent Record Name |
Identify the intermediate record needed to get from the Org Chart Viewer to the data to be displayed by the respective data element class. This is not necessarily the source record’s parent record. |
|
Display as Xlat |
If the source field is defined to use the Translate Table, then specify if the field should display the long or short name. |
Set label information for the data element that will display in the Org Chart Viewer.
The delivered data that appears on this tab can be modified.
|
Field Label ID |
Enter the field label ID that should be used to display on the Org Chart Viewer pages. For example, the PHONE_CELL field would use the Field Label ID MOBILE to differentiate it from other phone types, such as work phone. |
|
Label Message Set Number and Label Message Number |
Enter the message number for this field mapping. Enter the number that will identify the label that should be used for the field on the Org Chart Viewer pages. Do not use these fields if you have entered a value in the Field Label ID field. |
|
Show Label When No Value |
Select to display the field label even when there is no value to display. For example, If an employee does not have peers, the peers label will still display but with no names listed after it on the Profile page. |
The tab is used to assign the code used for fetching and displaying the data element.
The delivered data in this tab cannot be modified, but new rows can be added.
|
Qualified Package/Class Path |
Displays the qualified package/class in the root package ID that resolves the field mapping element value. |
|
Application Class ID |
Displays the application class ID in the qualified package/class path that resolves the field mapping element value. Note. Any class assigned here must be inherited from HRCD_COMPANY_DIRECTORY:DATA_ELEMENTS: DataElementBase. |
|
Method Name |
Displays the method name in the application class ID that resolves the field mapping element value. Note. Field mapping IDs that are configured to use a method name getElement are using the logic inherited from the base class. |
|
Export Method Name |
Displays the method name in the application class ID that resolves the export data for the field mapping element. An export method is only required when if the logic in the class assigned to method name is not also compatible with export. |
Defining Additional Contact Types for the Org Chart Viewer
Access the Additional Contact Types page (Set Up HRMS, Common Definitions, Org Chart Viewer, Additional Contact Types, Additional Contact Types).
|
Select |
Select the contact types that should be available to the user on the Edit Additional Contacts page when the user updates his or her additional contact information on the Profile page of the Org Chart Viewer. If you deselect an option, this contact type will not be available to the user. The following contact types are delivered selected:
|
|
Contact Type |
Enter a unique four letter code to identify the contact type. This page sorts the contact types by the code. However the Edit Additional Contacts page accessible from the Profile pages of the Org Chart Viewer sorts them by label name. |
|
Label |
Enter the name of this type of contact. This value will appear in the Contact Type drop-down list and as the Label name on the Edit Additional Contacts page. This label will appear on the Profile pages of the Org Chart Viewer when a user selects and enters a value for this contact type. The following text or email contact types are delivered with the system:
The following instant messaging contact types are delivered with the system:
These labels are display-only for the user with the exception of the Other field. The contact type Other enables users of the Company Directory to enter their own label or field description for a contact type. |
|
Value Format |
Select the format the system should use for this field. Options are Email, Instant Message, Text, and Text or Email. |
|
IM Protocol (instant messaging protocol) |
Identify the IM protocol that should be associated with this IM contact type. Valid values include GTALK, MSN, XMPP, and YAHOO. This field is available when you select Instant Message from the Value Format field. With the delivered IM contact types, the field displays the associated IM protocol type. |
|
Add Row |
Click this button to add additional contact types in the Employee Options group box. This will open up free-form text fields in which the administrator can enter the field labels and determine the value format that will be available to the user. |
Accessing the Setup Pages for an Org Chart View Type
Access the Chart and Profile Settings page (Set Up HRMS, Common Definitions, Org Chart Viewer, Chart and Profile Settings, Chart and Profile Settings search page).
You use the Chart and Profile Settings component to identify the setup of the Org Chart Viewer pages for each org view type.
When users accesses the Org Chart Viewer component, the system presents them with up to three types of organizational views through the use of folders and tabs. These org view types are:
Company Directory — a view of the Company Directory.
Direct-Line Reports — a view of a user’s direct-line reports.
Matrix Reports — views of the matrix teams associated with a user.
The Chart and Profile Settings component consists of three pages: General Settings, Profile Content, and Org Chart Content.
Each Org View Types uses a similar setup format, however, some fields are hidden, depending upon the Org View Type value you select.
|
Org View Type |
Select from one of the list of valid values to define the setup for that specific org view type. Valid values: Company Directory - 8.52, Direct-Line Reports, or Matrix Reports. |
Defining General Settings for the Org Chart View Types
Access the General Settings page (Set Up HRMS, Common Components, Org Chart Viewer, Chart and Profile Settings, General Settings).
Field Availability on the General Settings Page by Org View Type
This table lists the field elements available on the Chart and Profile Settings - General Settings page according to the Org View Type value you select:
|
Page Element |
Company Directory 8.52 |
Direct-Line Reports |
Matrix Reports |
|
Display Multiple Jobs |
Yes |
N/A |
N/A |
|
Show Domain Name in Emails |
Yes |
Yes |
Yes |
|
Display Matrix Teams |
Yes |
Yes |
Yes |
The Start Page Content group box field elements:
|
Page Element |
Company Directory 8.52 |
Direct-Line Reports |
Matrix Reports |
|
Search Box Only |
Yes |
N/A |
N/A |
|
Show User’s Information |
Yes |
N/A |
N/A |
|
Show Other Person’s Info |
Yes |
N/A |
N/A |
The following field elements are available for all Org View Types in the Layout group box:
Profile First
Org Chart First
The following field elements are available for all Org View Types in the Data Export group box:
Allow Export to MS Excel-Org Chart
Allow Export to MS Excel-Profile
Allow Export to MS Visio-Org Chart
General Settings
Use the first several check boxes on the General Settings page to specify the amount of detail the system should display about a person.
|
Display Multiple Jobs |
This field is available for the Company Directory org view type. Select to have the Company Directory search feature return all multiple job or additional job rows for a person. Deselect this option to have the system display the primary job only for the person. When you select this check box, the Job Title fields on the Profile Content and Org Chart Content pages will be automatically selected. Also, the Company Directory - Profile page will display the Additional Jobs field in the Company Details section. Note. Selecting the Display Multiple Jobs check box will allow additional jobs in the search only when these jobs are present in the tree. You may need to refresh the tree using the Job Tree Builder component or update the tree manually in Tree Manager. See Defining Hierarchical Reporting Structures Using the Tree Builder Process. |
|
Show Domain Name in Emails |
This field is available for all of the org view types. Select this check box to have the domain name appear in the person's email. The domain name is the text that appears after the @ sign in an email address. Deselect this check box to not have the system display the domain name. This will save space on the page and avoid redundancy, such as when all employees have the same domain name in their business email address. With this option deselected, the full email address still appears when the user places the mouse over an email address field. Note. The selection you make here does not affect the email addresses entered by end-users in the Additional Contact Information section of the Profile page. |
|
Display Matrix Teams |
This field element is available for a all org view types. Select this check box to enable the user to view or export hierarchical reporting details for a matrix team. See the Data Export group box on this page. |
Start Page Content
These fields are available for the Company Directory Org View Type.
Use this section to specify the default settings for the Company Directory start page. Choose from one of the three options to define what information the system should display to the user when first accessing the Company Directory. Users can override this default setting by defining their own preferences.
|
Search Box Only |
Select this option to display the search field only, where you can search by name, job title, department, or email for any active person in the system. You will also have the option to use an advanced search, where you can enter additional search criteria. |
|
Show User's Information |
Select this option to have the system display the information of the user accessing the Org Chart Viewer pages. The user will appear as the focus of the node or Profile page, depending on the layout setting selected. The search field is also available at the top of the page when you select this option. |
|
Show Other Person's Info |
Select this option and enter a person’s employee ID in the accompanying field to have the system display the information of this employee on the startup page. The identified person will appear as the focus of the node or the Profile page, depending on the layout setting selected.
Note. In order to populate this field, a tree must already
be created and the tree name must match the Tree Name provided on the portal
folder definition HC_COMPANY_DIRECTORY. |
See Defining Org Chart Viewer Personal Preferences.
Layout
These fields are available for all Org View Types.
Use this section to define which page of the Org Chart Viewer pages the system should display first. The value you select here will determine the page order. The user can override these default settings by defining personal preferences.
|
Profile First |
Select this option to have the system display the Profile page for the focus person. The Profile page displays detailed information about the person, such as contact information, company details, and personalized links and information. This option will also display the Profile page as the first page in the component. |
|
Org Chart First organizational chart first |
Select this option to have the system display the Org Chart page. The Org Chart page displays a multi-leveled graphical representation of the focus person’s reporting structure, as well as high-level details about this person. This option will also display the Org Chart page as the first page in the component. |
See Defining Org Chart Viewer Personal Preferences.
Data Export
These field elements are available for all Org View Types. In order to use the data export functionality, Microsoft Excel and Microsoft Visio must be installed and enabled on the Installation Table - Third Party/System page.
See Defining Parameters for Using Third-Party Applications.
Use this section to enable exporting options for the user.
|
Allow Export to MS Excel (allow export to Microsoft Excel) – Org Chart and Profile |
Select these check boxes to enable the user to export profile or org chart information to a Microsoft Excel spreadsheet. Users will be able to export the following hierarchical reporting details:
|
|
Allow Export to MS Visio – Org Chart |
Select this check box to enable the user to export org chart information to a Microsoft Visio drawing. |
Identifying Fields on the Profile Page for the Org Chart View Types
Access the Profile Content page (Set Up HRMS, Common Definitions, Org Chart Viewer, Chart and Profile Settings, Profile Content).
The Profile page in the Org Chart Viewer component will display detailed information about a person using the fields you select on this page for the individual org view types.
The field elements on this page are available for all org view types unless otherwise specified.
Profile Display Options
|
Initialize |
This field element is available for the following org view types: Direct-Line Reports and Matrix Reports. Click to have the system provide by default the same settings you established for the Company Directory org view type. |
|
Photo |
Select to have the photo of the person appear on the Profile page, if available. When you select this option, you must select the Default Photo from HR System check box, Allow User to Add Own Image check box, or both selected. If you deselect this check box, the Default Photo from HR System and Allow User to Add Own Image check boxes will not be available. |
|
Default Photo from HR System |
Select this option to have the system use the HR photo stored on the Identification Data - Employee Photo page for a person. You can use this option in conjunction with the Allow User to Add Own Image check box. |
|
Allow User to Add Own Image |
Select this option to enable the use to upload his or her own picture. This option can be used in conjunction with the Default Photo from HR System check box. Note. As delivered, users can upload images of type JPEG with a maximum file size of 256KB. For more information on field images, see PeopleTools PeopleBook: PeopleSoft Application Designer Developer's Guide, "Creating Field Definitions," Specifying Image Field Attributes. |
|
Instant Message Presence Icon |
Select this check box to have the Profile page display the IM icon for a person, if an IM address exists for a person. Store instant message IDs for a person on the Contact Information page of personal data in HR. |
|
IM Protocol (instant messaging protocol) |
Identify the IM protocol that the system should use when displaying the IM icon. Valid values include GTALK, MSN, XMPP, and YAHOO. If a person does not have this IM protocol type defined in their personal data, the icon will not display for this person. This field is available when you select the Instant Message Presence Icon check box. |
|
IM Domain |
Displays the Instant Message domain associated with the IM Protocol you selected for all protocols except XMPP. For XMPP, you must select the value of the XMPP server that has been defined by your organization. See PeopleTools: PeopleSoft MultiChannel Framework, "Configuring Instant Messaging in PeopleSoft MultiChannel Framework" |
Contact and Organizational Content
Select fields in this section that should appear on the left side of the Profile page. This information comes from the HR tables. The field elements in this section are available for all org view types unless otherwise specified.
|
Contact Information |
Select up to nine contact fields that will appear in the Contact Information section of the Profile page. The Profile page will display the fields in the order you select them on this page. Valid values are:
These options are available for line numbers 3-8. Select the fields and the order in which you want the system to display them on the Profile page.
Values specific to the Direct-Line Reports and Matrix Reports org view types:
Note. * These field elements are considered to be sensitive data. Sensitive data will only display if the employee reports to the signed-in user, hence the user will only see this information for his or her subordinates. |
|
Company Details |
Select up to five company details fields that will appear in the Company Details section of the Profile page. The Profile page will display the fields in the order you select them on this page. Valid values for all org view types are:
Value specific to the Company Directory - 8.52 org view type: Additional Jobs Value specific to the Company Directory - 8.52 and Direct-Line Reports org view types: Teams Value specific to the Direct-Line Reports org view type: Salary Plan/Grade/Step Note. Salary Plan/Grade/Step is considered to be sensitive data. Sensitive data will only display if the employee reports to the user, hence, the user will only see this information for his or her subordinates. Value specific to the Direct-Line Reports and Matrix Reports org view types: Reports Count - Total Values specific to the Matrix Reports org view type:
When there is an empty position, only these values will display, if selected:
|
|
Allow Export |
Select this check box to enable the user to export this field content. |
See Updating a Personal Photo.
Employee Personalizations
Use information in this section to determine which personalization group boxes should appear on the right side of the Profile page.
|
Display Additional Contacts |
Select this option to have the Additional Contact Information section available on the Profile page. When this option is selected, the system will enable the user to select from the different contact types you specify on the Additional Contact Types page. If you deselect this option, the Additional Contact Information section will not be available on the Profile page. |
|
Go to Define Additional Contact Types |
Click this link to access the Additional Contact Types page to add or review contact types. See Defining Additional Contact Types for the Org Chart Viewer. |
|
My Profile Links |
Select this option to have the My Profile Links section available on the Profile page. Profile links enable the user to define shortcut links to other web sites. When you select this option, the Show My Links Shortcut Icon check box on this page will be available for selection. If you deselect this option, the My Profile Links section will not be available on the Profile page. |
|
Show My Links Shortcut Icon |
Select this check box to have the shortcut icons associated with target web addresses appear next to the label entered by the user. Some sites may or may not have a default shortcut icon. For example, when this check box is selected, and the user enters the web address for Oracle (http://oracle.com), the following icon will appear next to the label name. This option is available when the Display My Profile Links check box is selected. |
|
Personal Statement |
Select this option to have the Personal Statement section available on the Profile page. This functionality enables the user to enter personalized text. Users will update their personal statement using the Rich Text Editor. See PeopleTools PeopleBook: Using PeopleSoft Applications, "Using PeopleSoft Application Pages," Working With the Rich Text Editor If you deselect this option, the Personal Statement section will not be available on the Profile page. |
Identifying Fields on the Org Chart Page for the Org Chart View Types
Access the Org Chart Content page (Set Up HRMS, Common Definitions, Org Chart Viewer, Chart and Profile Settings, Org Chart Content).
The field elements on this page are available for all org view types unless otherwise specified.
Node Display Options
|
Initialize |
This field element is available for the following org view types: Direct-Line Reports and Matrix Reports. Click this button to have the system provide by default the same settings you established for the Company Directory org view type. |
|
Show Siblings of Focus Node |
Select this check box to have the system display peers within the same reporting structure level of the focus person. Deselect this check box to show only the focus person at the middle level of the organizational chart. The report to and subordinate nodes will still display for this person, if applicable. |
|
Photo |
Select to have a photo of the person appear within the node box of the person on the Org Chart page. When you select this option, the Image Height (pixels) field becomes available. The photo that appears in a node depends upon the settings you have defined on the Profile Content page. |
|
Image Height (pixels) |
Enter size in which the height of the picture should appear within the node. This option is available when you select the Photo check box. |
|
Instant Message Presence Icon |
Select this check box to have the Profile page display the IM icon for a person, if IM information exists in the HR person model. Instant Message IDs for a person can be stored on the Contact Information page of personal data in HR. |
|
IM Protocol (instant messaging protocol) |
Identify the IM protocol that the system should use when displaying the IM icon. Valid values include GTALK, MSN, XMPP, and YAHOO. If a person does not have an IM protocol type defined in his or her personal data, the icon will not display for this person. This field is available when you select the Instant Message Presence Icon check box. |
|
IM Domain |
Displays the Instant Message domain associated with the IM Protocol you selected for all protocols except XMPP. For XMPP, you must select the value of the XMPP server that has been defined by your organization. See PeopleTools: PeopleSoft MultiChannel Framework, "Configuring Instant Messaging in PeopleSoft MultiChannel Framework" |
Org Chart Node Attributes
|
Org Chart Node Attributes |
Select up to eight field attributes that will display in the individual nodes of the chart on the Org Chart page. The fields within the node will appear in the order of the attribute line number. Valid values for line numbers are:
These values are available for line numbers 4-6.
These options are specific to the Company Directory org view type.
These values are specific to the Direct-Line Reports and Matrix Reports org view types:
When there is an empty position, only these values will display, if selected:
Attribute number 8 enables you to display either the Teams or Other Teams link in a node for a person who is part of a matrix team. If the person is not part of a matrix team, the link will not appear in the node. Valid values are:
|
|
Allow Export |
Select this check box to enable the user to export this field content. |
Defining Matrix Team Details
Access the Matrix Team page (Set Up HRMS, Common Definitions, Org Chart Viewer, Matrix Teams, Matrix Team or Workforce Administration, Define Matrix Team, Matrix Team, Matrix Team).
Matrix Details
|
Owner |
Select the employee ID for the person who is the owner of this matrix team. The owner is the top node or person of the matrix team or org chart when creating a manual matrix team. When the matrix team is built from an existing hierarchy, the Owner is Top of Hierarchy check box must be selected on this page to have the owner appear in the top node. Note. An owner may or may not have access to administer manager self service transactions for all of their dotted-line reports through the Action link in the Org Chart Viewer pages. This depends on transaction assignment definitions. See Assigning Transaction Access to Matrix Owners and Leads. |
|
Owner Title |
Displays the job title for the person you entered in the Owner field. If this person holds multiple jobs, the system will display the job title of the primary job. If the person is associated with a position, the page will display the position title. You can change the title but this information will not be written back to Job Data or Position Management. |
|
Show in Viewer for Owner Only |
Select to have this matrix team viewable as an Org Chart Viewer – <matrix report name> tab folder to only the owner of this matrix. Other members of this matrix team will not see this folder tab when this option is selected. |
Display Options – Allow Display Across Features
|
Allow Access |
Select the org view types for which a user will be able to access and view the matrix team. Options are Company Directory - 8.52, Direct-Line Reports, and Matrix Reports. By selecting a check box, you make the matrix public to other users under the Teams or Other Teams link on the Org Chart or Profile pages for that org view type. Deselect an option to keep the matrix team private for that org view type. Note. You must also select the Display Matrix Teams check box on the General Settings page for the same org view types that should display this matrix ID. For example, if Company Directory - 8.52 is selected here and the Chart and Profile Settings component for the Company Directory - 8.52 org view type is set up to view teams, this matrix team will appear in the Teams menu drop-down list on the Company Directory pages for employees associated with this team. You would also be able to search for this matrix team within the Company Directory. |
See Understanding and Viewing Matrix Teams.
See Identifying Fields on the Profile Page for the Org Chart View Types.
See Identifying Fields on the Org Chart Page for the Org Chart View Types.
Hierarchy Definition
|
Build Manually |
Select this option to have the Reporting Relationship group box display and enter employee names manually into a team matrix. |
|
Build with Existing Hierarchy |
Select this option to have the Source (Existing Hierarchy) group box display. This will enable you to select an access type or a tree as the basis for your matrix hierarchy. |
Reporting Relationship
This section is available when you select Build Manually as a hierarchy definition. Employees that have others reporting to them are considered leads and will be available to you when you assign transactions to managers and leads through the Action Assignment page.
|
Employee ID, Name, and Title |
Enter the employee IDs of those whom you want to include in this matrix team. The name and title will display. The job title is provided by default from the employee’s job code. You can override the job title, but doing this will not update the Job Data information in HR for the person. |
|
Dotted Line to Empl ID and Name |
Enter the employee ID of the person who should have a dotted-line report to the matrix owner. The people you enter in this field are considered managers or leads because they have others reporting to them. Valid values for this field come from other employee IDs associated with this matrix team. To have an employee available to you in this field, add the employee ID in the Employee ID or the Owner field. Note. A manager or lead may or may not have access to administer manager self service transactions for all of their dotted-line reports through the Action link in the Org Chart Viewer pages. This depends on transaction assignment definitions. See Assigning Transaction Access to Matrix Owners and Leads. |
Source (Existing Hierarchy)
This section is available when you select Build with Existing Hierarchy as a hierarchy definition.
The matrix definition is built dynamically at runtime. Employees that have others reporting to them are considered managers or leads and will be available to you when you assign transactions to managers and leads through the Action Assignment page.
|
Owner is Top of Hierarchy |
Select if the owner of this matrix team should be placed at the top of the hierarchy. This option is selected automatically when you select an access type of By Group ID or By Dept Security Tree. |
|
Use Access Type |
Select this option to choose an access type as the basis for the matrix hierarchy. |
|
Access Type |
This field is available when you select the Use Access Type option. Valid options are:
See Common Terms and Elements Used in this Section. Note. The system issues a warning message when you select and access a type that does not match your Installation table settings, such as Position Management. |
|
Group ID |
This field is available when you select By Group ID as the access type. Groups are defined using the Group Build feature. A group must be available for manager self service through the group definition and then assigned access to Matrix Teams (HRMH_MATRIX_SETUP) component though Group Build security. |
|
Force Group Refresh |
This field is available when you select By Group ID as the Access Type value and enter a group ID. This enables the user to refresh a group at the matrix level. |
|
Starting Employee ID |
This field is available when you select the Use Access Type option and specify any Access Type value except By Group ID. The system will display all currently active employees. |
|
Starting Position Number |
This field is available when you select any of the Position Management related access types: By Part Posn Mgmt Dept Mgr ID, By Part Posn Mgmt Supervisor, or By Reports To Position. |
|
Use Tree |
Select this option to use an existing tree assigned to the MATRIX BY JOB tree structure. See Defining Hierarchical Reporting Structures Using the Tree Builder Process. |
|
Tree Name |
Enter the tree name that will serve as the basis for your matrix team. The tree you enter here must use the MATRIX_BY_JOB tree structure. |
|
Start Tree Node |
Select a node from the tree. The node can be from anywhere within the selected tree. |
Note. A matrix will become invalid under these circumstances:
- An employee of a manually built matrix has an inactive status in HR.
- When a starting employee ID is no longer a member of a prebuilt existing
hierarchy.
- When a starting employee ID, position number, or tree node is no longer
a lead due to an external hierarchy change and that lead is allocated access
to transactions via the matrix.
- The transaction defined is no longer available through content services.
- The approval override transaction on the Action Assignment page is
no longer associated with the component in Approval Workflows.
- The approval override process definition on the Action Assignment
page is no longer associated with the transaction in Approval Workflows and
therefore the component.
An owner, manager, or lead may or may not have access to administer manager self service transactions for all of their dotted-line reports through the Actions link in the Org Chart Viewer pages. This depends on transaction assignment definitions.
See Understanding and Viewing Matrix Teams, Assigning Transaction Access to Matrix Owners and Leads.
Associating Manager Self-Service Transactions to a Matrix
Access the Action Assignment page (Set Up HRMS, Common Definitions, Org Chart Viewer, Matrix Teams, Action Assignment).
Use this page when a matrix owner or lead within the matrix team should have the capability to administer manager self service transactions for any dotted-line report.
|
Component Name and Service Label |
Enter the manager self service transaction that should be available to this matrix team. The page displays the name of the transaction. |
|
Approval Supported |
The field displays Yes when the transaction uses an approval process. These transactions are defined in Approval Workflow as having content service IDs. You can access this information by navigating to Set Up HRMS, Common Definitions, Approvals, Workflow Transactions. The content service is defined on the Details2 tab to the approval transaction in the Org Viewer Service ID column. Components that are delivered with approvals are:
|
|
Override Approval Workflow |
This field is available when the transaction is associated with more than one process definition. Note. For a complete list of delivered transaction registry definitions, access the Register Transactions component by navigating to Set Up HRMS, Common Definitions, Approvals, Approvals Setup Center, Register Transactions. For more information about approvals, see PeopleSoft PeopleBook: Approval Framework, “Understanding the Approval Framework”. |
|
Approval Transaction, Approval Definition ID, and Definition Description |
Displays the approval transaction associated with this component, if applicable. The component associated with this transaction is where requests are approved or denied. Define approval processes by navigating to Set Up HRMS, Common Definitions, Approvals, Approval Process Setup. When you select the Override Approval Workflow check box, this field becomes available for you to select another approval transaction. |
|
View/Edit Assign |
Click the button to access the Assign Transaction Access page and assign transaction access to the owner or leads within the matrix team. |
|
Assign Same Access |
Select multiple components and click this button to access the Assign Same Transaction Access page. |
See Also
Understanding and Viewing Matrix Teams
Assigning Transaction Access to Matrix Owners and Leads
Access the Assign Transaction Access page (click the View/Edit Assign button on the Action Assignment page).
|
Allow Owner Access |
Select to allow the transaction to be assigned to the owner of this matrix team. |
|
Lead Access |
Identify matrix team leads to which you want to assign transaction access. Options are:
|
|
Add All Leads |
Click to automatically list all leads as having access to this transaction. This button is available when you select Manually Add Lead Access. Use the Delete button to remove those who should not be on this list. |
|
Empl ID |
Enter the leads that should have access to this transaction. Valid values come from the Matrix Team page for this matrix and are employees that have others reporting to them. |
Note. The Assign Same Transaction Access page setup is identical to this page but enables you to assign access to multiple component transactions simultaneously. You access the Assign Same Transaction Access page by selecting multiple components on the Action Assignment page and clicking Assign Same Access.
See Also
Understanding and Viewing Matrix Teams