18 Verifying and Implementing Community-Gadgets
Having deployed Community-Gadgets, you will verify the installation and display its interfaces by authorizing users to work with the Community WEM application and the Gadgets WEM application. You also have the option to integrate Community-Gadgets with the WebCenter Sites Contributor interface to deploy gadgets and widgets directly from the Contributor interface, as well to customize the deployed widgets.
This chapter contains the following sections:
-
Section 18.2, "Registering the Community-Gadgets Application"
-
Section 18.3, "Authorizing Users to Access Community and Gadgets Interfaces"
-
Section 18.4, "Integrating Community-Gadgets into the WebCenter Sites Contributor Interface"
18.1 Verifying Community-Gadgets URLs
In this section, you will verify that your newly installed Community-Gadgets application is operating correctly.
Note:
The URLs in this section are used only to verify that Community-Gadgets is correctly installed. The URLs cannot be used to invoke the Community WEM application or the Gadgets WEM application for management operations (an error will be displayed).For security, after completing the verification process, ensure that the URLs cannot be accessed externally. Internal access, however, may still be helpful for troubleshooting.
-
Start application servers in the following order:
Note:
In this section, we first start all servers, then verify all the URLs. For simplicity, you can start and test each server one at a time. This way, if a problem exists, you can correct it before starting the rest of the servers.-
Start the WebCenter Sites load balancers (assuming your installation is clustered).
-
Start the WebCenter Sites application servers (production and management).
Note:
Ensure that the servers are properly started and you can login as the user provided to Community-Gadgets on both servers.It is recommended that WebCenter Sites on the production system is backed up before continuing with the Community-Gadgets installation.
-
Start the Community-Gadgets load balancers (assuming your installation is clustered).
-
Start a single Community-Gadgets (production) application server instance.
Note:
Monitor all logs on WebCenter Sites on the production system and the Community-Gadgets production server and applications. Resolve errors reported in the logs before continuing. Failing to do so may leave Community-Gadgets in an unknown state. -
Start the remaining Community-Gadgets (production) application server instances.
-
Start a single Community-Gadgets (management) application server instance.
-
Start the remaining Community-Gadgets (management) application server instances.
-
-
At this point, all instances should be running, and you can verify the individual URLs, and then test the load balancer.
-
Verify the following for all deployed instances of Visitors CAS:
-
Verify that the Visitors CAS application login form is displayed. You cannot yet log in:
http://<production_cg_host>:<production_cg_port>/<production_cg_cas_context root>/login
For example:
http://192.0.2.1:8080/cas/login
-
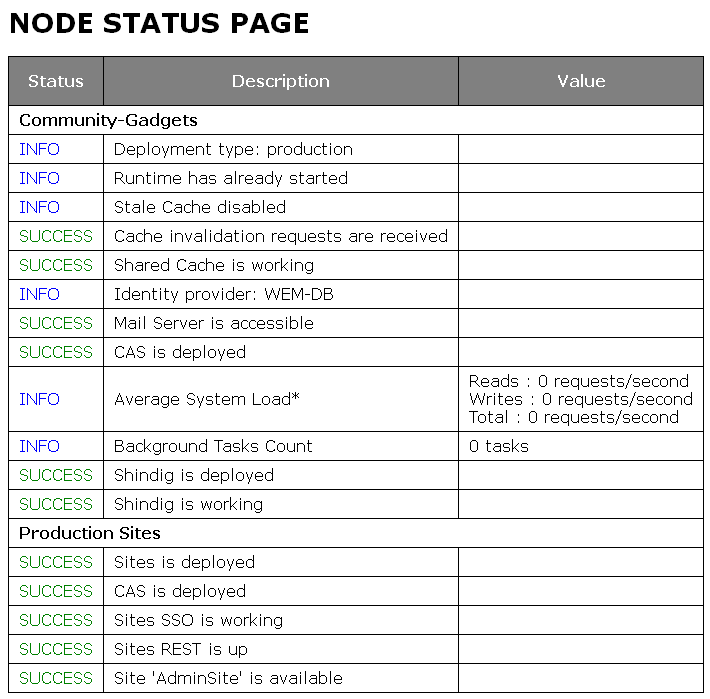
Verify the status of the Community-Gadgets application on each node of the production and management systems. It is best to start with production, then move to management:
http://<cg_node_host>:<cg_node_port>/<cg_context_root>/status
For example:
Node1:
http://192.0.2.1:8080/cg/statusNode2:
http://192.0.2.1:8080/cg/statusA screen similar to Figure 18-1 should be displayed with all the options showing either
SUCCESSorINFO. If any option displays another status (ERRORorWARNING) or the page does not load within 90 seconds, then you cannot continue. If the status for Lucene is "Lucene is not working", or the "Processing..." status is shown for more than 2 minutes, then you cannot continue. Configure Lucene engine on the WebCenter Sites production instances, as described in the section "Configuring Lucene Parameters" of the Oracle Fusion Middleware WebCenter Sites Developer's Guide.Note:
If you see any errors or warnings, review the Community-Gadgets log file and the application server's logs for details on what has failed.
-
-
On each Management node, log in to the Community user interface as a general administrator (the default user is
fwadmin. If you entered the credentials of a different administrator during the installation process, use those credentials):http://<cg_node_host>:<cg_node_port>/cg/admin/start.jsp?siteid=<Site to which Community WEM application will be assigned>
For example:
http://192.0.2.1:90/cg/admin/start.jsp?siteid=avisports
Once logged in, you should see a message stating that you did not access the Community user interface through the WEM Framework (Figure 18-2).
Figure 18-2 Community User Interface Accessed from Outside the WEM Framework
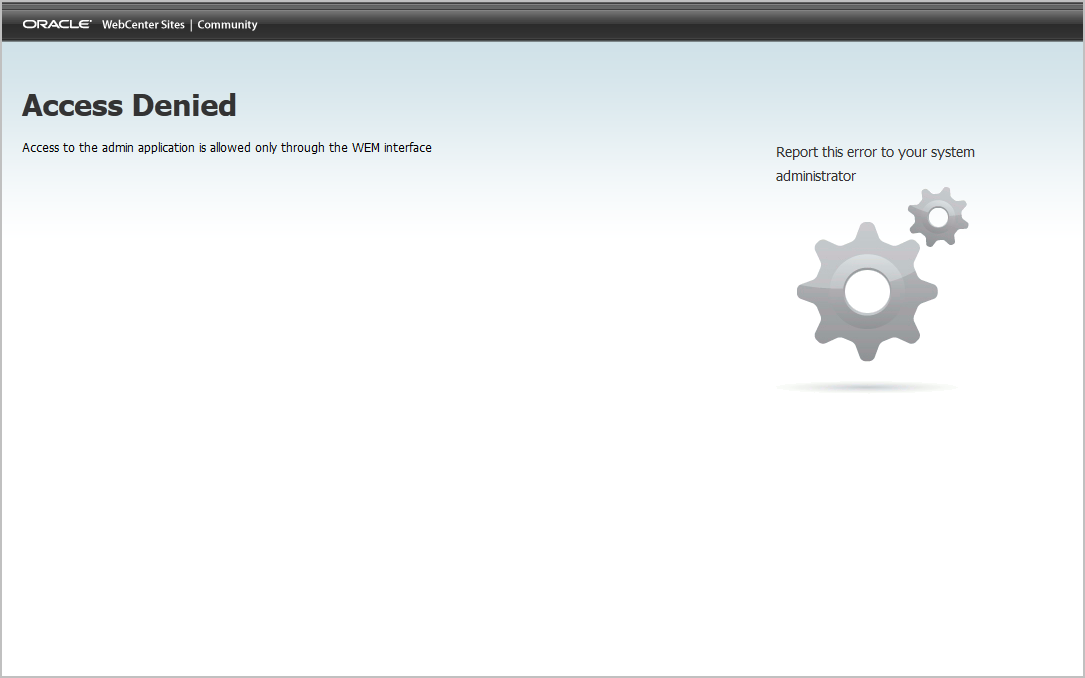
Description of ''Figure 18-2 Community User Interface Accessed from Outside the WEM Framework''
Note:
If the Community user interface is not displayed, or you get an error message other than"Access Denied," then a login error exists and you cannot continue.If any failures are seen, review the Community-Gadgets application's log file and the application server's logs for details on what has failed.
-
On each management node, log in to the Gadgets administrator interface (Global Catalog) as a general administrator (the default user is
fwadmin. If you entered the credentials of a different administrator during the installation process, use those credentials):http://<cg_node_host>:<cg_node_port>/cg/admin-gadgets/start.jsp?siteid=<Site to which Gadgets WEM application will be assigned>
For example:
http://192.0.2.1/cg/admin-gadgets/start.jsp?siteid=avisports
Once logged in, you should see a message stating that you did not access the Gadgets administrator interface through the WEM Framework (Figure 18-3).
Figure 18-3 Gadgets Administrator Interface Accessed from Outside the WEM Framework
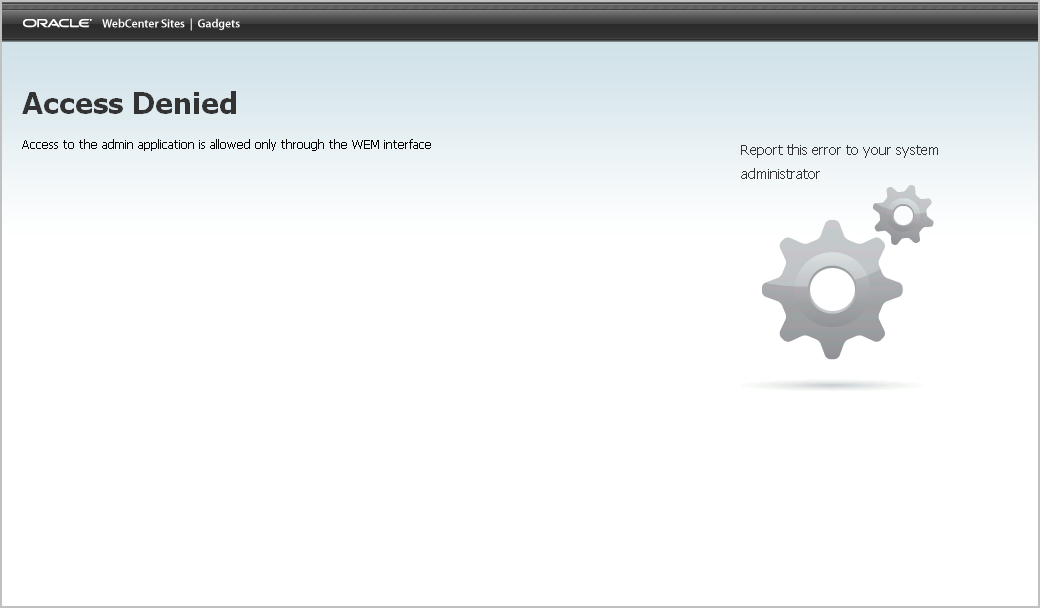
Description of ''Figure 18-3 Gadgets Administrator Interface Accessed from Outside the WEM Framework''
Note:
If the Gadgets administrator interface is not displayed, or you get an error message other than"Access Denied," then a login error exists and you cannot continue.If any failures are found, review the Community-Gadgets log file and the application server's logs for details on what has failed.
18.2 Registering the Community-Gadgets Application
During first launch (when the Community-Gadgets application server is first started), Community-Gadgets registers itself with the management WebCenter Sites instance. It creates two WEM applications:
-
Community – This WEM application provides the Community user interface.
-
Gadgets – This WEM application provides the Gadgets user interface and the Gadgets administrator interface (Global Catalog).
Your next steps are to display the interfaces of the Community WEM application and the Gadgets WEM application. For instructions, continue to Section 18.3, "Authorizing Users to Access Community and Gadgets Interfaces."
18.3 Authorizing Users to Access Community and Gadgets Interfaces
In this section, you will display the Community and Gadgets interfaces by authorizing users to work with the Community WEM application and Gadgets WEM application, and logging in as the users to access the interfaces.
Note:
Detailed information about user authorization is available in the Oracle Fusion Middleware WebCenter Sites Administrator's Guide. For a quick start, follow the steps below.Throughout this section, you will be using the WEM Admin interface to authorize users as follows:
-
Assign the Community WEM application and its users to the same site (
<app_site>)via a common role. Sharing at least one role to an application and a user on the same site grants the user access to the application on that site. -
Assign the Gadgets WEM application and its users to the same site (
<app_site>)via a common role. -
Assign the Gadgets WEM application to
<base_site>to display the Gadgets administrator interface (Global Catalog).
To authorize users, complete the following steps:
Note:
If your management WebCenter Sites system is using read-only LDAP, manually add theModerator role to the LDAP database. This role is required to give users moderator rights in the Community application. All other Community-Gadgets roles (GeneralAdmin, SiteAdmin, and Designer) are pre-defined in WebCenter Sites.-
Assign the Community WEM application to
<app_site>:-
Starting with the Apps page of the WEM Admin interface, point to the Community application name and select Manage App.
-
In the Manage App screen, click Assign to Sites.
-
Select the
<app_site>site to which you are assigning the Community WEM application. -
Select the following roles for the Community application: GeneralAdmin, SiteAdmin, Moderator, and Designer
-
-
Assign the Gadgets WEM application to
<app_site>:-
Starting with the Apps page of the WEM Admin interface, point to the Gadgets application name and select Manage App.
-
In the Manage App screen, click Assign to Sites.
-
Select the
<app_site>site to which you are assigning the Gadgets WEM application. -
Select the following roles for the Gadgets application: GeneralAdmin, SiteAdmin, and Designer.
-
-
Assign the Gadgets WEM application to
<base_site>:-
Starting with the Apps page of the WEM Admin interface, point to the Gadgets application name and select Manage App.
-
In the Manage App screen, click Assign to Sites.
-
Select the
<base_site>site to which you are assigning the Gadgets WEM application. -
Select the GeneralAdmin role for the Gadgets application.
-
-
Authorize users to access the Community WEM application:
-
In the menu bar, select Sites.
-
Point to the site to which the Community WEM application is assigned and select Manage Site Users.
-
In the Manage Site Users screen, complete one or both of the following steps, as necessary:
-
To assign a user to the site and assign roles to the user, click Assign Users.
-
To assign roles to an existing site user, point to the user's name and select Assign Roles to User.
In the Assign Roles to User screen, select at least one of the following roles: GeneralAdmin, SiteAdmin, Designer, Moderator.
Click Save and Close.
Note:
If you assigned theSiteAdminrole to any of the users, verify that the users are members of the REST security group calledSiteAdmin_AdminSite. For instructions on adding a user to a REST security group, see the part, "Administering the Web Experience Management Framework" in the Oracle Fusion Middleware WebCenter Sites Administrator's Guide.
-
-
-
Authorize users to access the Gadgets WEM application:
-
In the menu bar, select Sites.
-
Point to the site to which the Gadgets WEM application is assigned and select Manage Site Users.
-
In the Manage Site Users screen, complete one or both of the following, as necessary:
-
To assign a user to the site and assign roles to the user, click Assign Users.
-
To assign roles to an existing site user, point to the user's name and select Assign Roles to User.
In the Assign Roles to User screen, select at least one of the following roles: GeneralAdmin, SiteAdmin, Designer for
<app_site>. Select GeneralAdmin role for<base_site>. For permissions associated with each role, see the chapter, "Welcome to the Oracle WebCenter Sites: Community Application" in the Oracle Fusion Middleware WebCenter Sites User's Guide.Click Save and Close.
-
Note:
If you assigned theSiteAdminrole to any of the users, verify that the users are members of the REST security group calledSiteAdmin_AdminSite. For instructions on adding a user to a REST security group, see the part, "Administering the Web Experience Management Framework" in the Oracle Fusion Middleware WebCenter Sites Administrator's Guide. -
-
Verify each user's access to the Community WEM application on
<app_site>as follows:-
Log in to WebCenter Sites as the Community user that you authorized in the steps above.
-
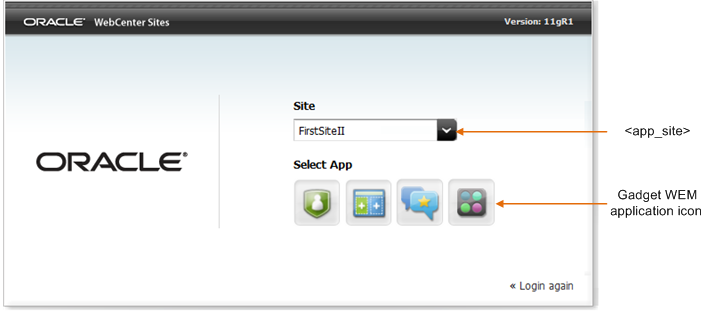
Select
<app_site>and click the Community application icon, highlighted in Figure 18-4.Figure 18-4 Site Drop-down List and Community Application Icon
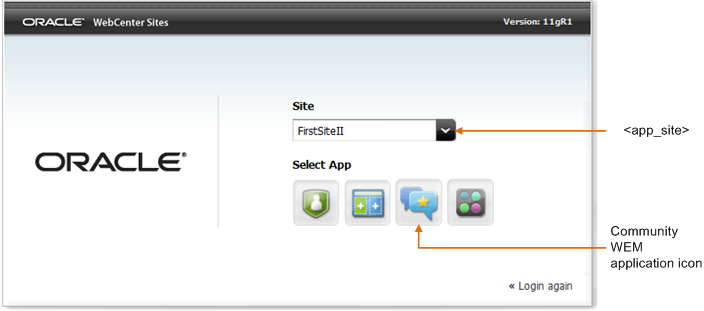
Description of ''Figure 18-4 Site Drop-down List and Community Application Icon''
-
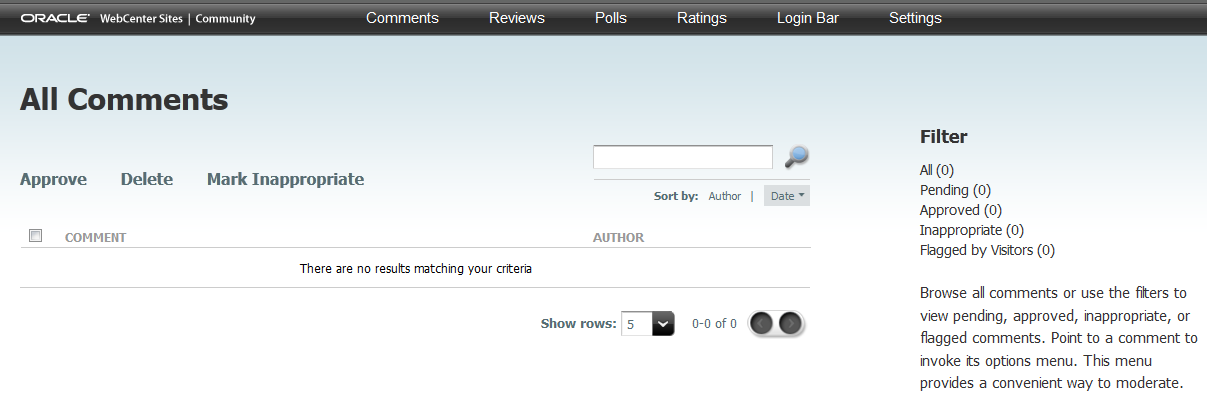
The "All Comments" screen is displayed (Figure 18-5). For users with the Designer role, the "All Polls" screen is displayed. If you see the named screen, you have completed authorizing the current user to access the Community interface. Continue to the next step.
-
-
Verify each user's access to the Gadgets WEM application on
<app_site>and<base_site>as follows:-
Log in to WebCenter Sites as a Gadgets user that you authorized in the steps above.
-
Select
<app_site>and click the Gadgets application icon, highlighted in Figure 18-6.Figure 18-6 Site Drop-down List and Gadgets Application Icon
Description of ''Figure 18-6 Site Drop-down List and Gadgets Application Icon''
-
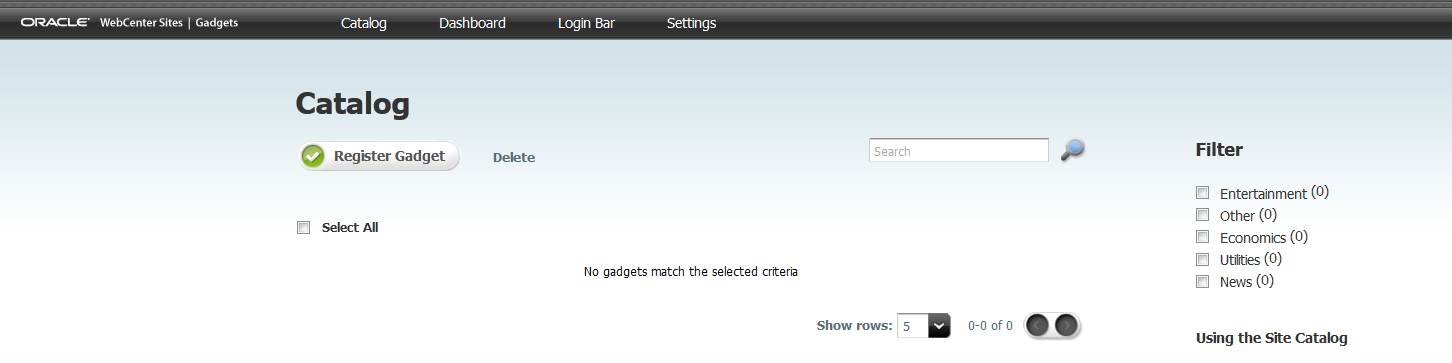
If you see the Catalog screen (Figure 18-7), you have completed authorizing the current user to access the Gadgets WEM application on
<app_site>. Continue with the next step.
-
-
Verify the general administrator's access to the Gadgets WEM application on
<base_site>as follows:-
Log in to WebCenter Sites as a general administrator.
-
Select
<base_site>and click the Gadgets application icon, highlighted in Figure 18-8.Figure 18-8 Site Drop-down List and Gadgets Application Icon
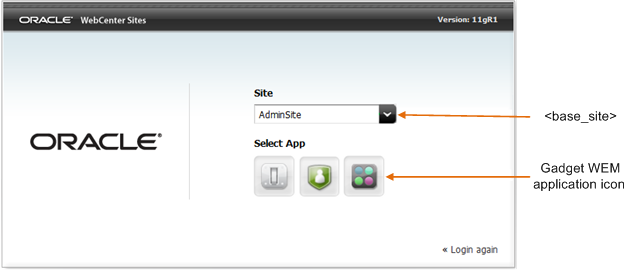
Description of ''Figure 18-8 Site Drop-down List and Gadgets Application Icon ''
-
The Gadgets administrator interface (Global Catalog) is displayed (Figure 18-9). Continue to the next step.
Figure 18-9 Gadgets Administrator Interface
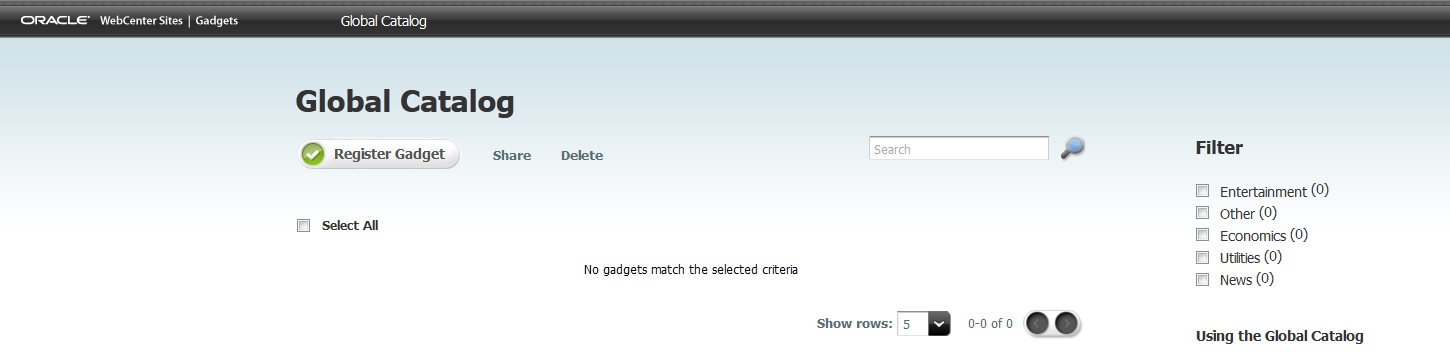
Description of ''Figure 18-9 Gadgets Administrator Interface''
-
-
If you wish to assign the Community WEM application or Gadgets WEM application to additional sites, first create or select the sites on the WebCenter Sites content management system, then mirror publish the sites to the WebCenter Sites production system, and repeat the steps in this section.
18.4 Integrating Community-Gadgets into the WebCenter Sites Contributor Interface
If you integrate the management Community-Gadgets web application into the WebCenter Sites Contributor interface, users can deploy widgets and gadgets directly from the WebCenter Sites Contributor interface.
To integrate Community-Gadgets into the WebCenter Sites Contributor Interface
-
Add the Community-Gadgets URLs to the
futuretense_xcel.iniproperty file:-
Open the
futuretense_xcel.inifile (located in the management WebCenter Sites installation folder) in the WebCenter Sites Property Editor. -
Set
cg.management.urlto specify the URL for the management Community-Gadgets web application.If you are not using the Property Editor to modify the file, the syntax of the property value is the following, where the colon character (:) must be escaped with a backslash (\):
cg.management.url=<protocol>\://<cg_mgmt_host>\:<cg_mgmt_port>/<cg_mgmt_context>
For example:
cg.management.url=http\://cgmgmt.example.com\:8280/cg
-
Set the
cg.production.urlto specify the URL of the production Community-Gadgets web application.If you are not using the Property Editor to modify the file, the syntax of the property values is the following, where the colon character (:) must be escaped with a backslash (\):
cg.production.url=<protocol>\://<cg_prod_host>\:<cg_prod_port>/<cg_prod_context>
For example:
cg.production.url=http\://cgprod.example.com\:8380/cg
-
-
Restart the application server for both the management and production WebCenter Sites instances.
-
If you have not assigned the Community and Gadgets WEM applications to the site on which you wish to integrate Community-Gadgets with the Contributor interface, follow the steps in Section 18.3, "Authorizing Users to Access Community and Gadgets Interfaces."
-
Enable the Community-Gadgets asset types and "Search" start menu items:
-
Log in to a site on which you enabled either the Community interface or the Gadgets interface as a user assigned one of the following roles: GeneralAdmin, SiteAdmin, or Designer.
-
Select the icon for either the Community interface or the Gadgets interface.
Upon first access of either the Community interface or the Gadgets interface, the following Community-Gadgets asset types are automatically enabled on all the necessary sites:
CGGadget,CGPoll, andCGWidget. The "Search" start menu items for these asset types are also enabled automatically.
-
-
Verify the Community-Gadgets integration with the Contributor interface:
-
Log in to the WebCenter Sites Contributor interface as a user assigned one of the following roles: GeneralAdmin, SiteAdmin, or Designer.
-
Verify that the Community-Gadgets tree pane is displayed in the left navigation pane and that the Community-Gadgets tree contains widgets and gadgets.
-
Verify that the search field displays options for finding the following asset types:
CGGadget,CGWidgetandCGPoll. -
Perform a search for the
CGWidgetasset type and verify that the search results return relevant data.
The WebCenter Sites Contributor interface should look similar to the one shown in Figure 18-10. The Community-Gadgets tree should list the available widgets and gadgets for the site. Those widgets and gadgets can now be deployed directly from the Contributor interface. For more information about the Community-Gadgets tree, see the Oracle Fusion Middleware WebCenter Sites User's Guide.
Note:
If the Contributor interface does not display the Community-Gadgets tree, or if the Community-Gadgets asset types and/or "Search" start menu items are not accessible from the Contributor interface, verify the username and password for thexcelerate.batchuserandxcelerate.batchpassparameters in thefuturetense_xcel.inifile. For more information about these parameters, see the Oracle Fusion Middleware WebCenter Sites Property Files Reference.Figure 18-10 Community-Gadgets Tree in the WebCenter Sites Contributor Interface
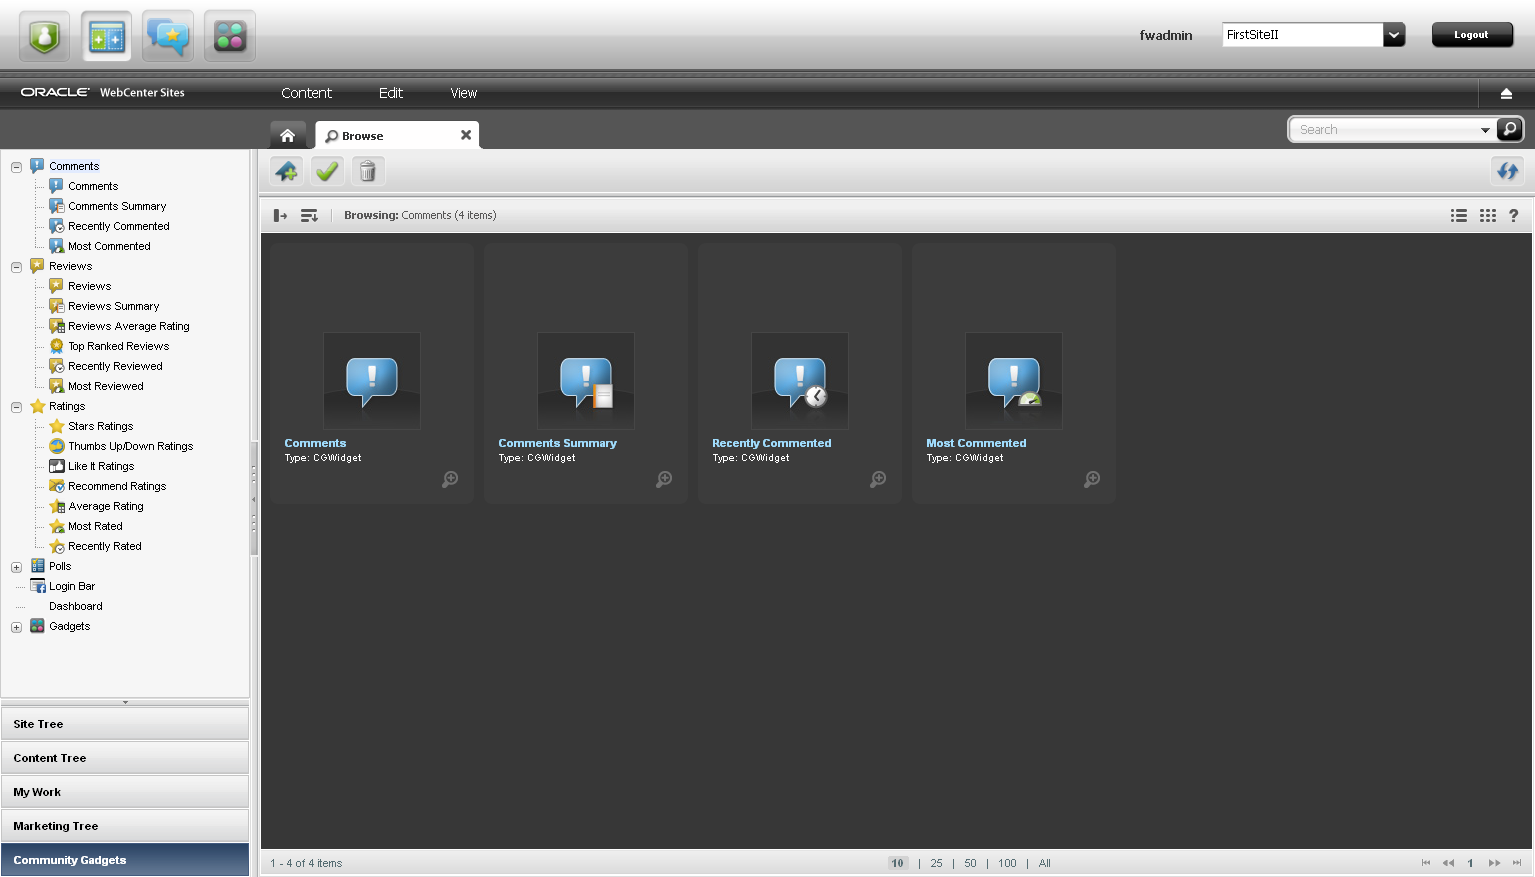
Description of ''Figure 18-10 Community-Gadgets Tree in the WebCenter Sites Contributor Interface''
-