63 Consuming Portlets
This chapter describes how to add portlets to the pages of your WebCenter Portal Framework applications and the options that accompany this process.
This chapter includes the following topics:
This chapter does not cover Oracle JDeveloper or Oracle ADF page creation basics. It covers only those aspects of page creation that are specific to Portal Framework application pages. Therefore, you should familiarize yourself with the information covered in the Oracle Fusion Middleware Web User Interface Developer's Guide for Oracle Application Development Framework before reading this chapter.
For information about creating portlets, which can then be consumed by Portal Framework application pages, see the following chapters:
-
Chapter 58, "Creating Portlets from JSF Applications Using the Oracle JSF Portlet Bridge"
-
Chapter 59, " Building Standards-Based Java Portlets Using JSR 286"
63.1 Introduction to Consuming Portlets
Oracle WebCenter Portal Framework enables you to consume a portlet by registering its producer with the application. Your application can consume portlets that you build and portlets that you receive from a third party, such as a packaged-application vendor.
You can register portlet producers in two ways:
-
Register the portlet producer with a specific application. Use this option if you are not likely to want to register the producer with other applications.
-
Register the portlet producer using the Resource Palette. Use this option to use the producer's portlets in multiple applications.
A portlet that is available in the Resource Palette can be added to any of your Portal Framework applications by dropping it on the page as you would any other component. When you add a portlet from the Resource Palette, its producer gets registered with the application if that producer is not already registered with the application. You can drag and drop a whole producer connection from the Resource Palette into the Application Resources panel of the Application Navigator. This registers the producer with the application. Alternatively, you can right-click a producer in the Resource Palette and choose Add to Application from the context menu to register the producer with the currently open application.
JDeveloper provides wizards for registering both WSRP producers and Oracle PDK-Java producers.
Note:
If your application is source controlled, you must manually create elements in the source control system for any new files created during producer registration. Any files that are already source controlled are checked out automatically by the producer registration process.There are many options associated with portlet consumption. For example, you can choose to place portlets straight onto a page or nest them in a Composer component, you can adjust many attributes of the portlet tag, and you can wire portlets to each other.
63.2 Registering Portlet Producers with a WebCenter Portal Framework Application
This section includes the following topics:
63.2.1 Registering a WSRP Portlet Producer with a WebCenter Portal Framework Application
When you register a WSRP portlet producer, you provide basic information that describes the producer's operational parameters. This information is used by the portlet-consuming application to communicate with the producer and with the portlets through the producer.
WebCenter Portal Framework supports both WSRP 1.0 and WSRP 2.0 producers. The WSRP 2.0 standard, among others, provides support for inter-portlet communication and export and import of portlet customizations. You can leverage the benefits of WSRP 2.0 while building standards-based JSR 286 portlets.
This section includes the following topics:
63.2.1.1 How to Register a WSRP Portlet Producer
The Register WSRP Portlet Producer wizard is the entry point for registering both WSRP 1.0 and 2.0 producers. When registration is successful, the newly registered producer displays in JDeveloper either in the Application Resources panel of the Application Navigator, or in the Resource Palette, depending on where you created the connection. You can then select portlets from the producer for placement on your application (.jspx) pages.
Note:
If you are registering a producer provided by Oracle WebLogic Portal, and the portlet uses ADF Rich Components, you should register the WSRP 2.0 WSDL URL to ensure that the portlet functions correctly.You also use the Register WSRP Portlet Producer wizard to register JSF portlets, which are portletized JSF applications or portletized ADF task flows. Once you create a portlet from a JSF application, you can deploy the portlet to a WLS instance and register the JSF portlet producer as you would register any WSRP portlet producer. The Oracle JSF Portlet Bridge exposes JSF applications and task flows as JSR 286 portlets. For more information, see Chapter 58, "Creating Portlets from JSF Applications Using the Oracle JSF Portlet Bridge."
To register a WSRP portlet producer:
Note:
In the Register WSRP Portlet Producer wizard, if you click Cancel after you have clicked Finish, the registration is not canceled.-
In the Application Resources panel of the Application Navigator, right-click Connections, choose New Connection and then choose WSRP Producer.
-
In the Specify Producer Name page of the Register WSRP Portlet Producer wizard, the Create Connection in option is set depending on how you accessed the wizard. The default selection is Application Resources if you invoked the wizard from an application, and Resource Palette if you invoked the wizard from the Resource Palette. You can change this option at this point.
-
From the Target Project dropdown list, select the project to be configured for the WSRP producer connection.
This should be the same project as the one in which you intend to consume the portlets.
You can change this option only if you invoked the wizard from the Application Navigator.
-
In the Producer Registration Name field, enter a name for the producer registration that is unique among all connections and then click Next.
-
In the Specify Connection Details page, in the WSDL URL field, enter the producer's URL.
The syntax varies according to your WSRP implementation, for example, the sample WSRP producer uses the following syntax:
-
http://host:port/context-root/portlets/wsrp1?WSDL -
http://host:port/context-root/portlets/wsrp2?WSDL -
http://host:port/context-root/portlets?WSDL(WSRP 1.0 for backward compatibility)
Where:
-
hostis the server to which your producer has been deployed. -
portis the port to which the server is listening for HTTP requests. -
context-rootis the Web application's context root. -
portlets[/wsrp(1|2)]?WSDLis static text. The text entered here depends on how the producer is deployed.
For example:
http://myhost.example.com:7101/portletapp/portlets/wsrp2?WSDL
You can access the producer test page through the URL:
http://host:port/context-root/info
-
-
If the application and the producer are separated by a firewall, an HTTP proxy is needed for communication between the application and the producer. If this is the case for your application, select Use Proxy for Contacting Producer and specify the URL and port number of the proxy.
Note:
The proxy fields in this step default to the proxy preferences set in JDeveloper Preferences (from the main menu, choose Tools > Preferences, and then select Web Browser and Proxy). -
Click Next.
The connection to the producer is tested. If there are any problems, an error message displays. You must resolve any problems before you can continue.
-
In the Specify Additional Registration Details page, in the Default Timeout Interval (Seconds) field, enter the number of seconds to wait for the producer to respond during design time operations.
Some producers define additional registration properties. In such cases, the properties are displayed in a table on this page of the wizard. You can enter values for these additional properties in the table. These properties are producer-specific and are used only at registration time. That is, they collect information that consumer applications send to producers at registration time; the producers store this information against the consumers and use it subsequently.
-
If you are registering the producer in the Resource Palette, click Finish to complete the registration.
If you are registering the producer in the Application Resources panel, and plan to request authentication whenever the producer (and consequently, its portlet) is accessed, click Next and follow the remaining steps. If you do not want to configure security, click Finish.
If the producer declares user categories, when you click Finish, the Register WSRP Portlet Producer dialog displays. Click Yes and see Section 63.2.1.2, "How to Map a Producer's Declared User Categories to an Application's Defined Java EE Security Roles." Click No to decline this opportunity and complete the registration process.
Note:
If you decline to map the user categories to security roles at this point, you can do so later by editing the producer registration. -
In the Configure Security Attributes page, from the Token Profile dropdown list, select the type of token profile to use for authentication with the WSRP producer:
-
None—No token; no WS-Security header is attached to the SOAP message.
If you select this option, you do not want to complete the rest of the wizard. Click Finish.
-
WSS 1.0 SAML Token with Message Integrity—Provides message-level integrity protection and SAML-based authentication for outbound SOAP requests in accordance with the WS-Security 1.0 standard. A SAML token, included in the SOAP message, is used in SAML-based authentication with sender vouches confirmation. This policy uses WS-Security's Basic 128 suite of asymmetric key technologies and SHA-1 hashing algorithm for message integrity.
-
WSS 1.0 SAML Token with Message Protection—Provides message-level protection (integrity and confidentiality) and SAML-based authentication for outbound SOAP requests in accordance with the WS-Security 1.0 standard. The Web service consumer includes a SAML token in the SOAP header and the confirmation type is sender-vouches. This policy uses WS-Security's Basic 128 suite of asymmetric key technologies. Specifically, RSA key mechanisms for message confidentiality, SHA-1 hashing algorithm for message integrity, and AES-128 bit encryption.
When you select this policy, you must also specify the Recipient Alias.
-
WSS 1.0 User Name Token without Password—Provides username (with password) token profile based identity propagation with certificate based message protection for outbound SOAP requests in accordance with the WS-Security v1.0 standard. Both plain text and digest mechanisms are supported. This policy uses WS-Security's Basic128 suite of asymmetric key technologies. Specifically, RSA key mechanism for message confidentiality, SHA-1 hashing algorithm for message integrity, and AES-128 bit encryption.
Use this token profile if the WSRP producer has a different identity store. You must define an external application pertaining to the producer and associate the external application with this producer. The external application defined here is used to retrieve and propagate the user credentials to the producer. The producer verifies this against the identity store configured for the external application.
When you select this policy, you must also specify the Recipient Alias.
-
WSS 1.0 User Name Token with Password—provides username (with password) token profile based identity propagation with certificate based message protection for outbound SOAP requests in accordance with the WS-Security 1.0 standard. Credentials (username only) are included in outbound SOAP request messages through a WS-Security UsernameToken header. No password is included. Message protection is provided using WS-Security 1.0's Basic128 suite of asymmetric key technologies. Specifically, RSA key mechanisms for message confidentiality, SHA-1 hashing algorithm for message integrity, and AES-128 bit encryption.
When you select this policy, you must also specify the Recipient Alias.
-
WSS 1.0 SAML Token—Provides SAML-based authentication for outbound SOAP request messages in accordance with the WS-Security 1.0 standard. The policy propagates user identity and is typically used in intra departmental deployments where message protection and integrity checks are not required.
This policy does not require any keystore configuration.
-
WSS 1.1 SAML Token with Message Protection—Provides message-level protection (integrity and confidentiality) and SAML token population for outbound SOAP requests in accordance with the WS-Security 1.1 standard. A SAML token, included in the SOAP message, is used in SAML-based authentication with sender vouches confirmation. This policy uses the symmetric key technology for signing and encryption, and WS-Security's Basic128 suite of asymmetric key technologies for endorsing signatures.
-
-
Select the configuration type:
-
Default—If you choose default, then all the default keystore attributes, that is location, password, keystore type, signature key and alias, encryption key and alias are picked up from the JPS (Java Platform Security) configuration. The value for Recipient Alias is taken from the policy being used. The WebLogic Server where the application is deployed must be configured for WS-Security. For more information, see the "Securing a WSRP Producer with WS-Security" section in Oracle Fusion Middleware Administering Oracle WebCenter Portal.
-
Custom—If you select this option, then you must enter the appropriate keystore attributes in the next page of the wizard.
-
-
In the Default User field, enter a user name to assert to the remote producer when the user has not authenticated to the Portal Framework application.
When unauthenticated, the identity
anonymousis associated with the application user. OWSM does not currently support the propagation of an anonymous identity, so you must specify an alternative identity here. Keep in mind though, that in this case, the Portal Framework application has not authenticated the user so the default user you specify should be a low privileged user in the remote producer that is an appropriate identity to use for showing public content. For example, you may want to create a guest account in the identity store for this purpose. If the user has authenticated to the application, then the user's identity is asserted rather than the default user.Note:
If you specify a Default User, the remote producer must be set up to accept this information.The Default User field does not appear if you selected User Name Token with Password.
-
In the Issuer Name field, enter the name of the issuer of the SAML Token, for example
www.oracle.com.This field appears only if you selected an SAML Token option from the Token Profile dropdown list, and Custom from the Configuration options. The issuer name is the attesting entity that vouches for the verification of the subject.
-
Select Associate Producer with External Application, then select the application, if this producer must provide authentication to an external application.
For more information, see Section 74.13.3, "Managing External Applications."
This option is available only if you selected User Name Token with Password.
-
Click Next.
If you selected Default as the configuration option, then the fields on the Specify Key Store page are disabled. Click Finish to complete the registration.
If the producer declares user categories, when you click Finish, the Register WSRP Portlet Producer dialog displays. Click Yes and see Section 63.2.1.2, "How to Map a Producer's Declared User Categories to an Application's Defined Java EE Security Roles." Click No to decline this opportunity and complete the registration process.
-
In the Specify Key Store page, in the Store Path field, provide the full path to the keystore that contains the certificate and the private key that is used for signing some parts (security token and SOAP message body) of the SOAP message.
If you are not sure of the full path, click Browse to navigate to and select the file. The selected file should be a keystore created with the Java keytool.
-
In the Store Password field, provide the password to the keystore that was set when the keystore was created.
The keystore password must be correct for the Store Type field and the Signature Key Alias dropdown list to populate.
If an incorrect keystore path or password is entered, then an error message appears stating that the password is invalid and must be corrected. All fields on this screen except for Store Path and Store Password are disabled until you specify the correct values.
-
After you provide the correct keystore path and password, press the Tab key to move to another active field (for example, the Store Path field). This ensures that the Store Type field and the Signature Key Alias dropdown list are properly populated.
-
The Store Type value is read from the keystore and is never editable. The store type is always JKS (Java Key Store).
-
From the Signature Key Alias dropdown list, select the signature key alias.
This list populates automatically when the correct password is entered in the Store Password field. The Signature Key Alias is the identifier for the certificate associated with the private key that is used for signing. The key aliases found in the specified keystore are available in the list. Select the one to be used for signing.
-
In the Signature Key Password field, specify the password for accessing the key identified by the alias specified in Signature Key Alias.
-
Optionally, from the Encryption Key Alias dropdown list, select the encryption key alias.
This list populates automatically when the correct password is entered in the Store Password field. The key aliases found in the specified keystore are available in the list. Select the one to be used for encryption.
-
Optionally, in the Encryption Key Password field, specify the password for accessing the key identified by the alias specified in Encryption Key Alias.
-
From the Recipient Alias field, select the keystore alias that is associated with the producer's certificate and then click Finish.
This certificate is used to encrypt the message to the producer.
This field is not displayed if you selected SAML Token with Message Integrity as the Token Profile in the Configure Security Attributes page of the wizard.
If the producer declares user categories, when you click Finish, a dialog displays asking whether you want to map the user categories to Java EE roles. Click Yes and see Section 63.2.1.2, "How to Map a Producer's Declared User Categories to an Application's Defined Java EE Security Roles." Click No to decline this opportunity and complete the registration process.
63.2.1.2 How to Map a Producer's Declared User Categories to an Application's Defined Java EE Security Roles
The user categories the producer declares come from the portlets it contains. For example, if the producer contains one or more JSR 286 portlets created with the Standards-based Java Portlet (JSR 286) wizard, then any security roles added during portlet creation are included in the user categories the producer declares. Java EE security roles can be specified through the Portal Framework application's web.xml file properties.
For more information about security roles in JSR 286 portlets, see Section 74.17, "Securing Identity Propagation Through WSRP Producers with WS-Security."
This procedure continues forward from Section 63.2.1.1, "How to Register a WSRP Portlet Producer."
To map producer-declared user categories with application-defined Java EE security roles:
-
After clicking Finish in the Register WSRP Portlet Producer wizard, click Yes in the resulting dialog.
-
In the User Categories dialog, for each User Category, click the corresponding field in the J2EE Security Role column.
The User Categories dialog is also accessible when you edit producer registration settings. For more information see Section 63.3.1, "How to Edit Portlet Producer Registration Settings."
-
From the resulting list, select the security role to map to the producer user category.
-
Click OK when all user categories are mapped.
63.2.2 Registering an Oracle PDK-Java Portlet Producer with a WebCenter Portal Framework Application
When you register a PDK-Java portlet producer, you provide basic information that describes the producer's operational parameters. This information is used by the portlet-consuming application to communicate with the producer and with the portlets through the producer.
When registration is successful, the newly registered producer is displayed in JDeveloper either in the Application Resources panel of the Application Navigator, or in the Resource Palette, depending on where you created the connection. You can then select portlets from the producer for placement on your application (.jspx) page.
Note:
In the Register Oracle PDK-Java Portlet Producer wizard, if you click Cancel after you have clicked Finish, the registration is not canceled.To register a PDK-Java portlet producer:
-
In the Application Resources panel of the Application Navigator, right-click Connections, choose New Connection and then choose Oracle PDK-Java Producer.
-
In the Specify Producer Name page of the Register Oracle PDK-Java Portlet Producer wizard, the Create Connection in option is set depending on how you accessed the wizard. The default selection is Application Resources if you invoked the wizard from an application, and Resource Palette if you invoked the wizard from the Resource Palette. You can change this option at this point.
-
From the Target Project dropdown list, select the project to be configured for the PDK-Java producer connection.
This should be the same project as the one in which you intend to consume the portlets.
You can change this option only if you invoked the wizard from the Application Navigator.
-
In the Producer Registration Name field, enter a name for the producer registration that is unique among all connections and then click Next.
-
In the Specify Connection Details page, in the URL Endpoint field, enter the producer's URL using the following syntax:
http://host:port/context-root/providers
Where:
-
hostis the server to which your producer has been deployed. -
portis the port to which the server is listening for HTTP requests. -
context-rootis the Web application's context root. -
providersis static text. The text entered here depends on how the producer is deployed.
For example:
http://myhost.example.com:7101/myEnterprisePortlets/providers
-
-
In the Service ID field, enter the unique identifier for this producer.
PDK-Java enables you to deploy multiple producers under a single adapter servlet. The producers are identified by their unique service IDs. A service ID is required only when a service ID or producer name is not appended to the URL endpoint. For example the following URL endpoint requires the service ID,
sample:http://myhost:7101/myEnterprisePortlets/providers
However, the following URL endpoint, does not require a service ID:
http://myhost:7101/myEnterprisePortlets/providers/sample
-
If the application and the producer are separated by a firewall, an HTTP proxy is needed for communication between the application and the producer. If this is the case for your application, select Use Proxy for Contacting Producer and specify the URL and port number of the proxy.
Note:
The proxy fields in this step default to the proxy preferences set in JDeveloper Preferences (from the main menu, choose Tools > Preferences, and then select Web Browser and Proxy.) -
Select Associate Producer with External Application, then select the application, if this producer must provide authentication to an external application.
For more information, see Section 74.13.3, "Managing External Applications."
This option is available only if you invoked the wizard from the Application Navigator, as external applications are scoped to individual applications.
-
Select Enable Producer Sessions to enable sessions between the producer and the consuming application.
When sessions are enabled, the server maintains session-specific information, such as user name. Message authentication uses sessions, so if the shared key is set, then this option should also be selected.
For sessionless communication between the producer and the server, deselect this option.
-
At this point in the wizard, you can click Finish to complete the registration, using the default values for all remaining steps.
To provide additional details, click Next and follow the remaining steps.
-
In the Specify Additional Details page, in the Default Timeout Interval (Seconds) field, enter the number of seconds to wait for the producer to respond during design time operations.
-
In the Subscriber ID field, enter a string to identify the consumer of the producer being registered.
When a producer is registered, a call is made to the producer. During the call, the consumer passes the value for Subscriber ID to the producer. This value is also passed every time a portlet call is made. If the producer does not see the expected value for Subscriber ID, then it might reject the registration call.
Note:
Editing the producer registration to change the Subscriber ID after the initial registration has no effect. To specify a different Subscriber ID, you must reregister the producer. -
In the Shared Key field, enter a shared key to use for producers that are set up to handle encryption and then click Finish.
The shared key is used by the encryption algorithm to generate a message signature for message authentication. Producer registration fails if the producer is set up with a shared key and you enter an incorrect shared key here. The shared key can contain between 10 and 20 alphanumeric characters.
63.3 Managing Portlet Producer Connections
After registering a portlet producer, you can edit the registration settings, test the connection, refresh the producer to obtain the latest list of portlets, or delete the connection to the portlet producer.
This section includes the following topics:
63.3.1 How to Edit Portlet Producer Registration Settings
Both the WSRP and PDK-Java portlet producer registration wizards enable you to access and revise many of the values you entered when you registered the producer.
To edit portlet producer registration settings:
-
Navigate to the producer in the Application Resources panel of the Application Navigator or in the Resource Palette.
-
Right-click the producer to edit, and choose Properties.
-
Edit the producer registration properties as required, clicking Next to step through the pages of the wizard.
You can also go directly to a specific step by clicking the links in the navigation panel on the left side of the wizard.
-
For information about WSRP Producer settings, see Section 63.2.1, "Registering a WSRP Portlet Producer with a WebCenter Portal Framework Application."
-
For information about Oracle PDK-Java Producer settings, see Section 63.2.2, "Registering an Oracle PDK-Java Portlet Producer with a WebCenter Portal Framework Application."
You cannot edit the Producer Registration Name.
-
-
When you have changed all the necessary settings, click Finish.
-
Editing some properties, such as the WSDL URL or URL Endpoint, requires a producer refresh. When you make such a change, a dialog displays allowing you to refresh the producer immediately, save the changes but do not refresh the producer, or return to the edit producer registration wizard. Click Yes, No, or Cancel as appropriate.
Note:
While you can edit the value of the WSDL URL field, you can point to a different producer only if the new producer has access to the preference store of the old producer, or if the preference store of the old producer has been migrated to that of the new producer. -
Click OK when the producer has been successfully refreshed, if necessary.
-
Once you have completed your edits, consider testing the producer connection to be sure the connection information is valid. For more information, see Section 63.3.2, "How to Test a Portlet Producer Connection."
63.3.2 How to Test a Portlet Producer Connection
The connection testing feature provides a means of testing the validity of a portlet producer connection.
To test a portlet producer connection:
-
Navigate to the producer in the Application Resources panel of the Application Navigator or in the Resource Palette.
-
Right-click the producer to test, and choose Test Producer Connection.
-
A progress bar appears while the test is underway. A success or failure dialog displays when the test is complete. Click OK to close this dialog.
If the failure dialog displays, consider editing the producer registration details and retesting the producer connection. Additionally, especially if the failure dialog takes a long time to display, ensure that the producer is available. For example, if the producer is provided through the Integrated WLS, ensure that the Integrated WLS is running, and then retest the connection.
63.3.3 How to Refresh a Portlet Producer
When you refresh a portlet producer, the portlets from that producer are also refreshed. Newly added portlets and any updates to existing portlets become available to any applications that are consuming portlets from this producer.
Tip:
When a portlet is removed from a producer, be sure to manually delete the portlet from all application pages on which it has been placed. For more information, see Section 63.9, "Deleting Portlets from Application Pages."To refresh a portlet producer:
-
Navigate to the producer in the Application Resources panel of the Application Navigator or in the Resource Palette.
-
Right-click the producer you want to refresh, and choose Refresh Producer Registration.
-
In the Portlet Producer Refresh dialog, click Yes.
63.3.4 How to Delete a Portlet Producer
If you no longer want to use a particular producer with your application, you can delete the producer. For information about deleting portlets and relevant page variables, see Section 63.9, "Deleting Portlets from Application Pages."
Note:
if you delete a producer, any pages that consume portlets from that producer display an error message that the portlet is unavailable. The portlets continue to be unavailable even if you re-register the producer using the same name.To delete a portlet producer:
-
Navigate to the producer in the Application Resources panel of the Application Navigator or in the Resource Palette.
-
Right-click the producer you want to delete, and choose Delete.
-
In the Delete Confirmation dialog, click Yes.
63.3.5 How to Edit Portlet Client Configuration
The adf-config.xml file contains configuration information for WebCenter Portal tools and services. Portlet client configuration details, such as timeout and cache settings, are specified in the adf-portlet-config section of the file.
You can edit the adf-config.xml file for your application and edit the portlet client configuration.
Note:
If you edit theadf-config.xml file, you must redeploy your application after the changes are made.Table 63-1 describes the child elements of adf-portlet-config. The init-param names in the first column correspond to the names of the servlet init-params used when the portlet client is accessed through the web adapter.
Table 63-1 Child Elements of adf-portlet-config
| Element (init-param) | Description | Default Value |
|---|---|---|
parallelPoolSize (parallel.pool.size) |
The number of threads to use for parallel execution of tasks. |
10 |
parallelQueueSize (parallel.queue.size) |
The size of the queue of tasks waiting for parallel execution. Tasks are rejected when the queue size is exceeded. |
20 |
defaultTimeout (default.timeout) |
The default timeout period in seconds for requests made to producers. This value is used when a timeout is not defined at the portlet or producer level. |
10 |
minimumTimeout (minimum.timeout) |
The minimum timeout period in seconds for requests made to producers. This value is used to impose a lower limit on timeout periods specified by portlets or producers. |
0.1 |
maximumTimeout (maximum.timeout) |
The maximum timeout period in seconds for requests made to producers. This value is used to impose an upper limit on timeout periods specified by portlets or producers. |
300 |
resourceProxyPath (resource.proxy.path) |
The base path of the resource proxy servlet, relative to the context root of the application. Used to construct links to the resource servlet within portlet markup. |
/resourceproxy |
supportedLocales (supported.locales) |
The set of supported locales defined using strings of the form: language[_country[_variant]] |
Commented out by default. You should uncomment this element if you have multiple locales. See Example 63-1. |
portletTechnologies (portlet.technologies) |
The set of portlet technologies supported by the client defined by the fully qualified names of classes that implement the PortletTechnologyConfig interface. |
{o.p.c.ci.web.WebPortletTechnologyConfig, o.p.c.ci.wsrp.WSRPPortletTechnologyConfig} |
cacheSettings (cache.*) |
Cache configuration information. Used to enable or disable the cache, define its maximum size and impose limits on the amount of space available for different users and subscribers. |
The cache is enabled and no size restrictions are imposed. |
maximumResourceUrlLength (maximum.resource.url.length) |
The maximum length allowed for resource URLs. This prevents the URL from becoming to long if the portlet passes a lot of contextual information in a resource request. Resource URLs longer than 2048 characters may cause problems in some browsers. If the information encoded in a resource URL exceeds this value, the portlet client stores the information in the session and encodes a key to the session attribute in the URL instead. The key is calculated in a deterministic way to avoid adversely affecting browser caching. |
2048 |
Example 63-1 illustrates the usage of the adf-portlet-config section in adf-config.xml.
Example 63-1 The adf-portlet-config Section of adf-config.xml
<adf-portlet-config xmlns="http://xmlns.oracle.com/adf/portlet/config">
  <supportedLocales>
    <value>en</value>
    <value>fr</value>
    <value>de</value>
    <value>es</value>
  </supportedLocales>
  <portletTechnologies>
   <value>oracle.portlet.client.containerimpl.web.
     WebPortletTechnologyConfig</value>
   <value>oracle.portlet.client.containerimpl.wsrp.
     WSRPPortletTechnologyConfig</value>
  </portletTechnologies>
  <defaultTimeout>20</defaultTimeout>
  <minimumTimeout>1</minimumTimeout>
  <maximumTimeout>300</maximumTimeout>
  <resourceProxyPath>/portletresource</resourceProxyPath>
  <cacheSettings>
    <maxSize>10000000</maxSize>
    <subscriber default="true">
      <systemLevel>
        <maxSize>5000000</maxSize>
      </systemLevel>
      <userLevel>
        <maxSize>8000000</maxSize>
      </userLevel>
    </subscriber>
  </cacheSettings>
</adf-portlet-config>
Tip:
To edit portlet client configuration at runtime, without having to redeploy the application, you can use thesetPortletClientConfig WLST command. For more information, see the "setPortletClientConfig" section in the Oracle Fusion Middleware WebLogic Scripting Tool Command Reference.63.4 Adding the Portlet Producer Task Flow
The portlet producer task flow (Producer) enables users to manage portlet producer connections at runtime.
For applications created using WebCenter Portal's Portal Framework application template, the portlet producer task flow is available out of the box through the runtime administration console (Services tab). For details, see the "Configuring Services, Portlet Producers, and External Applications for Portal Framework Applications" chapter in Oracle Fusion Middleware Administering Oracle WebCenter Portal.
In addition, just like other task flows, you can add the portlet producer task flow to your application pages. This might be especially useful if you are not using WebCenter Portal's Portal Framework application template and the runtime administration console is therefore not part of your project. Special permissions are required to manage or view portlet producer connections through the Producer task flow:
-
AppConnectionManager—Users with this role can register, modify, and delete portlet producer connections at runtime. -
AppConnectionViewer—Users with this role can view portlet producer connections at runtime. By default, any user who is logged in (that is, has theauthenticated-userrole) is granted this role.
By default, users with the Administrator role can manage portlet producers. If you want other users to manage connections through the portlet producer task flow, you must grant them the AppConnectionManager role.
To add the portlet producer task flow:
-
Create or open the JSF page in your application on which you want to add the task flow.
-
In the Resource Palette, expand My Catalogs, WebCenter Portal - Services Catalog, and Task Flows.
-
Drag Producer from the Resource Palette and drop it onto the page inside the
af:formtag. -
Grant the
AppConnectionManagerrole to one or more test users, if required:-
Add the test user
TEST_PROD. -
Grant the
AppConnectionManagerrole.
For information about how to add a user and grant this role, see the "Creating Test Users" section in the Oracle Fusion Middleware Fusion Developer's Guide for Oracle Application Development Framework.
-
-
Save and run your page. Login as an administrator or the
TEST_PRODuser defined in the previous step. The screen shown in Figure 63-1 appears.Figure 63-1 The Portlet Producer Task Flow
Description of "Figure 63-1 The Portlet Producer Task Flow"
Note:
At runtime, application administrators can grant users theAppConnectionManagerandAppConnectionViewerroles through WebCenter Portal Administration (see the "Adding Members to Application Roles" section in Oracle Fusion Middleware Administering Oracle WebCenter Portal). Alternatively, system administrators can grantAppConnectionManagerandAppConnectionViewerroles through Fusion Middleware Control (see the "Granting Application Roles Using Fusion Middleware Control" section in the Oracle Fusion Middleware Administering Oracle WebCenter Portal).
63.5 Adding Portlets to a Page
Placing a portlet on a Portal Framework application page is a simple matter of dragging the portlet from the Application Resources panel or Resource Palette and dropping it on the page.
This section includes the following topics:
-
Section 63.5.2, "What Happens When You Add a Portlet to a Page"
-
Section 63.5.3, "What You May Need to Know About Interportlet Communication"
-
Section 63.5.4, "What You May Need to Know About Inline Frames"
-
Section 63.5.5, "What You May Need to Know About Portlet Sizing"
-
Section 63.5.6, "What You May Need to Know About Minimize, Restore, and Move"
Before you can place a portlet on a page, there are a few preparatory steps you must perform before you can take this simple action. These include:
-
Creating a Portal Framework application. For more information, see Section 6.1, "Creating a New WebCenter Portal Framework Application."
-
Creating an application page. For more information, see Section 15.2, "Creating Pages in a WebCenter Portal Framework Application."
-
Registering the portlet's producer with the application. For more information, see Section 63.2.1, "Registering a WSRP Portlet Producer with a WebCenter Portal Framework Application" or Section 63.2.2, "Registering an Oracle PDK-Java Portlet Producer with a WebCenter Portal Framework Application."
-
Some of the portlets you plan to consume may come from applications that handle their own authentication. In such cases, you must register the application as an external application and identify it to the portlet producer that provides it. For more information, see Chapter 74, "Securing Your WebCenter Portal Framework Application."
-
Some of the portlets you plan to consume may come from producers that are Secure Sockets Layer (SSL) enabled. When you try to access an SSL-enabled producer, you may be presented with a Security Alert dialog, prompting you to view the producer's certificate and add it to the list of trusted certificates. The Security Alert dialog displays only if the producer uses a security certificate issued by a certificate authority that is not widely accepted. To consume portlets from such a producer, you must first add the producer's security certificate to the keystore. For more information, see Section 74.14, "Registering Custom Certificates with the Keystore."
63.5.1 How to Add a Portlet to a Page
You can add a portlet to a page by dragging and dropping it from the Application Resources panel of the Application Navigator or from the Resource Palette.
To add a portlet to a page:
-
In the Application Navigator, open the application that contains the page (
.jspxfile) to which you want to add the portlet. -
Expand the project that contains the page.
-
Locate the page, right-click it, and then choose Open.
Tip:
You can also double-click the page to open it. -
Under the Connections node in the Application Resources panel of the Application Navigator, or in the Resource Palette:
-
If the producer is a WSRP producer, expand the WSRP Producer node.
-
If the producer is a PDK-Java producer, expand the Oracle PDK-Java Producer node.
-
-
Expand the node for the portlet producer that contains the portlet to add to the page.
Under the selected producer, all portlets contained by that producer are listed.
-
Drag the portlet from the producer node directly onto the page.
You should drag the portlet onto a form on the page. If you do not, a dialog displays prompting you to create a form to contain the portlet. Select:
-
ADF Faces - Form if the page contains rich client components. This adds an
af:formcomponent to the page. -
JSF HTML - Form if the page contains HTML components (for example, if it is an upgraded 10.1.3.2 page). This adds an
h:formortr:formcomponent to the page, depending on the surrounding document tag.
Do not select HTML - Form as this is not valid for portlets.
Note:
You can include any Oracle ADF Faces component or task flow as a child component of aShow Detail Framecomponent. However, portlets contain headers similar to those provided by theShow Detail Framecomponent and can be added to aPanel Customizablecomponent directly. There are no additional benefits to including portlets inShow Detail Framecomponents. -
Note:
If you add a portlet as a Trinidad component, that is, inside atr:form component, and the portlet implements modes other than View mode, you must include the following in the application's web.xml file:
<context-param>
  <param-name>
    oracle.adf.view.rich.newWindowDetect.OPTIONS
  </param-name>
  <param-value>off</param-value>
</context-param>
Note:
If you are adding a PeopleSoft portlet to a page in a Portal Framework application, you must set therenderPortletInIFrame portlet tag attribute to true.
For more information, see Section 63.6, "Setting Attribute Values for the Portlet Tag."
63.5.2 What Happens When You Add a Portlet to a Page
When you add a portlet to a page, a portlet tag (adfp:portlet or adfph:portlet) is added to the page source. This is the tag that represents the portlet component. This tag includes attributes that you can edit using the Property Inspector, or in the page source, to further control the behavior and appearance of the portlet. For information about these attributes, see Section 63.6, "Setting Attribute Values for the Portlet Tag."
The type of portlet tag used is determined by the following:
-
If the project is configured for rich client components alone, the
adfp:portlettag is used. -
If the project is configured for Trinidad components alone, the
adfph:portlettag is used. -
If the project is configured for both rich client and Trinidad components, the
adfp:portlettag is used. -
If the project is not configured for rich client or Trinidad components, the
adfp:portlettag is used and the project is automatically configured for rich client components.
This is so that the look and feel of the portlet matches that of other components on the page. For example, if you created your page as described in Section 15.2, "Creating Pages in a WebCenter Portal Framework Application." the page is a rich client page. In this case, the portlet is added using the adfp:portlet tag, as shown in Example 63-2.
Example 63-2 A Rich Client Page Containing a Portlet
<?xml version='1.0' encoding='US-ASCII'?>
<jsp:root xmlns:jsp="http://java.sun.com/JSP/Page" version="2.0"
          xmlns:h="http://java.sun.com/jsf/html"
          xmlns:f="http://java.sun.com/jsf/core"
          xmlns:af="http://xmlns.oracle.com/adf/faces/rich"
          xmlns:adfp="http://xmlns.oracle.com/adf/faces/portlet">
  <jsp:directive.page contentType="text/html;charset=US-ASCII"/>
  <f:view>
    <af:document>
      <af:form>
        <adfp:portlet value="#{bindings.Portlet11_1}"
                      id="portlet1"
                      renderPortletInIFrame="true"/>
      </af:form>
    </af:document>
  </f:view>
</jsp:root>
If you are working with an upgraded 10.1.3.2 application or an application that contains Trinidad components, the application uses HTML components, rather than rich client components. In this case, when you drag a portlet onto a page, the adfph:portlet tag is used, as shown in Example 63-3.
Example 63-3 A Trinidad Page Containing a Portlet
<?xml version='1.0' encoding='US-ASCII'?>
<jsp:root xmlns:jsp="http://java.sun.com/JSP/Page" version="2.0"
          xmlns:h="http://java.sun.com/jsf/html"
          xmlns:f="http://java.sun.com/jsf/core"
          xmlns:af="http://xmlns.oracle.com/adf/faces/rich"
          xmlns:tr="http://myfaces.apache.org/trinidad"
          xmlns:adfph="http://xmlns.oracle.com/adf/faces/portlet/html">
  <jsp:directive.page contentType="text/html;charset=US-ASCII"/>
  <f:view>
    <tr:document title="Title 1">
      <tr:form>
        <adfph:portlet value="#{bindings.Portlet12_1}"
                       id="portlet1"/>
      </tr:form>
    </tr:document>
  </f:view>
</jsp:root>
If the application page includes one or more Composer components, this may influence where the portlet is placed. For example, in the Structure panel, a portlet placed on a page with a cust:panelCustomizable tag, would be placed as illustrated in Example 63-4:
Example 63-4 Hierarchical Placement of the Portlet Tag
af:document
  af:form
   cust:panelCustomizable
     adfp:portlet
Note:
We recommend that you do not mix ADF Faces rich client components with HTML or Trinidad components on the same page. Doing so may produce unexpected results at runtime. Therefore, do not place a rich client portlet inside a Composer HTML component or an HTML portlet inside a Composer rich client component.For information about Composer tags, see Chapter 18, "Enabling Runtime Editing of Pages Using Composer."
Note:
When you drop an instance of OmniPortlet onto your page, open the Property Inspector and ensure that theAllModesSharedScreen property, under the Display Mode category, is set to false, the default value. Setting this property to true may prevent you from editing certain sections of your OmniPortlet in the OmniPortlet wizard.63.5.3 What You May Need to Know About Interportlet Communication
One way to make your WebCenter Portal Framework application more interactive is by linking related components such that their contents are synchronized based upon the context. For example, suppose you have two stock portlets on a page, one provides data about a stock's price while the other provides headline news items for a stock. Both portlets are based upon the stock ticker symbol, hence it would make sense that, when the ticker symbol is changed in the stock price portlet, the stock headlines portlet picks up that change and refreshes itself with headlines pertaining to the same ticker symbol.
The JSR 286 standard introduces public render parameters, which you can use to link portlets on a page. For more information, see Section 59.3.5, "How to Use Public Render Parameters in JSR 286 Portlets."
The JSR 286 standard also supports portlet events. You can use portlet events to drive the content of a portlet based on actions that occur elsewhere on the page. Portlet events can be cascaded so that a portlet may respond to an event by triggering an event of its own, which in turn affects other portlets on the page. Portlet events can also be consumed by ADF contextual events and contextual events can be consumed by portlets. You can use this to contextually link portlets and task flows. For more information, see Section 59.3.6, "How to Use Portlet Events in JSR 286 Portlets."
When you add a portlet to a page, a portlet binding is added to the page definition file. This portlet binding includes attributes that specify whether the portlet should automatically listen for parameter changes and events (Example 63-5).
<portlet id="LotteryPortlet2_1"
         portletInstance="oracle/adf/portlet/SamplePortlets/ap/Ei7default_03ba18be_012d_1000_8002_0ae8827e9493"
         class="oracle.adf.model.portlet.binding.PortletBinding"
         retainPortletHeaders="false"
         listenForAutoDeliveredPortletEvents="true"
         listenForAutoDeliveredParameterChanges="true"
         xmlns="http://xmlns.oracle.com/portlet/bindings"/>
Setting these attributes to true (the default) means that any parameters that are changed or events that are raised elsewhere on the page that match those supported by the portlet (that is, they have the same QName) automatically cause the portlet to be updated accordingly. In addition, the portlet can define aliases for its parameters and events to match parameters and events with different QNames.
You can set these attributes to false to disable this automatic parameter and event listening. For example, your page might contain multiple instances of the same portlet that require values to come from different sources. If you disable automatic parameter and event listening, or if your portlet defines parameters or events with names that do not match those you want to use for linking, you must manually configure the portlet wiring. For more information, see Section 63.7, "Manually Wiring Parameters and Events in JSR 286 Portlets."
63.5.4 What You May Need to Know About Inline Frames
Rendering a portlet directly on a page provides a better user experience as compared to placing it in an inline frame (iframe). However, at times, it may be required to include the portlet markup inside an inline frame. You can use the renderPortletInIFrame attribute to determine whether or not a portlet should be rendered in an inline frame.
The default setting of the renderPortletInIFrame attribute is auto. This causes the portlet consumer to attempt to rewrite the portlet markup whenever possible, so that it renders correctly within the Oracle ADF page without the need for an inline frame.
However, in the following circumstances, the portlet is rendered within an inline frame:
-
The parser throws an exception as it is not able to parse the markup.
-
The portlet code contains a multi-part form post.
-
The portlet code contains a file upload element.
-
The portlet developer explicitly requested that the portlet be rendered in an inline frame by setting the
com.oracle.portlet.requireIFramecontainer runtime option in theportlet.xmlfile totrue.Note:
Portlets created using the Oracle JSF Portlet Bridge have therequireIFramecontainer runtime option set totrueas these portlets are too complex to render directly on Oracle ADF pages due to JavaScript issues.
In some circumstances, the portlet consumer may be unable to rewrite the portlet markup and JavaScript to accommodate the portlet in the Oracle ADF page. If this is the case, you may find that the portlet does not behave as expected, for example, buttons do nothing or you get JavaScript errors in the console. If this happens, you should set the renderPortletInIFrame attribute to true so that the portlet is always rendered in an inline frame.
Some examples of when you should set renderPortletInIFrame to true are when:
-
The portlet code builds up element names dynamically in JavaScript.
-
The portlet code uses multiple forms and references them in JavaScript by index.
-
JavaScript library code references elements within the portlet.
Note:
If you render a portlet within an inline frame, then manipulatingwindow.location may give unexpected results. If your portlet uses window.location, then you should ensure that your JavaScript is robust enough to handle the case where the portlet renders itself inside an inline frame.If you want to ensure that a portlet is never rendered in an inline frame, for example for accessibility reasons, set the renderPortletInIFrame attribute to false. Note however, that HTML markup from a portlet that is not rendered in an inline frame may interfere with other components on the Oracle ADF page.
For more information about the accessibility implications of using inline frames, see Section H.1.3, "Accessibility Considerations for Portlets."
63.5.5 What You May Need to Know About Portlet Sizing
ADF Faces components can stretch their children, or not. It is usually a requirement that a parent only contains a single child for it to be able to stretch that child. Components also support being stretched or not. When a component that supports being stretched is placed inside a parent that is stretching its child, the dimension of the child is determined by those of the parent. The child is said to be stretched by the parent and it is sized to fill the parent.
When a component is not stretched by its parent, it is said to be in a flow layout. Here it is not taking its size from its parent. It must determine its own size, either from its children or from dimension style settings specified by the page designer.
The portlet Faces component supports being stretched by its parent. It does not explicitly stretch its children.
There are three ways the size of a portlet component is determined, depending on the portlet's parent component and attributes set on the portlet component itself.
-
If the portlet is being stretched by its parent, the size is determined only by the parent. The portlet is in a stretch layout.
-
It does not matter how big the content is, this is irrelevant to the size of the portlet. If the content is bigger than the portlet, scrollbars are provided to enable users to display all the content.
-
If you specify a height for the portlet, it is ignored; stretching takes precedence.
-
This is the preferred layout method; it is always reliable.
-
The ADF Faces Tag documentation tells you whether each component stretches its children or not.
-
-
If the portlet is not being stretched by its parent and explicit sizes are set, they are used.
-
This is also always reliable; you'll get the size you specified.
-
If the content is bigger than the specified size, scrollbars are provided to enable users to display all the content.
-
The size is fixed; the size of the content is not taken into account.
-
-
If the portlet is not being stretched by its parent and no explicit sizes are set, the portlet attempts to auto-size to the content.
When a portlet is in a flow layout and has no explicit size set, it attempts to set the size of the portlet so that it is exactly big enough to display all of the portlet content without scrollbars.
The portlet does this by asking the browser how much space is required to show the content without scrollbars and using that to set the height of the portlet. More specifically, it looks at the scrollHeight property of the inline frame window.
How well this works depends on what is inside the portlet. Some layouts have a nice intrinsic size which auto-sizes well. However, some layouts and components inside the portlet, typically those that allow their content to overflow invisibly or with scrollbars, effectively hide the size of their contents. In specific terms of the HTML markup are HTML elements with overflow setting of hidden, auto, or scroll. This can come from inline styles or CSS styles applied to the element.
The problem arises because the scrollHeight is the minimum height required to correctly display the content. If you have, for example, a div element with an overflow="auto", then if that div is smaller than its content, then it uses scroll bars. So, when you ask what minimum size is needed to display the div, unless it has an explicit height or minimum height set, the answer is 0. That means that the content of this div, even if it has a definite height does not contribute to the overall scroll height of the content.
In ADF terms, this is often associated with components that expect to take their dimensions from their parents, for example panelStretchLayout with dimensionFrom="parent" or that scroll their contents, for example, panelGroupLayout with layout="scroll". These are the components that tend to have hidden or scrollable overflows.
Thinking about the ADF Faces layout model also gives us an alternative way of understanding the problem. The ADF Faces layout guidelines dictate starting with an unbroken chain of the components that are stretched by their parents and within that islands of flow layout, usually initiated by an af:panelGroupLayout where the components have fixed heights or take their dimensions from their children. If in the root of the portlet, we have that unbroken chain of components looking to take their dimensions from their parent but the portlet itself is in a flow layout and therefore is looking to take its dimensions from the content there is an impasse. The portlet is looking to take its dimensions from its parent for the size. It should be clear then that the solution to this is to stretch the portlet (that is, take it out of the flow layout island), set a height on the portlet, or make the content of the portlet entirely and island of flow layout content.
If the content cannot be auto-sized, the height defaults to 200px in Firefox and 0px in Internet Explorer. The fact that Internet Explorer is 0 is caused by incorrect behavior where the scrollHeight does not correctly respect the min-height CSS style setting. In Firefox, the 200px height comes from the minheight setting on the region that renders the portletized task flow. To work around this, you can set the height or min-height CSS in the consumer.
To get the best results when using the portlet in a flow layout where you want it auto-size the content:
-
Make the portlet content an unbroken chain of components that take their dimensions from their children.
-
Use the
dimensionsFrom="children"attribute on components that support it, for example,af:panelStretchLayout, to make them take their dimensions from their children. -
Use
layout="vertical"rather thanlayout="scroll"onpanelGroupLayoutto make the size of its children contribute to the overall auto-sized dimensions. -
When switching from the flow layout chain of components to a stretch layout, set an explicit height on the first component that stretches its children. Typically, this will be where you have used
panelStretchLayoutwithdimensionsFrom="parent".
63.5.6 What You May Need to Know About Minimize, Restore, and Move
To accommodate the needs of the development environment, the behavior of the actions Minimize, Restore, and Move for Show Detail Frame and portlet components differs between design time and runtime. At design time, these actions persist in a given WLS session, but do not persist over sessions (session means the time between starting and stopping WLS). At runtime, these actions persist both during a given WLS session and across sessions.
This difference has been introduced to enable an automatic reset of an application page at design time.
If persisting across sessions is not required at runtime, then a simple modification to the application's web.xml file can turn it off. Go to the following parameter setting in the application's web.xml file (Example 63-6):
Example 63-6 Persistence Setting in the Application's web.xml File
<context-param>
  <param-name>oracle.adf.view.faces.CHANGE_PERSISTENCE</param-name>
  <param-value>oracle.adfinternal.view.faces.change.HybridChangeManager</param-value>
</context-param>
Replace it with the following (Example 63-7):
Example 63-7 Turning Runtime Persistence Off in the Application's web.xml File
<context-param>
  <param-name>oracle.adf.view.faces.CHANGE_PERSISTENCE</param-name>
  <param-value>oracle.adf.view.faces.change.SessionChangeManager</param-value>
</context-param>
If security has been implemented on the application, then the Minimize, Restore, and Move actions display only to users with Customize privileges. They do not display to users with Personalize privileges. Customize users can test the effect of these actions by following these steps at design time:
-
Run the application page using JDeveloper's Integrated WLS.
-
Log in as the administrator.
-
Minimize a portlet, move portlets around, make whatever changes you want using the relevant actions commands.
-
Log out, then log in as a user and check the effects of your actions.
63.5.7 What Happens at Runtime
Once you place a portlet on a page, right-click the page and choose Run. This displays the page and runs the portlet in your default browser using JDeveloper's Integrated WLS. Different portlets may require additional runtime configuration. Notably, the content of an OmniPortlet or Web Clipping portlet instance is defined at runtime. For more information about OmniPortlet, see Chapter 64, "Creating Portlets with OmniPortlet." For more information about the Web Clipping portlet, see Chapter 65, "Creating Content-Based Portlets with Web Clipping." For more information about portlets generally, see Chapter 57, "Introduction to Portlets."
When running a portlet that has an Edit mode (in a Portal Framework application, this renders as a Personalize icon (pencil icon) in the portlet header), the Personalize icon displays only to authenticated users (that is, users who have logged in). Anonymous or public users do not see the option to personalize the portlet. Some form of security must be implemented for the portlet-consuming application before users can personalize their view of a portlet. If you are a developer creating portlets and pages, you may want to test your portlet's Edit mode without creating a complete security model for your application. For information about how to add security to enable testing of a portlet's Edit mode, see Section 74.12, "Configuring Basic Authentication for Testing Portlet Personalization."
Note:
To be able to add portlets to your page at runtime, you must add at least one portlet to that page at design time. Adding a portlet at design time ensures that the following is added to the<definitionFactories> element of the DataBindings.cpx file:
<factory nameSpace="http://xmlns.oracle.com/portlet/bindings"
className="oracle.adf.model.portlet.binding.PortletBindingDefFactoryImpl"/>
<dtfactory className="oracle.adfdtinternal.view.faces.portlet.PortletDefinitionDTFactory"/>
This entry is required to enable consumption of portlets at runtime.
If a portlet supports parameters or events and the automatic parameter and event listening is enabled, any changes to the supported parameters and events (or to parameters and events that are aliased) automatically update the portlet.
When running a portlet from a producer associated with an external application, a link to update login information is displayed. Clicking the link displays a credential provisioning page for entering external application credentials. After specifying valid credentials the portlet displays content appropriately. For more information about external applications, see Section 74.13, "Working with External Applications."
63.6 Setting Attribute Values for the Portlet Tag
In the source code view of a page, each portlet is represented by an adfp:portlet tag (or adfph:portlet tag), which includes a set of required and optional attributes. Required attributes, value and portletType, are provided automatically by the framework, and must not be altered. Optional attribute values are relevant when support for the attribute is built into the portlet. For example, you can set isAboutModeAvailable to true, but if no About mode has been defined for the portlet, then the attribute setting does not affect the portlet.
Portlets also support a set of style-related attributes, which are discussed more fully in Section 20.10, "Applying Styles to Components."
The portlet tag uses many attributes, which you can set at design time either through the JDeveloper Property Inspector or in the source code as attributes of the tag.
This section includes the following topics:
-
Section 63.6.1, "How to Set Attribute Values for the Portlet Tag Using the Property Inspector"
-
Section 63.6.2, "How to Set Attribute Values for the Portlet Tag in Source Code"
-
Section 63.6.6, "Portlet Modes Attributes of the Portlet Tag"
-
Section 63.6.9, "Customization Attributes of the Portlet Tag"
63.6.1 How to Set Attribute Values for the Portlet Tag Using the Property Inspector
The Property Inspector provides a quick and easy way to set attribute values for the portlet tag without having to edit the source code yourself.
To set attribute values for the portlet tag using the Property Inspector:
-
In the Application Navigator, open the application that contains the page on which the portlet appears.
-
Expand the project that contains the page.
-
Locate the page, right-click it, and then choose Open.
Tip:
You can also double-click the page to open it. -
In the design view, select the portlet whose attributes you want to set.
-
In the Property Inspector, click the appropriate tab and set the desired attribute.
Repeat this step as often as required.
-
Save your changes.
-
To test the changes you have made, right-click the page and choose Run.
63.6.2 How to Set Attribute Values for the Portlet Tag in Source Code
If you prefer working in source code, you can set attribute values for the portlet tag directly there.
To set attribute values for the portlet tag in source code:
-
In the Application Navigator, open the application that contains the page on which the portlet appears.
-
Expand the project that contains the page.
-
Locate the page, right-click it, and then choose Open.
Tip:
You can also double-click the page to open it. -
In the design view, select the portlet whose attributes you want to set.
-
Click the Source tab. The portlet that you selected is highlighted in the source code.
-
Make your changes directly to the source code. Example 63-8 shows an edited portlet tag.
-
Save your changes.
-
To test the changes you have made, right-click the page and choose Run.
63.6.3 Common Attributes of the Portlet Tag
Table 63-2 describes the common attributes of the portlet tag.
Table 63-2 Common Attributes of the Portlet Tag
| Attribute | Value | Description |
|---|---|---|
|
|
Text string. For example: id="newsBrief" The value must follow a subset of the syntax allowed in HTML:
|
The unique identifier of the portlet. This attribute is populated with a unique value by default when you add the portlet to a page. |
|
|
Text string. For example: title="Announcements" |
The portlet title, which is displayed in the portlet header. The value specified here takes precedence over any title specified elsewhere (for example, in the portlet markup). If no value is specified here, the portlet extracts its title from the portlet markup (response). If no value is specified either here or in the portlet markup, the portlet extracts its title from the portlet definition. Note: Supplying a value to the |
|
|
Number expressed in pixels or as a percentage of available area:
|
The width of the area to allow for portlet display. If the actual portlet width is larger than the |
|
|
Number expressed in pixels, for example: height = 300px |
The height of the area to allow for portlet display. If the actual portlet height is larger than the |
|
|
URI to an image. For example: icon="coffee.png" In the Property Inspector, click the Property Menu icon next to the field and then choose Edit to locate and select the required image. The value must be an absolute URI or a URI that is resolvable relative to the current page or the application context root. The URI provided in the preceding example is stored at the application context root, therefore a full path is not required. |
A URI specifying the location of an image to use as an icon, displayed to the left of the portlet title in the portlet header. You can use the icon to indicate the portlet's purpose, to reinforce branding, as a content indicator, or for some other reason. |
|
|
One or more component IDs. For example: partialTriggers="_id1 _id2 componentID5" Separate component IDs with spaces. |
The IDs of the components that trigger a partial update. The portlet listens on the specified trigger components. If a trigger component receives a trigger event that causes it to update in some way, this portlet also requests to be updated. |
63.6.4 Appearance Attributes of the Portlet Tag
Table 63-3 describes the appearance attributes of the portlet tag.
Table 63-3 Appearance Attributes of the Portlet Tag
| Attribute | Value | Description |
|---|---|---|
|
|
minimized
normal
Default: |
The default state of the portlet:
|
|
|
auto
false
true
Default: |
Whether a change in portlet mode renders the new mode on a new page, rather than the page on which the portlet resides.
|
|
|
auto
false
true
Default: |
Whether the portlet is rendered in an IFRAME:
For more information, see Section 63.5.4, "What You May Need to Know About Inline Frames." |
|
|
auto
false
true
Default: |
Whether a scroll bar is displayed:
|
|
|
false
true
Default: |
Whether the portlet header is displayed:
|
|
|
false
true
Default: |
Whether to display a shadow decoration around the portlet:
|
|
|
false
true
Default: |
Whether the portlet is rendered.
|
|
|
dark
light
medium
Default: |
The style selector to apply to the skin used by the portlet:
This provides a way for you to apply a different look and feel to each portlet on an page. |
|
|
Text string. For example: shortDesc="Portlet for entering display text in place." |
A short description of the portlet. |
|
|
always
onHover
Default: |
Whether seeded interactions for the portlet are shown:
|
|
|
menu
none
Default: |
Whether to display the Move command in the portlet's Action menu:
There is a difference in the way that the Move command behaves at design time and at runtime. For more information, see Section 63.5.6, "What You May Need to Know About Minimize, Restore, and Move." |
|
|
menu
none
Default: |
Whether to display the Remove icon on the portlet chrome:
There is a difference in the way that the Remove icon behaves at design time and at runtime. For more information, see Section 63.5.6, "What You May Need to Know About Minimize, Restore, and Move." Note: This attribute is available only for the |
|
|
always
never
Default: |
Whether to display the resize handle at the bottom right corner of the portlet.
Note: This attribute is available only for the |
|
|
chrome
none
Default: |
Whether to display the Minimize icon on the portlet chrome:
There is a difference in the way that the Minimize icon behaves at design time and at runtime. For more information, see Section 63.5.6, "What You May Need to Know About Minimize, Restore, and Move." |
63.6.5 Behavior Attributes of the Portlet Tag
Table 63-4 describes the behavior attributes of the portlet tag.
Table 63-4 Behavior Attributes of Portlet Tag
| Attribute | Value | Description |
|---|---|---|
|
|
One or more component IDs. For example: partialTriggers="_id1 _id2 componentID5" Separate component IDs with spaces. |
The IDs of the components that trigger a partial update. The portlet listens on the specified trigger components. If a trigger component receives a trigger event that causes it to update in some way, this portlet also requests to be updated. |
|
|
false
true
Default: |
Whether parameters in portlet links that point to the page on which the portlet is placed are made available to the page:
|
63.6.6 Portlet Modes Attributes of the Portlet Tag
Portlet Modes attributes control the rendering of mode-switching UI actions, such as entering edit mode. The ability to render a portlet in a particular mode depends on the modes supported by the portlet and the user authorization. For example, if the isCustomizeModeAvailable attribute is set to true, but the action is not supported in the portlet, then the attribute setting does not affect the portlet.
Portlet Modes attributes, described in Table 63-5, are value binding expressions that evaluate to true or false:
-
truemeans the portlet is allowed to render in the named mode. -
falsemeans the portlet is not allowed to render in the named mode.
Table 63-5 Portlet Modes Attributes of the Portlet Tag
| Attribute | Value | Description |
|---|---|---|
|
|
false
true
Default: |
Whether to render an About command on the portlet's Actions menu. Users choose About to invoke the portlet's About mode. |
|
|
false
true
Default: |
Whether to render a Configure command on a JSR 286 portlet's Actions menu. Users choose Configure to open the portlet's Configuration settings. |
|
|
false
true
Default: |
Whether to render a Customize icon in the portlet header. Site administrators choose Customize to edit a portlet's default personalization data. |
|
|
false
true
Default: |
Whether to render a Details command on a PDK-Java portlet's Actions menu. Users choose Details to open the portlet in Full Screen mode. |
|
|
false
true
Default: |
Whether to render a Help command on the portlet's Actions menu. Users choose Help to open the portlet's Help page. |
|
|
false
true
Default: |
Whether to render a Print command on a JSR 286 portlet's Actions menu. Users choose Print to displays a printer-friendly version of the portlet. |
|
|
false
true
Default: |
Whether to render a Refresh command on the portlet's Actions menu. Users choose Refresh to redraw the portlet independent of any other content on the page (also known as a partial-page refresh). |
|
|
false
true
Default: |
Whether to render a Personalize icon in the portlet header. Users choose Personalize to alter their personal view of the portlet. This mode is equivalent to the Edit mode selection in the Standards-based Java Portlet (JSR286) Wizard. The Personalize icon displays only to authenticated users (that is, users who are logged in). It does not display to public or unauthenticated users. You must implement some form of application security for users to be able to personalize their portlet views. If you are a developer creating portlets, and you want to test the Personalize mode without creating a complete security model for your application, then see Section 74.12, "Configuring Basic Authentication for Testing Portlet Personalization." Note: A typical personalization setting is Portlet Title. You can set Portlet Title at design time, by providing a value for the |
|
|
false
true
Default: |
Whether to enable previewing of portlet content. This mode has no particular application in Portal Framework applications, but it is used in Oracle Portal's Portlet Repository, where it renders as a magnifying glass icon, which users click to preview a portlet. |
63.6.7 Style Attributes of the Portlet Tag
Table 63-6 describes the style attributes of the portlet tag.
Table 63-6 Style Attributes of the Portlet Tag
| Attribute | Value | Description |
|---|---|---|
|
|
One or more CSS styles. These should be in compliance with, at least, CSS 2.0 and take the following format: contentStyle="color:rgb(255,0,255); font-family:Arial Helvetica Geneva sans-serif;font-size:large;" |
The CSS style to apply to the portlet content. Values entered here take precedence over styles specified in the |
|
|
One or more CSS styles. These should be in compliance with, at least, CSS 2.0 and take the following format: inlineStyle="color:rgb(255,0,255); font-family:Arial Helvetica Geneva sans-serif;font-size:large;" |
The CSS style to apply to the whole portlet. Values entered here take precedence over styles included in a CSS or skin on the specific portlet instance. For more information, see Understanding contentStyle and inlineStyle Properties. |
63.6.8 Binding Attributes of the Portlet Tag
Table 63-7 describes the binding attributes of the portlet tag.
Table 63-7 Binding Attributes of the Portlet Tag
| Attribute | Value | Description |
|---|---|---|
|
|
Name of a managed bean. For example:
binding="#{frameActionsBean.Binding}"
In the Property Inspector, click the Property Menu icon next to the field and then choose Edit to select a managed bean and specify the relevant managed bean property. |
A binding reference to store the component instance. The binding reference binds an instance of the portlet to a managed bean property. Managed beans are any JavaBeans used by the application that are registered in the JSF |
63.6.9 Customization Attributes of the Portlet Tag
Table 63-8 describes the customization attributes of the portlet tag.
Table 63-8 Customization Attributes of the Portlet Tag
| Attribute | Value | Description |
|---|---|---|
|
|
false
true
Default: |
Whether design time customizations of the portlet tag are allowed on this portlet. |
|
|
Text string |
The roles for which design time customizations are allowed. This attribute enables you to allow customizations, but restrict who can actually perform them. |
63.6.10 Other Attributes of the Portlet Tag
Table 63-9 describes the other attributes of the portlet tag.
Table 63-9 Other Attributes of the Portlet Tag
| Attribute | Value | Description |
|---|---|---|
|
|
loose
none
strict
Default: |
Which DTD, if any, is specified in the
|
63.7 Manually Wiring Parameters and Events in JSR 286 Portlets
If the portlet that you add to your page defines parameters or events that it uses to dynamically alter its content, for the most part this happens automatically. For more information, see Section 63.5.3, "What You May Need to Know About Interportlet Communication."
However, in some circumstances you may find it necessary to turn off the default automatic parameter and event listening, or you may be using portlets with parameters or events with names that do not match or define appropriate aliases. In such situations, you must manually wire the parameters and events in your portlets.
This section includes the following topics:
-
Section 63.7.1, "How to Manually Link Portlets with Public Render Parameters"
-
Section 63.7.2, "How to Manually Link Portlets with Portlet Events"
63.7.1 How to Manually Link Portlets with Public Render Parameters
When you place a portlet on a page, any public render parameters with the same QName are automatically linked. For example, if one portlet publishes a value to a parameter with the name myParam, then if a second portlet on the page accepts values from a parameter with the same name, the second portlet is automatically updated with the appropriate value.
Portlets can also link together using parameters with different QNames if the portlet developer has set up aliases for the parameter.
The following example shows how to use public render parameters to link the behavior of two portlets using parameters with different names and no defined aliases. In the example, we take a generic Parameter Form portlet that allows us to update public render parameters, and show how that can be linked to a Stock Price portlet that renders stock prices, taking the stock symbol from a public render parameter.
When these two portlets are dropped onto the same page, they are not automatically linked together. This is because none of the generic parameter names in the Parameter Form portlet match the stocksymbol parameter in the Stock Price portlet, and the Stock Price portlet does not define any aliases for the stocksymbol parameter that match the generic parameter names in the Parameter Form portlet.
There are two methods for manually linking parameters: using page variables and using the ParametersChange ADF contextual event.
This section includes the following topics:
-
Section 63.7.1.1, "Manually Linking Parameters Using Page Variables"
-
Section 63.7.1.2, "Manually Linking Parameters Using the ParametersChange ADF Contextual Event"
63.7.1.1 Manually Linking Parameters Using Page Variables
When the portlets are dropped onto a page, page variables are created for each of the parameters supported by the portlets. In our example, there are three page variables for the Parameter Form portlet and one for the Stock Price portlet (Example 63-9).
Example 63-9 Page Variables Created for Portlet Parameters
<pageDefinition ...>
  <parameters/>
  <executables>
    <variableIterator id="variables">
      <variable Name="ParameterFormPortlet1_1_Parameter1"
                Type="java.lang.Object"/>
      <variable Name="ParameterFormPortlet1_1_Parameter2"
                Type="java.lang.Object"/>
      <variable Name="ParameterFormPortlet1_1_Parameter3"
                Type="java.lang.Object"/>
      <variable Name="StockPricePortlet1_1_stocksymbol"
                Type="java.lang.Object"/>
    </variableIterator>
    <portlet id="ParameterFormPortlet1_1"
             ...>
      <parameters>
        <parameter name="Parameter1"
                   pageVariable="ParameterFormPortlet1_1_Parameter1"/>
        <parameter name="Parameter2"
                   pageVariable="ParameterFormPortlet1_1_Parameter2"/>
        <parameter name="Parameter3"
                   pageVariable="ParameterFormPortlet1_1_Parameter3"/>
      </parameters>
      <events>
        <event eventType="ParametersChange"
               name="ParameterFormPortlet1_1_Event"/>
      </events>
    </portlet>
    <portlet id="StockPricePortlet1_1"
             ...>
      <parameters>
        <parameter name="stocksymbol"
                   pageVariable="StockPricePortlet1_1_stocksymbol"/>
      </parameters>
      <events>
        <event eventType="ParametersChange"
               name="StockPricePortlet1_1_Event"/>
      </events>
    </portlet>
  </executables>
  <bindings/>
</pageDefinition>
To link the portlets, you can make the Stock Price portlet use the value from one of the page variables created for the Parameter Form portlet (Example 63-10).
Example 63-10 Linking Portlet Parameters Using Page Variables
<portlet id="StockPricePortlet1_1"
         ...>
  <parameters>
    <parameter name="stocksymbol"
               pageVariable="ParameterFormPortlet1_1_Parameter1"/>
  </parameters>
  <events>
    <event eventType="ParametersChange"
           name="StockPricePortlet1_1_Event"/>
  </events>
</portlet>
Now, entering a value in the first parameter field of the Parameter Form portlet sets the corresponding page variable to the same value, which in turn causes the Stock Price portlet to be updated with the new value.
63.7.1.2 Manually Linking Parameters Using the ParametersChange ADF Contextual Event
When you drop a portlet that supports parameters, as well as the page variables discussed in the previous section, an ADF ParametersChange contextual event is created for the portlet. This event is triggered when the values of the portlet's parameters change. The payload of the event is the new value of the parameter. You can use this event to set the value of another portlet's parameter by creating an event map in the page definition that maps the payload of the first portlet's event to the second portlet's parameter. Example 63-11 shows how this event map would look for our example.
Example 63-11 Linking Portlet Parameters Using the ParametersChange ADF Contextual Event
<eventMap xmlns="http://xmlns.oracle.com/adfm/contextualEvent">
  <event name="ParameterFormPortlet1_1_Event">
    <producer region="ParameterFormPortlet1_1">
      <consumer handler="StockPricePortlet1_1">
        <parameters>
          <parameter name="stocksymbol">
                     value="${payLoad.Parameter1}"/>
        </parameters>
      </consumer>
    </producer>
  </event>
</eventMap>
Entering a value in the first parameter field of the Parameter Form portlet triggers the ParametersChange event. The payload of this event, the new parameter value, is then sent to the Stock Price Portlet and used to specify the value of the stocksymbol parameter.
63.7.2 How to Manually Link Portlets with Portlet Events
The following example shows how to manually link portlets using portlet events in the case where the names of the events defined for the different portlets do not match.
In the example, we have a portlet, the Department Locations portlet, which lists the geographical locations of a company's various offices. The Department Locations portlet raises a portlet event (latLong) when a particular department is selected in the portlet.
There is another portlet, the Map portlet, which displays a Google map. The Map portlet listens out for a portlet event (geolocation) to use to determine a location to display on a map.
When the two portlets are dropped on a page, there is no way for the Map portlet to know that the event raised by the Department Locations portlet provides information that it can use to display a map. To make this link between the two portlets, you must edit the page definition to explicitly create the mapping between the two events, as shown in Example 63-12.
Example 63-12 Explicit Event Mapping in the Page Definition
<pageDefinition ...>
  <parameters/>
  <executables>
    <variableIterator id="variables"/>
    <portlet id="DepartmentLocations1_1"
             ...
      <events>
        <event name="latLong">
          <portletevent namespace-uri="http://xmlns.oracle.com/portlet/EventSample"
                        localpart="latLong"/>
        </event>
      </events>
    </portlet>
    <portlet id="Map1_1"
             ...
      <events>
        <event name="geolocation">
          <portletevent namespace-uri="http://xmlns.oracle.com/portlet/EventSample"
                        localpart="geolocation"/>
        </event>
      </events>
    </portlet>
  </executables>
  <bindings/>
  <eventMap xmlns="http://xmlns.oracle.com/adfm/contextualEvent">
    <event name="{http://xmlns.oracle.com/portlet/EventSample}latLong">
      <producer region="DepartmentLocations1_1">
        <consumer handler="Map1_1.{http://xmlns.oracle.com/portlet/EventSample}geolocation"/>
      </producer>
    </event>
  </eventMap>
</pageDefinition>
63.8 Copying Portlets
When you copy portlets, the portlets and their copies must reside within the same application. For example, you can copy a portlet from one page in an application to another page in the same project in that application, or from one place on a page to another place on the same page. You can also copy a portlet from one project to another project in the same application, if the target project is configured for consuming portlets. The copies are references to the same portlet instance, so customizations or personalizations made to any instance of the portlet (original or copy) affect all the other instances.
Copying a portlet is more than a matter of copying and pasting the portlet view tag. It involves copying portlet-related entries from the application page's source. It may also involve copying portlet-related entries from the page definition file and removing duplicate portlet binding information or creating a new method in the copied portlet's binding bean.
When a portlet is copied, the target page must be an Oracle ADF Faces page. Any preexisting code on the target page must reflect that. This is quite easy to accomplish. When JDeveloper creates a new JSF page, it contains pure JSF tags. The first time you drop an Oracle ADF Faces component onto the page, tags are automatically updated to be Oracle ADF Faces tags. For example, an <html> tag becomes <afh:html>, <head> and <title="title"> tags become <afh:head title="title">, and so on. Therefore, a simple way to ensure the conversion of the target page to an Oracle ADF Faces page is to place any Oracle ADF Faces component on the target page. This performs any required code conversion for you automatically.
This section includes the following topics:
-
Section 63.8.1, "How to Copy a Portlet and Place it on the Same Page"
-
Section 63.8.2, "How to Copy a Portlet from One Application Page to Another"
63.8.1 How to Copy a Portlet and Place it on the Same Page
Because all of the page's resources are available to both portlet instances when you copy a portlet to the same page, there is no requirement to copy portlet-related information from the page's Page Definition file. It is just a matter of copying and pasting the portlet's view tag, and assigning a unique identifier to the copy.
To copy and place a portlet on the same page:
-
In the Application Navigator, open the application that contains the page on which the portlet to copy appears.
-
Expand the project that contains the page.
-
Locate the page, right-click it, and then choose Open.
Tip:
You can also double-click the page to open it. -
In the design view, select the portlet to copy.
-
Click the Source tab. The portlet that you selected is highlighted in the source code.
-
Copy the portlet tag (Example 63-13).
Example 63-13 Code Fragment to be Copied When Copying a Portlet
<f:view> <afh:html binding="#{backing_portlet_page.html1}" id="html1"> <afh:head title="portlet_page" binding="#{backing_portlet_page.head1}" id="head1"> <meta http-equiv="Content-Type" content="text/html;charset=windows-1252"/> </afh:head> <afh:body binding="#{backing_portlet_page.body1}" id="body1"> <h:form binding="#{backing_portlet_page.form1}" id="form1"> <adfp:portlet value="#{bindings.portlet1}" portletType="/oracle/adf/portlet/ pdksampleproducer_1153245807295/applicationPortlets/ Portlet2_82d49b79_010c_1000_8006_82235ffc4e2b" binding="#{backing_portlet_page.portlet1}" id="portlet1" isCustomModesAvailable="true"/> </h:form> </afh:body> </afh:html> </f:view> -
Paste the copied code fragment into the desired location of the page source.
-
Provide a unique value for the copy's
idattribute (Example 63-14).Example 63-14 Changing the Portlet ID
<adfp:portlet value="#{bindings.portlet1}"
  portletType="/oracle/adf/portlet/
  pdksampleproducer_1153245807295/applicationPortlets/
  Portlet2_82d49b79_010c_1000_8006_82235ffc4e2b"
  binding="#{backing_portlet_page.portlet1}"
  id="portlet2"
  isCustomModesAvailable="true"/>
Note:
On a given page, each portlet must have a unique ID. -
In the page source, if the copied portlet's
adfp:portlettag has a binding attribute, for example:binding="#{backing_untitled2.portlet1}"Then either remove this binding, or create a new method in the binding bean by opening the managed bean class for this managed bean and defining the new method.
For example, if portlet1 is copied, the pasted copy becomes portet2 in the managed bean class, as shown in Example 63-15.
-
From the main menu, choose File > Save All.
63.8.2 How to Copy a Portlet from One Application Page to Another
When you copy a portlet from one page to another in an application, portlet-related code must also be copied from the source page's Page Definition file. This section describes the steps related to both copying from one application page to another and from one application project to another.
To copy a portlet from one page to another:
-
In the Application Navigator, open the application that contains the page on which the portlet to copy appears.
-
Expand the project that contains the page.
-
Locate the page, right-click it, and then choose Open.
Tip:
You can also double-click the page to open it. -
In the design view, select the portlet to copy.
-
Click the Source tab. The portlet that you selected is highlighted in the source code.
-
Copy the portlet tag (Example 63-16).
Example 63-16 Source Page Code Fragment to Be Copied When Copying a Portlet
<f:view> <afh:html binding="#{backing_portlet_page.html1}" id="html1"> <afh:head title="portlet_page" binding="#{backing_portlet_page.head1}" id="head1"> <meta http-equiv="Content-Type" content="text/html;charset=windows-1252"/> </afh:head> <afh:body binding="#{backing_portlet_page.body1}" id="body1"> <h:form binding="#{backing_portlet_page.form1}" id="form1"> <adfp:portlet value="#{bindings.portlet1}" portletType="/oracle/adf/portlet/ pdksampleproducer_1153245807295/applicationPortlets/ Portlet2_82d49b79_010c_1000_8006_82235ffc4e2b" binding="#{backing_portlet_page.portlet1}" id="portlet1" isCustomModesAvailable="true"/> </h:form> </afh:body> </afh:html> </f:view> -
Go to the application page to which to copy the portlet (the target page).
Portlets can reside only on Oracle ADF Faces pages. If the target page does not contain Oracle ADF Faces components, then ensure that the container objects—that is, any tags the portlet tag is nested in—use Oracle ADF tags.
If you are copying the portlet to a page in a different project, the target project must be configured for consuming portlets. To configure the project, you must register a portlet producer with the project. For information, see Section 63.2.1, "Registering a WSRP Portlet Producer with a WebCenter Portal Framework Application" or Section 63.2.2, "Registering an Oracle PDK-Java Portlet Producer with a WebCenter Portal Framework Application."
-
Click the Source tab and paste the copied code fragment into the desired location of the page source.
-
In the Application Navigator, right-click the source page (the page from which the portlet was copied), and choose Go to Page Definition.
-
Click the Source tab and copy the portlet binding from the source page's page definition file (Example 63-17).
Example 63-17 Code Fragment to Be Copied From a Page Definition File
<portlet id="portlet1"
  portletInstance="/oracle/adf/portlet/pdksampleproducer_1153245/applicationPortlets/Portlet2_82d49_010c_1000_8006_82235"
 class="oracle.adf.model.portlet.binding.PortletBinding"
 xmlns="http://xmlns.oracle.com/portlet/bindings"/>
Note:
When the portlet being copied includes parameters, be sure to include the copied portlet's portlet parameters and the page variables linked to the portlet parameters in the copy. -
In the Application Navigator, right-click the target page and choose Go to Page Definition.
If a page definition does not exist for the page, you are asked if you want to create one. Click Yes.
-
Click the Source tab and paste the portlet binding you copied from the source (along with relevant portlet parameters and the page variables associated with those parameters).
Paste the code between the
<executables>tags. You may need to add a closing</executables>tag and ensure that the opening tag does not contain a slash (/). -
From the main menu, choose File > Save All.
63.9 Deleting Portlets from Application Pages
When you delete a portlet from an application page, if the portlet had parameters, then you should also delete page variables associated with those parameters from the application page's Page Definition file.
To delete a portlet and its related page variables from a page:
-
In the Application Navigator, open the application that contains the page on which the portlet to delete appears.
-
Expand the project that contains the page.
-
Locate the page, right-click it, and then choose Open.
Tip:
You can also double-click the page to open it. -
In the design view, right-click the portlet to delete and choose Delete.
This deletes the portlet from the page and the portlet binding from the Page Definition file.
-
If the portlet included variables, in the Application Navigator, right-click the page and choose Go to Page Definition.
-
Click the Source tab and locate the page variables associated with the deleted portlet, and delete them from the page definition file.
For example, if you deleted portlet1, you would also delete the highlighted variables in Example 63-18:
Example 63-18 Deleting Portlet-Related Page Variables from a Page Definition File
<?xml version="1.0" encoding="UTF-8" ?> <pageDefinition xmlns="http://xmlns.oracle.com/adfm/uimodel" version="10.1.3.38.97" id="untitled1PageDef" Package="project1.pageDefs"> <parameters/> <executables> <variableIterator id="variables"> <variable Name="portlet1_param1" Type="java.lang.Object"/> <variable Name="portlet1_param2" Type="java.lang.Object"/> <variable Name="portlet2_param1" Type="java.lang.Object"/> <variable Name="portlet2_param2" Type="java.lang.Object"/> </variableIterator> <portlet id="portlet2" portletInstance="/oracle/adf/portlet/ PdkPortletProducer2_1154100666247/applicationPortlets/ Portlet1_b5e49696_010c_1000_8008_8c5707ef9c4f" class="oracle.adf.model.portlet.binding.PortletBinding" xmlns="http://xmlns.oracle.com/portlet/bindings"> <parameters> <parameter name="param1" pageVariable="portlet2_param1"/> <parameter name="param2" pageVariable="portlet2_param2"/> </parameters> </portlet> </executables> <bindings/> </pageDefinition> -
From the main menu, choose, select File > Save All.
63.10 Consuming WebCenter Services Portlets
WebCenter Services Portlets is a preconfigured, out-of-the-box producer that enables you to expose WebCenter Portal tools and services task flows in other applications as WSRP portlets or pagelets.
WebCenter Services Portlets provides the following portlets:
-
Document Manager—Displays folders, files, and wikis from the WebCenter Content repository
-
Blogs—Displays blog posts from a selected location in the WebCenter Content repository
-
Discussion Forums—Displays all discussions and their respective replies and enables users to perform various operations based on their privileges
-
Announcements—Displays all current announcements and enables users to perform various operations based on their privileges
-
Lists—Displays user-created lists and provides controls for creating lists and adding list data
-
Polls Manager—Enables users to perform administrative operations on polls
-
Take Polls—Displays the most recently published available poll, or a specific poll identified by the pollId parameter
-
Mail—Displays a mail inbox
-
Activity Stream—Provides an overview of the most recent activities performed by a user's connections
-
Tag Cloud—Displays a tag cloud, which is a visual depiction of all the tags used on the page
You can consume WebCenter Services Portlets in the following applications:
-
Oracle Portal
-
Oracle WebLogic Portal
-
Oracle WebCenter Interaction, using Oracle WebCenter Portal's Pagelet Producer
The WebCenter Services Portlets producer is a WSRP producer. As such, you register it with your application in the same way as you would any other WSRP producer.
Note:
The WebCenter Services Portlets producer is a secured producer, so when you register the producer, you must use the same token as was used when configuring the producer in WebCenter Portal.For information about configuring the WebCenter Services Portlets producer, see the "Configuring WebCenter Services Portlets" section in Oracle Fusion Middleware Administering Oracle WebCenter Portal.
This section includes the following topics:
-
Section 63.10.1, "How to Consume WebCenter Services Portlets in Oracle Portal"
-
Section 63.10.2, "How to Consume WebCenter Services Portlets in Oracle WebLogic Portal"
-
Section 63.10.3, "How to Consume WebCenter Services Portlets in Oracle WebCenter Interaction"
-
Section 63.10.4, "How to Set WebCenter Services Portlets Parameters"
-
Section 63.10.6, "Troubleshooting Problems with WebCenter Services Portlets"
63.10.1 How to Consume WebCenter Services Portlets in Oracle Portal
To consume WebCenter Services Portlets in Oracle Portal:
-
Register the WebCenter Services Portlets WSRP producer in Oracle Portal.
For information about how to do this, see the "Securing Access to Web Services Remote Portlets" section in the Oracle Fusion Middleware Administrator's Guide for Oracle Portal.
-
After registering the producer, you can then add any of the portlets provided by the producer to pages in your Oracle Portal application.
For information about how to do this, see the "Adding a Portlet to a Page" section in the Oracle Fusion Middleware User's Guide for Oracle Portal.
63.10.2 How to Consume WebCenter Services Portlets in Oracle WebLogic Portal
To consume WebCenter Services Portlets in Oracle WebLogic Portal:
-
Register the WebCenter Services Portlets WSRP producer in Oracle WebLogic Portal.
For information about how to do this, see the "Adding a Producer" section in the Oracle Fusion Middleware Federated Portals Guide for Oracle WebLogic Portal.
-
Add the remote portlets to the Portal Library.
For information about how to do this, see the "Adding a Remote Portlet to the Portal Library" section in the Oracle Fusion Middleware Federated Portals Guide for Oracle WebLogic Portal.
-
The WebCenter Services Portlets producer is a secured WSRP producer, so you must set up the SAML security.
For information about how to do this, see the "SAML Security Between a WebLogic Portal Consumer and a WebCenter Portal: Framework Application Producer" section in the Oracle Fusion Middleware Federated Portals Guide for Oracle WebLogic Portal.
-
After registering the producer and setting up the security, you can then add any of the portlets provided by the producer to pages in your Oracle WebLogic Portal application.
For information about how to do this, see the "Adding Contents to a Page" section in the Oracle Fusion Middleware Portal Development Guide for Oracle WebLogic Portal.
63.10.3 How to Consume WebCenter Services Portlets in Oracle WebCenter Interaction
To consume WebCenter Services Portlets in Oracle WebCenter Interaction:
-
To make WebCenter Services Portlets available in Oracle WebCenter Interaction, you must first register the producer as a pagelet producer using Oracle WebCenter Portal's Pagelet Producer.
For information about how to do this, see the "Registering WSRP and Oracle JPDK Portlet Producers in the Pagelet Producer" section in Oracle Fusion Middleware Administering Oracle WebCenter Portal.
Note:
You must select the same Token Profile that was specified when configuring WS-Security for WebCenter Services Portlets. -
After creating the pagelet producer, you must then register it with Oracle WebCenter Interaction.
For information about how to do this, see the "Creating the Oracle WebCenter Pagelet Producer Remote Server" section in the Oracle Fusion Middleware Administrator's Guide for Oracle WebCenter Interaction.
-
When the pagelet producer is registered with your Oracle WebCenter Interaction application, you must then create remote pagelet web services for each of the pagelets that you want to use.
For information about how to do this, see the "Creating or Editing a Remote Pagelet Web Service" section in the Oracle Fusion Middleware Administrator's Guide for Oracle WebCenter Interaction.
-
Next, create portlets for the pagelets.
For information about how to do this, see the "Creating or Editing a Portlet" section in the Oracle Fusion Middleware Administrator's Guide for Oracle WebCenter Interaction.
-
Finally, you can add the portlets to your Oracle WebCenter Interaction community pages.
For information about how to do this, see the "Creating a Community Page" section in the Oracle Fusion Middleware Administrator's Guide for Oracle WebCenter Interaction.
63.10.4 How to Set WebCenter Services Portlets Parameters
Each portlet provided by WebCenter Services Portlets defines various parameters that enable you to change the appearance or behavior of the portlet when you consume it in your application.
This section includes the following topics:
63.10.4.1 Common WebCenter Services Portlets Parameters
Table 63-10 lists the parameters that are available for all the portlets provided by WebCenter Services Portlets.
Table 63-10 Common Parameters for WebCenter Services Portlets
| Parameter | Description |
|---|---|
|
|
Specifies the width of the portlet on the consuming page. If not specified, the portlet takes up as much horizontal space as the page allows. |
|
|
Specifies the height of the portlet on the consuming page. If not specified, the portlet height is determined by the portlet consumer. |
63.10.4.2 Document Manager Portlet Parameters
Table 63-11 lists the additional parameters available for the Document Manager portlet.
Table 63-11 Document Manager Portlet Parameters
| Parameter | Description |
|---|---|
|
|
The name of the Oracle Content Server connection used by WebCenter Services Portlets. If no value is selected, the default connection specified by the application developer or administrator is used. For information about configuring content repository connections, see the "Registering Content Repositories" section in Oracle Fusion Middleware Administering Oracle WebCenter Portal. Default: The connection selected as default in the Create Content Repository Connection dialog box by the application developer, which can be changed by the administrator. |
|
|
A list of disabled features for the portlet. Use commas or spaces to separate items. Valid values are exposed in the JavaDoc: Example:
${'search, advancedSearch, clipboard, dnd, rename, newfolder, upload, newwiki, checkin, checkout, editoffice, edithtml, delete, sidebars, history'}
|
|
|
A target layout for the task flow. Select from:
|
|
|
The maximum number of rows to show in the portlet. If the listing of folders and files in the portlet is larger than the specified number of rows, the portlet displays a scroll bar. Default: Note: If you set |
|
|
Specifies whether to disable and hide all content management operations:
|
|
|
The currently focused resource. This value can be a folder ID or a document ID. |
|
|
The name of the folder to use as the root folder in the current portlet instance. This is a content-scoping parameter that assists with determining the source and range of content to display in the portlet instance. You can specify an EL expression to set this value. Example: |
63.10.4.3 Discussion Forums Portlet Parameters
Table 63-12 lists the additional parameters available for the Discussion Forums portlet.
Table 63-12 Discussion Forums Portlet Parameters
| Parameter | Description |
|---|---|
|
|
An identifier for an existing category in WebCenter Portal's Discussion Server to which the view should be scoped. When no value is supplied, it defaults to the appropriate root category of the discussions server. (This root category ID can be overridden by supplying an additional property named application.root.category.id in the connection.) For testing purposes, you may want to create a category through the discussions server administrator interface and then reference that category identifier here. |
|
|
An identifier for an existing forum in your discussions server for which popular topics should be fetched. If both categoryId and forumId are given, then only categoryId is honored. |
|
|
Determines if the portlet shows forums either in a category only or in subcategories. True means all forums under a given category/subcategory are shown; false means only the category's direct child forums are shown. The default value is false. Note: A value of true can impact performance. |
|
|
Determines if the forums are grouped under the Category ID category or the topics are grouped under the Forum ID forum. True means the portlet displays the forums classified under categoryId; false means the portlet displays the topics associated with the specified forumId. The default value is false. This parameter works in combination with other parameters. |
63.10.4.4 Blogs Portlet Parameters
Table 63-13 lists the additional parameters available for the Blogs portlet.
Table 63-13 Blogs Portlet Parameters
| Parameter | Description |
|---|---|
|
|
Specifies whether or not to display blog post comments:
|
|
|
Specifies how many blog posts to show before pagination is displayed and users can select to go to the next page. By default, up to 10 blog posts can be displayed on a blog page. |
|
|
Specifies the unique identifier of the selected folder. The value can be specified in the following formats:
|
63.10.4.5 Lists Portlet Parameters
The Lists portlet does not include any additional parameters.
63.10.4.6 Polls Manager Portlet Parameters
Table 63-14 lists the additional parameters available for the Polls Manager portlet.
63.10.4.7 Take Polls Portlet Parameters
Table 63-15 lists the additional parameters available for the Take Polls portlet.
63.10.4.8 Announcements Portlet Parameters
Table 63-16 lists the additional parameters available for the Announcements portlet.
Table 63-16 Announcements Portlet Parameters
| Parameter | Description |
|---|---|
|
|
The forum ID in the discussions server under which announcement objects are maintained. Each application should create a forum on the discussions server. Enter that forum ID here, for example If this parameter is not specified, then amusements default to global announcements. |
63.10.4.9 Mail Portlet Parameters
Table 63-17 lists the additional parameters available for the Mail portlet.
Table 63-17 Mail Portlet Parameters
| Parameter | Description |
|---|---|
|
|
Using the EL value type, enter a value of true to display the information associated with a mail message, such as its subject, sender, and, date sent, in a tabular format. If this parameter is set to false, then mail messages render in a list view. |
63.10.4.10 Activity Stream Portlet Parameters
Table 63-18 lists the additional parameters available for the Activity Stream portlet.
Table 63-18 Activity Stream Portlet Parameters
| Parameter | Description |
|---|---|
|
|
A field for specifying a custom query to filter streamed items. For more information, see Section 39.4, "About the Activity Stream Advanced Query Option." |
|
|
A means of showing or omitting detailed information about the object in the current context (that is, in a popup or other contextual instrument).
When this parameter is true and the |
|
|
A means of showing or hiding the Comments feature on streamed activities. Enter |
|
|
A means of hiding the personalization option on the task flow instance. |
|
|
A means of allowing or omitting an inline preview of files attached to streamed activities. Enter |
|
|
A means of showing or hiding the Like link on a streamed activity. Enter |
|
|
A means of showing or hiding the Share menu on streamed activities. Enter |
|
|
The number of items to stream in a given task flow instance. |
|
|
The form of pagination to use on a multipage stream.
|
|
|
A means of streaming activities only from user profiles.
|
|
|
The current user ID. Enter |
|
|
A field for entering a comma-separated list of names of services from which to stream activities. Use this parameter to limit the display of streamed activities to only those associated with the specified service or services. Enter one or more service IDs, for example: oracle.webcenter.collab.announcement, oracle.webcenter.collab.forum For a list of valid service ID, see Table F-7. Note that all listed service IDs cannot be used because all services do not stream items to the Activity Stream. For example, the RSS service does not stream any activities. |
63.10.4.11 Tag Cloud Portlet Parameters
The Tag Cloud portlet does not include any additional parameters.
63.10.5 WebCenter Services Portlets Limitations
This section identifies limitations with WebCenter Portal services when they are accessed remotely using WebCenter Services Portlets.
-
WebCenter Services Portlets do not include the Send Mail option to email links to resources, for example wikis.
-
WebCenter Services Portlets do not support the View Profile option when clicking a user name.
-
WebCenter Services Portlets do not support recommendations.
-
WebCenter Services Portlets do not support anonymous access.
-
WebCenter Services Portlets no longer supports a Worklist portlet.
Consider using the Task List task flow provided by Oracle Business Process Management instead. For more information, see the "Creating Custom ADF Applications with Oracle Business Process Management Workspace Task Flows" appendix in Oracle Fusion Middleware User's Guide for Oracle Business Process Management.
-
When creating a link to a discussion forum from another WebCenter Services Portlet, such as the Document Manager or Blogs portlet, only discussion forums with a category ID of 0 are listed.
-
RSS is not supported within the Discussion Forums, Lists, and Announcements portlets.
-
The Mail portlet does not support the Find Users option when composing messages. Recipients must be entered manually.
-
The Download URL option is not available from the View menu in the Document Manager. Instead, users must access the URL provided in the Direct URL field to view the document, and then click the Download button.
-
The Edit with Word option is not available from the File menu in the Document Manager portlet.
-
When using a link from the Get a Link option of the Document Manager or Blogs portlet, you must open the link in a new browser session. You cannot open the link in a new tab of the same browser session that is currently running the portlet.
-
The Subscribe option, accessed from the File menu, is not supported in the Document Manager or Blogs portlets.
-
The Share option is not available from the Edit menu when viewing a blog in the Blogs portlet.
63.10.6 Troubleshooting Problems with WebCenter Services Portlets
This section provides information to assist you in troubleshooting problems you may encounter when using WebCenter Services Portlets.
This section includes the following topics:
-
Section 63.10.6.1, "External Link in Announcements or Discussion Forum Portlet Not Working"
-
Section 63.10.6.2, "Get a Link Option in Document Manager and Blogs Portlets Not Working"
-
Section 63.10.6.3, "Recommendations Tab in Document Manager and Blogs Portlets Is Empty"
-
Section 63.10.6.5, "Selected Text Is Lost When Creating a Link in a Blog Post or Wiki"
63.10.6.1 External Link in Announcements or Discussion Forum Portlet Not Working
When users click a link to an external web page in the Announcements or Discussion Forum portlet nothing displays.
WebCenter Services Portlets are displayed inside inline frames. Some web sites, for example Google, do not display inside an inline frame if the parent frame does not have the same origin. Therefore, if you link to one of these web sites within the Announcements or Discussion Forum portlet, the link does not display.
When linking to an external web page from the Announcements or Discussion Forums portlet, it is recommended that you display the target in a new browser tab or window. To do this, add the target="_blank" attribute to the link. For example:
<a href="http://www.google.com" target="_blank">Google</a>
63.10.6.2 Get a Link Option in Document Manager and Blogs Portlets Not Working
When consuming the Document Manager or Blogs portlet in Oracle WebCenter Interaction, the link provided from the Get a Link option of the View menu does not work in Microsoft Internet Explorer.
Oracle WebCenter Interaction accesses WebCenter Services Portlets through a pagelet producer. As such, when you consume a WebCenter Services Portlets portlet on a page in Oracle WebCenter Interaction, the portlet's underlying pagelet is accessed using an injectpagelet JavaScript call. This can result in links within the portlet that exceed Internet Explorer's 2KB limit for URLs.
Replace the injectpagelet JavaScript call with an HTML portlet that references the pagelet in an inline frame. An inline frame results in shorter URLs which are less likely to exceed Internet Explorer's 2KB limit.
For example, by default, Oracle WebCenter Interaction might provide the following call to access the Document Manager portlet:
<script type='text/javascript'>
  injectpagelet("ServicesPortlets_PS6_49823a17-f56d-41cf-b50e-3506b4394f25",
  "Document_Manager", "iframe ifheight=650px ifwidth=100%", "",
  "resourceId=dev-ucm%23dDocName%3ADSS000411", "", "", "", "none", false);
</script>
Replace this call with an HTML portlet that includes the following inline frame:
<iframe id="pt-pagelet-iframe-1" frameborder="0" height='650px' width='100%'
  src='http://server.example.com:7777/inject/v2/pagelet/
  ServicesPortlets_PS6_49823a17-f56d-41cf-b50e-3506b4394f25/Document_Manager
  ?content-type=html&csapi=true&instanceid=1&chrome=none&consumepage=true
  &resourceId=dev-ucm%23dDocName%3ADSS000411'>
</iframe>
63.10.6.3 Recommendations Tab in Document Manager and Blogs Portlets Is Empty
The Recommendations tab in the Documentation Manager and Blogs portlets does not list any recommendations.
WebCenter Services Portlets do not support recommendations.
To remove the Recommendations tab from the Document Manager or Blogs portlet, edit the portlet and set the featureOff parameter to recommendations.
63.10.6.4 Unable to Embed an Image into a Blog
When consuming the Blogs portlet in Oracle WebCenter Interaction, images cannot be embedded in a blog post.
If the file name of the image is long, for example 250 characters or more, the length of the resource URL used for the image in the blog may exceed the supported limit.
Reduce the length of the image file name.
Alternatively, it is recommended that when consuming WebCenter Services Portlets in Oracle WebCenter Interaction, you should place portlets within an HTML portlet. For more information, see the solution in Section 63.10.6.2, "Get a Link Option in Document Manager and Blogs Portlets Not Working."
63.10.6.5 Selected Text Is Lost When Creating a Link in a Blog Post or Wiki
When you select text in a blog post or wiki and click the Select Resource or New Resource icon to create a link, the selected text disappears.
The selected text is temporarily replaced with an insertion cursor while the link is created.
No action is required. When you finish creating the link, or cancel the operation, the selected text is restored.
63.11 Troubleshooting Portlets
This section provides information to assist you in troubleshooting problems you may encounter while using portlets. It contains the following topics:
-
Section 63.11.1, "Diagnostic Tools for Troubleshooting Portlets"
-
Section 63.11.3, "Portlet Displays a Portlet Consumer Error"
-
Section 63.11.5, "Portlet Displays a Remote Portlet Communication Error"
63.11.1 Diagnostic Tools for Troubleshooting Portlets
There is a set of tools available for both the consumer and producer to help identify and resolve issues with portlets.
If you encounter a portlet error message when a portlet is rendered, or if the portlet displays but you cannot interact correctly with it, there are some general steps using these tools that you should follow to diagnose the issue.
This section includes the following topics:
63.11.1.1 Identify the Portlet Instance
The first step when you encounter a portlet error, is to identify which portlet producer and portlet instance is being invoked. Execute the portletDebugShow() JavaScript from your browser to display this information in the main portlet content area.
To identify the portlet instance:
-
Enter the following command in the Location field of your browser:
javascript:portletDebugShow()
Tip:
In Internet Explorer and Google Chrome, you must type this command in the Location field. If you paste the command into the field, thejavascriptpiece is removed.In Firefox 6 and above, you cannot enter JavaScript in the Location field, you must enter the command in JavaScript console.
-
After running the script, every portlet now displays the following information:
-
Producer name
-
Portlet name
-
Portlet instance ID
-
Execution Context IDs (ECIDs)
The ECIDs are unique IDs used to identify a portlet request. Use the ECIDs to correlate the messages across different consumer and producer log files using Fusion Middleware Control. The same ECID is propagated from the consumer to the producer. For more information, see the "Correlating Messages Across Log Files and Components" section in the Oracle Fusion Middleware Administrator's Guide.
Note:
Broken portlets show two ECIDs: one for the request in which the error occurred and one for request in which the error was reported. For inline portlets (that is, portlets that are not displayed in an IFRAME), these two ECIDs are the same.For IFRAME portlets, for example Oracle JSF Portlet Bridge portlets, the ECIDs are different. This is because the error is reported in a later request than the one in which the original exception occurred. When checking the logs, you should look for both ECIDs, as either may contain relevant information.
Description of the illustration portlet_debug.gif
You can use this information in the subsequent diagnostic steps to help locate the issue.
Note:
The ECIDs shown in the portlet diagnostic information do not reflect partial page rendering requests that have been made to the portlet producer (using the portlet consumer resource proxy). These requests may update the portlet, but the ECIDs are not recorded in the portlet diagnostic information. Errors that occur during these requests are logged on the producer and by the portlet resource proxy on the consumer but you cannot use the ECID information reported in the portlet diagnostic information to help you determine the ECIDs for the relevant log entries. -
-
When you have finished debugging the portlets, enter the following command to hide the portlet debugging information:
javascript:portletDebugHide()
Tip:
In Internet Explorer and Google Chrome, you must type this command in the Location field. If you paste the command into the field, thejavascriptpiece is removed.In Firefox 6 and above, you cannot enter JavaScript in the Location field, you must enter the command in JavaScript console.
63.11.1.2 Examine the Portlet Consumer Test Page
The next step in diagnosing a portlet error is to access the Portlet Consumer Test Page (shown in Figure 63-2) to locate the portlet producer and, if necessary, test the portlet in isolation.
Figure 63-2 The Portlet Consumer Test Page
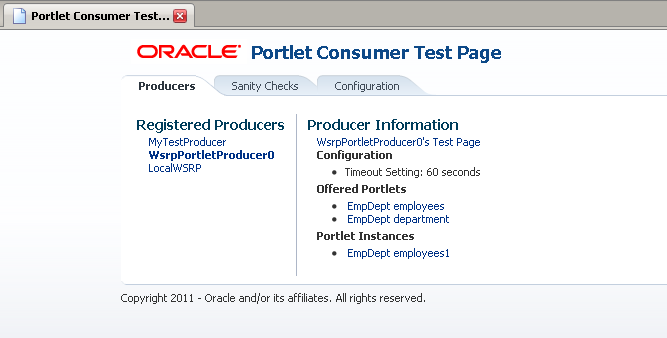
Description of "Figure 63-2 The Portlet Consumer Test Page"
The Portlet Consumer Test Page contains three tabs:
-
Producers: This tab lists all the producers registered with the consumer application. Selecting a producer provides specific information about that producer.
-
Sanity Checks: This tab may contain a predefined set of portlet instances and required parameters that can be run in the consumer application, as configured by the consumer application developer. Any failures within these portlets indicate a problem with the corresponding producer and/or portlet.
-
Configuration: This tab enables you to identify the consumer configuration entries for portlet consumption. You cannot change these values as they are stored within the application; they are displayed for reference information only.
After accessing the Portlet Consumer Test Page, you can perform further diagnostic steps.
This section describes how to use the Portlet Consumer Test Page to diagnose portlet issues. It includes the following topics:
63.11.1.2.1 Access the Portlet Consumer Test Page
The Portlet Consumer Test Page provides diagnostic information about the portlet consumer.
To access the Portlet Consumer Test Page:
-
In your browser, enter the URL for the Portlet Consumer Test Page:
http://host:port/context-root/faces/oracle/portlet/client/adf/diagnostic/pages/ConsumerTestPage.jspx
Note:
If the consumer application is secured, the Portlet Consumer Test Page can be accessed only by users granted permission to view those pages. -
In the Portlet Consumer Test Page, you can perform further diagnostic steps as described in the following sections.
63.11.1.2.2 Locate the Portlet Producer
The Producers tab of the Portlet Consumer Test Page lists all the producers that have been registered with the consumer application. If a portlet instance in your application displays an error message, you can view information about the producer that owns the portlet by selecting it on this tab.
To locate the portlet producer:
-
In the Portlet Consumer Test Page, select the portlet producer that owns the portlet instance that is reporting the error.
You noted this information in Section 63.11.1.1, "Identify the Portlet Instance."
-
The following information is provided for the selected producer:
-
Producer Test Page: A link to the Producer Test Page.
-
Configuration: Details of potential issues surrounding skins, security, and timeouts associated with the using producer.
-
Offered Portlets: A list of all portlets offered by the producer. If there are no offered portlets listed, this indicates that there is a problem with the registration metadata for the producer.
-
Portlet Instances: A list of all portlet instances for the selected producer in the consumer application. This list may be empty.
You can use this information to identify potential issues with the producer.
-
63.11.1.2.3 Locate and Run the Portlet Instance
If you have still not been able to identify the cause of the portlet error, the issue may lie with the portlet instance itself.
To locate and run the portlet instance:
-
In the Portlet Consumer Test Page, select the portlet producer that owns the portlet instance that is reporting the error.
You noted this information in Section 63.11.1.1, "Identify the Portlet Instance."
-
Under Portlet Instances, select the portlet instance to display the Consumer Test Page: Portlet page.
You noted this information in Section 63.11.1.1, "Identify the Portlet Instance."
Description of the illustration portlet_test_page.png
-
The Portlet Consumer Test Page: Portlet page renders the portlet in a standalone page. If the portlet runs correctly on this page, the problem is most likely caused by other components on the page containing the broken portlet.
-
The Parameters section enables you to experiment with how the portlet looks using a stretch or flow layout
-
If the portlet contains parameters, the Parameters section also lists all the public parameters for the portlet. Enter values for any parameters to test that the portlet is receiving parameters correctly.
-
To navigate back to the Portlet Consumer Test Page, click the producer name link at the top of the page.
63.11.1.2.4 Perform Sanity Checks
The Sanity Checks tab of the Portlet Consumer Test Page (shown in Figure 63-3) provides a quick overview of the state of portlet communication in your application across all producers.
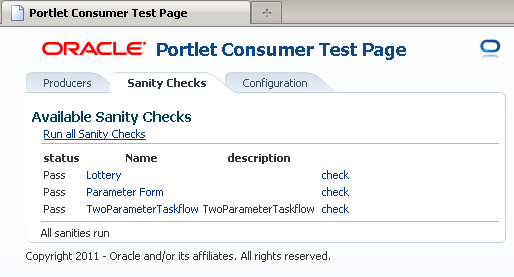
The Sanity Checks tab references portlet instances used within the consumer application. This list is configured by the application developer who chose the portlets to include and the parameters to pass to these portlets.
The checks on this page do not render the output in the UI, but simply create a runnable instance of the portlet under the covers and report any failures if any exception is returned by the portlet.
To perform sanity checks:
-
In the Portlet Consumer Test Page, click the Sanity Checks tab.
-
Click the check link next to the portlet that you want to test.
The results of the sanity tests are displayed in the Status column.
-
To run sanity checks on all listed portlets, click the Run all Sanity Checks link.
63.11.1.2.5 Check Consumer Configuration Entries
The Configuration tab of the Portlet Consumer Test Page (shown in Figure 63-4) enables you to identify the consumer configuration entries for portlet consumption. This tab displays settings defined in the adf-config.xml file, for example, the minimum and maximum timeout values and the consumer version number. You cannot change these values as they are stored within the application; they are displayed for reference information only.
63.11.1.3 Examine the Producer Test Page
If you cannot identify the cause of the error in the consumer application, the next step is to use the Producer Test Page (shown in Figure 63-5) to identify potential issues with the portlet producer application.
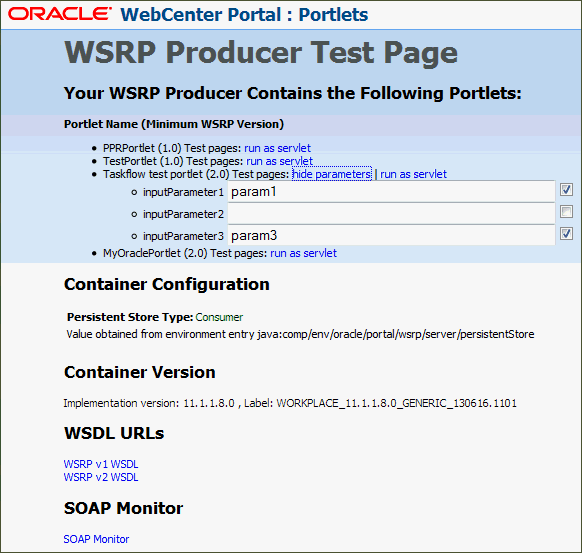
Access to the main Producer Test Page is public, but links to the test pages for each portlet are accessible only to users granted permission on the underlying pages and task flows.
The Producer Test Page contains five sections:
-
Portlets
A list of all the portlets within the producer. For Oracle JSF Portlet Bridge portlets, each portlet also provides a separate link to run the portlet as a servlet (this is a prerequisite to running them as portlets: if a portlet does not run as a servlet, it cannot run as a portlet).
-
Container Configuration
Information on where the consumer preference information is stored.
-
Container Version
The version number of the Portlet Producer Container.
-
WSDL URLs
Links to the Web Service Definition Language (WSDL) documents to use for registration.
-
SOAP Monitor
A link to the WSRP SOAP monitor where users with the
MonitororAdminrole can track the SOAP messages between the consumer and producer.
After accessing the Producer Test Page, you can perform further diagnostic steps.
This section includes the following topics:
63.11.1.3.1 Access the Producer Test Page
The Producer Test Page provides diagnostic information about the portlet producer.
To access the Producer Test Page:
-
In your browser, enter the URL for the Producer Test Page:
http://host:port/context-root/info
-
In the Producer Test Page, you can perform further diagnostic steps as described in the following sections.
63.11.1.3.2 Run the JSF Portlet as a Servlet
To verify that an Oracle JSF Portlet Bridge portlet producer is running correctly, you must first verify that the producer application runs correctly through standard HTTP requests. If the artifacts the producer exposes as portlets do not run as servlets, they will not run as portlets.
To run a JSF portlet as a servlet:
-
In the Producer Test Page, click the run as servlet link next to the portlet.
-
The portlet is called using standard HTTP to request the underlying page or task flow. The results of the request are displayed in a new browser window.
If the resulting page or task flow does not render correctly, then there is a problem with the producer application that must be resolved before you can run the page or task flow as a portlet.
-
If the portlet accepts parameters, click show parameters to list them and provide values. When you click run as servlet, the portlet call includes the parameter values.
63.11.1.3.3 Examine the SOAP Monitor
The SOAP monitor provides access to the SOAP requests between the consumer and producer when rendering a portlet. This is very useful in diagnosing problems at the communication level.
To examine the SOAP monitor:
-
In the Producer Test Page, click the SOAP Monitor link at the bottom of the page.
-
When prompted, enter your user name and password.
Note:
To access the SOAP monitor you must be a member of theMonitorsorAdministratorsrole in the Identity Management System. -
By default, the SOAP monitor is disabled, so the page is empty. You must first enable the monitor by clicking the Enable link at the top of the page.
-
The page does not automatically refresh, so to display SOAP messages, you must click the Refresh link.
-
To force a request to the failing portlet, go to the Portlet Consumer Test Page: Portlet page for the portlet and select Refresh Portlet.
-
When the portlet has rendered, or failed, click the Refresh link in the SOAP monitor to display the captured request.
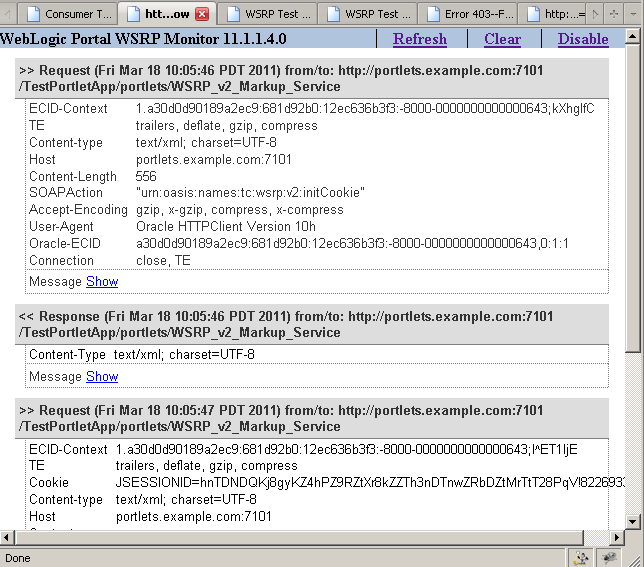
Description of the illustration portlet_soap_monitor.png
-
Now, you can investigate the SOAP messages that were sent and the responses to try to narrow down the cause of the problem.
Note:
If, after rerunning the portlet and refreshing the SOAP monitor, you see no messages displayed, this indicates that there may be a security issue between the producer and the consumer. You must verify that the correct WS-Security settings are set up for the producer and consumer to communicate.
63.11.2 Configuring the Portlet Logging File
To troubleshoot portlet issues, it is useful to add portlet log-handlers and loggers to the logging configuration file, logging.xml.
Example 63-19 shows how to add the portlet log-handlers and loggers. The example assumes that you are running the consumer and producer applications on the same WebLogic Server instance. If you are running the consumer and producer applications on different instances, you must split them up appropriately.
Note:
Add the log entries at the end of the file to ensure that they override any seeded settings.Example 63-19 Configuring Log Files for Troubleshooting Portlet Issues
<!-- NOTE: You need to change the path where the logfile is located -->
<log_handlers>
...
   <!-- Portlet Consumer -->
   <log_handler name="portlet-consumer-handler" class="oracle.core.ojdl.logging.ODLHandlerFactory">
      <property name="format" value="ODL-Text"/>
      <property name="path" value="/scratch/logs/portlet-consumer.log"/>
   </log_handler>

   <!-- Portlet Producer -->
   <log_handler name="portlet-producer-handler" class="oracle.core.ojdl.logging.ODLHandlerFactory">
      <property name="format" value="ODL-Text"/>
      <property name="path" value="/scratch/logs/portlet-producer.log"/>
   </log_handler>

   <!-- Portlet Bridge -->
   <log_handler name="portlet-bridge-handler" class="oracle.core.ojdl.logging.ODLHandlerFactory">
      <property name="format" value="ODL-Text"/>
      <property name="path" value="/scratch/logs/portlet-bridge.log"/>
   </log_handler>
...
</log_handlers>

<loggers>
...
   <!-- Portlet Consumer -->
   <logger name="oracle.portlet.client" level="FINEST" useParentHandlers="false">
      <handler name="portlet-consumer-handler"/>
   </logger>

   <!-- Portlet Servers -->
   <logger name="com.bea.portlets" level="FINEST" useParentHandlers="false">
      <handler name="portlet-producer-handler"/>
   </logger>
   <logger name="com.bea.netuix" level="FINEST" useParentHandlers="false">
      <handler name="portlet-producer-handler"/>
   </logger>
   <logger name="com.bea.wsrp" level="FINEST" useParentHandlers="false">
      <handler name="portlet-producer-handler"/>
   </logger>
   <logger name="oracle.portlet.producer" level="FINEST" useParentHandlers="false">
      <handler name="portlet-producer-handler"/>
   </logger>

   <!-- Portlet Bridge -->
   <logger name="oracle.portlet.bridge" level="FINEST" useParentHandlers="false">
      <handler name="portlet-bridge-handler"/>
   </logger>
   <logger name="oracle.portlet.server.bridge" level="FINEST" useParentHandlers="false">
      <handler name="portlet-bridge-handler"/>
   </logger>
...
</loggers>
The logging configuration file is located in:
DOMAIN_HOME/config/fmwconfig/servers/server/logging.xml
The log file name is also defined in logging.xml. By default the log file name is:
DOMAIN_HOME/servers/server/logs/server-diagnostic.log
63.11.3 Portlet Displays a Portlet Consumer Error
The message Portlet Consumer Error (shown in Figure 63-6) typically indicates that an error occurred within the operation of the portlet parts of the portlet consumer application.
Figure 63-6 Portlet Displaying a Portlet Consumer Error
Description of "Figure 63-6 Portlet Displaying a Portlet Consumer Error"
An error has occurred within the operation of the portlet parts of the portlet consumer application. In other words, the error is unrelated to the remote portlet producer application.
Consult the diagnostic log file to determine the cause of the exception.
If the DebugErrorRenderer is enabled, the cause exception is displayed in the portlet along with links to the log file. If running in production mode, then consult the consumer-side logs.
The exception that caused the error message to be displayed is logged. Wherever possible, a message is included in the log at the start of the exception stack to indicate for which portlet binding the exception occurred. Example 63-20 shows a message logged for a portlet error.
Example 63-20 Example Message Logged for a Portlet Error
<PortletRenderer> <setErrorState> An error has occured for Portlet Binding
portlet1.
oracle.portlet.client.container.PortletContentTypeException: Unexpected content
type "null" in WSRPGetMarkup response.
...
Pay particular attention to the cause exceptions in the stack as this is likely to indicate what the real underlying problem is.
The cause is likely to be an internal error and the appropriate course of action is to contact Oracle Support.
63.11.4 Portlet Displays a Portlet Timeout
If a Portlet Timeout is displayed in the area of the page that you would expect to contain a portlet (as shown in Figure 63-7), this means that the consumer waited for a configured period of time for the producer to respond and did not get a response during that time, or the response did not complete during that time. There are a number of possible causes.
Figure 63-7 Portlet Displaying a Portlet Timeout Error
Description of "Figure 63-7 Portlet Displaying a Portlet Timeout Error"
The producer machine is overloaded.
Check the load on the producer managed server (the tools used to do this vary depending on the operating system that is running on the producer). If the load is high, check whether a particular process is causing this high load, and whether such a process could be run on another machine, or at a less busy time. If no single process is causing the high load, or if the Oracle WebLogic Server is causing the high load, and if the load is consistently high, consider whether the producer hardware is adequate, or whether it is necessary to upgrade it (or add further nodes to the cluster). Also consider adjusting the Oracle WebLogic Server configuration to increase the size of the request thread pool. For more information, see the Oracle WebLogic Server documentation.
The network is overloaded, or there are problems with the network affecting communication between the consumer and producer.
Check that you can ping the producer machine from the consumer machine. Check that you can access the producer's WSRP Producer Test Page in your local browser. If this works, check that you can access this same page from a browser running on the consumer machine. If any of these steps cause problems, and the machine is not overloaded, this could be a network problem, which should be investigated by a system administrator.
There is a deadlock (or a stuck thread) on the producer machine causing the request thread to hang.
This should not happen during normal operation. If it does occur, there will generally be an error in the producer's log files indicating the point at which the deadlock occurred. This may help diagnose the problem. In some cases, it may be possible to alleviate this by modifying the configuration of Oracle WebLogic Server. For more information, see the Oracle WebLogic Server documentation.
The producer application is running slowly (for example, due to processing large quantities of data).
In this case, the producer application may be processing large quantities of data, causing it to spend too long building the response. If the application will regularly deal with large quantities of information, it may be necessary to either add or improve producer hardware, or to increase the portlet timeout duration. The portlet timeout can be configured on the producer connection in the consumer application using Enterprise Manager or the WLST setWSRPProducerConnection command. Additionally, minimum and maximum timeouts for all producer connections within the application can be configured within the portlet section of the adf-config.xml file.
The producer application is waiting for a response from another resource, such as a database, that is taking too long (for example, if the database is overloaded).
Check that the resource in question is functioning correctly. If it is, the solution is same as Solution 4.
The portlet timeout values have been misconfigured such that the timeout period is too short.
Typically, the timeout for a portlet is set on the registration of the producer. This may have been set to a value that does not give time for the portlet to respond.
Also, the portlet section of the adf-config.xml file allows minimum, maximum, and default values for portlet timeouts to be configured across the whole application. The maximum timeout imposes an upper limit on timeouts specified by portlet producers, so if the maximum timeout is too short, this could cause unwanted portlet timeout errors even if the timeout specified on the producer connection is longer.
63.11.5 Portlet Displays a Remote Portlet Communication Error
When a section of the screen shows the Remote Portlet Communication Error message (as shown in Figure 63-8), and there is an otherwise blank region surrounding it, this area is expected to be filled with a portlet, which the application is not able to contact.
Figure 63-8 Portlet Displaying a Remote Portlet Communication Error

Description of "Figure 63-8 Portlet Displaying a Remote Portlet Communication Error"
The producer is down.
It could be that the producer application is not running, or the managed server on which it is deployed is not started. In this case, it will need to be started. Identify the application that needs to be started based on the task being attempted at the time of the portlet failure.
The web services security is incorrectly configured.
Troubleshooting steps for web services security depend on the type of security profile being used, for example AuthN, SSL, or Message Security.
For more information about troubleshooting web service security, see the "Diagnosing Problems" chapter in the Oracle Fusion Middleware Security and Administrator's Guide for Web Services.
The producer managed server cannot be reached.
The producer may be in a location that cannot be reached by the consumer application, due to intervening firewalls or incorrect routing rules. In an environment that is installed by Oracle's provisioning software, this should not be the case, but it is worth checking that you are able to access the WSDL endpoint for the producer from the machine hosting the consumer, by going to:
http://host:port/context-root/portlets/wsrp2?WSDL
Where:
-
hostis the server to which the portlet producer is deployed -
portis the port to which the server is listening for HTTP requests -
context-rootis the producer web application's context root
For example:
http://portlets.example.com:9999/sample/portlets/wsrp2?WSDL
63.11.6 Portlet Displays a Remote Portlet Error
If the portlet displays a Remote Portlet Error (as shown in Figure 63-9), this indicates that the producer responded with an error message. The error message is returned in the form of a SOAP fault message inside the response document. There are a number of reasons the producer might return an error. The best strategy to diagnose these errors is to first find the corresponding exception stack trace in the consumer diagnostic logs. This stack trace shows what kind of fault was returned by the producer, plus any further information required in the response. Some faults you may encounter are listed in the following sections.
Figure 63-9 Portlet Displaying a Remote Portlet Error
Description of "Figure 63-9 Portlet Displaying a Remote Portlet Error"
OperationFailedException. This is the most common type of Remote Portlet Error and it is a catch-all for most unhandled exceptions raised in the producer application.
To resolve an OperationFailedException, examine the exception in the consumer diagnostic logs. This generally shows any exception that was raised in the producer application to trigger the fault response as the final Caused by exception.
If required, you can then examine the diagnostic logs on the producer application for more detail, or for any related exceptions that occurred prior to the fault being triggered. In some cases, the exception in the producer log indicates a problem that can be simply resolved, such as a database connection failure or configuration problem. In other cases, the exception might indicate a bug in the portlet code.
InvalidRegistrationException. This error indicates that the producer has not been properly registered with the consumer before the consumer attempted to communicate with it. This could also occur if the producer's preference store has been moved or deleted since the consumer registered it.
Ensure that the persistence store is available and that the configuration of the persistence store in the web.xml file is correct.
InvalidHandleException. This indicates that the consumer has asked the producer to render, or otherwise interact with, a portlet instance that the producer does not know about. This could occur if the producer's preference store has been corrupted in some way since the portlet was added to the page.
Ensure that the persistence store is available and that the configuration of the persistence store in the web.xml file is correct.
AccessDeniedException. This indicates that the producer application decided that the current user did not have access to the portlet or task flow in question.
This could either be a legitimate error message or an indication of a configuration problem. In most cases, WebCenter Portal should deal with authorization errors gracefully, without a Portlet Remote Error being displayed.