
|
|
|
Reservation Screen
Note: The Recently Used feature (available when the General>Recent Used Records Menu application parameter is set to Y) allows you to quickly access up to 10 of the last-used (created, opened, or changed) profiles, reservations, contracts and business blocks from the main OPERA menu bar. (When the OPS/OPC<version number> Sales and Catering license is also active, up to 10 recently used contacts, events, and accounts are additionally available.) In multi-property environments, (when the OPP_MHOT Multi-Property PMS add-on license code is active), you may access business blocks and reservations at properties other than your log-in property if you have appropriate permissions at those properties. (In Sales and Catering environments, you may also access events for properties other than your log-in property.) Profiles (including contact and account profiles), are considered to be "global" across properties. If you have permission to view and edit profiles, you may access any profile, regardless of the property at which it was created.
The Reservation screen is used to complete reservations for individual guests, travel agents, groups, source, and companies. When you access this screen from the Profile Search screen (by selecting the New Resv. button) or from the Rate Query Details screen (by selecting the Resv. button), profile or rate information automatically fills the appropriate fields on the Reservation screen. You may make changes as necessary.
Note: Changes may be made to a specific reservation by only one OPERA user at a time. Once you begin making a change, the reservation is locked for editing. If another user attempts to make a change while the reservation is locked, a message informs the other user that the record is being changed by another user; the message provides information that identifies you, your department, and the workstation at which you are working. Once you have saved the change, a message informs the other user that the reservation has been updated and their screen will be refreshed. Once the screen refreshes, the change you made is reflected in the reservation displayed to the other user.
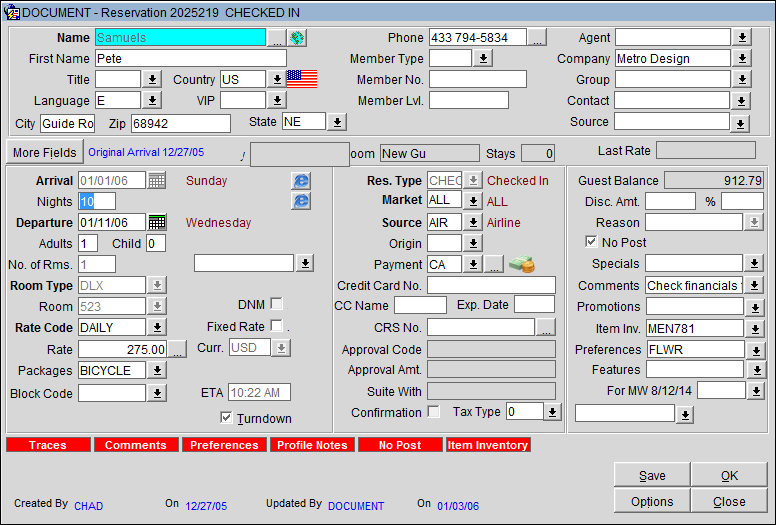
The Reservation screen is made up of the following sections:
Header: Information about the guest and the guest's company, travel agent, group, and membership affiliation's. A button links you directly to the guest's Profile screen where complete guest demographics are stored.
Details: Particulars about the guest's stay, including arrival and departure dates, room and rate information, payment method, credit cards, and packages.
More Fields: Additional information such as transportation requirements. These fields may be customized for each property. Options in this section may control whether transactions may be posted to the guest's Billing screen, whether video check out may be used by this guest, and check out time. This section appears when the Reservations>Reservation More Fields application parameter is set to Y (this is the default). See Reservation More Fields.
Lamps (indicators or notations) may appear in the lower part of the screen to alert you about information that pertains to the reservation (see Indicator Lamps for a complete list and details).
To make a reservation fast, follow these steps. (Details about all the fields on this screen are provided below.)
Note: The reservation flow at your property may differ from what is described here depending on the Reservations> Reservation Flow application setting.
1. Enter the Name (last name) and First Name or select the Name field ellipsis button to select the guest from existing profiles. (When the application setting under Reservations>Parameter>Enhanced Profile Search is activated, the Profile Search screen will not appear when Save is selected. A third required profile field must be entered. For example, if the user enters the Last and First Names of the guest, the user will also need to enter the City, Postal Code, or Phone Number. If three fields are not populated, the user will be prompted with the message, "Additional profile information required to search for existing profile.")
2. Enter the Arrival and Departure dates. OPERA defaults to today and tomorrow's dates (depending on parameter settings). You can change the departure date by adjusting the Nights field.
3. Enter the number of Adults, Children and No. of Rooms to reserve.
4. Select the down arrow at the Rate Code field to display the Rate Query screen and choose the room type and rate code. Use the scroll bars to view availability not immediately displayed on the grid.
5. Highlight the room and rate from the grid and select the OK button. You are returned to the Reservation screen. At this point, all the required information has been entered.
6. Select the OK button from the Reservation screen and wait for the Confirmation message to appear. The Confirmation Number message prompt may not be displayed as it can be selected to be hidden in configuration (see Popup Blockers for details). Selecting to hide the message automatically skips over it and continues with the reservation closing script, if the Reservation>Closing Script application function is active.
The rest of the fields are optional; except for Room Type, Reservation Type, Market, and Source.
Note: When the OPV_<version number> OPERA Vacation Ownership System license code is active and Comp (complimentary) is selected in the Rate Code field when making a reservation for a rental room with a comp night restriction, OPERA prompts, "Room has used X number of complimentary nights and has Y complimentary nights left between DD/MM/YY and DD/MM/YY. Do you want to continue?". This allows the property to view the number of comp nights used and the number remaining.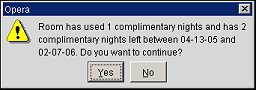
This prompt only appears if the maximum number of nights specified in the comp nights restriction have not been used.
When the OPX_CONC2 OPERA Gateway for Concepts EAS XML and the Reservation>Activity Prompt for New Reservation application parameter is active, then the user is taken to the Activity Scheduler upon the completion of the new reservation (See Activity Scheduler for details). This will not occur for walk-in reservations, but for reservations made directly or through the rate query path.
The Reservations>Reservation Flow application settings allow you to customize the reservation-making process more easily than ever before. Select from any of these options to control which screen appear when the user makes a new reservation:
Direct - Go directly to the Reservation screen.
Calendar - Display the Property Calendar screen first. Select the start date and end date for the reservation. (The default start date is today's business date.) The Reservation screen appears, with the arrival and departure dates per-filled.
Calendar/Grid - Display the Property Calendar screen first. Select the start date and end date for the reservation. Following a prompt to select number of adults, the Rate Query Details screen appears. Select the rate for the reservation before proceeding to the Reservation screen.
Rate Query - Go directly to the Rate Query screen where you may enter the arrival and departure dates, number of persons, etc. From there, you are taken to the Rate Query Details screen and finally the Reservation screen.
Room Plan/Grid - Go directly to the Room Plan for new reservations where the room and number of nights can be selected. Then the number of guests, the rate to apply to the reservation, and then the Reservation screen is displayed to finish all of the remaining reservation information.
Please refer to Reservation Screen Header and Reservation Screen Details for more information concerning these sections of the Reservation Screen.
Save. Select to save the reservation or modifications that have been made. When the Reservation>Auto Deposit Collection application parameter is set to Y and there is a deposit rule associated with the reservation, then the deposit screen displays automatically when the user saves the reservation (See Reservation Deposits and Cancellations for details).
Options. Select this button to display the options associated to the reservations. The Reservation Options menu appears. (See Reservation Options for details). The Options button is disabled for reservations that were created by a Sales and Catering Event.
Note: When the General> Enhanced Options Management application parameter is set to Y, you have another way of quickly accessing options without selecting the Options button to open the Options menu itself. You can press Ctrl+T to display the blue Option field.![]()
To view all the available options in alphabetical order, scroll through the options list by selecting the Up and Down arrow keys. Press Enter to select the displayed option and open the corresponding option screen. Or, instead of scrolling through the options list, type the first three letters of the desired option. The corresponding options screen appears. (For example, type c-a-n for Cancel.)
You may also enter the first letter of the desired option and all options beginning with that letter will appear in alphabetical order as you scroll. To scroll, use the arrow keys or repeatedly press the beginning letter key. For example, if you typed a-a-a-a you might scroll through the options of Accompanying, Add on, Agent/Company, Alerts. Press Enter to open the desired option.
End Call (ORS only). If you select the End Call button prior to receiving a confirmation number, you return to the main screen and the panels clear of any information. If the Turnaways feature is activated (Application Settings>Reservations>Turnaway set to Y), the Turnaway screen appears. Here you can enter the reason a reservation wasn't made.
Note: When accessing the Reservation screen from the Front Desk>Arrivals>Edit for a guest that has an arrival date of the current business date, when the Reservations>CC Pre Check In Authorization application parameter is set to Y, selecting the OK or Save will display the following prompt: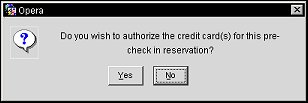
Selecting Yes displays the Authorization screen to manually authorize the credit card and once the authorization is completed, then the Credit Card Swipe check box will be selected, if screen painted on. Answering No will return the user to the Arrivals Search screen.
Show Me
![]() Reservation Flow: Calendar - Rate Query - Details
Reservation Flow: Calendar - Rate Query - Details
See Also
|
|