Entering Applicant Data
This topic discusses how to enter applicant data.
|
Page Name |
Definition Name |
Usage |
|---|---|---|
|
HRS_ADD_APPLICANT |
Create a new applicant record. |
|
|
HRS_ADD_APPLICANT |
Manage basic identifying information about the applicant, including name and contact information. |
|
|
HRS_ADD_APPLICANT |
View a list of applications for the applicant. This tab appears after you first save a new applicant record on the Create Applicant page. |
|
|
HRS_ADD_APPLICANT |
Manage an applicant’s references and send a request for references. |
|
|
HRS_APP_REF_SEC |
Add or edit detailed reference information. |
|
|
HRS_ADD_APPLICANT |
Manage eligibility and identity information that may be required to comply with local or country regulatory requirements |
|
|
HRS_APP_NID |
Enter national ID information for an applicant. |
|
|
HRS_APP_CIT_PSP1 |
Enter citizenship information for an applicant. |
|
|
HRS_APP_VSA_PMT1 |
Enter visa permit information for an applicant. |
|
|
HRS_APP_BANKACCT |
Enter bank account information for an applicant. |
|
|
HRS_DISUSA_AUD_SEC |
View an applicant’s disability status history. |
Use the Create Applicant page (HRS_ADD_APPLICANT) to create a new applicant record.
Note: To view data for an existing applicant, use the Manage Applicant page: Applicant Data Tab.
Navigation
Initially, the Create Applicant page includes three tabs: Personal Information, References, and Eligibility and Identity. When you save the applicant, the Applications tab appears, and identifying information about the applicant appears in the header area between the toolbar and the tabs.
Image: Create Applicant page before saving
This example illustrates the Create Applicant page before saving, when there are three tabs.
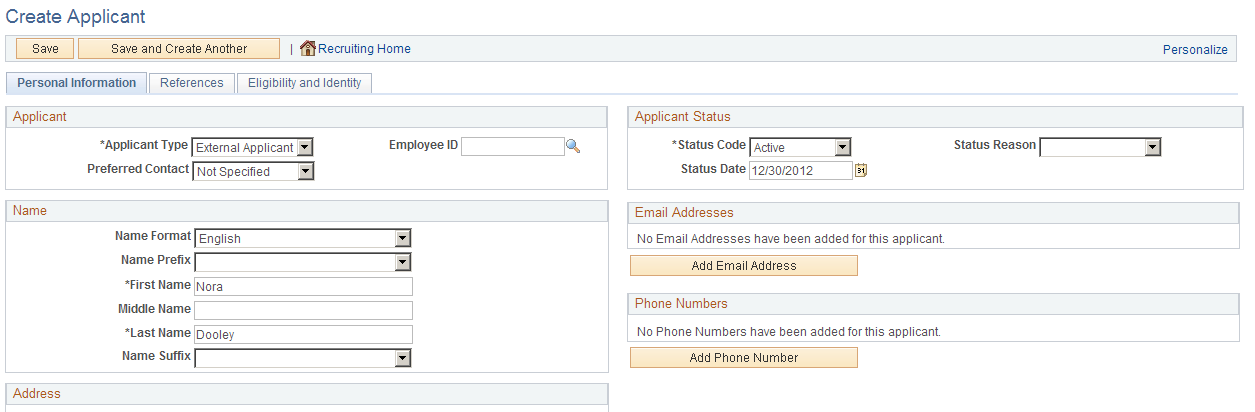
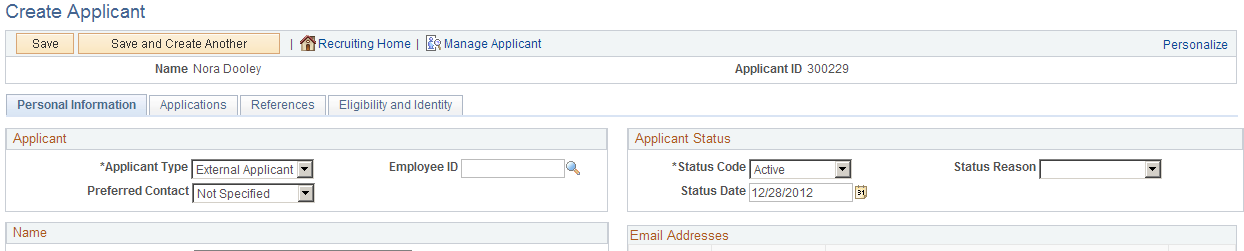
Image: Create Applicant page before saving
This example illustrates the Create Applicant page after saving. Now there are four tabs, and the applicant’s name and ID are displayed at the top of the page. Also, the toolbar now includes the Manage Applicant button for accessing the Manage Applicant page.
Processing That Occurs When the Record is First Saved
You must supply the applicant’s name before you can save the record. When the record is first saved, the system assigns an applicant ID, adds header information and an Applications tab to the Create Applicant page, and creates an application for the applicant. The new application is not associated with any job openings.
If you supply an employee ID for the applicant before the first save, the system copies employee profile data into the new application. Otherwise, the new application is blank except for default preference data.
Toolbar and Header Area
|
Field or Control |
Definition |
|---|---|
| Save |
Click to save the applicant data. |
| Save and Create Another |
Click to save the applicant data and immediately open a new blank applicant record. |
| Recruiting Home |
Click to navigate to the Recruiting Home Page. |
| Manage Applicant |
This button appears after you save the record. Click to access the Manage Applicant Page for the newly created applicant. The Manage Applicant page enables you to manage the recruiting process for the applicant, add contact notes, and view and update applicant data. |
| Name and Applicant ID |
These fields display identifying information about the applicant. They appear only after you save the record, which is when the system assigns an applicant ID. |
Tabs
|
Field or Control |
Definition |
|---|---|
| Personal Information |
Use the Create Applicant Page: Personal Information Tab to manage name and contact data along with general information such as the applicant type and applicant status. |
| Applications |
Use the Create Applicant Page: Applications Tab to access the application that the system creates when you first save the applicant record. You can also create additional applications from this tab. |
| References |
Use the Create Applicant Page: References Tab to manage and request applicant references. |
| Eligibility & Identity |
Use the Create Applicant page: Eligibility & Identity Tab to manage various information that may be required to comply with local or country regulatory requirements. Because much of this information is sensitive, this tab is visible only to recruiting administrators. |
Use the Create Applicant page: Personal Information tab (HRS_ADD_APPLICANT) to enter personal information and contact information for an applicant. You can also manage this data on the Manage Applicant page: Applicant Data tab: Personal Information subsection.
Navigation
Access the Personal Information tab.
Click an applicant name to access the Manage Applicant page, then access the Applicant Data tab: Personal Information subsection.
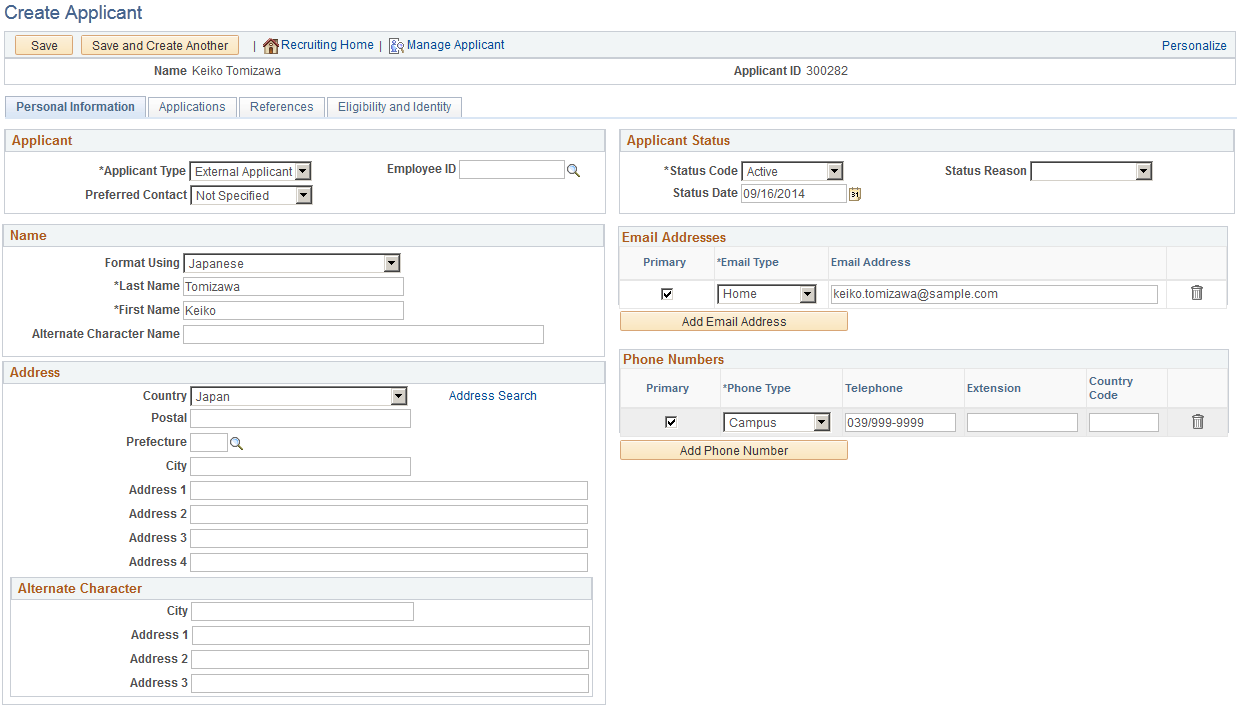
Image: Create Applicant page: Personal Information tab
This example illustrates the Create Applicant page: Personal Information tab
Applicant
|
Field or Control |
Definition |
|---|---|
| Applicant Type |
Select the type of applicant: External, Employee, or Non-Employee. Non-employee indicates that the applicant is a person of interest (rather than an employee) in your Human Resources system. When Candidate Gateway creates an applicant record, it assigns the applicant types based on the navigation or link that the applicant used to access the site. |
| Preferred Contact |
Select the preferred method of contact for the applicant. Values are: Email, Mail, Phone, and Not Specified. |
| Employee ID |
If this is an employee or a person of interest in the system, select the employee ID. If you have not yet saved the applicant record, entering an employee ID sets the applicant type to Employee or Non-Employee based on the information in PeopleSoft Human Resources. When you enter an employee ID, the system imports the employee’s personal information and eligibility & identity data into the applicant record, replacing any existing data. Clearing the field reverses these changes. When you first save a record where an employee ID has been entered, the system brings employee profile data into the new application that is created. After you save the record, changes to the employee ID do not affect any other fields. Additionally, when you view applicant data on the Manage Applicant page, the Employee ID field is hidden when the applicant type is External. |
Name
Use this group box to enter name information for the applicant. The specific fields for the applicant’s name depend on the name format. For more information about defining name formats, see Setting Up Additional Name Information.
PeopleSoft HCM supports alternate character data entry to enable users to use two character sets for one language. This architecture is described in the topic Working with Alternate Character Sets.
The Alternate Character Name field appears if alternate character setting on the Org Defaults by Permission Lst - Defaults Page is enabled for the user’s primary permission list and if the Format Using field is Chinese , Hong Kong, or Japanese.
Address
Use this group box to enter a single address for the applicant. The fields that appear change depending on the country that you select in the Country field. Define address formats on the Address Format page in the Country Table (COUNTRY_TABLE) component.
The Alternate Character fields within the Address group box appears if alternate character functionality is enabled for the user’s primary permission list and if the Country in the Address group box is China, Hong Kong, or Japan.
Applicant Status
|
Field or Control |
Definition |
|---|---|
| Status Code |
Select a status code. This is the overall applicant status, not the applicant's disposition with regards to any particular job opening. You can use the statuses that are provided with the PeopleSoft system, or you can define your own statuses on the Statuses and Reasons Page. As delivered, the statues are:
|
| Status Reason |
Select a status reason. Define status reasons for status codes on the Statuses and Reasons Page. |
| Status Date |
Enter a status date. The date defaults to the system date. You can use this date for equal employment opportunity (EEO) reporting and other auditing functions. |
| Registered Online |
This field is not visible in add mode (on the Create Applicant page), but it appears when you view personal information on the Manage Applicant page: Applicant Data page. This read-only field displays Yes or No to indicate whether the applicant is a registered user of Candidate Gateway. The value remains Yes even if the Candidate Gateway account is deactivated. |
| Inactivate Online Account |
This field is visible only if the Registered Online field is Yes. Like the Registered Online field, is it not visible in add mode (on the Create Applicant page). Instead, it appears when you view personal information on the Manage Applicant page: Applicant Data page. Select this check box to make the applicant’s Candidate Gateway account inactive. Deselect the checkbox to reactivate the account. You cannot reactivate accounts that deactivated by the applicant merge process. The system recognizes such accounts by their status, which indicates that the account was a duplicate. |
Email Addresses
Use this group box to enter email address information for the applicant. The Email Address Required field on the Recruiting Installation - Applicants Page controls whether applicants who register in Candidate Gateway are required to supply an address, but it does not effect whether an email address is required in this grid.
|
Field or Control |
Definition |
|---|---|
| Primary |
If any email addresses are listed, one must be marked as primary. The system uses this email address when sending correspondence and notifications. The preferred email address also appears on the My Applicants pagelet on the Recruiting Home page. |
| Email Type and Email Address |
Enter the applicant’s email address and identify it as Business, Campus, Dormitory, Home, or Other. You cannot have more than one email address for each email type. |
Phone Numbers
Use this group box to enter phone information for the applicant.
|
Field or Control |
Definition |
|---|---|
| Primary |
If any phone numbers are listed, one must be marked as primary. The preferred phone number also appears on the My Applicants pagelet on the Recruiting Home page. |
| Phone Type |
Identify each phone number as Business, Campus, Cellular, Dormitory, Fax, Home, Main, Other, Pager 1, Pager 2, or Telex. You cannot have more than phone number for each phone type. |
| Telephone, Extension, and Country Code |
Enter the phone number. |
Use the Create Applicant page: Applications tab (HRS_ADD_APPLICANT) to review a list of the applicant's job applications.
Note: This tab appears on the Create Applicant page after you have saved the record. There is no equivalent section header on the Manage Applicant page: Applicant Data tab. Instead, the Manage Applicant page provides access to applications from the Applicant Activity tab.
Navigation
Access the Applications tab.
Image: Create Applicant page: Applications tab
This example illustrates the Create Applicant page: Applications tab.
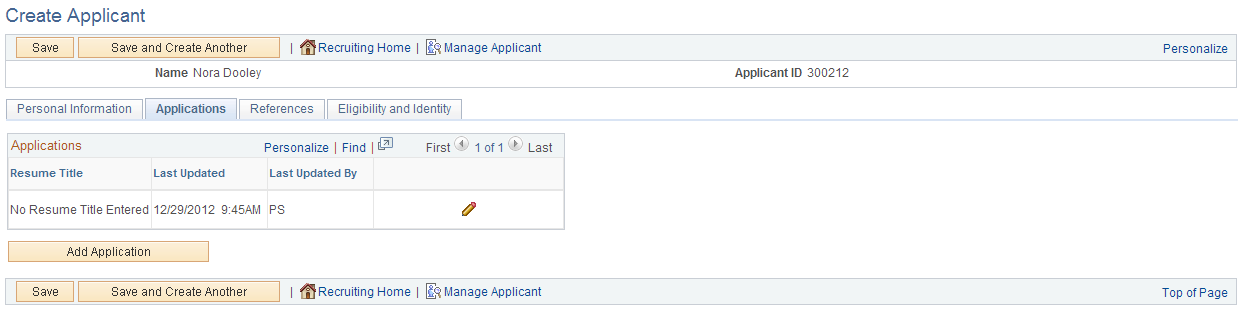
Note: You can create multiple applications for an applicant.
Applications
This grid lists the applicant’s applications. There is always at least one application because the system creates an application when you first save the applicant record.
|
Field or Control |
Definition |
|---|---|
| Resume Title |
Displays the title of the resume that is associated with the application. If the application does not include a resume, or if the resume has no title, this field displays No Resume Title Entered. |
| Last Updated and Last Updated By |
These fields display information about the last update to the application data. |
 Edit Application Details Edit Application Details |
Click this link to access the Application Details page, where you can view and modify the application data. Remember that the system creates a blank application when you first save the applicant record. The best practice is to use this existing application for the applicant’s first job application. Until you enter a job opening ID for the application, the application is considered to be an application without a job opening. If you exit the Create Applicant component, use the Edit Application Details action to access and update the existing application. |
| Add Application |
Click this link to access the Application Details page for a new application. |
Use the Create Applicant page: References tab (HRS_ADD_APPLICANT) to review references for an applicant, and add and edit references. You can also manage this data on the Manage Applicant page: Applicant Data tab: References subsection.
Navigation
Access the References tab.
Click an applicant name to access the Manage Applicant page, then access the Applicant Data tab: References subsection.
Image: Create Applicant page: References tab
This example illustrates the Create Applicant page: References tab.
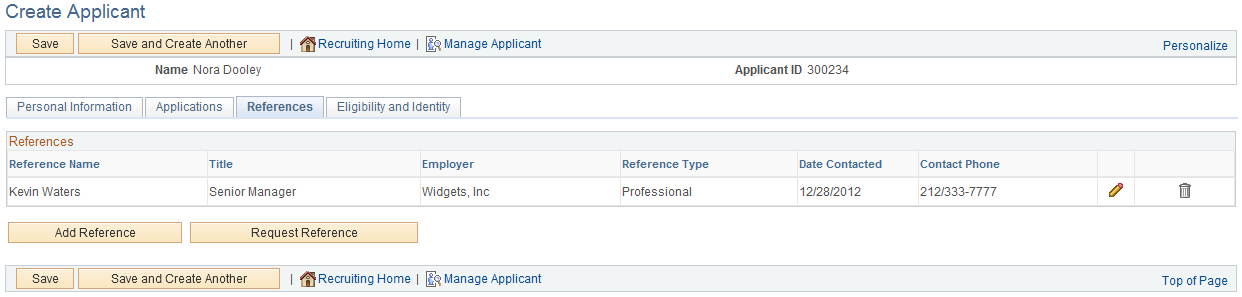
References
Use this group box to view summary information about each reference. This data comes from the Reference Details Page.
|
Field or Control |
Definition |
|---|---|
| Edit References |
Click to access the Reference Details page. Use the Reference Details page to view and edit detailed information about the reference. |
Additional Buttons
|
Field or Control |
Definition |
|---|---|
| Add Reference |
Click to access the Reference Details page, where you can enter new reference information for the applicant. |
| Request Reference |
Click to send a request for references email notification (HRS_UPDATE_REFERENCES) to the applicant. The applicant must have a primary email address so that the system can send this request. The notification instructs the applicant to use Candidate Gateway to enter reference information. If the applicant is not yet a registered user of Candidate Gateway, the system generates a Candidate Gateway user ID and password for the applicant and includes them in the email notification. By using these system-generated logon credentials, the applicant ensures that the Candidate Gateway account is properly associated with the existing applicant record. The auto-generated password is valid for a single use, and the applicant is prompted to change the password immediately after signing in. In Candidate Gateway, the Notifications page displays the request for references. The applicant must click the notification link to access the page where reference information is entered. |
Use the Reference Details page (HRS_APP_REF_SEC) to add or edit reference information.
Navigation
On the Create Applicant page or the Manage Applicant page, first access the References section. Next, click the Add Reference button or, to modify an existing record, click the Edit icon.
Image: Reference Details page
This example illustrates the Reference Details page.

Enter information about the person who provided the reference, then use the Comments field to record your notes.
Use the Create Applicant page: Eligibility & Identity tab (HRS_ADD_APPLICANT) to enter eligibility and identity information for an applicant. You can also manage this data on the Manage Applicant page: Applicant Data tab: Eligibility & Identity subsection.
Important! This tab contains sensitive information and is therefore visible only to recruiting administrators.
Navigation
Access the Eligibility & Identity tab.
Click an applicant name to access the Manage Applicant page, then access the Applicant Data tab: Eligibility & Identity subsection.
Image: Create Applicant page: Eligibility & Identity tab (1 of 4)
This is the first of four examples that illustrate the Create Applicant page: Eligibility & Identity tab.
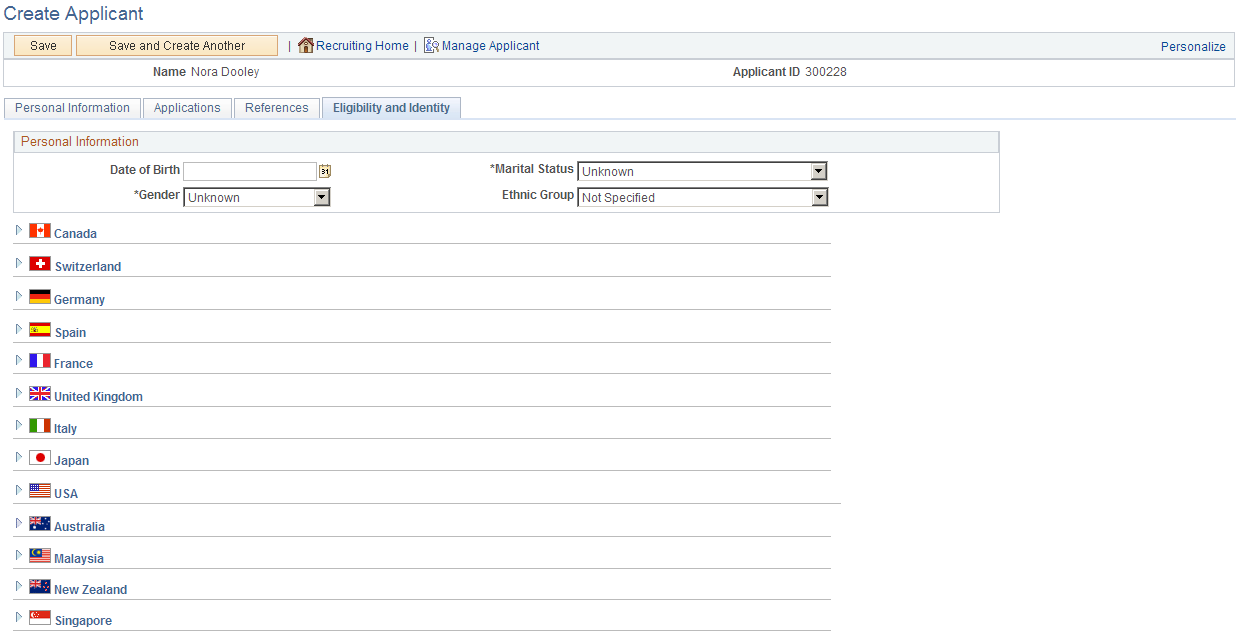
Image: Create Applicant page: Eligibility & Identity tab (2 of 4)
This is the second of four examples that illustrate the Create Applicant page: Eligibility & Identity tab.
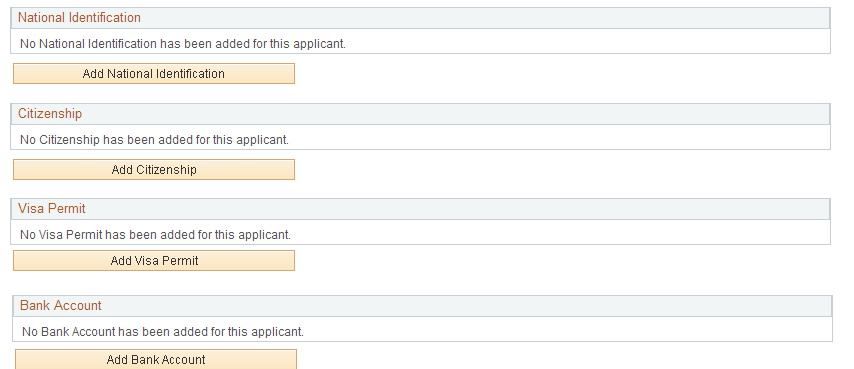
Image: Create Applicant page: Eligibility & Identity tab (3 of 4)
This is the third of four examples that illustrate the Create Applicant page: Eligibility & Identity tab.
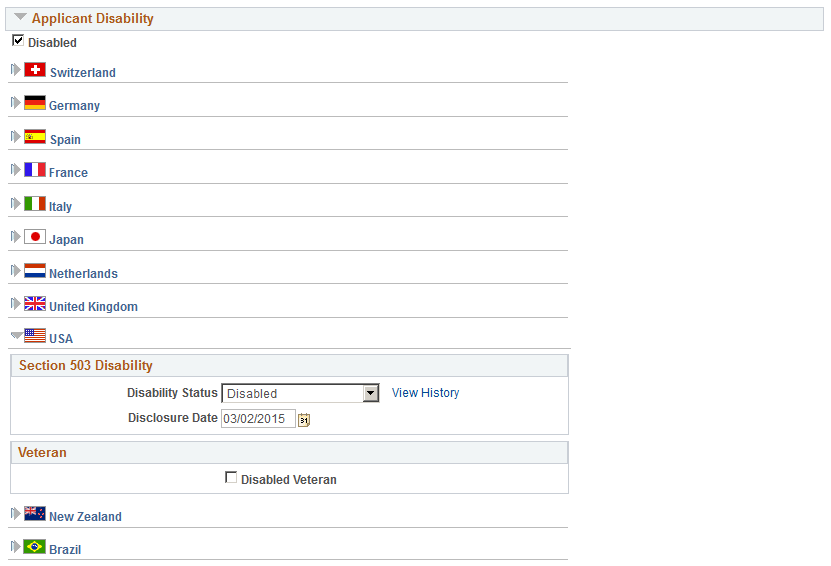
Image: Create Applicant page: Eligibility & Identity tab (4 of 4)
This is the fourth of four examples that illustrate the Create Applicant page: Eligibility & Identity tab.
Personal Information
Use this group box to enter date of birth, gender, and marital status and, in U.S. Federal implementations, to enter an ethnic group.
Date of birth and gender can be used to screen applicants. Date of birth is used to calculate the applicant's age and is compared to the Maximum and Minimum Age fields on the Job Opening page.
Country-Specific Information
Enter additional country-specific information for applicants. Entering citizenship information for an applicant is similar to entering citizenship information for an employee.
(USA) Ethnicity and Veteran Information for the United States
If applicants supply ethnicity and veteran information through Candidate Gateway, that information appears in the USA section of the Eligibility & Identity page.
Note: The U.S. Department of Labor’s Office of Federal Contract Compliance Programs (OFCCP) issues regulations related to collecting Veteran information from applicants. In Candidate Gateway, settings on the Site Setup Page control whether applicants are invited to self-identify as veterans while applying for jobs.
Image: USA Eligibility & Identity information
This example illustrates the fields in the USA section of the Eligibility & Identity tab.
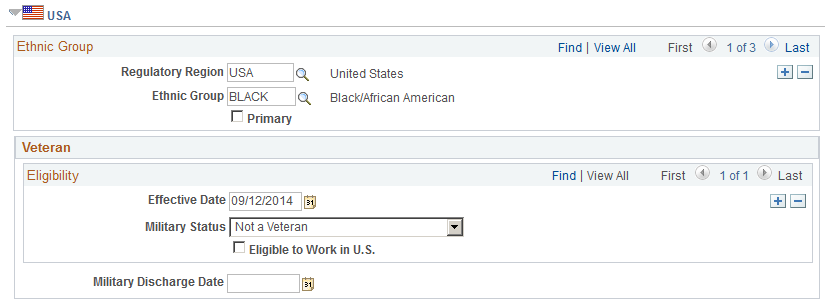
Note: The Ethnic Group scroll area does not appear here in a U.S. Federal system. Instead, Ethnic Group information appears in the Personal Information group box.
|
Field or Control |
Definition |
|---|---|
| Ethnic Group |
Ethnic group information appears in a scroll area regardless of whether you use the two-question format for collecting the information. If you use the two-question format and an applicant answers Yes to the question Are you Hispanic or Latino, then the system inserts a row for the ethnic group Hispanic/Latino in addition to one or more rows for the applicant’s answer to the question What is your race? |
| Effective Date |
For veteran data that is collected in Candidate Gateway, the effective date is the date that the application was submitted. |
| Military Status |
For veteran data that is collected in Candidate Gateway, this field displays the military status that corresponds to information that the applicant provided on the Veteran page. For information about how the self-identification options map to Military Status values, refer to the documentation for the Veteran page in the topics Applying for Jobs and Using Fluid Candidate Gateway to Apply for Jobs. |
| Military Discharge Date |
For veteran data that is collected in Candidate Gateway, this field displays the date, if any, that the applicant entered in the Military Discharge Date field on the Veteran page. |
National Identification
|
Field or Control |
Definition |
|---|---|
| Add National Identificationand Edit National ID |
Click to access the National ID page, where you can enter new or edit existing national ID information for the applicant. Entering national ID information for an applicant is similar to entering national ID information for an employee. |
Citizenship
|
Field or Control |
Definition |
|---|---|
| Add Citizenshipand Edit Citizenship Details |
Click to access the Citizenship page, where you can enter new or edit existing citizenship information for the applicant. Entering citizenship information for an applicant is similar to entering citizenship information for an employee. |
Visa Permit
|
Field or Control |
Definition |
|---|---|
| Add Visa Permit and Edit Visa Permit Details |
Click to access the Visa Permit Details page, where you can enter new or edit existing visa permit details. Entering visa information for an applicant is similar to entering visa information for an employee. |
Bank Accounts
|
Field or Control |
Definition |
|---|---|
| Add Bank Account and Edit Bank Account |
Click to access the Bank Account page, where you can enter new or edit existing bank account information for the applicant. Entering bank account information for an applicant is similar to entering bank account information for an employee. |
Applicant Disability
Use this group box to mark an applicant as having a disability and to enter country-specific disability information. Entering disability information for an applicant is similar to entering disability information for an employee.
See Disability Page.
Note: The U.S. Department of Labor’s Office of Federal Contract Compliance Programs (OFCCP) issues regulations related to collecting disability information from applicants. In Candidate Gateway, settings on the Site Setup Page control whether applicants are invited to self-identify their disability status while applying for jobs.
|
Field or Control |
Definition |
|---|---|
| Disability (not country-specific) |
Changes to the USA disability status (in the Section 503 Disability Status group box in the USA section) flow through to this non-country-specific check box:
Changes to the non-country-specific check box do not change the value of the Section 505 disability status. This check box does is not affected by (and does not affect) the Disabled Veteran check box. |
| (USA) Disability Status |
For disability data that is collected in Candidate Gateway, this field displays a status that corresponds to the applicant’s self-identified disability information.
|
| View History |
Click to access the Disability History page, where you can view the applicant’s disability status over time. |
| (USA) Disclosure Date |
For data that is collected in Candidate Gateway, the disclosure date is the date that the application was submitted. |
| (USA) Disabled Veteran |
If the applicant selected the Disabled Veteran check box on the Veteran page in Candidate Gateway, this check box is selected. |
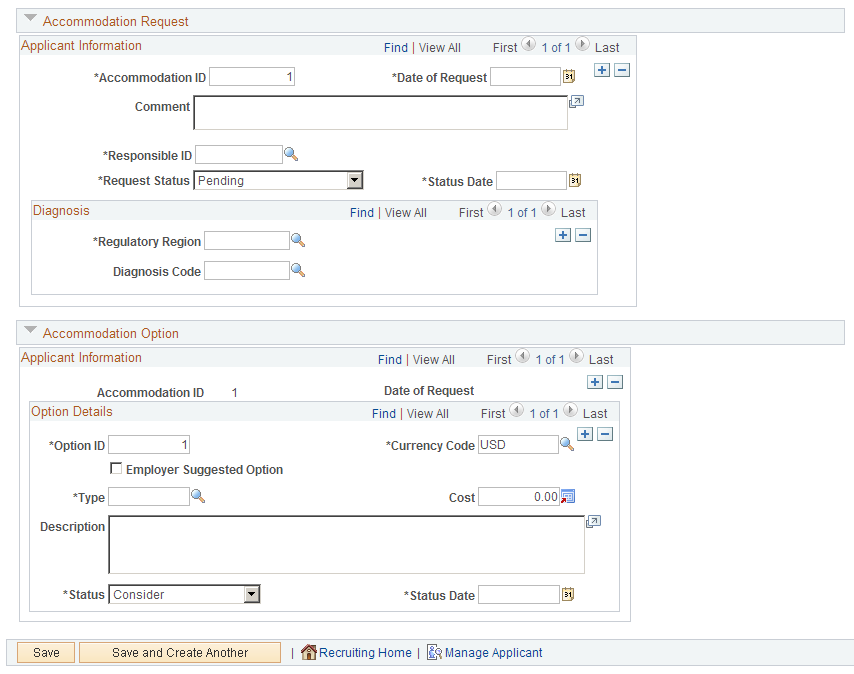
Accommodation Request
Use this group box to enter accommodation requests for an applicant with a disability. Entering accommodation requests for an applicant is similar to entering accommodation requests for an employee.
Accommodation Options
Use this group box to enter accommodation options for an applicant with a disability. Entering accommodation options for an applicant is similar to entering accommodation options for an employee.
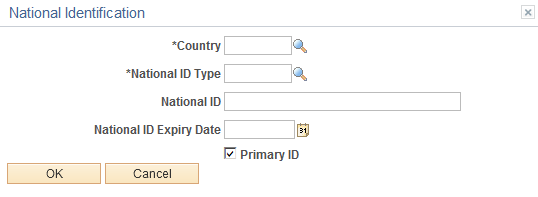
Use the National ID page (HRS_APP_NID) to enter national ID information for an applicant.
Navigation
On the Create Applicant page or the Manage Applicant page, first access the Eligibility & Identity section. Next, click the Add National Identification button or, to modify an existing record, click the Edit icon.
Image: National Identification page
This example illustrates the National Identification page.
Use the Citizenship page (HRS_APP_CIT_PSP1) to enter citizenship information for an applicant.
Navigation
On the Create Applicant page or the Manage Applicant page, first access the Eligibility & Identity section. Next, click the Add Citizenship button or, to modify an existing record, click the Edit icon.
Image: Citizenship page
This example illustrates the Citizenship page.

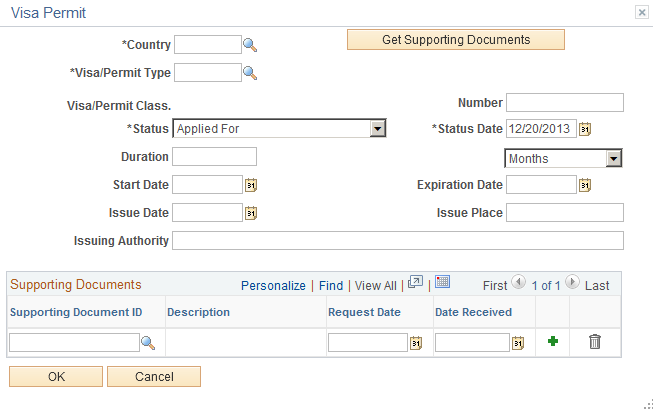
Use the Visa Permit page (HRS_APP_VSA_PMT1) to enter visa permit information for an applicant.
Navigation
On the Create Applicant page or the Manage Applicant page, first access the Eligibility & Identity section. Next, click the Add Visa Permit button or, to modify an existing record, click the Edit icon.
Image: Visa Permit page
This example illustrates the Visa Permit page.
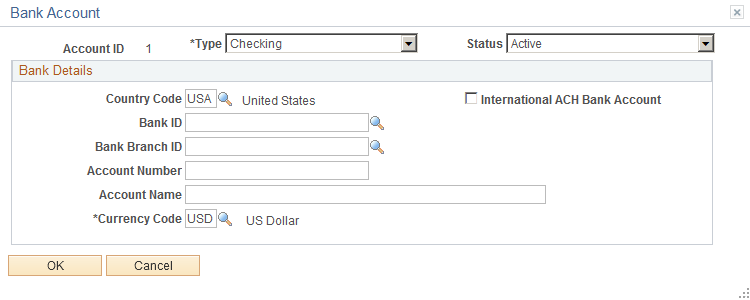
Use the Bank Account page (HRS_APP_BANKACCT) to enter bank account information for an applicant.
Navigation
On the Create Applicant page or the Manage Applicant page, first access the Eligibility & Identity section. Next, click the Add Bank Account button or, to modify an existing record, click the Edit icon.
Image: Bank Account page
This example illustrates the Bank Account page.
Use the Disability History page (HRS_DISUSA_AUD_SEC) to view an applicant’s disability status history.
Navigation
On the Create Applicant page or the Manage Applicant page, first access the Eligibility & Identity section. Next, click the View History link in the USA section of the Applicant Disability section.
Image: Disability History page
This example illustrates the Disability History page.
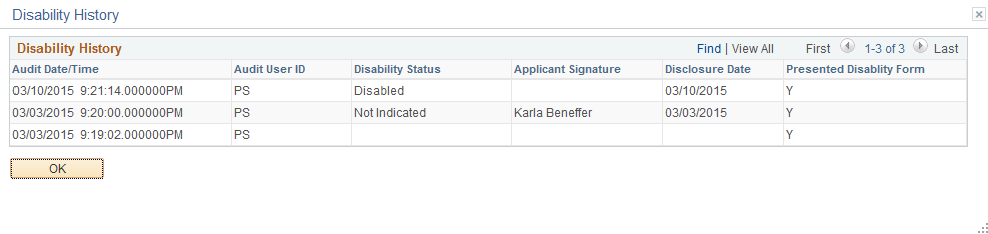
Candidate Gateway adds rows to the disability history when an applicant submits an application that included the Disability page (regardless of whether the applicant entered any disability information).
Talent Acquisition Manager adds rows to the disability history when a user saves a change to the Disability Status field in the applicant’s Eligibility & Identity information.
|
Field or Control |
Definition |
|---|---|
| Audit Date/Time |
Displays the date and time that the data was saved. |
| Audit User ID |
Displays the user ID of the person who saved the data. For external applicants, the user ID is the guest user ID that provides access to the Candidate Gateway site. |
| Disability Status |
Displays the disability status that was saved on the specified date and time. This field is blank if an applicant who saw the Disability page in Candidate Gateway did not select any value. |
| Applicant Signature |
If an applicant provided disability information in Candidate Gateway, the applicant’s name appears here. This field is blank if the applicant saw the Disability page but did not provide any information. The field is also blank if the disability status was entered in Talent Acquisition Manager. |
| Disclosure Date |
If an applicant provided the information in a Candidate Gateway job application, the disclosure date is the date that the application was submitted. If a Talent Acquisition Manager user entered the information, the user manually specifies the disclosure date. |
| Presented Disability Form |
Displays N (No) if the information was entered in Talent Acquisition Manager and the applicant has not previously been presented with the Disability page in Candidate Gateway. Displays Y (Yes) starting with the first row that represents a Candidate Gateway job application that included the Disability page. After the applicant has seen the disability form once, all subsequent history rows have a Y in this field. |