4 Setting Up SPMS Database Server
After the setup of the SPMS Secure Server, you can prepare the SPMS Database Server for the SPMS Secure Server to connect to the SPMS Database. Currently, there are two options to prepare the SPMS Database Server.
-
Upgrade from an existing SPMS 8.0 Database to SPMS 20.1 Database, or
-
Set up from a seed SPMS 20.1 Database. See Definition of SPMS Seed Database in Appendix section.
-
By upgrading from an existing SPMS 8.0 Database, there could be existing data in the Database. Therefore, you need to validate the Database to ensure that all data is valid and error free. This method of SPMS Database set up is similar to a live ship upgrade from SPMS 8.0 to SPMS 20.1.
-
When upgrading from a seed SPMS 20.1 Database, it should NOT contain any data in the SPMS Database. As there is no data, there won’t be a any SPMS Encryption Key in the SPMS Database yet. Subsequently, the Database will need to undergo a migration process to ensure that the SPMS 20.1 Database is now ready for SPMS installation. This method of SPMS Database set up is similar to a new ship installation with SPMS 20.1.
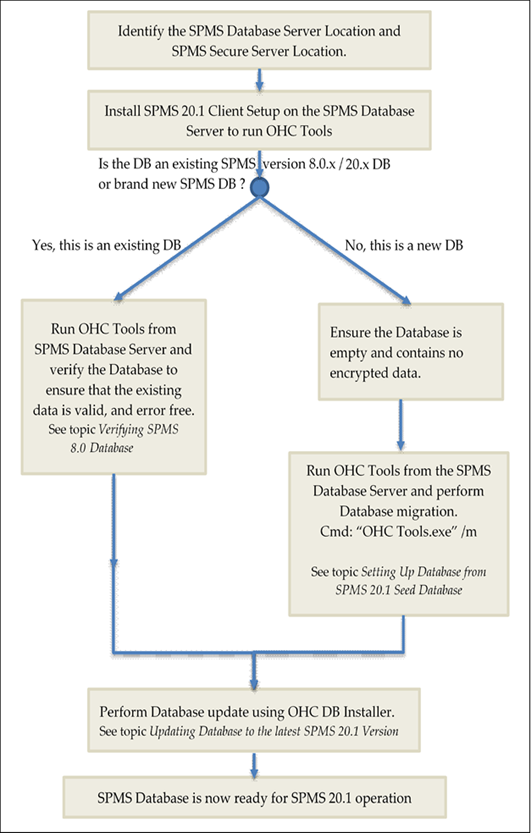
The diagram below summarizes the process of setting up the SPMS Database Server based on the options available to you when preparing the SPMS 20.1 Database.
Figure 4-1 Database Preparation Workflow
Prerequisites
-
Oracle 12c Database Management System is installed on the target machine. It is presumed that:
-
You know where to obtain the Oracle Database Server installer.
-
You know how to install Oracle Database Server.
-
You know how to perform Oracle Database DMP import and export.
-
-
SPMS 20.1 Installer is downloaded and available on the target machine. See topic SPMS Installation File in Where to download for download instructions.
-
SPMS 20.1 Package is downloaded and available in the target machine. See topic SPMS Package File for download instructions.
-
Before the SPMS Database preparation, you must ensure that the DB TNS name on the client machine is the same as the DB TNS name configured on the SPMS Web Server.
-
For the SPMS Database upgrade and before you begin,
-
You must ensure that the SPMS Database version is at Version 8.0 or later.
-
You must know the current Encryption Key of the database to be upgraded. Contact Customer Support if you do not have this information.
-
Important:
-
Before you proceed, it is important to know where you intend to set up the SPMS Database Server. See topic Recommendation for the Installed SPMS Environment section for some examples of SPMS Environment configurations. The SPMS Database Server is the heart of every SPMS environment. Therefore, the first thing you need to do before installing the full SPMS environment is to identify the location of the SPMS Database Server.
-
The SPMS Database Server must be reachable by all SPMS Application Clients, SPMS Secure Server, and SPMS Web Server.
SPMS Database Installation Steps
-
See topic Checking SPMS Database Instance.
-
See topic Verifying Connection to SPMS Database.
-
See topic Installing SPMS 20.1 Application Client on SPMS Database Server.
-
If you want to upgrade SPMS Database from version 8.0 to version 20.1, follow the steps below, else skip to (5).
-
See topic Verifying SPMS 8.0 Database.
-
-
If you want to setup SPMS Database version 20.1 from a seed SPMS Database version 20.1, follow the steps below, else skip to step 6.
-
See topic Setting Up Database from SPMS 20.1 Seed Database and Definition of SPMS Seed Database in Appendix.
-
-
See topic Updating Database to the latest SPMS 20.1 Version.
Checking SPMS Database Instance
The SPMS Database Server is the machine that hosts the SPMS Database Instance. Therefore, the first step to set up the SPMS Database Server is to ensure that there is already an SPMS Database Instance running on the same machine. If not, create a new Database Instance and Database Service for SPMS first. Below are the quick steps to verify that you have an SPMS Database Instance running on the SPMS Database Server machine.
This is to verify that the SPMS Database is hosted. To check, run the Oracle Instance Manager and verify that the SPMS Database Service is running
Verifying Connection to SPMS Database
After confirming that the SPMS Database Instance is available and running, you should verify that you can connect to the SPMS Database using the SQLPlus* tool, which is installed along with the Oracle Database Management System. This is important so that you can resolve any Database related issues.
-
All SPMS Application Clients or SPMS web services connect to the Oracle Database Instance using the TNS connection type. Therefore, ensure from the installed Oracle Client home folder, that there is a correct Database TNS entry in the Oracle TNSNames.ora file. You will need the Database TNS Name entry created in the TNSNames.ora file so that SPMS can locate the correct Database when it references the Database TNS.
-
The commonly installed Oracle Client folder for SPMS is C:/Oracle/product. However, you may choose to install it in a different folder. Now configure the Database TNS in the TNSNames.ora file. See Table 3-1.
    <DB_TNS_NAME> = (
        DESCRIPTION = (
            ADDRESS_LIST = (
                ADDRESS = (PROTOCOL = TCP)
                          (HOST = <DB_ADDRESS>)
                          (PORT = <DB_PORT>)
            )
        )
          (CONNECT_DATA = (SERVICE_NAME = <DB_NAME>)
        )
    )
Figure 4-2 Sample TNS Configuration in Tnsnames.ora

-
After setting the TNS entry in the TNSNames.ora file, you can now attempt to verify the Database connection using Oracle SQL*Plus. The command to connect to the Database is shown below. Resolve all Database connection issues before you proceed to set up the SPMS Database.sqlplus
[DB_USER]/[DB_USER_PASSWORD]@[DB_TNS_NAME]
Installing SPMS 20.1 Application Client on SPMS Database Server
Before you choose to upgrade an existing SPMS 8.0 Database or prepare the SPMS 20.1 Database using a seed SPMS Database, you will need to first install the SPMS 20.1 Application Client on the SPMS Database Server machine. This is because you are required to run the SPMS OHC Tools module to perform either the Database upgrade or migration as described in above installation steps. To install the SPMS Application Client, see chapter Setting Up SPMS Desktop Application Clients.Verifying SPMS 8.0 Database
Follow the instructions below if you are preparing a database upgrade from SPMS 8.0 to SPMS 20.1. This step is similar to upgrading an existing ship database from SPMS8.0 to SPMS 20.1.
-
Before performing the SPMS Database upgrade, it is recommended that a Database data verification is performed first on the SPMS Database for Version 8.0. This is to ensure that the data is valid and error -free before you upgrade the SPMS Database.
-
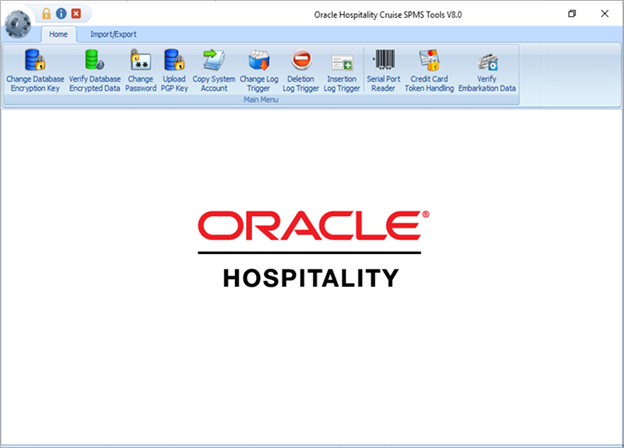
Run the OHC Tools program for SPMS Version 8.0.
Figure 4-3 OHC Tools - Verify Database Encrypted Data
-
From the ribbon bar, select Verify Database Encrypted Data.
-
Select the Service Name and Schema User for SPMS, and click Verify.
Figure 4-4 OHC Tools Encrypted Data Instance

-
Do not proceed to upgrade SPMS Database if the data verification returned failed message due to invalid data. You should fix the data error and repeat the process.
By not doing so, you acknowledge and assume the responsibility for data losses after the SPMS Database upgrade to Version 20.1.
-
Click the Close button when the process completes.
Setting Up Database from SPMS 20.1 Seed Database
Follow the instructions below if you are preparing a database upgrade from a seed SPMS 20.1 Database. See topic Definition of SPMS Seed Database in Appendix. This step is similar to setting up a new ship database.
-
You must ensure that SPMS Secure Service is hosted correctly and is reachable. During the SPMS Database migration process, the OHC Tools communicates with the SPMS Secure Service so that the SPMS Secure Service can create a local OHCSecurity.par file storing the Database Password. To verify that the SPMS Secure Service is hosted and reachable, you may browse to the URL shown below from the web browser. Do not proceed if the SPMS Secure Service is not reachable. Correct the web service issue before you proceed.
https://[SECURE_SERVER_URL]/OHCTransactionsService/OHCSecurity.asmxSee Figure 3-3
-
Run the Windows Command Prompt as a Windows Administrator.
-
Navigate to the Installed SPMS Application folder. For example,
C:\Program Files (x86)\Oracle Hospitality Cruise. -
Run the OHC Tools for Database migration using the following command.
“OHC Tools.exe” /m.Figure 4-5 Windows Command to Launch OHC Tools

-
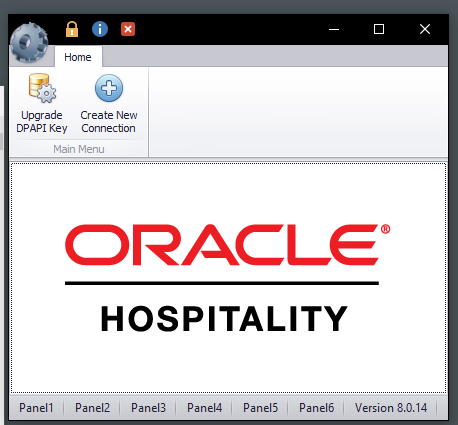
This will lead to the screen as shown below.
Figure 4-6 OHC Tools /M Mode Main Screen
-
Click the Upgrade DPAPI Key button to create a new Database entry record to both the local OHCSecurity.par file and also at the SPMS Secure Server.
-
At the Security Login prompt, choose the Database TNS and enter the Database Password for authorization.
-
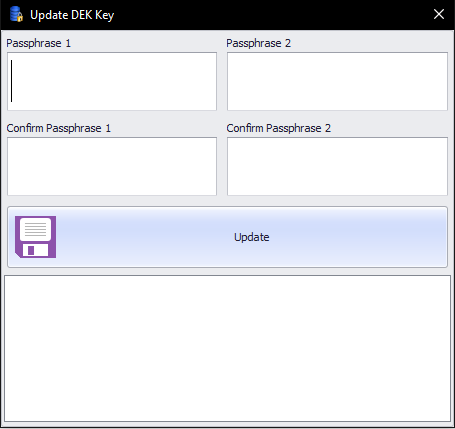
Key in the passphrase and click the Update button.
Figure 4-7 Encryption Passphrase Update Form
-
Upon completion, you will find that the SPMS Database password and encryption key are safely encrypted and stored by the SPMS Secure Server.
Updating Database to the latest SPMS 20.1 Version
After a successful set up of the SPMS Database for Version 20.1, ensure that the SPMS Database version is updated to the latest SPMS version. The SPMS Database Installer program is a Database updater program that upgrades the SPMS Database to the latest version. Apart from performing an SPMS Database version upgrade, the Database Installer also repairs missing or invalid Database objects required by SPMS. You can find the Database Installer program as part of the SPMS Package. See topic SPMS Package File for download instructions.
Note:
By running the OHC Database Installer, all existing custom changes made to the database objects, index and views will be repaired and restored to the default SPMS database requirement.
-
From the downloaded SPMS Package folder, browse to the EXE folder.
-
Copy the OHC Database Installer.exe file to the SPMS Installed folder
C:\Program Files (x86)\Oracle Hospitality Cruise. -
Run the Windows Explorer program and navigate to the Oracle Hospitality Cruise folder.
-
Double-click the OHC Database Installer.exe to launch the program.
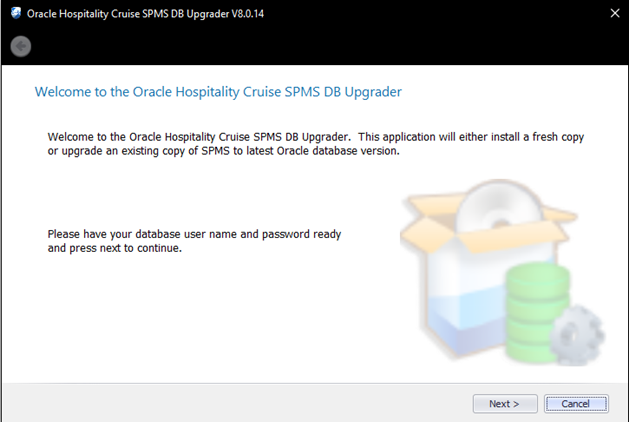
Figure 4-8 OHC Database Installer Welcome Screen
-
Click the Next button to navigate to the next screen.
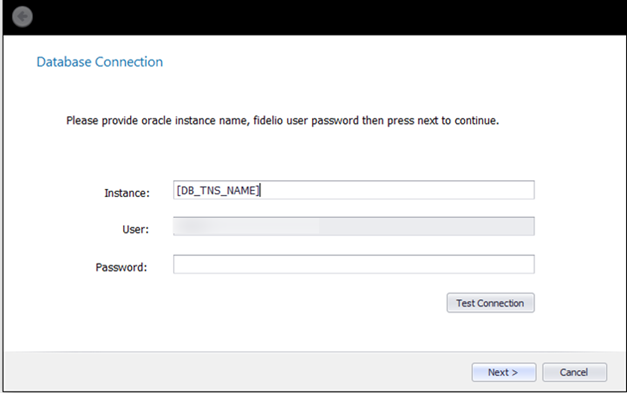
Figure 4-9 OHC Database Connection Instance Selection/Password.
-
On the Database Connection screen, enter the Database TNS name and Database Schema Password for SPMS.
-
If the Database TNS name or Database Schema password is incorrect, you will receive an error message. Correct the information and retry
-
-
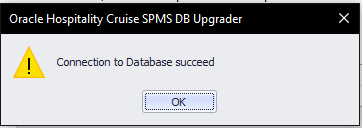
To validate the Database connection, click the Test Connection button.
Figure 4-10 OHC Installer DB Connection Successful
-
Click the Next button to proceed to the Options screen, and select the mode to run.
-
Standard: Updates the SPMS Database with the required changes.
-
Simulation: Checks and generate a list of changes that the system will apply. These changes will not affect the SPMS Database until you run the standard mode.
-
-
Click the Next button to proceed to the User Security Option screen.
-
On the User Security Option screen, the radio button is defaulted to Backward Compatible.
-
Backward Compatible: Additional user rights for new menus will be disabled. User rights that were added to existing menus will be enabled. User rights that were split in existing menus will be reset to the original assignment.
-
Disable: All Additional user rights for any new menus, as well as the existing menus will be disabled.
-
-
Select the appropriate User Security option and click the Next button to continue. This will lead you to the Confirmation screen.
-
On the Confirm screen, click the Next button to start the SPMS Database Version update process. If there are SPMS applications connected to the SPMS Database, you will receive a message to remind you to close all applications or terminate the SPMS Database connection with the application. Close all applications and click Yes to continue.
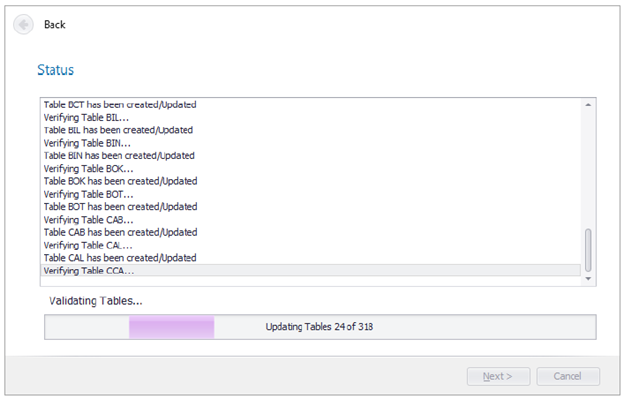
Figure 4-11 Update Progress of OHC Database Installer
-
The SPMS Database Version Update progress is shown in the Status screen. Upon completion of the update process, click the Next button to proceed.
-
After the SPMS Database Version Update, you will find:
-
A process log is saved in the SPMS Public Document folder
C:\Users\Public\Document\Oracle Hospitality Cruise. Alternatively, you may click the Copy to Clipboard button to save the file. -
If there are new User Security Rights added to the schema, a User Security Right file will prompt upon completion of the upgrade process.
-
-
Click the Finish button to exit the SPMS Database Installer. The SPMS Database Version will be updated automatically.
-
To verify the version, you can log in to the SPMS Administration module and navigate to System Setup, Database Parameters. Information is displayed in the Parameter group ‘System’, ‘Launcher Database Structure Version’.
Troubleshooting