Using the Shift Process to Provision the Migrated Environment on the Oracle Cloud
Use the Shift process to deploy the packaged environment in Oracle Cloud.
Prerequisites
The Lift and Shift topology must be modified with the required size and disk capacity of the database and middle-tier nodes. If shifting to DBaaS, then modify the Lift and Shift - DBaaS topology.
Note: The disk space of the database node must be configured based on the size of the lifted database. The recommended disk space on the database node is at least 2.5 times the lifted database size.
During the Shift process, Cloud Manager can update the PeopleTools patch of the lifted environment. To update the PeopleTools patch during shift, make sure to have the required PeopleTools DPK already downloaded and available in the repository.
The Shift process makes use of the latest PeopleSoft Update Image for the application type. For example, if your lifted environment is an HCM environment, then make sure you have the latest HCM PeopleSoft Update Image downloaded in the repository.
Before shifting, the Lift and Shift related topologies must be edited and saved to add shape name and disk capacity where applicable.
See Editing an Existing Topology
Lift And Shift topology is supported only when the database version associated with the lifted environment is Oracle 19c and the database is non-TDE. For all database versions other than Oracle 19c, the Lift and Shift - DBaaS topology is always used for shift.
Note: Verify the Lift and Shift topology; be sure to select the right topology based on the choice of database to be created on DBaaS. You also need to verify the sizing and disk space based on the lifted DPK size and desired environment; a minimum allocation should be provided. For database node, you need to provide a size that is equivalent to 2.5 times of the actual lifted DPK size (not zipped).
For Exadata database:
You need to add the SSH public key for the Cloud Manager user on all Exadata cluster VMs. See Adding SSH Keys to a VM Cluster in the Oracle Cloud Infrastructure documentation.
On the Infrastructure Setting page, click the Refresh OCI Metadata button to sync the Exadata DB Systems provisioned in OCI. After refreshing the metadata, the instance will appear in the DB Systems section on the provisioning page.
The DB Admin password and the Wallet password are the same. If you want to change the Wallet password you must do that manually.
The database operator IDs used during the Shift operation should have specific permissions to perform various actions. The permissions are listed below:
For ACM (Automated Configuration Manager) — ACM administrator
For IB (Integration Broker) — Integration administrator
For Elasticsearch or OpenSearch — Search Administrator, Search Server, Search Developer
For Process Scheduler — PeopleSoft Administrator, ProcessSchedulerAdmin, ReportDistAdmin
For Portal — PeopleTools, Portal Administrator
Supported databases are listed in the Support Matrix for Shift Provisioning on Target Database posted on the PeopleSoft Cloud Manager Homepage.
You must log on to Cloud Manager with a User ID, such as the default User ID CLADM, which includes the Cloud Manager PeopleSoft Administrator role (PACL_PAD).
For Government Cloud:
FIPS (Federal Information Processing Standards) is disabled during Shift. After the Shift process completes you can enable FIPS by following these steps:
Log in to the DBS instance.
Change user to oracle.
Open file "$ORACLE_HOME/ldap/admin/fips.ora".
Change SSLFIPS_140=TRUE.
SSLFIPS_140 value was set to FALSE during Shift.
Install JDK 1.8 on Cloud Manager.
Some DB Systems include JDK 11 by default, whereas the Shift process requires JDK 1.8. Use these steps to download and install JDK 1.8, before performing Shift operations. This procedure is needed once for each Cloud Manager instance.
Download JDK 1.8 from this Oracle site: https://www.oracle.com/java/technologies/javase/javase8-archive-downloads.html
The file name to download is jdk-8u202-linux-i586.tar.gz.
Log in to the Cloud Manager instance and save the JDK file in /tmp.
Extract the .tar.gz file using the following command:
sudo tar xvzf /tmp/jdk-8u202-linux-i586.tar.gz -C /cm_psft_dpks/The command copies the extracted directory to /cm_psft_dpks, which is the mounted directory for the Cloud Manager File Storage Service (FSS).
Rename the extracted directory to jdk1.8.
sudo mv jdk1.8.0_202 jdk1.8To verify the path is correct, run the command:
/cm_psft_dpks/jdk1.8/bin/java -versionYou should see a message such as:
java version "1.8.0_202"
Java(TM) SE Runtime Environment (build 1.8.0_202-b08)
Java HotSpot(TM) Server VM (build 25.202-b08, mixed mode)
|
Page Name |
Definition Name |
Usage |
|---|---|---|
|
ECL_LAS_GENERAL_FL |
Use the Lift and Shift – Create Environment wizard to perform shift operation by means of a guided process. |
|
|
ECL_LAS_ADV_FL |
Use Lift and Shift – Advanced Options page for defining target database details. |
|
|
ECL_LAS_CUSTATR_FL |
Use Lift and Shift – Custom Attributes page for defining the custom attributes as per the lifted environment. |
|
|
ECL_LAS_REVIE_FL |
Use Lift and Shift – Review and Submit page to review and submit the entered environment details. |
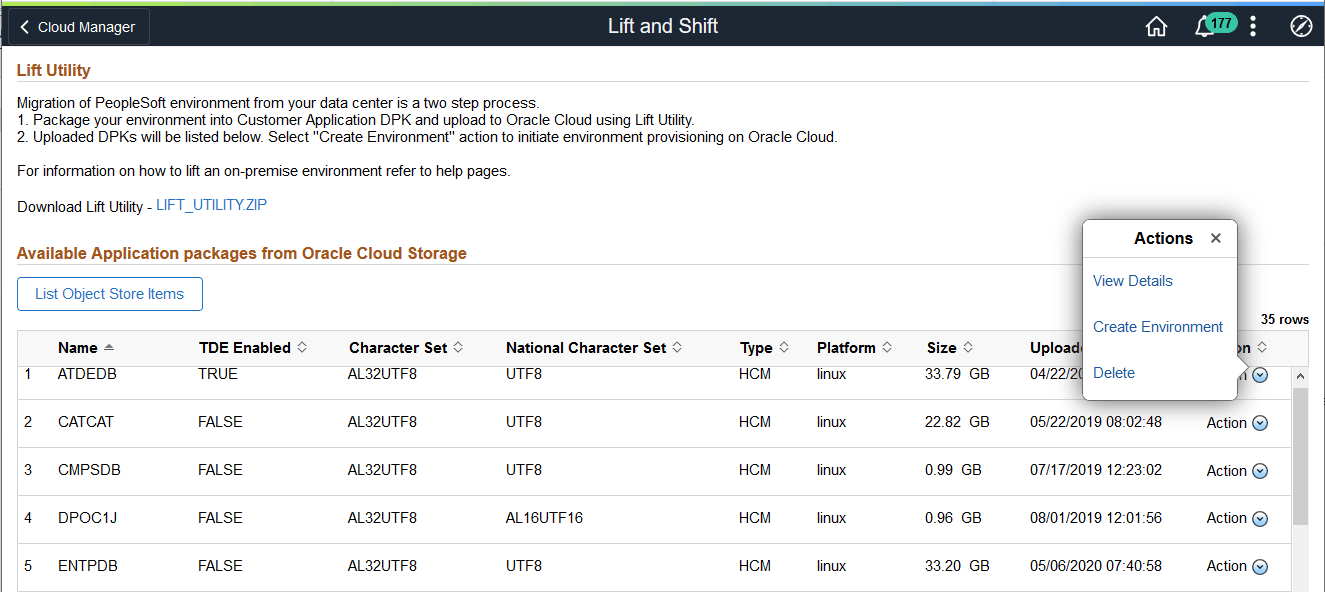
Once an environment is lifted, it will be available on the Lift and Shift page. Click the List Object Store Items button to view all items.
This example illustrates the fields and controls on the Lift and Shift page. You can find definitions for the fields and controls later on this page.
For description of this page see Lift and Shift Page
Lift and Shift actions:
Field or Control |
Description |
|---|---|
View Details |
Click to verify the lift details. The type of the DB zip file (2of3.zip or 2of2.zip file) will be db_rman. |
Create Environment |
Click to Shift the environment. |
Delete |
Click to delete. |
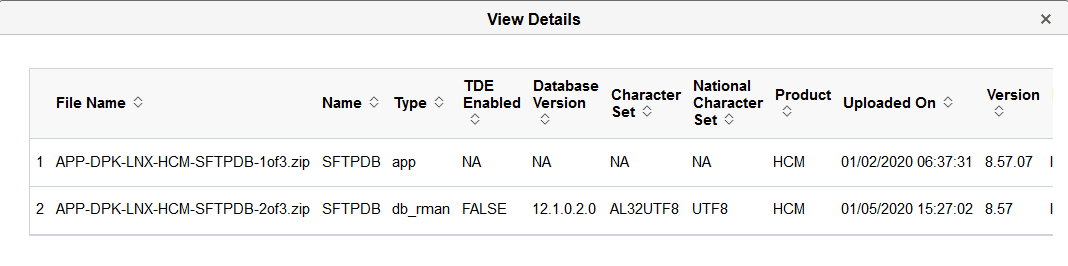
This example illustrates the fields and controls on the View Details page, showing the type as db_rman for the database zip file.
Use the Lift and Shift – Create Environment wizard (ECL_LAS_GENERAL_FL) to perform the Shift operation. The Shift operation facilitates provisioning a new environment using the lifted DPKs.
In Lift and Shift provisioning, you can:
Select the desired topology based on DB on Oracle Cloud (Compute or DBaaS).
Modify the sizing and disk space.
Note: The Database type must be set to DEMO on the Lift and Shift template. This field does not appear in the lift and shift provision pages.
Navigation:
Click the Related Action button corresponding to the lifted application. Select Create Environment option. By default, the Lift and Shift - General (New Environment Information) page is displayed.
This example illustrates the fields and controls on the Lift and Shift - New Environment Information page.
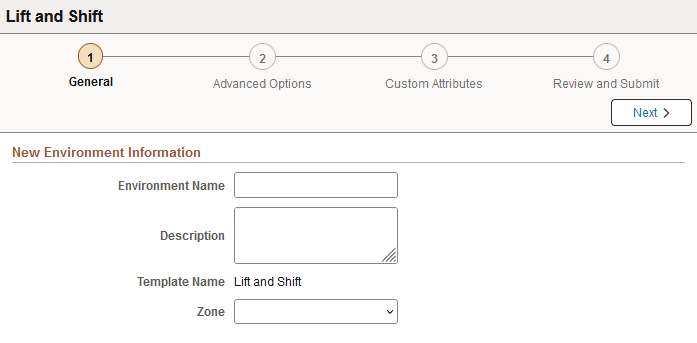
Field or Control |
Description |
|---|---|
Environment Name |
Enter the name of the environment which you want to create. Note: Length of environment name and identity domain name should not exceed 25 characters. |
Description |
Enter a description for the environment. |
Template Name |
Displays the default template to be attached with the environment. |
Zone |
Select the zone on which the environment should be created. |
Use the Lift and Shift – Advanced Options page (ECL_LAS_ADV_FL) for defining target database details.
Navigation:
Click step 2 or Next at the top of the Lift and Shift guided process.
This example illustrates the fields and controls on the Lift and Shift – Advanced Options page. You can find definitions for the fields and controls later on this page.
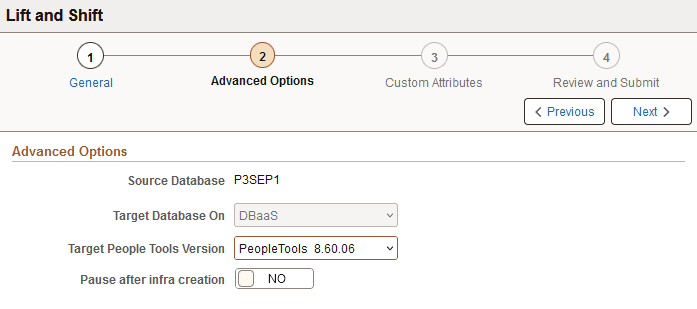
Field or Control |
Description |
|---|---|
Target Database On |
The Target Database On is DBaaS for all environments. Note: For TDE enabled environments, Target Database On is DBaaS, which cannot be changed. |
Target PeopleTools Version |
Select the PeopleTools version to be applied on the environment. |
Pause after infra creation |
Select Yes for the environment provisioning to pause after completion of the Infrastructure task. This provides the user the opportunity to do additional setup, actions, or operations on the newly created environment outside of Cloud Manager before proceeding with the PeopleSoft deployment. Note: When you are ready to proceed to the PeopleSoft deployment, select Deploy from the related actions on the Environment tile. Select No (default) to continue provisioning the environment when the infrastructure layer is complete. |
Use Lift and Shift – Custom Attributes page for defining the custom attributes as per the lifted environment.
Navigation:
Click step 3 or Next at the top of the Lift and Shift guided process.
Enter the custom attributes as per the lifted on-premises environment. It is recommended that the custom attribute values entered on this page match the on-premises configuration.
For details on custom attributes, see Managing Environment Attributes.
This example illustrates the fields and controls on the Lift and Shift – Region and Availability Domains and the Middle Tier Network sections.
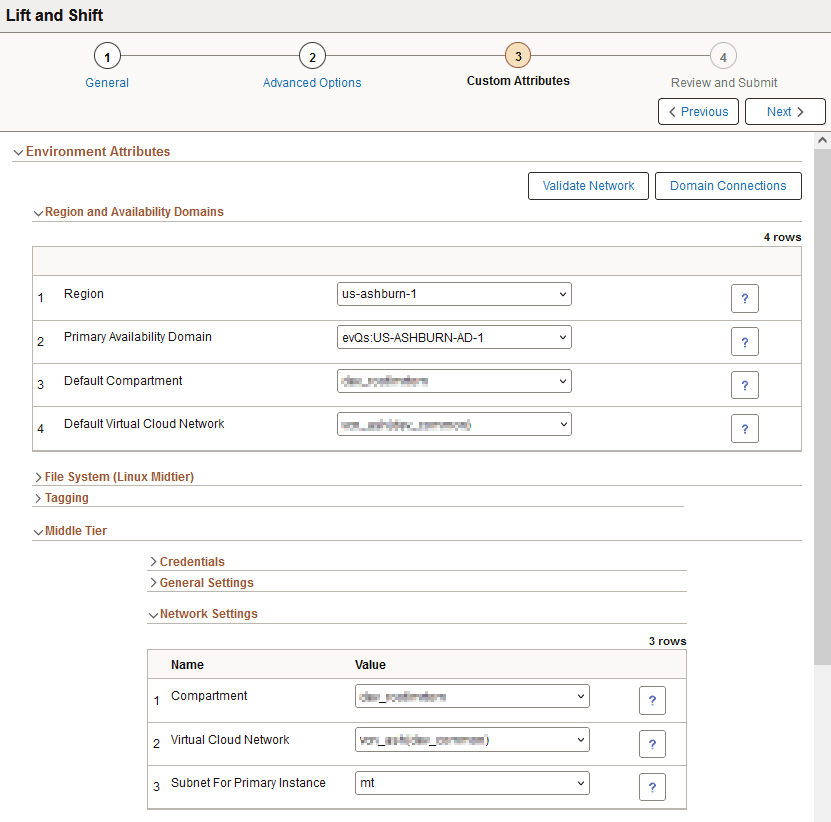
The values in the Network Settings section default to the compartment and VCN in the Region and Availability Domains section; these values can be changed for each tier.
See Configuring Region and Availability Domains, Configuring Network Settings, and Configuring Domain Connections section in Creating An Environment.
File System (Linux Midtier) Section
This example illustrates the fields and controls on the Lift and Shift – File System (Linux Midtier) section.
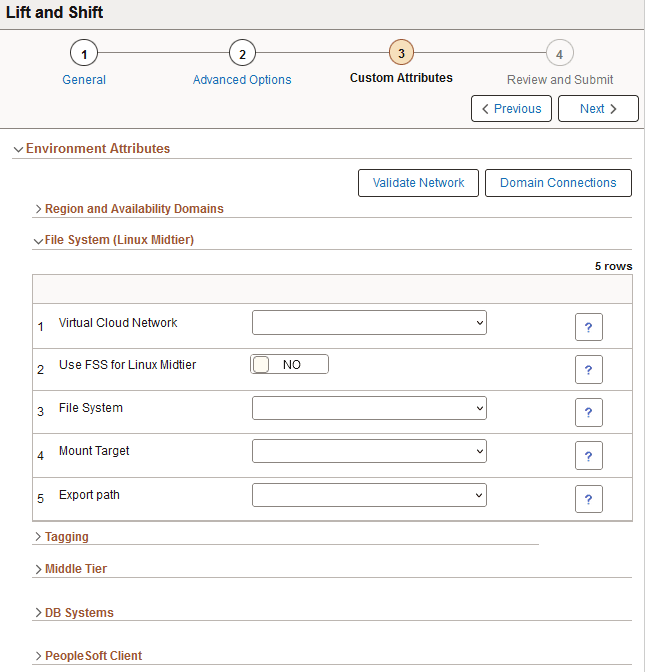
See Using Shared File System for Linux Middle Tier using File Storage Service for a description of the fields and controls.
Middle Tier Section
This example illustrates the fields and controls on the Lift and Shift - Middle Tier section.
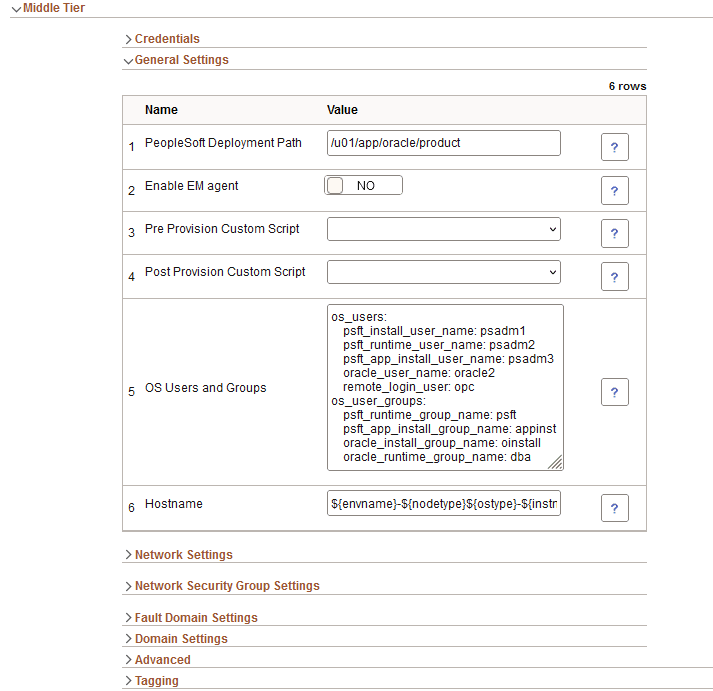
The fields and controls for Middle Tier are described in Configuring Web Server Tier Settings.
This example illustrates the fields and controls on the Lift and Shift – Middle Tier Domain Settings.
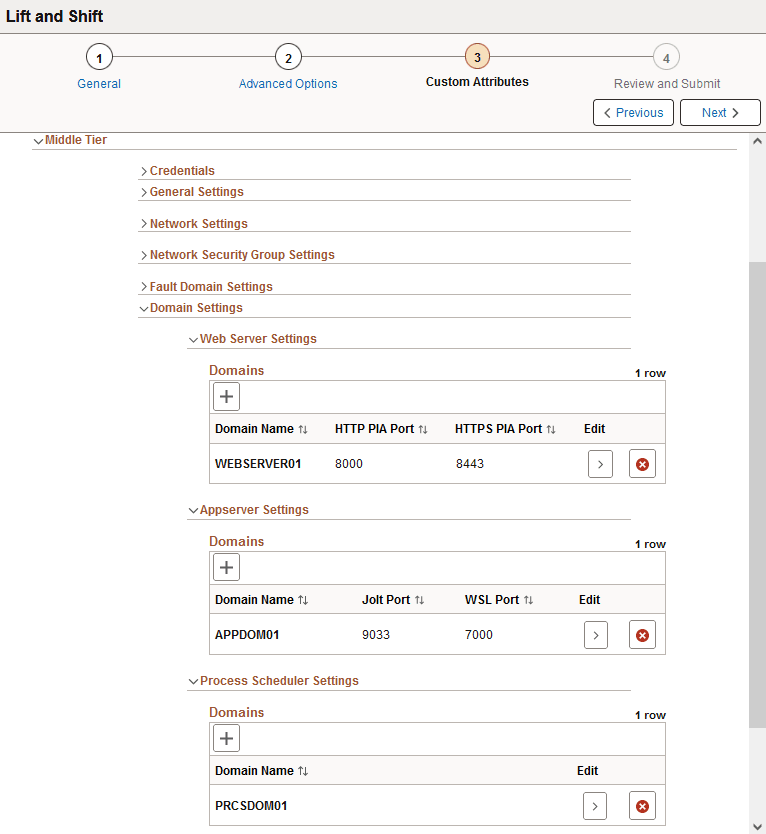
See Domain Settings Section in Configuring Full Tier Template Settings for field definitions and controls.
DB Systems Section
The DB Systems section fields change depending upon the database.
The fields and controls for the DB Systems section are described in Configuring DB Systems Settings.
This example illustrates the fields and controls on the Lift and Shift – DB Systems Credentials section for a TDE-enabled database.
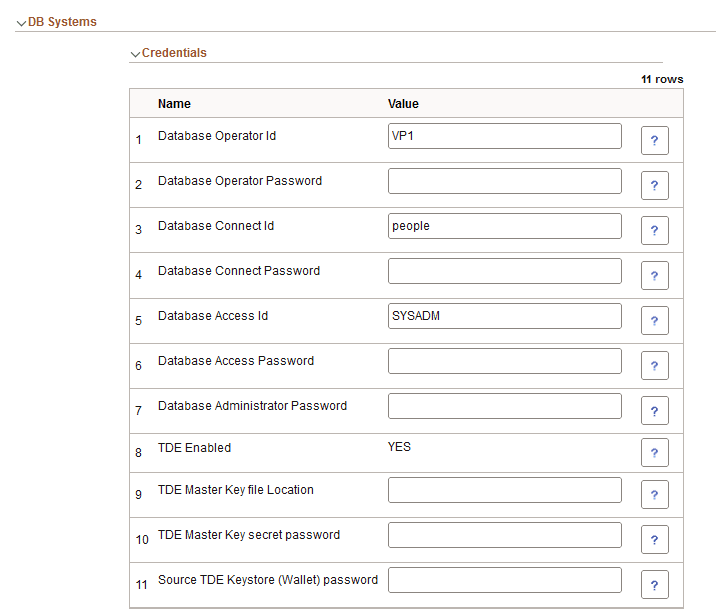
The fields and controls for TDE-enabled databases are described in Shifting TDE Encrypted Database.
This example illustrates the fields and controls on the Lift and Shift – DB Systems Credentials section with RMAN password.
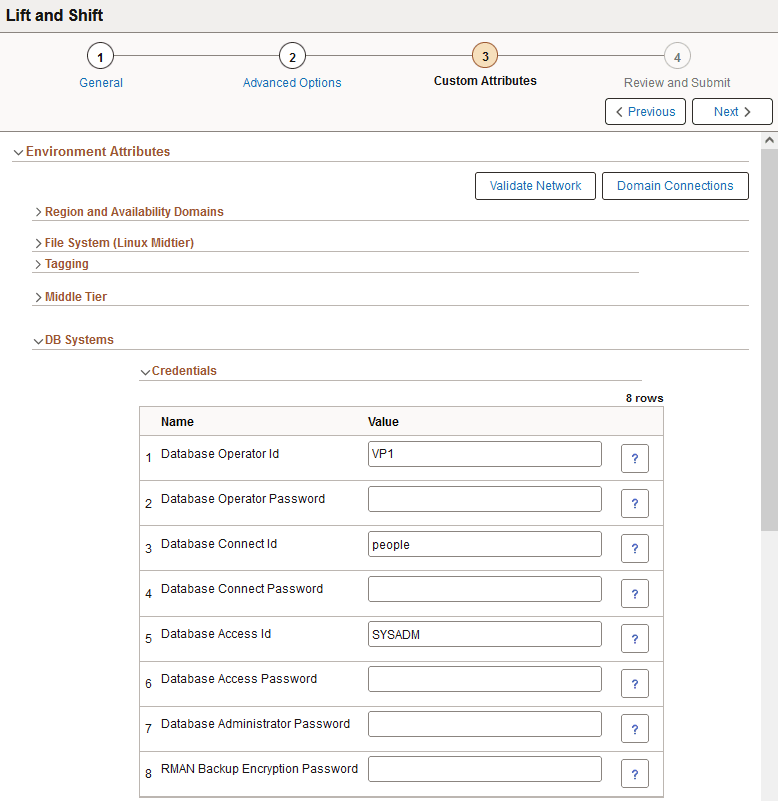
Note: When creating a new shifted environment of a lifted RMAN backup, you must provide a different CDB name than the CDB name of the source database on which the RMAN lift was performed. The shift will fail if the same CDB name is used.
See also Running Lift Using Hot Backup (RMAN).
This example illustrates the fields and controls on the Lift and Shift – DB Systems General Settings section.
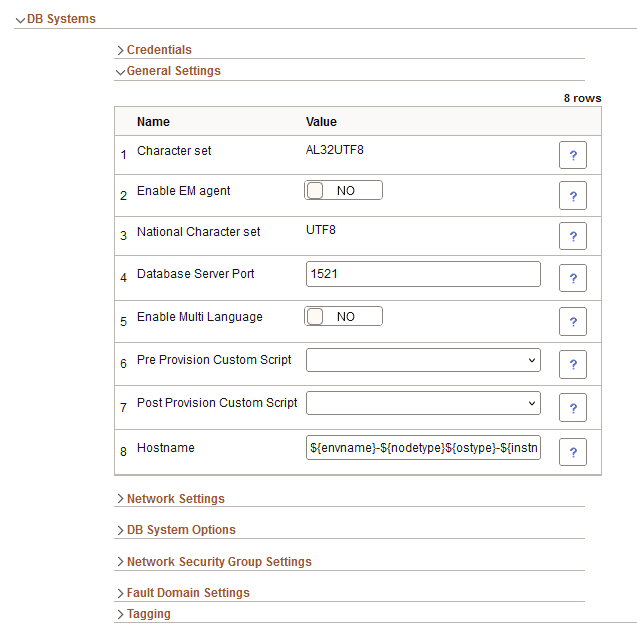
Character Set Attributes
The Character Set and National Character Set attributes are configured with the same values as the on-premises database configuration.
The database character sets to be used for the Shift operation are AL32UTF8 and National Character Set AL16UTF16. Possible values of National Character Set when character set is AL32UTF8 are AL16UTF16 and UTF8. There can be multiple possible values of character set such as UTF8 WE8ISO8859P15. If shifting to DBaaS, you need to modify the character sets based on the database selected.
If you are using Cloud Manager to initiate a DBCS Shift; the “DBaaS Charset” and “DBaaS National Charset” configuration (under the Database Tier section) should match with the “Charset” and “National Charset” of the Database environment where the DB Lift operation is performed.
If there is any mismatch in the Charset data, the DBCS shift will fail.
To find the Charset and National Charset information from the lifted environment, run the following SQL commands on the DB (lifted) environment.
select VALUE from nls_database_parameters where parameter='NLS_CHARACTERSET';
select VALUE from nls_database_parameters where parameter='NLS_NCHAR_CHARACTERSET';
Output:
SQL> SELECT value$ FROM sys.props$ WHERE name = 'NLS_CHARACTERSET' ;
VALUE$
AL32UTF8
SQL> SELECT value$ FROM sys.props$ WHERE name = 'NLS_NCHAR_CHARACTERSET';
VALUE$
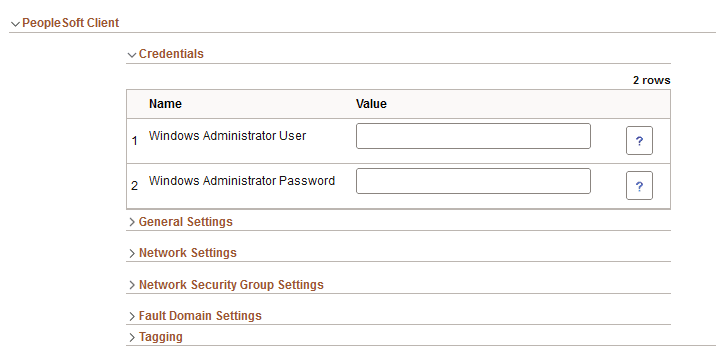
UTF8PeopleSoft Client Section
This example illustrates the fields and controls on the Lift and Shift – PeopleSoft Client Credentials section.
|
Field or Control |
Description |
|---|---|
|
Windows Administrator User |
The Windows Administrator User is required to access the instance. If you want to specify a user other than the default, opc, you must first create a custom Windows image and add the custom user. The custom user must have administrative privileges. See the tutorial Create a Custom Windows Image for PeopleSoft Cloud Manager in Oracle Cloud Infrastructure (Optional) at https://docs.oracle.com/en/applications/peoplesoft/cloud-manager/index.html#InstallationTutorials. |
|
Windows Administrator Password |
Enter the password for the Windows administrator. |
Use the Lift and Shift – Review and Submit page (ECL_LAS_CUSTATR_FL) to review and submit the entered environment details.
Navigation:
Click step 4 or Next at the top of the Lift and Shift guided process.
This example illustrates the fields and controls on the Lift and Shift – Review and Submit page.
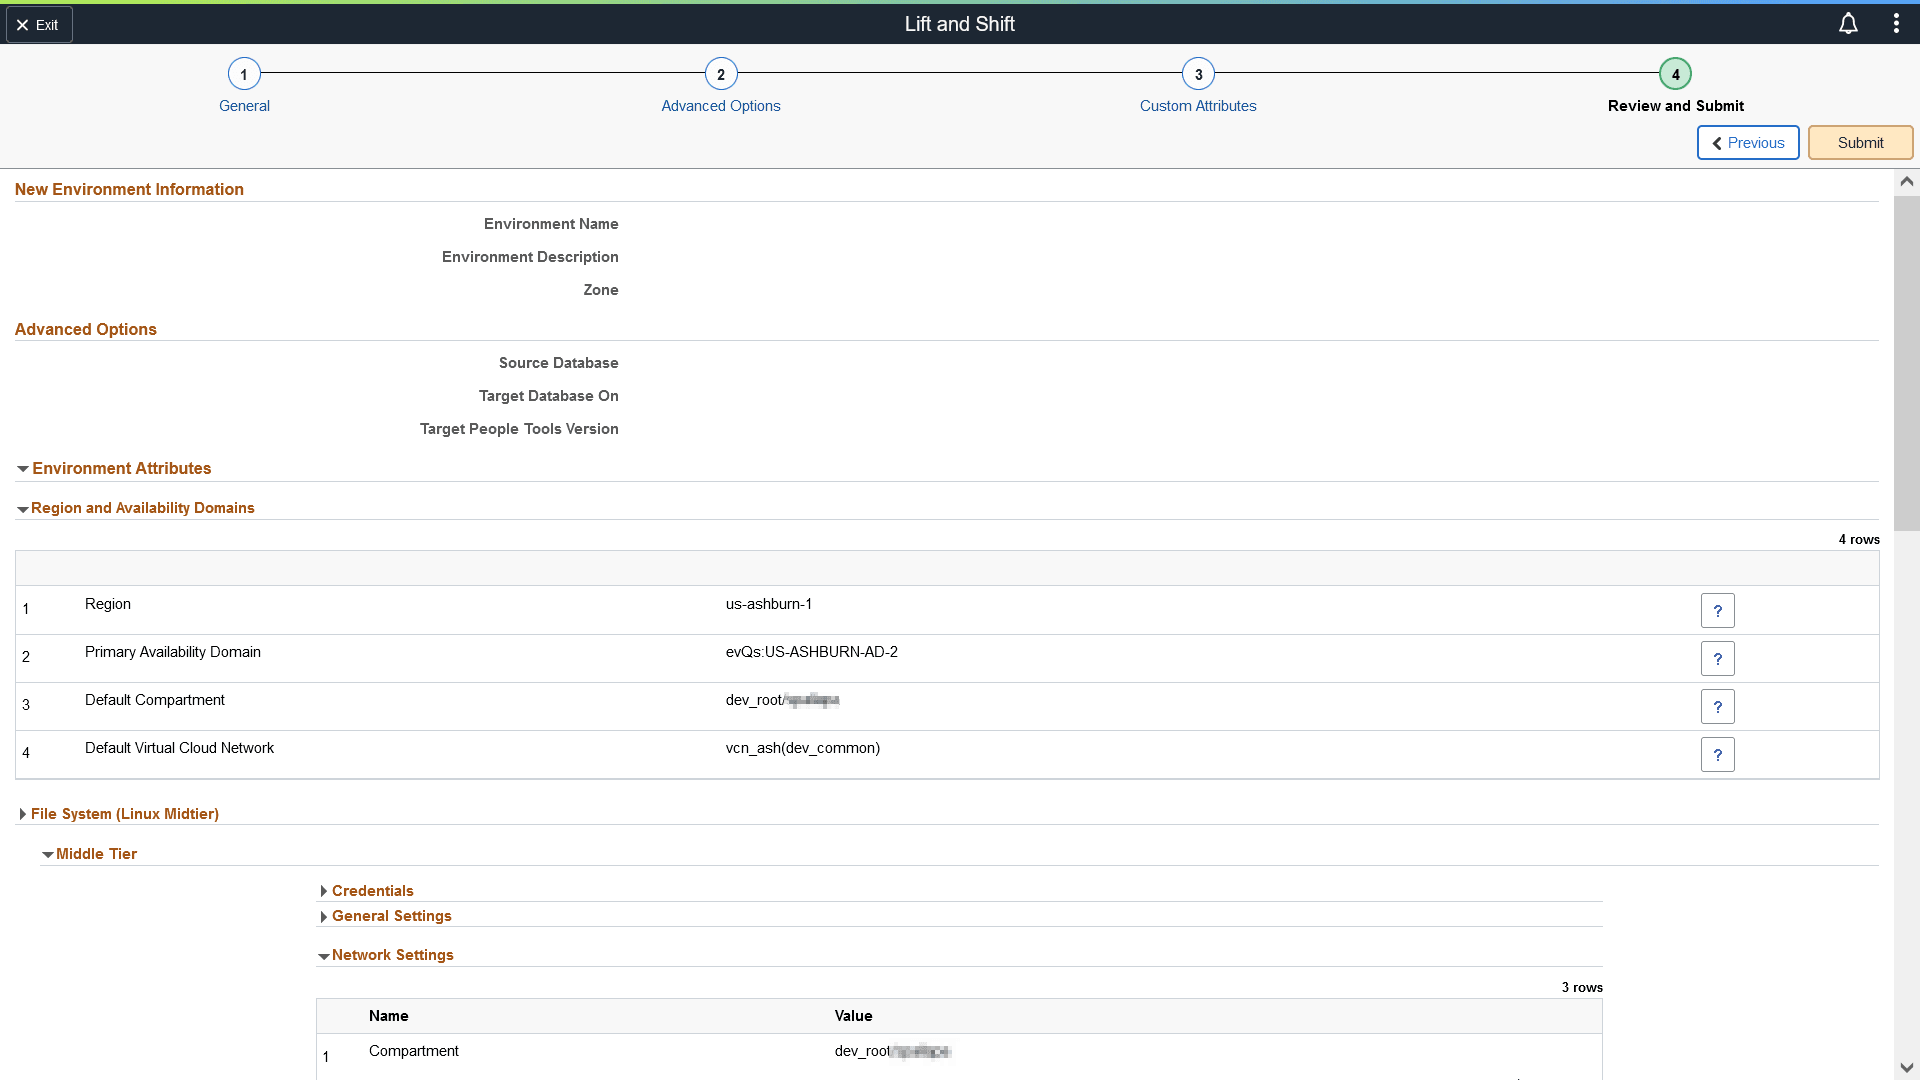
Review the details that were entered for the environment.
Click the Submit button to initiate the creation of a lifted environment in Oracle Cloud based on the details provided.
Once the environment is ready, you will be able to view it under the Environments tile. For details, see Environments Tile