Managing Installed Products
To manage installed products, use the Installed Product (RF_INST_PRODUCT) and Order Capture (RO_CAPTURE) components.
Note: In this section, the discussion of the Installed Product component is based on how it appears through system-delivered display templates. The visibility of sections and fields may differ if a modified or different display template is used.
|
Page Name |
Definition Name |
Usage |
|---|---|---|
|
Installed Product - Installed Product Page or Installed Assets - Installed Product Page |
RF_INST_PRODUCT |
Create or update installed products of any given type to track products that are installed at customer sites or issued to internal workers. |
|
Installed Product Address Page |
RF_IPRD_ADDR |
Add or update addresses for installed products. |
|
RF_INST_PROD_PM |
View or update pending preventive maintenance entries, or review the history of preventive maintenance entries for selected installed products. Preventive maintenance details are only available to installed products that are serial number-controlled or asset tag-controlled. |
|
|
Installed Product - Attributes Page or Installed Assets - Attributes Page |
RB_ATTR_RUN_IPROD |
Capture installed product data that is specific to business or industry requirements. |
|
Installed Product - History Page or Installed Assets - History Page |
RF_INST_PROD_HIST |
View information about events, audits, cases, and service orders that is associated with the installed product. |
Use the Installed Product - Installed Product page or Installed Assets - Installed Product page (RF_INST_PRODUCT) to create or update installed products of any given type to track products that are installed at customer sites or issued to internal workers.
Navigation
Image: Installed Product - Installed Product page (1 of 2)
This example illustrates the fields and controls on the Installed Product - Installed Product page (1 of 2).
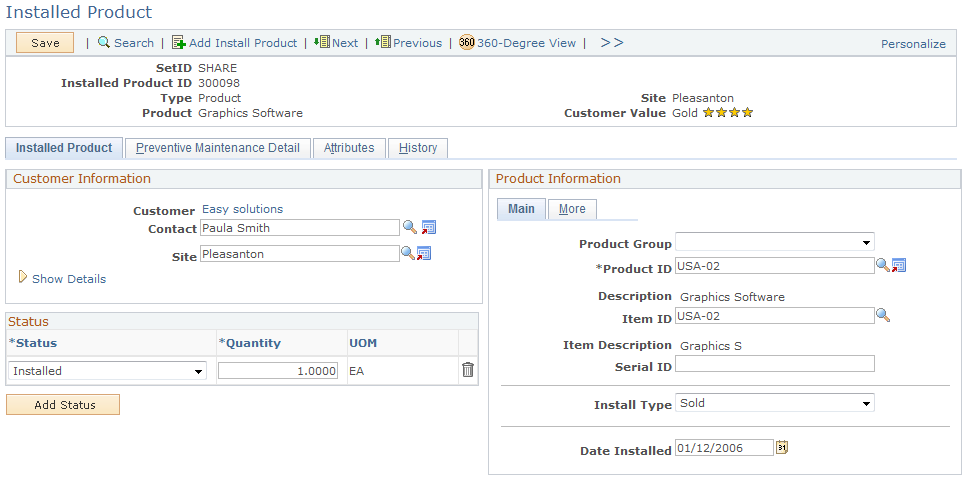
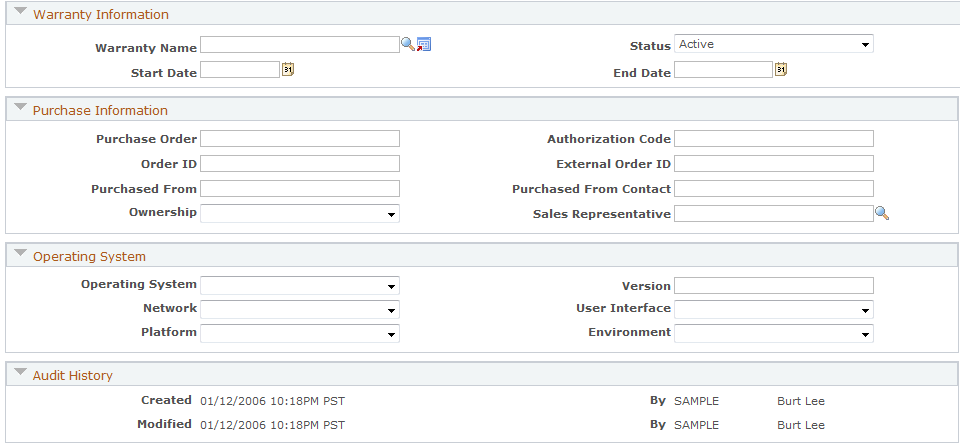
Image: Installed Product - Installed Product page (2 of 2)
This example illustrates the fields and controls on the Installed Product - Installed Product page (2 of 2).
Note: Installed products can also be added from 360-Degree View.
Customer Information
Use the fields in this section to record information about the customer.
Note: This section is labeled Owner Information for installed assets.
|
Field or Control |
Definition |
|---|---|
| Customer |
Enter the customer who owns or leases the installed product. After a customer is selected successfully, its name appears as a link. Click the Customer link to transfer to the corresponding company or consumer record. A customer can be a company or a consumer, which is created manually using the Company component (Customers CRM, Add Company). |
| First Name, Last Name, and Contact |
Enter the first and last name of a company contact to whom the installed product is given. The system limits the selection of contacts to those that are associated with the selected customer. After a contact is selected successfully, the Contact field appears and replaces the First Name and Last Name fields. Click the Transfer to Contact button to transfer to the corresponding person record. You can add business contacts using the Person component (Customers CRM, Add Person). |
| Postal |
Enter a postal code to refine the customer and contact search. |
| Site |
Enter a site of the customer where the installed product is located. Click the Transfer to Site button to transfer to the corresponding site record. You can add sites for customers using the Company, Consumer, or Site component (Customers CRM, Add Site). |
| Phone |
Displays the phone number of the selected contact. |
| Location Details |
Enter notes about the specific area within the customer's site where the installed product is located. |
Owner Information
This section replaces the Customer Information section if the currently opened installed product is of type asset.
|
Field or Control |
Definition |
|---|---|
| Asset Owner |
Select the owner of the asset, which can be: Employee: This is the default value. When selected, an employee must be specified. Department: When selected, an asset department must be specified. Location: When selected, an asset location must be specified. None: When selected, the only value you can optionally specify is asset contact. An AAF term called Installed Asset Owner is created for this field. Note: Because the CRM and Financials systems interpret asset owner differently, the Asset Owner field in these two systems are not mapped and the data is not published from the CRM to the Financials system. |
| Employee |
Enter a worker for the installed asset. On the Installed Asset page, the system displays workers (employees) who are defined in the CRM system. Set up workers under . If an employee is specified but the selected asset owner is not Employee, a system message appears when the installed asset is saved. To correct the error, either reselect the asset owner based on the value that is being specified (employee in this case), or remove the employee value and specify another value that is required by the selected asset owner. |
| Asset Department |
Enter the department that owns the asset. Choose from a list of active departments that are based on the setID of the installed asset. The system does not automatically default the employee's department as the value of the asset department in add mode. If an asset department is specified but the selected asset owner is not Department, a system message appears when the installed asset is saved. To correct the error, either reselect the asset owner based on the value that is being specified (asset department in this case), or remove the asset department value and specify another value that is required by the selected asset owner. |
| Asset Location |
Enter the location where the asset resides. Choose from a list of active locations that are based on the setID of the installed asset. The system does not automatically default the employee's location as the value of the asset department in add mode. If an asset location is specified but the selected asset owner is not Location, a system message appears when the installed asset is saved. To correct the error, either reselect the asset owner based on the value that is being specified (asset location in this case), or remove the asset location value and specify another value that is required by the selected asset owner. |
| Asset Contact |
Enter the employee to which the asset is assigned. Choose from a list of active employees that are based on the setID of the installed asset. The system does not automatically default the employee of the installed asset as the value of the asset contact in add mode. If an asset contact is specified but the selected asset owner is not None, a system message appears when the installed asset is saved. To correct the error, either select None as the new asset owner, or specify another value that is required by the selected asset owner. An AAF term called BO ID of Asset Contact is created for this field. |
| Department and Location |
Displays the department and location of the employee selected for the installed asset. |
Status
|
Field or Control |
Definition |
|---|---|
| Status |
Select the current status of the installed product. Available values are configured on the Define Status Translates page which is keyed by setID and are different by installed product type. The status of an installed product can be set manually (if the installed product is created manually) or automatically (if the installed product is generated by the system as a result of a business process). Note: The system uses the Active Analytics Framework (AAF) to cascade the status and reason code of the parent installed product to its child installed products if the installed product status was not empty and the installed product status has changed. The parent status is cascaded only to those children whose status is equal to the original parent status. This policy is called Installed Product Cascade Status and is delivered for the COM01 setID as an active policy. |
| Quantity |
Enter the quantity (in the standard unit of measure) of the installed product in the indicated status. If the item is serial-controlled, the quantity is set to 1 by default. You must enter a nonzero value for each row of status before saving the installed product. Multiple rows appear for partial shipments of an installed product order to indicate the status for each quantity. You can add rows manually as necessary to indicate the quantity of an installed product in repair, uninstalled, and so forth. |
| UOM (unit of measure) |
Indicates the unit of measure being used for the quantity. For example, package, each, pallets, and so on. |
Product Information
Use the fields in this group box to enter product information.
For installed assets, this section is labeled Asset Information.
Note: Depending on the installed product type, some of the fields in this section are hidden because they do not apply. For example, the Asset Tag field is not visible in installed products because the field is specific only to installed assets.
|
Field or Control |
Definition |
|---|---|
| Product Group |
(Optional) Select a product group to refine the list of products available for selection. This field lists all the product groups of all types that are associated with the setID of the installed product. If you select a product for the installed product and that product happens to belong to only one product group, the system automatically populates that product group value in this field. Product groups are effective dated in installed product records. It means that if you open an installed product created some time ago and the product group that it references is no longer active, the value is not displayed. However, if you search for installed products by product group on the search page, product groups are not effective dated. Note: If multiple product groups have the same name and description but different types, then only one instance of this product group appears as an available value (the description appears). And if you select this product group, the system makes all products that are associated with all product groups using this name available for selection. Similarly, suppose that multiple product groups have the same name (for example, dishwasher) but different descriptions (for example, DW-Acct and DW-Gen) and types (for example, Acct and General). In this example, if you select one of the two product groups, which have different descriptions but share the same product group code, PeopleTools picks the first available entry in the product group base table (PROD_GROUP_TBL) and displays the value, and in this case it is DW-Acct. Therefore, if you select the DW-Gen product group, the system overrides your selection to DW-Acct because DW-Acct comes before DW-Gen alphabetically in the product group base table. An AAF term called Product Group is created for this field. |
| View Configuration |
Click to access the Installed Product Hierarchy page to view the configuration of the associated product. This link is available only to installed products for product packages. |
| Item ID |
Enter the ID of the item that is installed at the customer site. Establish items using the Item Master EIP or the Item Definition component. |
| Serial ID |
Enter the serial number if the item is serial-controlled. |
| Install Type |
Select the reason why the product was installed at the customer site (for informational purposes only). Values are Beta, Demo, Evaluation, Loan, and Sold. |
| Date Installed |
Enter date of installation if you are creating or updating installed products or installed assets manually. The system populates this field, as applicable for the given transaction, when it creates or updates installed products or installed assets. |
Access the More tab.
|
Field or Control |
Definition |
|---|---|
| Parent Product |
Enter another installed product to define as the parent of this installed product. View parent, child, and sibling relationships between installed products on the Installed Product Hierarchy page. Note: When Asset Management integration is enabled, select an installed product of type IT Hardware as the parent product. However, only those products that are synchronized between CRM and Financials application are available for selection. |
| Manufacturer |
Select the manufacturer of the product. You set up manufacturers on the Manufacturers page (). |
| Price Per Unit |
Displays the price of the product per unit if such value is available. |
| Date Ordered, Date Shipped, and Date Registered |
Enter dates if you are creating or updating installed products or installed assets manually. The system populates these fields, as applicable for the given transaction, when it creates or updates installed products or installed assets. The Date Registered field does not apply to installed assets. |
Asset Information
The Product Information section is renamed Asset Information for installed assets. In addition to the fields described in the Product Information section, this section also contains fields that pertain to installed assets.
|
Field or Control |
Definition |
|---|---|
| Asset Tag |
Enter the asset tag that is available if the item is issued an internal worker. |
These fields appear if the Enable Asset Integration with PeopleSoft Financials option is enabled in the general option of the display template.
Note: These fields (Validated, Asset Type, Asset Subtype and Transfer) must be enabled in the display template in order for them to be shown when the asset integration option is enabled.
|
Field or Control |
Definition |
|---|---|
| Validated |
Indicates whether or not the data in the installed asset has been validated. Values are Yes and No. |
| Asset Type |
Specify a type for the installed asset. |
| Asset Subtype |
Specify a subtype for the installed asset. Available values are filtered by the selected asset type. |
Registration
|
Field or Control |
Definition |
|---|---|
| Date Registered |
Enter the date when the product is registered and the installed product is created or updated. If this installed product is registered using the Product Registration component, this field displays the date when the registration is submitted. |
Warranty Information
Only one warranty can be associated with an installed product.
|
Field or Control |
Definition |
|---|---|
| Warranty Name |
Enter the warranty that is associated with the item. Click the Transfer to Warranty button to access the component you use to define warranties. |
| Status |
Select the current status of the warranty for the installed product, either Active or Inactive. For entitlement searches from cases or service orders that reference an installed product, the system first checks for an active warranty that is valid for the current date. |
| Start Date and End Date |
Enter the dates when the warranty period begins and ends for the installed product. The system populates start date automatically using the install, ship, or order date for the installed product, depending on the start date option that the warranty definition specifies. The default end date is based on the length that the associated warranty definition specifies. |
Purchase Information
|
Field or Control |
Definition |
|---|---|
| Purchase Order |
Enter the customer's purchase order number for the installed product. |
| Authorization Code |
Enter the authorization code that the credit card company provides, if applicable. |
| Order ID |
Enter the order identification number for the installed product. |
| External Order ID |
Enter the customer's order identification number for the installed product, if it exists. |
| Purchased From |
Enter the name of the customer the installed product is purchased from. |
| Purchased From Contact |
Enter the name of the contact the installed product is purchased from. |
| Ownership |
Select whether the customer owns the installed product or possesses it under the terms of a lease or rental agreement. |
| Sales Representative |
Enter the name of the sales representative who is associated with the order for the installed product. If your installation includes PeopleSoft Sales, the system prompt for this field lists the people who are defined as sales force representatives in the system. |
Operating System
The fields in this group box are relevant to installed computers, computer software, and computer accessories, and are for information purposes only. Enter or select the information from the fields that appear in this group box.
Use the Installed Product - Preventive Maintenance Detail page (RF_INST_PROD_PM) to view or update pending preventive maintenance entries, or review the history of preventive maintenance entries for selected installed products.
Navigation
Note: If you are adding a service or asset, the system does not display this page. Preventive maintenance details are only available to installed products that are serial number-controlled or asset tag-controlled.
Image: Installed Product - Preventive Maintenance Detail page
This example illustrates the fields and controls on the Installed Product - Preventive Maintenance Detail page.
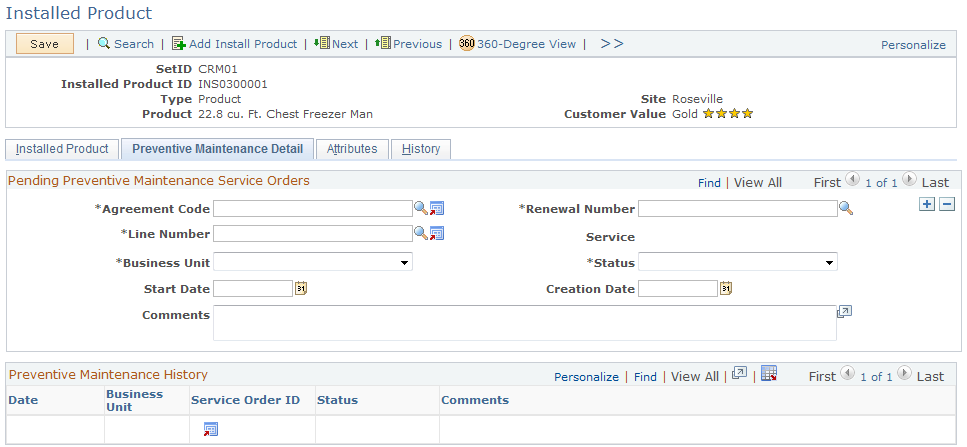
Use this page to view the preventive maintenance history of the installed product. You can also preview and update information about the upcoming preventive maintenance service using the agreement code, renewal number, line number, business unit, status start date, and creation date.
Use the Installed Product - Attributes page (RB_ATTR_RUN_IPROD) to capture installed product data that is specific to business or industry requirements.
Navigation
Image: Installed Product - Attributes page
This example illustrates the fields and controls on the Installed Product - Attributes page.
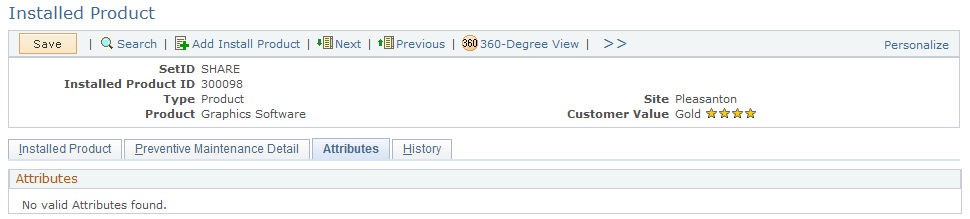
Attribute groups and attributes that are associated with the Installed Product component appear on this page if their conditions are evaluated to true.
Depending on the setup, an attribute field can be an edit field or a drop-down list box, which can be set as display-only or available for edit.
An attribute field can be set as hidden from this page on the Object Type Attributes page for the Installed Product object type.
Refer to the Understanding Attributestopic for more information on using and setting up attributes in PeopleSoft CRM.
Use the Installed Product - History page or Installed Assets - History page(RF_INST_PROD_HIST) to view information about events, audits, cases, and service orders that is associated with the installed product.
Navigation
Image: Installed Product - History: Events page
This example illustrates the fields and controls on the Installed Product - History: Events page.
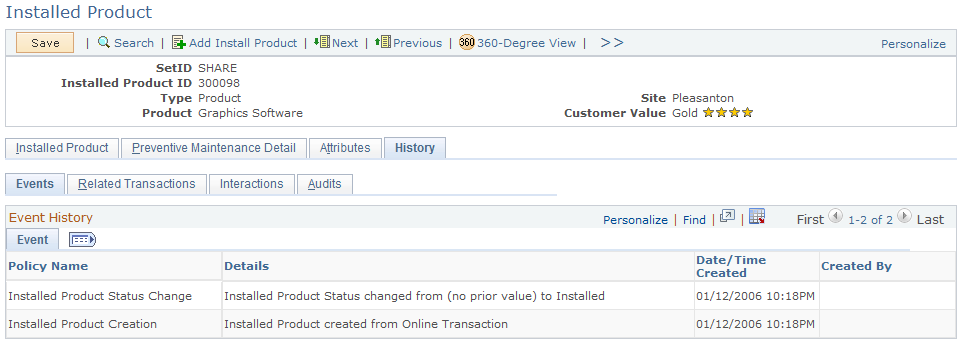
History - Events
Click the Events tab to view events that are associated with the installed product.
The CRM system generates logs for these installed product events (if functionality is enabled) based on the setID in which they occur:
|
Policy Name |
Description |
|---|---|
|
Installed Product Parent Change |
Changes in the parent-installed product ID, showing old and new values. |
|
Creation of installed products, showing where they were created from. |
|
Changes in status, showing the old and new values. |
|
Employee and department transfers, including old and new values (for installed products of type asset only). |
The event logging functionality is delivered through the AAF and is disabled by default (policies are not activated as delivered). You can create new policies to capture additional event logs based on the delivered ones. Refer to the PeopleSoft Active Analytics Framework for detailed documentation on AAF.
See Understanding AAF.
History - Related Transactions
Click the Installed Product - History: Related Transactions page to view the cases and services orders that are associated with the installed product.
Image: Installed Product - History: Related Transactions page
This example illustrates the fields and controls on the Installed Product - History: Related Transactions page.
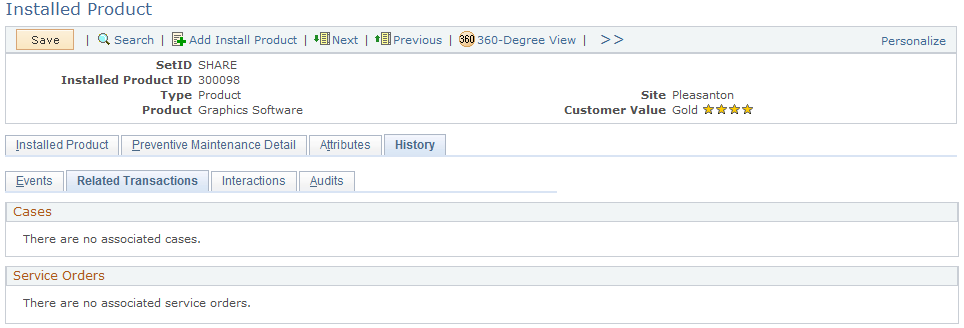
This page displays summary information for each related transaction. Click the ID link to transfer to the corresponding transaction record. As delivered, the section for change requests is available only to installed products of type asset.
For performance and usability purposes, each section displays a maximum of 10 transactions at a time. If the installed product is associated with more than 300 counts of the same type of transaction, only the first 300 appear.
History - Interactions
Click the Installed Product - History: Interactions page to view the summary information of all interactions (for example, phone and email correspondence) that have been created for the installed product.
Image: Installed Product - History: Interactions page
This example illustrates the fields and controls on the Installed Product - History: Interactions page.
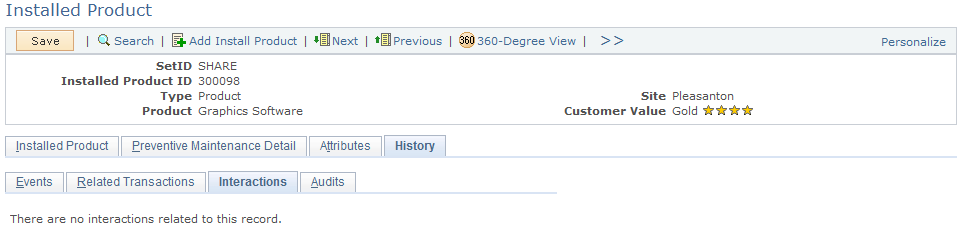
Click the Go To Interaction Detail button to access the Interaction page to view detailed information about the interaction.
History - Audits
Click the Installed Product - History: Audits page to display changes to the records and fields that are associated with the installed product.
Image: Installed Product - History: Audits page
This example illustrates the fields and controls on the Installed Product - History: Audits page.
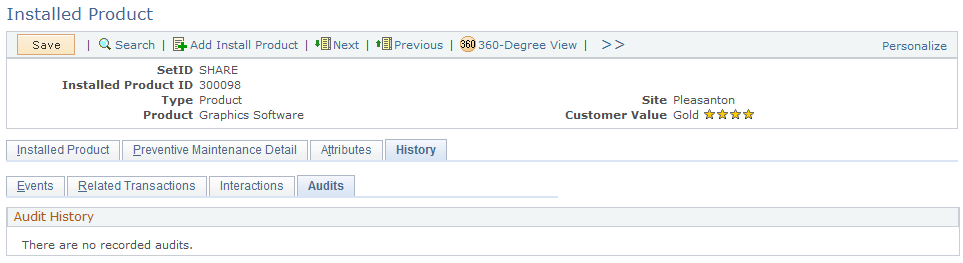
The system displays previous and new values for the fields that have changed. The system displays all fields from both the installed product main record as well as the installed product status record.
Note: At delivery, auditing is turned off by default. It must be enabled using PeopleSoft Application Designer. The audit record for Installed Product is RF_INST_PROD_AT. This record contains the fields from the records on which auditing must be enabled, if desired: RF_INST_PROD (the main installed product record), RF_INST_PROD_ST (the status record), and RF_INST_PROD_PM (the preventive maintenance record).