Understand the Site Creation Process
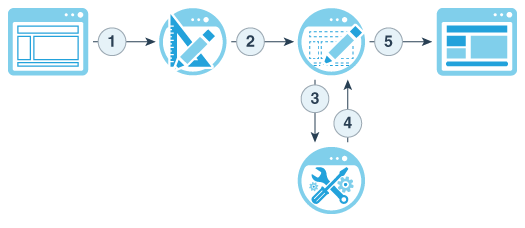
Let’s look at the overall process to create and publish a website.
Before you get started, your service administrator should have enabled site creation, configured who can create sites, and installed and made available the templates you'll use to create sites. The service administrator must assign you at least Downloader permissions to the templates. See Learn About User Roles, Get Started with Sites and Understand Site Governance.
If you'll be creating an enterprise site, which enables the use of assets, multilingual sites, and site security taxonomies, it will be associated with a repository. You store the assets and documents you need for the site in the repository, and the repository policies dictate what can be done with the assets. The repository and any security taxonomies must be created before you create an enterprise site. See Understand Asset Repositories and Manage Sites in a Shared Repository.
Here’s an overview of the site creation process, with links to more information about the details.

-
Select a template and name the site: If site governance is enabled and your site requires approval, you'll have to wait for it to be approved before you can complete the next step. The site remains offline until you’re ready to publish it.
-
Create a site: This creates an empty framework that you can customize.
-
Create a new update or use an existing update: An update is a named collection of changes to the current base site. Each time you view or edit a site in the editor, you use an update. See Understand Site Updates.
-
Open the site in the editor: Use the drag-and-drop editor to add pages and content to your site. See Understand Site Updates.
-
Add pages to the site: Select a predefined layout to quickly define the type of page. See Add Pages.
-
Add components to a page: Drag-and-drop text, images, documents, and more onto the page. See Use Built-In Components.
-
Change the content or properties of a component: Fine-tune the spacing, alignment, and other properties for components. See Use Styles and Formatting.
-
Optionally switch the layout used for a page: Change the page design on the fly. See Change the Page Layout.
-
Optionally switch the theme used for the site: Quickly change the look and feel of the entire site. See Use Site Templates and Themes in Sites.
-
Set search engine properties: Help search engines find your site to increase traffic. See Set Search Engine Properties.
-
-
Apply a site update: Update the site with the changes in an update. See Publish Site Changes.
-
Share the site with other team members: Share the site with specified users and assign each of them a role to determine what they can do with the site. See Understand Site Security for information about sharing.
-
Set site security: Choose which users can access your published site. See Change Site Security.
- Publish the site: Publish the changes to the site. See Publish Site Changes.
-
Bring the site online: Make the site available to users based on your site security. See Bring a Site Online or Take It Offline.
-