Custom Workspaces
In addition to standard workspaces, B2C Service gives you complete flexibility to create your own custom workspaces to help your staff work more efficiently.
Custom workspaces are used to provide your team with access to records stored in custom objects, which by definition have no standard workspaces of their own. Custom workspaces are created on a workspace designer (shown here) consisting of a ribbon and a design space. You define a workspace by dragging and dropping fields and controls from the ribbon to the design space.
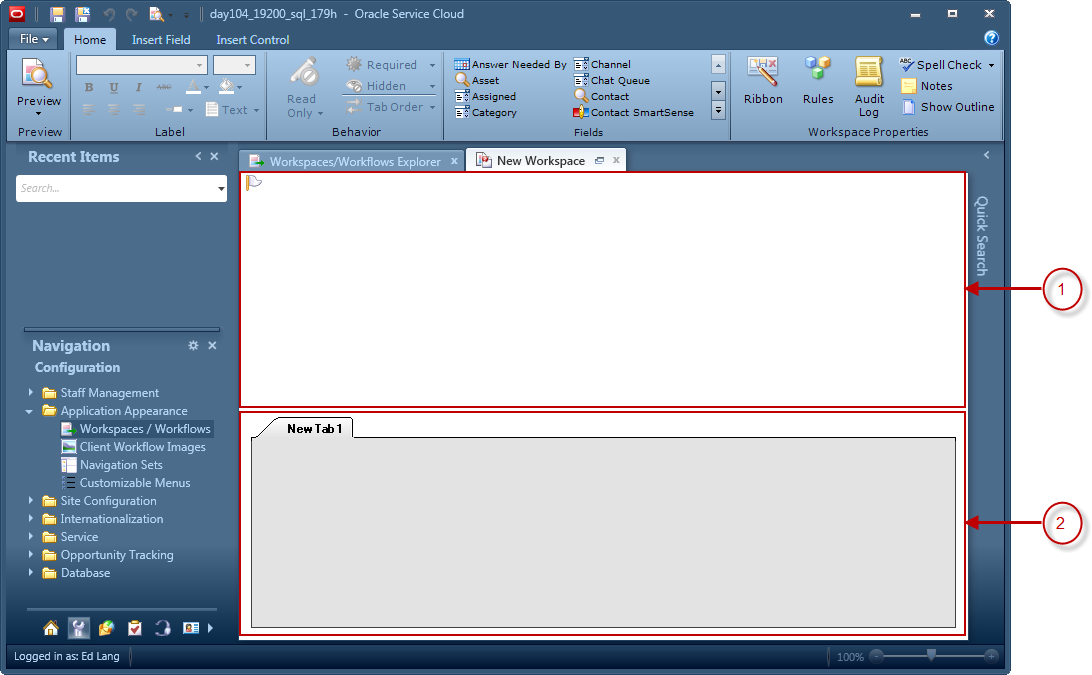
Legend for image: 1. Summary Panel 2. Tab Set
The design space is the working area where you arrange fields and controls as you want them to appear on the workspace. In most standard workspaces, a summary panel at the top of the design space displays the most frequently accessed fields for the record type, while a tab set at the bottom provides controls and information related to the record, such as associated records, file attachments, and an audit log.
The summary panel and tab set both contain a table, hidden by default, that forms an underlying grid for aligning fields and controls. To aid you in laying out the workspace, you can display outlines around items on the design space to help you identify the table cells they are in. See Design Space Layout Options.
After you add a field or control to the design space, you can select it to adjust its properties on the designer ribbon.
| Tab | Description |
|---|---|
| Home | Contains buttons for managing the entire workspace. You can preview the workspace, customize the ribbon that displays with the workspace, create workspace rules, add spell-check functionality, and display an outline on the workspace to guide your design. You can also add notes, review the audit log, insert fields, and alter display and behavior properties for fields and controls. |
| Insert Field | Lists the fields you can add to the workspace. The type of workspace you select when creating a new workspace determines the fields available. For example, when creating an incident workspace, you can add incident, contact, and organization fields. See Workspace and Script Fields. |
| Insert Control | Lists controls and relationship items you can add to the workspace. Controls include spacers, tab sets, scripts, reports, title bars, and other items you can use to enhance the display or add functionality. Relationship items also add functionality to the workspace, but vary based on the type of workspace you are creating. See Workspace and Script Controls. |
| Design | Displays when you select an item on the design
space and contains buttons you can use to modify the properties of
the selected item. For example, you can change fonts and margins for
a field, or set a field to read-only if you want to display it only
for informational purposes. The options available on the Design tab
vary based on the control or field that is selected. Tip: You can double-click an item on the workspace to automatically select
the Design tab and populate it with properties related to the item. |
| Rules | Displays when you select an item on the design space. Using the buttons on this tab, you can create rules that alter the workspace according to the conditions you define. For example, you can create a rule to hide a field when certain staff members use the workspace. See Workspace Rules. |