Managing Personalization attributes
Learn more by watching these videos!
Personalization attributes allow you to send personalized campaign messages to customers in the segment. You can manage them on the Personalization list dashboard.
Important
-
You will need to add at least one personalization attribute to a segment before you can save it.
-
To add a personalization attribute from a data object directly or indirectly linked to the base object, you must first add any attribute from the related data object to the segmentation canvas. You can then follow the steps for Managing personalization attributes using the Target icon.
-
You can include static data when the segment is exported segment by adding static personalization attributes.
-
Review the Attributes available for personalization.
Attributes available for personalization
The following attributes are available for personalization:
- Attributes from the base object selected to create the segment.
- Attributes from data objects directly or indirectly linked to the base object selected to create the segment. Learn more about Managing personalization attributes using the Target icon.
- Intelligent attributes such as Most popular channel and Average order value. Learn more about Intelligent attributes.
To use an attribute that is not part of the base object for personalization, the data object it belongs to needs to be included in the segment you are creating or managing. You can do this in one of two ways.
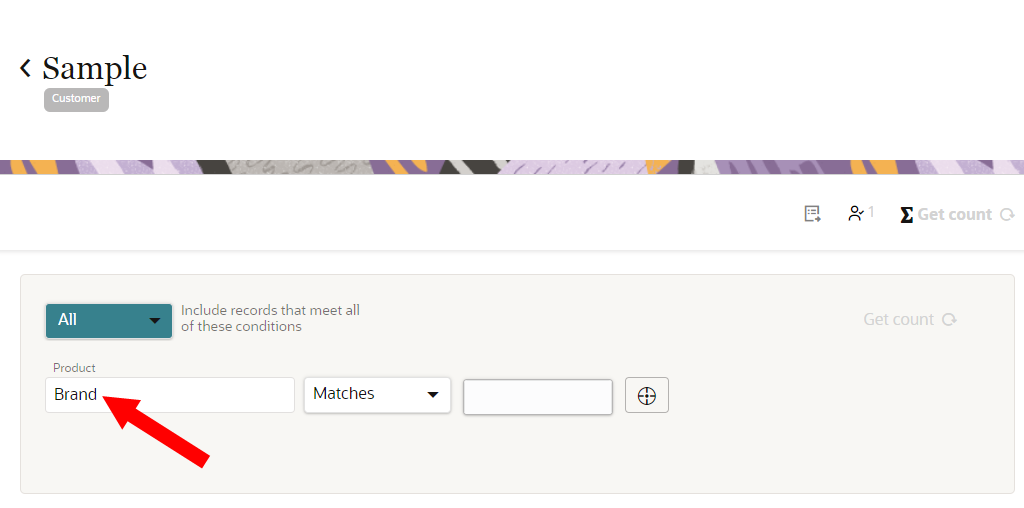
- The attribute you want to use for personalization belongs to a data object used for inclusion or exclusion criteria in the segment. In the example below, you can use the Brand attribute for personalization because it belongs to the Product data object, and Product is being used for inclusion criteria. You can also use any other attribute from the Product data object as a personalization attribute.
- The attribute you want to use for personalization belongs to a data object that links another data object to the base object used for creating the segment. In the example below, you can use any attribute from the Order Item or Product data objects for personalization because they are in the path linking Product Category to the base object. You do not need to include attributes from Order Item or Product as criteria in the segment canvas for personalization since they are already included in the object path for Product Category.

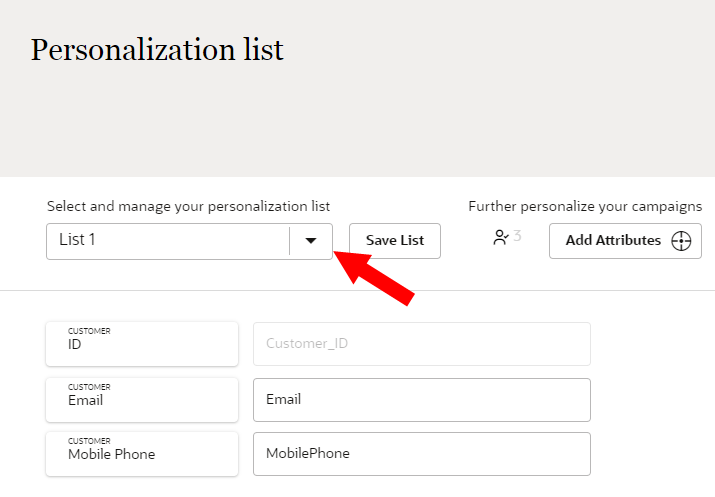
Managing the Personalization list dashboard
The Personalization list dashboard allows you search for and add personalization attributes from the base object selected to create the segment.
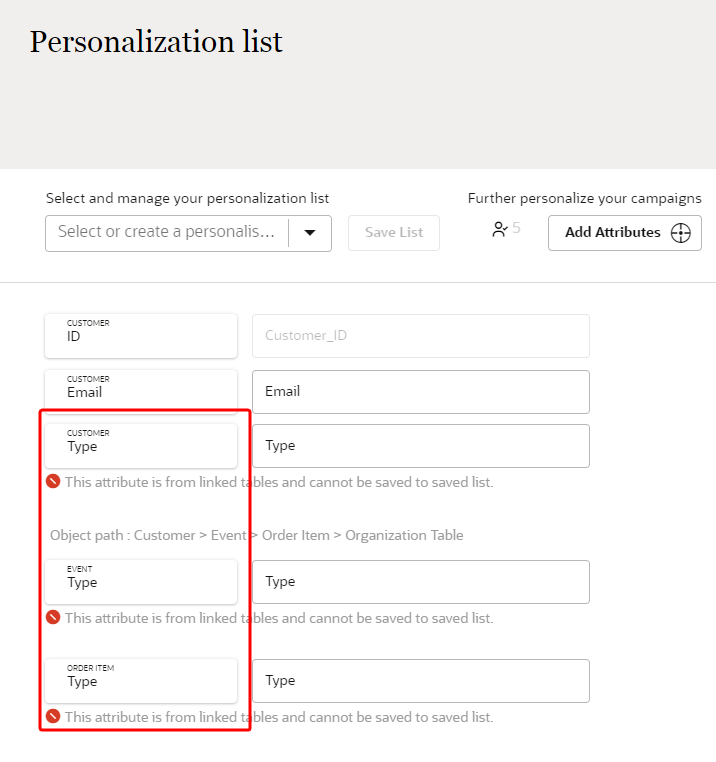
Personalization attributes from data objects directly or indirectly linked to the base object can only by added by following the steps for Managing personalization attributes using the Target icon. Once they are added, they will display in the Personalization list dashboard and can be removed.
To manage the Personalization list dashboard:
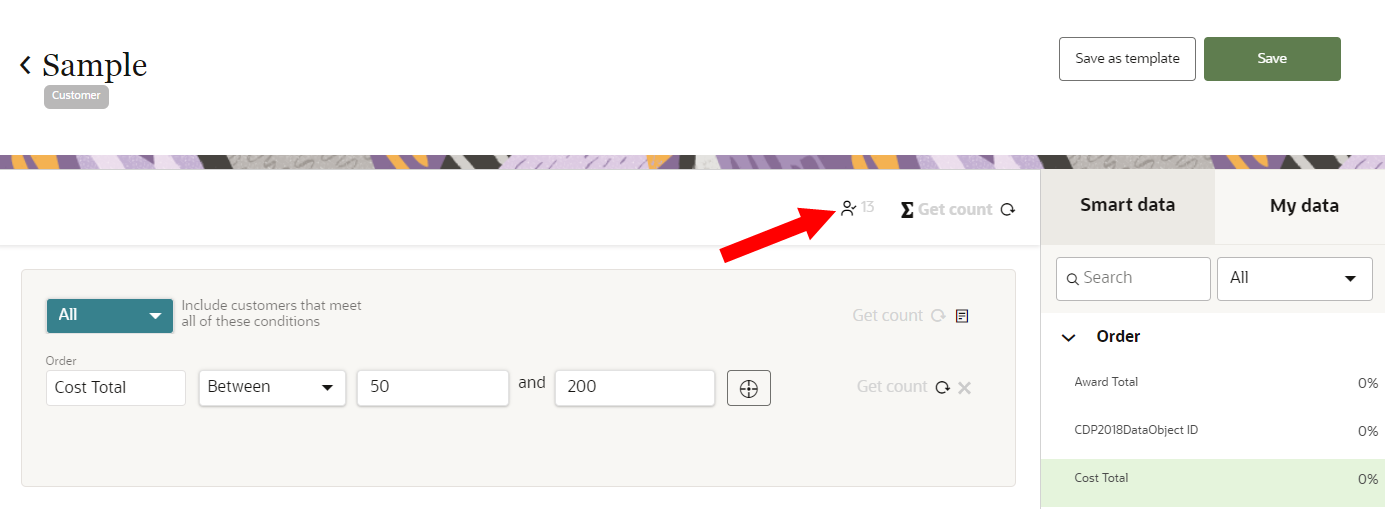
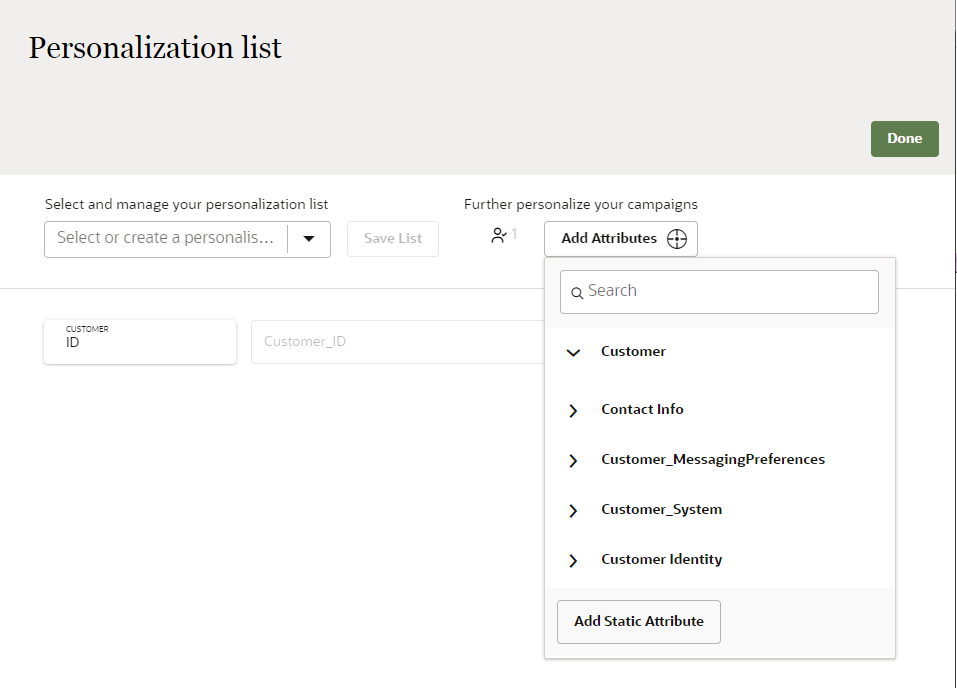
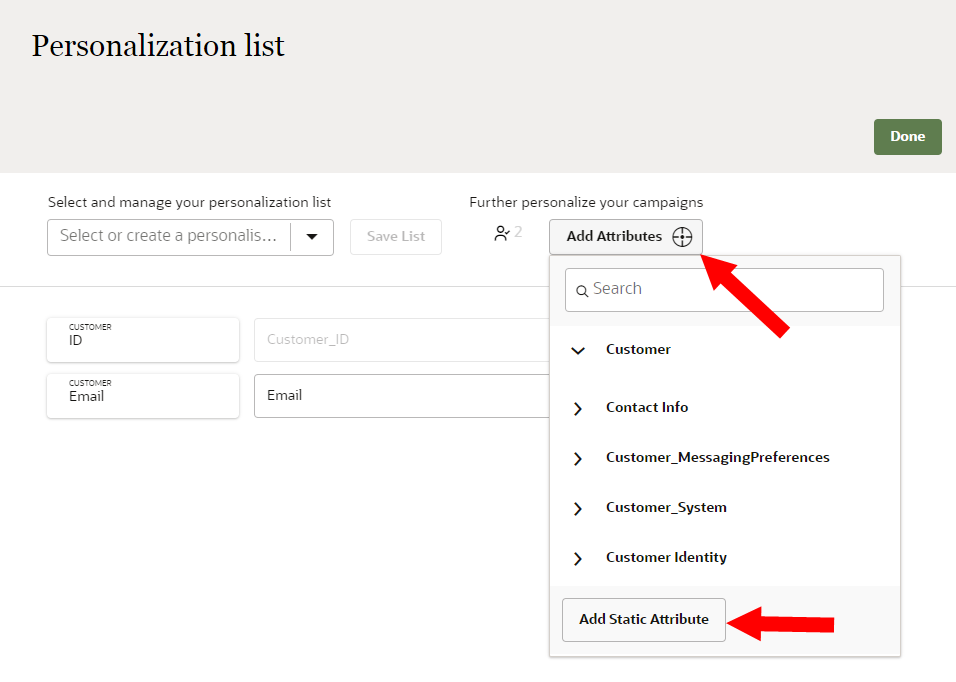
- Review the current number of personalization attributes in the segment by referencing the number next to Personalization
 . Click that number to view the Personalization list dashboard.
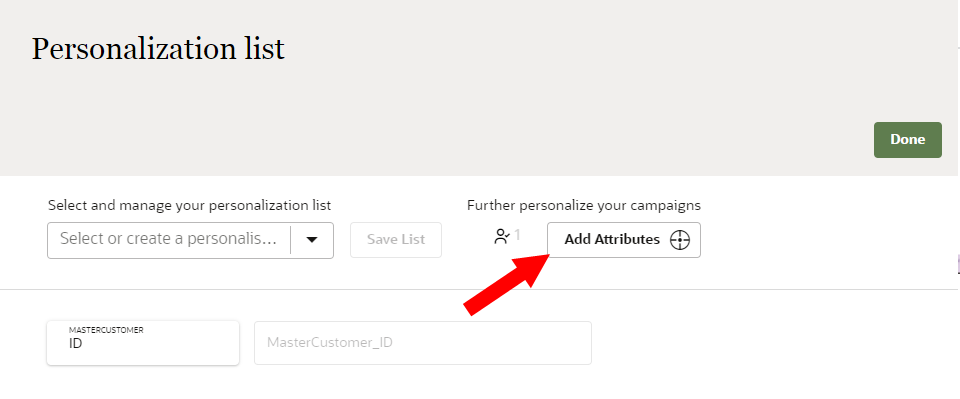
 - Click Add Attributes.
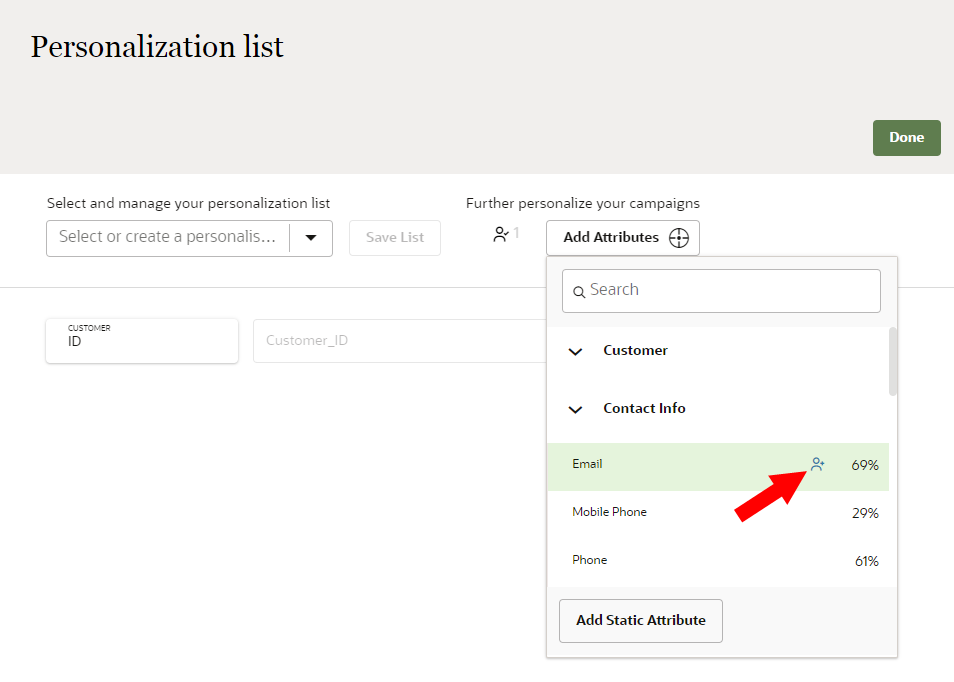
- Click an attribute group to view the list of attributes. Use the search bar to search for specific attributes from the base object.
- Hover your mouse over the attribute and click Personalization .
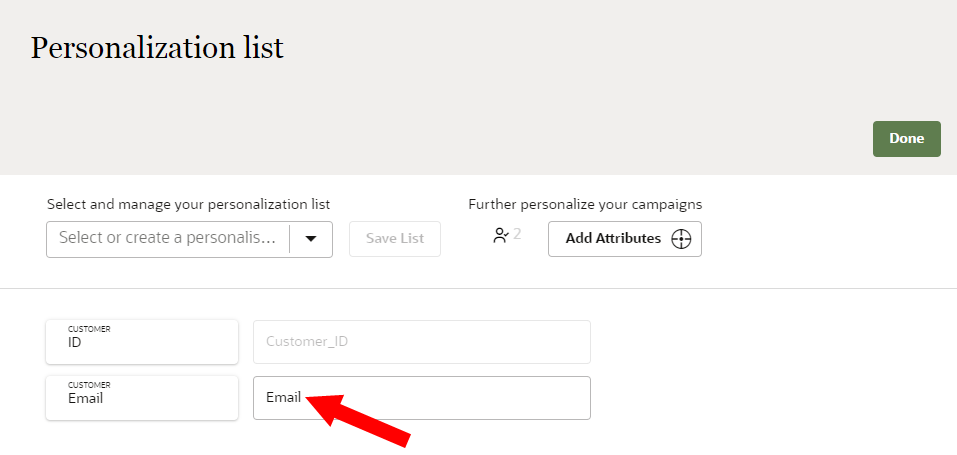
- Optionally, you can enter an alias in the field next to the attribute name that will be exported along with the segment.
- The name must be 1 or more characters, up to a maximum of 30.
- You can use characters from your preferred language.
- Other than underscores (_), special characters are not allowed.
- The first character cannot be a space.
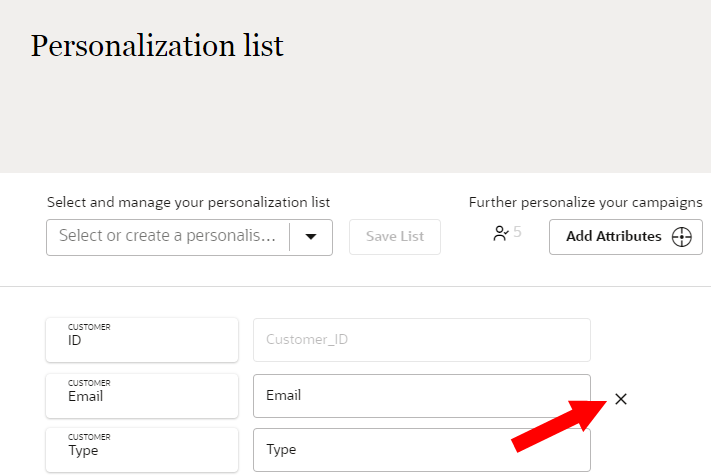
- Optionally, to remove any personalization attribute added to the segment, hover your mouse over the personalization attribute name and click X.
- When you are done managing the personalization list, click Done.
Managing personalization attributes using the Target icon
The Target icon ![]() allows you to manage the following:
allows you to manage the following:
-
Personalization attributes from the base object selected to create the segment.
-
Personalization attributes from data objects directly or indirectly linked to the base object selected to create the segment.
Note: The ability to add attributes to the Personalization list from the target icon is only available for attributes within Include a group enclosures. You can't add attributes from the Exclude enclosure to the Personalization list.
To manage personalization attributes using the Target icon ![]() :
:
-
Follow the steps for creating the segment and add one of the following to the segmentation canvas:
-
Any attribute you want to personalize that belongs to the base object.
-
The attribute you want to personalize that belongs to a related data object. For example, if you want to use the street address as a personalization attribute, select the "Address Line 1" attribute from the Address data object.
-
Any attribute from the related data object that has the attribute you want to personalize. For example, if you want to use the street address as a personalization attribute, you can add any attribute from the Address data object.
-
-
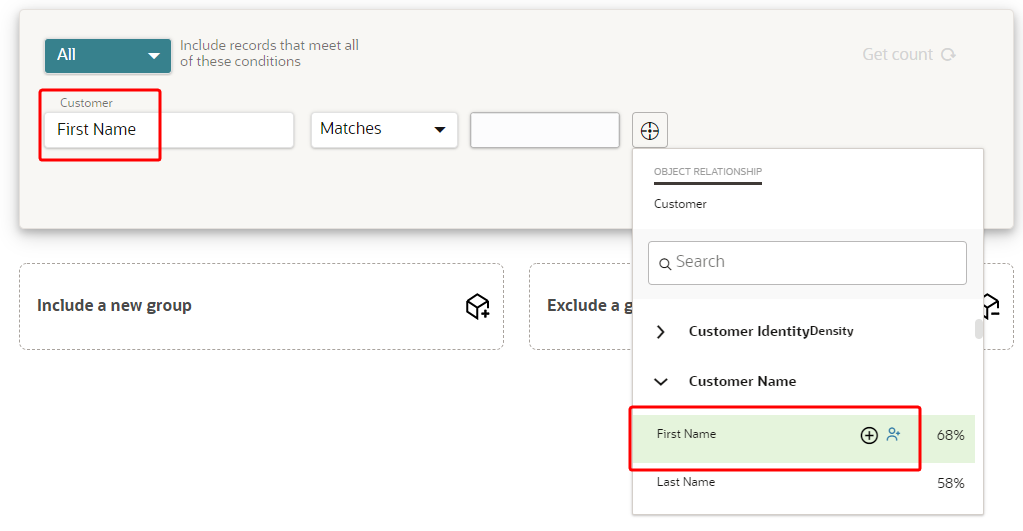
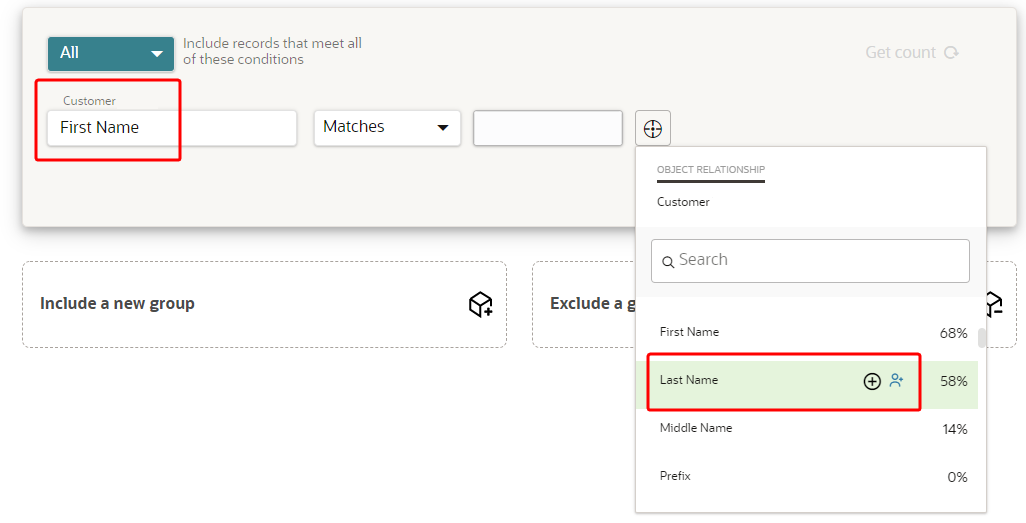
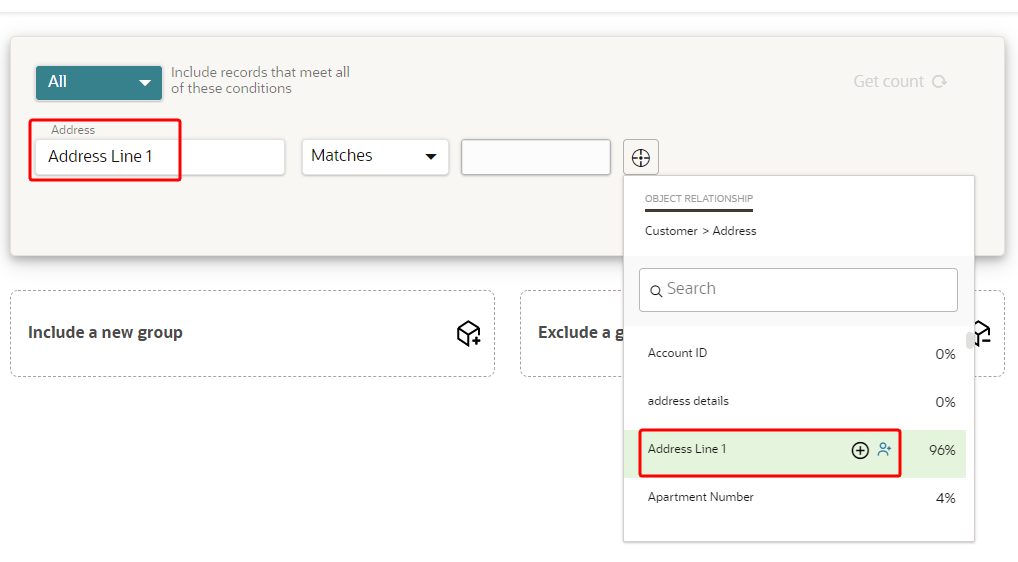
Click the Target
 for the attribute, expand the appropriate data object category, and hover your mouse over the attribute you want to personalize. Click Personalization to add or remove the attribute as a personalization attribute. You can add personalization attributes in the following ways:
-
Add the First Name attribute to the segmentation canvas and then add it as a personalization attribute. The attribute comes from the Customer base object.
-
Add the First Name attribute to the segmentation canvas and then add Last Name as a personalization attribute. Both attributes come from the Customer base object.
-
Add the Address Line 1 attribute to the segmentation canvas and then add it as a personalization attribute. The attribute comes from the related Address data object.
-
Add the Address Line 1 attribute to the segmentation canvas and then add City as a personalization attribute. Both attributes come from the related Address data object.

Static personalization attributes
If you need to include custom data to the records included in a segment, you can add static personalization attributes.
To add a static personalization attribute:
- From the Personalization list dashboard, click Add Attributes and then Add Static Attribute.
- Enter the details for the static attribute.
- Add a name.
- The name must be 1 or more characters, up to a maximum of 30.
- You can use characters from your preferred language.
- Other than underscores (_), special characters are not allowed.
- The first character cannot be a space.
- Add a value.
- The value must be 1 or more characters, up to a maximum of 50.
- You can use characters from your preferred language.
- Other than underscores (_) and hyphens (-), special characters are not allowed.
- The first character cannot be a space.
Personalization attribute lists
You can save and reuse personalization attribute lists so that you can apply the same list of personalization attributes to multiple segments. You can save a maximum of 100 Personalization attribute lists.
- Attributes from the base object.
- Static personalization attributes.
To create a new personalization attribute list:
- Follow the steps for managing personalization attributes.
- When you're done creating the list of personalization attributes, enter a name and click Save List.
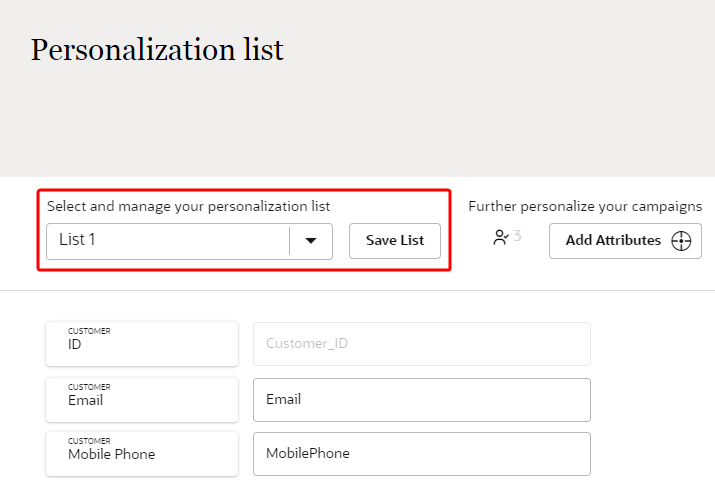
To use an existing personalization attribute list:
- Use the drop-down list of personalization attribute lists and select the list to use.