Creating segments
Learn more by watching these videos!
A segment is a group of customers based on behavior and profile characteristics. It is created by selecting attribute data and then setting conditions on the data.
Important
-
You will need to select the base object that will be used to create the segment:
-
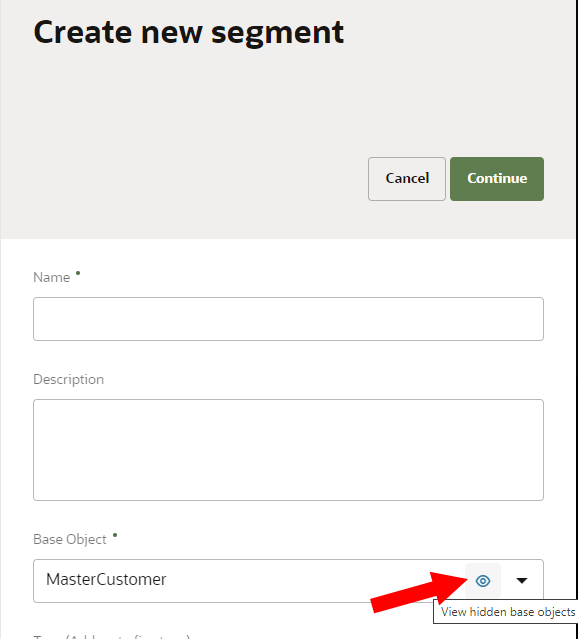
- The Instance admin user role can manage the list of available base objects by clicking Hide
 for base objects that shouldn't be available for selection.
 - To view hidden base objects, hover your mouse over the drop-down menu and click View hidden base objects . You can then click the option to make them available to select again.
- If a data object is hidden from the data model, it will not be available to select as a base object. Learn more about Managing the visibility of data.
- The list of available segments under Segments will only be segments created with the same base object selected.
- You will be able to select Personalization attributes from attributes belonging to the base object selected. Learn more about Attributes available for personalization.
- You can view the base object for a segment on the Segments page under the Base Object column.

-
-
You can't create segments with attributes that have the array - string data type. Learn more about Data types.
-
You cannot access or search for objects and attributes hidden from the data model. However, when adding data objects to a segment, hidden data objects can be part of the path linking them to the base object used for creating the segment. Learn more about Hidden data model items in segmentation.
-
You have the option of hiding items from the segmentation canvas. This does not affect the visibility of items in the data model. Learn more about Hiding items on the segmentation canvas and Viewing hidden items on the segmentation canvas.
-
When creating conditions with timestamp data, the time selected will be based on your local time zone. For example, if you are in California and select "01/01/2021 12:00:00 PM", Oracle Unity will interpret this input based on your local timezone. The query will be based on the Pacific time zone and you will see “01/01/2021 12:00:00 PM PDT” when viewing the condition on the segmentation canvas. Another user in New York viewing the same condition will see "01/01/2021 3:00:00 PM EDT".
-
While the segmentation canvas loads, there may be a delay in displaying the Save and Save as template buttons.
-
When configuring conditions on the segmentation canvas, you have the option to normalize variants of Japanese characters.
Create a new segment
Start creating the segment by choosing a name, entering a description, and configuring the details of the segment.
To create a new segment:
-
Click the Oracle icon
 in the bottom-right corner to open the navigation menu.
- Select Segments.
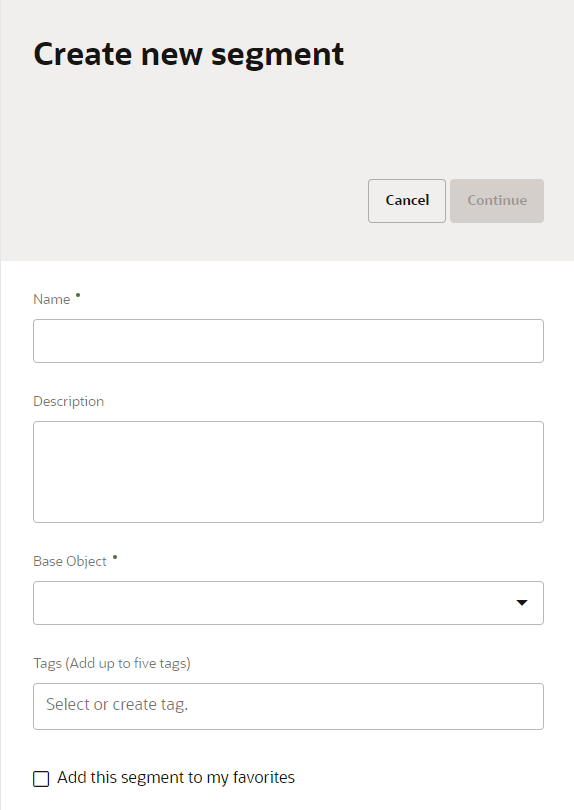
- In the top-right corner, click Create. The Create new segment dialog will display. Enter the details for the segment.
- Enter a unique name. The name must be 1 or more characters, up to a maximum of 128. Other than underscores (_) and hyphens (-), special characters are not allowed. The first character cannot be a space. You can use characters from all languages supported in the language settings.
- Enter a description. This field is optional, but it is highly recommended to add descriptions for any entity created. This helps all other users get additional context when using and navigating Oracle Unity. The description can have a maximum of 512 characters with no restrictions on characters used. You can use characters from all languages supported in the language settings.
- Select the base object that will be used to create the segment.
- Enter applicable tags to organize the segment with keywords.
- Tag names must be 30 or fewer characters. Other than underscores (_), special characters are not allowed. The first character must be a letter. You can use characters from all languages supported in the language settings.
- You can add up to five tags to a segment.
- You can search for tags on the Segments page under the Tags filter.
- Click the checkbox to add the segment to your list of favorites.
- Click Continue.
The Create segment page is displayed.
Build the segment
Start building the segment by selecting attributes you want to include.
To build the segment:
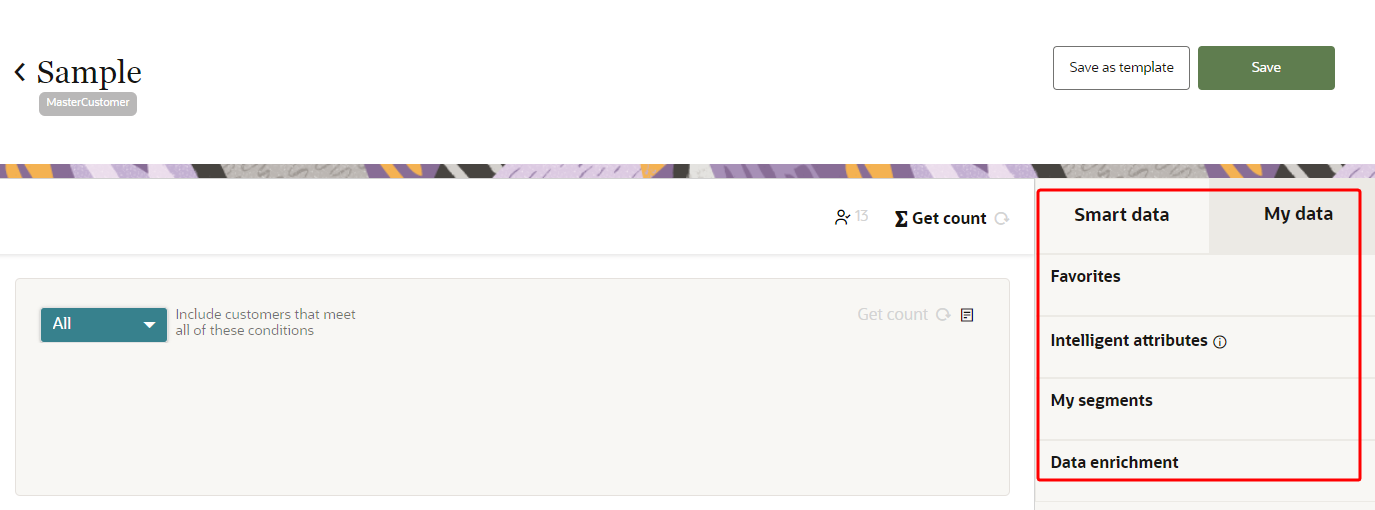
- Select data from the Smart data and My data sections. My data has data objects and attributes from your data model.
- Favorites: The list of attributes (My Attributes) and segments (My Segments) you have tagged as a favorite.
- To tag an attribute as a favorite, click the Action menu (
 ) for the item and click Add To Favorites.
 - To tag a segment as a favorite, click Favorite
 next to the segment name.
 - You will only see items that you have tagged as a Favorite in your user account. You won't see favorites other users have selected.
- The list of available favorite segments is based on the base object selected to create the segment. If you previously tagged a segment as a favorite but it doesn't belong to the base object for the segment you are currently creating, that item will not be available in the list of favorites.
- To tag an attribute as a favorite, click the Action menu (
- Intelligent attributes: Aggregates data from multiple attributes. Examples include Average order value, Most frequently purchased product category, and Email engagement score. Intelligent attributes are categorized by the master entity data object they belong to.
- Segments: Segments categorized into the following categories.
- My Segments: Recent segments that you have created or edited.
- Other Segments: Segments created and edited by other users.
- Templates: The list of segment templates tagged with Template
 .
. - Personalization attributes: To add or remove a personalization attribute from the base object to the segment, hover your mouse over the attribute and click Personalization
 . Learn more about Managing Personalization attributes.
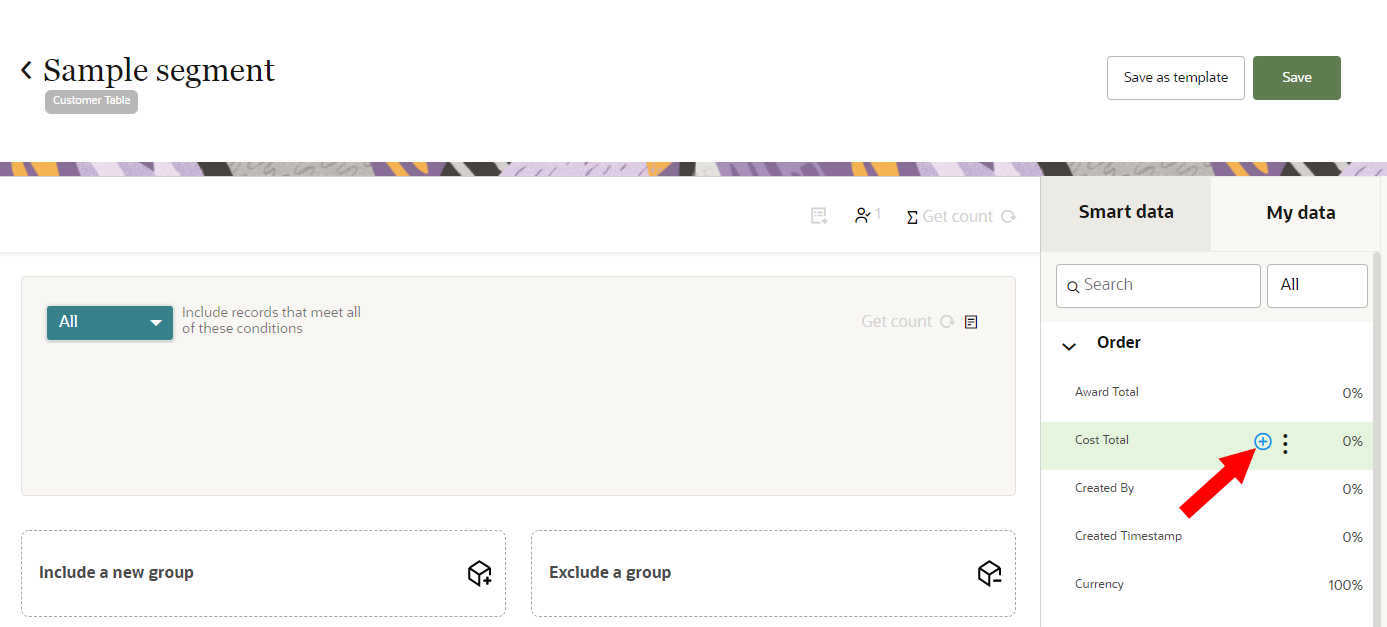
 - Move the item you want to add to the segment canvas by clicking Add
 . Include all the required items to create one group. When you add an attribute to the segment, Oracle Unity will select the shortest path by default to link the attribute's data object and the base object selected for creating the segment.
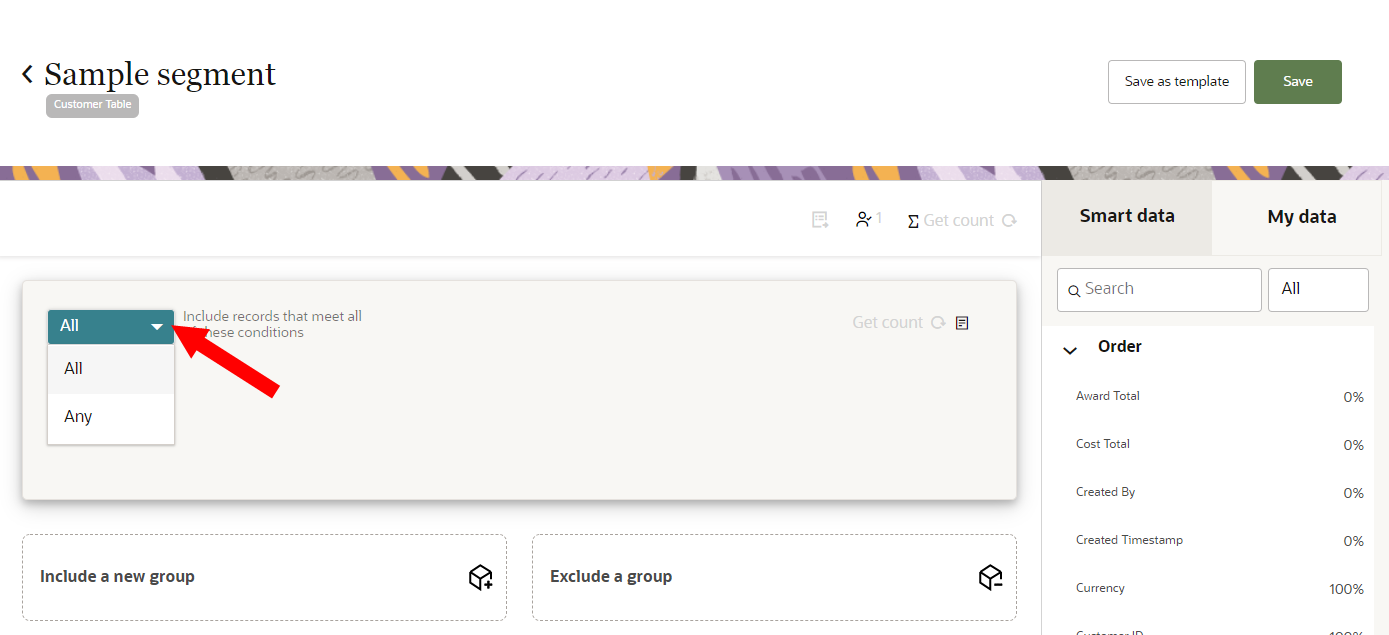
 - Use the operator drop-down list to select how the individual conditions within the group will be combined. You have the option of linking conditions in a group. Learn more about Condition groups.
- Select Any to add customers to the segment that meet any of the conditions within the group.
- Select All to add customers to the segment that meet all of the conditions within the group.
Customers that live in California.
Customers that have made at least one purchase in the last month.
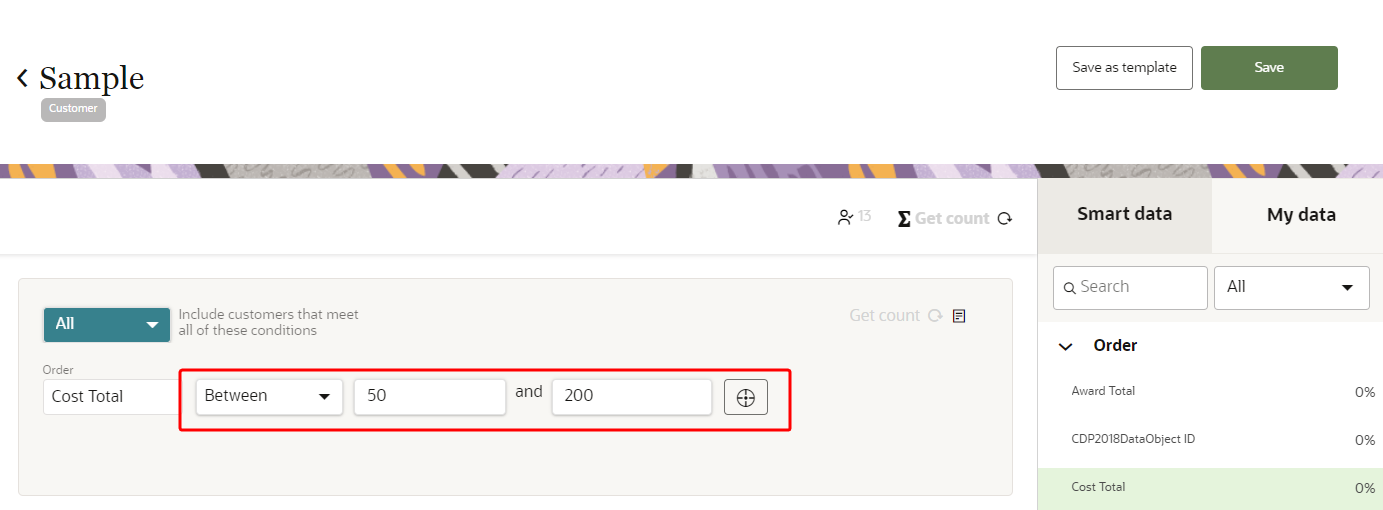
- Fill in the conditional fields and operators to define the criteria within the segment.
- Learn more about Segmentation operators and what operators are available by data type.
- Review segmentation functionality for building segments so that you can use the full set of tools available on the segmentation canvas.
- Manage the Personalization attributes dashboard to configure the personalized data that will be exported with the segment.
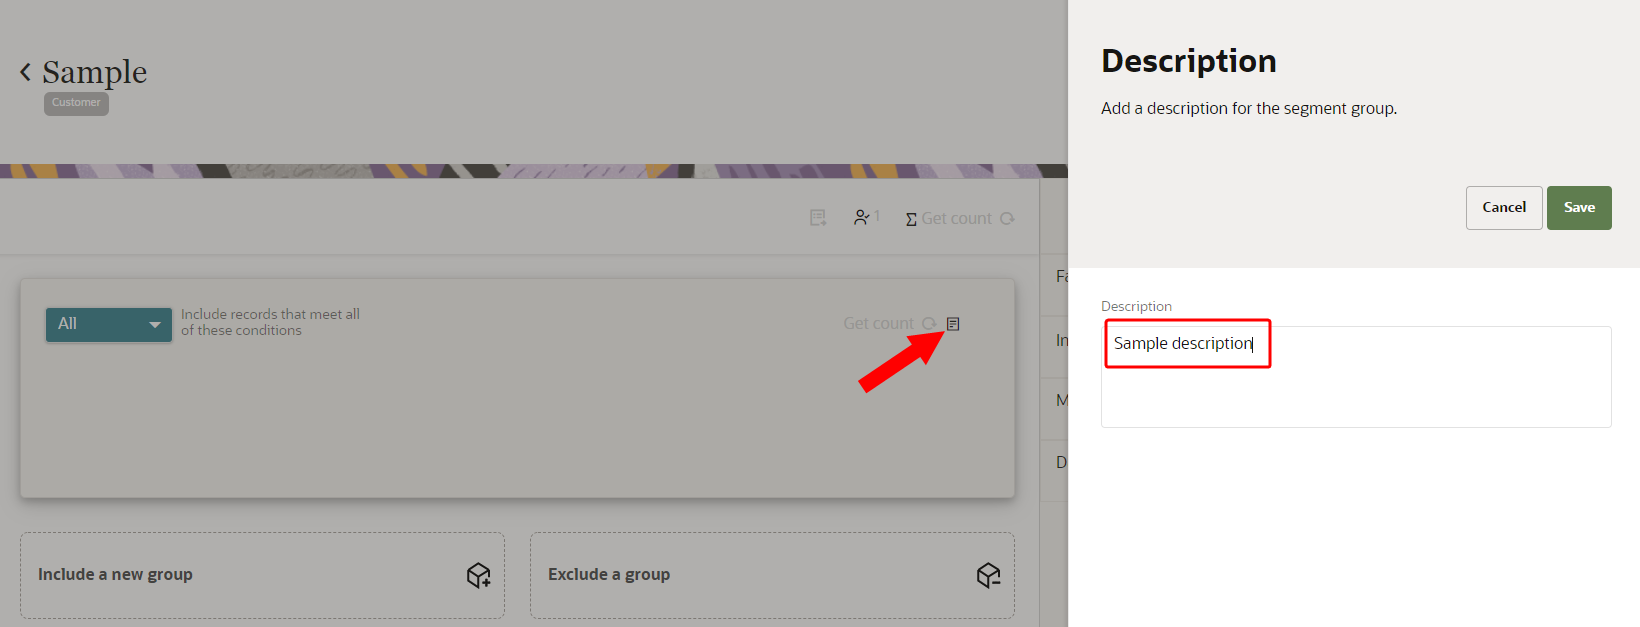
- After creating conditions for a group, you have the option of adding a description for the individual group of conditions. To add a description, click Group description
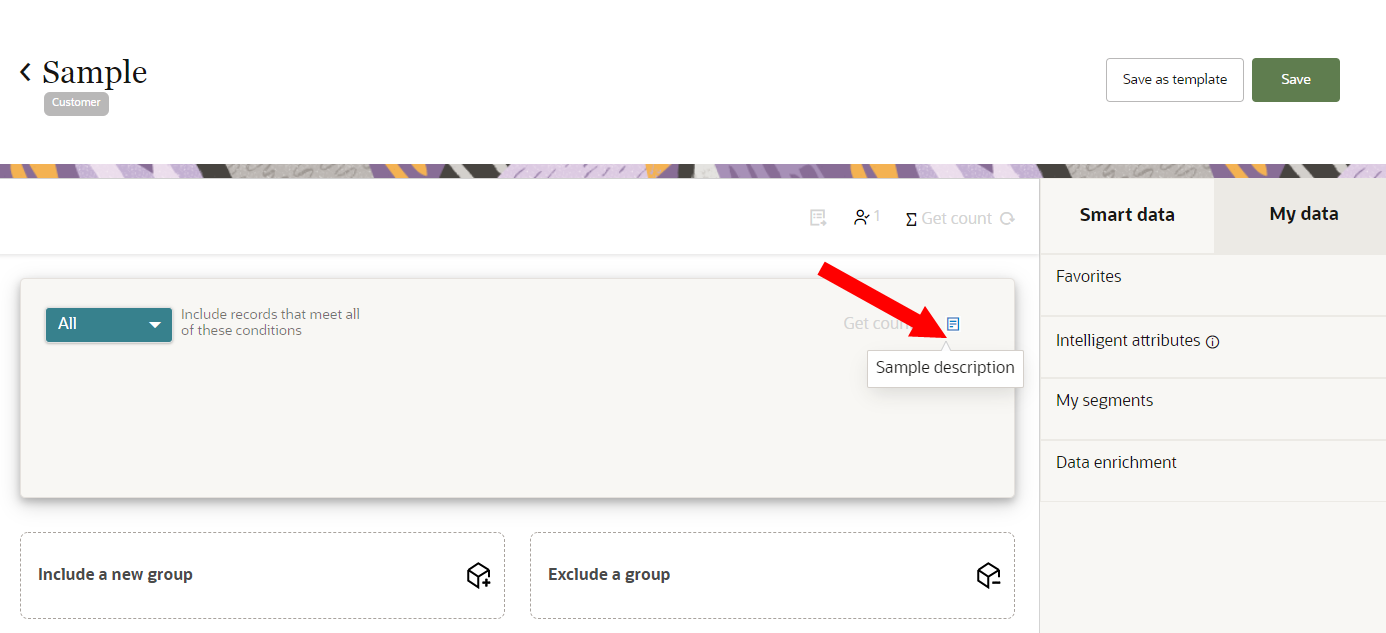
 . The description can have a maximum of 256 characters. You can use characters from all languages supported in the language settings. To view the current description, hover your mouse over Group description .
 - When done configuring the segment, save it as a completed segment or a segment template.
The 20 most recent created and modified segments are listed. If you don't see a segment listed, use the search field to enter a search term and press Enter. Oracle Unity will then perform a search of all existing segments. You can search by segment name or tags added to segments.
If you select Any, the segment will target customers that either live in California or have made a purchase in the last month. These customers can meet one or both of the conditions. If you select All, the segment will target customers that live in California and have made a purchase in the last month. These customers must meet both of the conditions.
Next steps
Managing Personalization attributes