Synchronizing Users and Groups from Microsoft Entra ID to IAM
Using SCIM, Identity Domain Administrators can smoothly integrate Microsoft Entra ID with IAM, enabling automatic synchronization of users and groups between the two systems. This section outlines the steps:
- Step 1: Setting Up SSO with Cloud EPM Using Microsoft Entra ID
- Step 2: Creating a Confidential Application to Configure Authorization
- Step 3: Configuring Connectivity for Synchronization with Microsoft Entra ID
Step 1: Setting Up SSO with Cloud EPM Using Microsoft Entra ID
- Add IAM as an enterprise application in Microsoft Entra ID. See Steps to Complete in Microsoft Entra ID.
- Set up Microsoft Entra ID as the IdP in the IAM Interface. See Steps to Complete in Oracle Cloud Console.
Step 2: Creating a Confidential Application to Configure Authorization
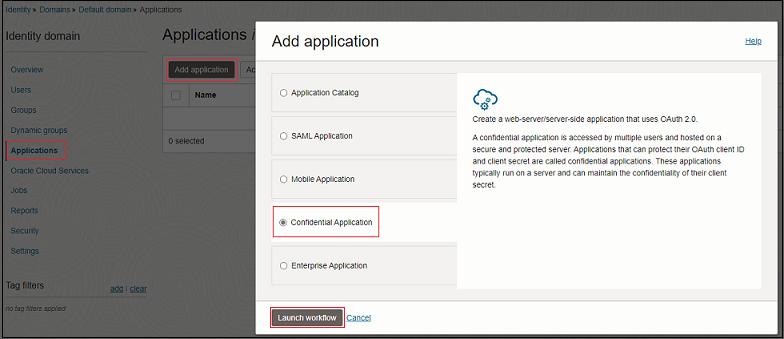
- Sign into IAM Interface as an Identity Domain Administrator in the source domain. See: Accessing IAM Interface.
- Click Integrated applications under Identity domain.
- Click Add application.
- On the Add application page, select
Confidential Application, and then click
Launch workflow.
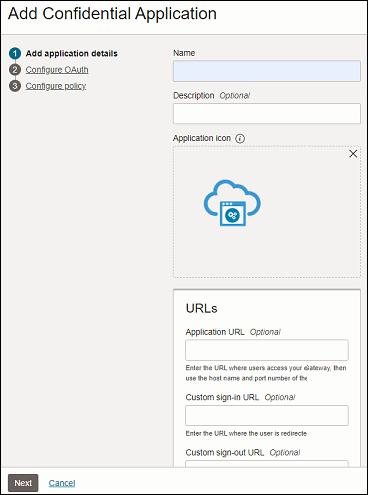
- On Add application details, enter application name and
other optional details, and then click Next.
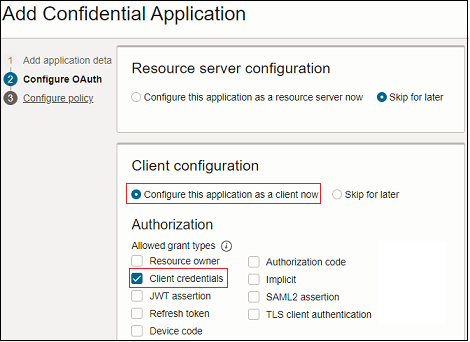
- On Configure OAuth, select Configure this application as a client now.
- Select Client Credentials for
Authorization.
- Select Confidential for Client type.
- Scroll-down to Token Issuance Policy, and click
Specific for Authorized
resources.
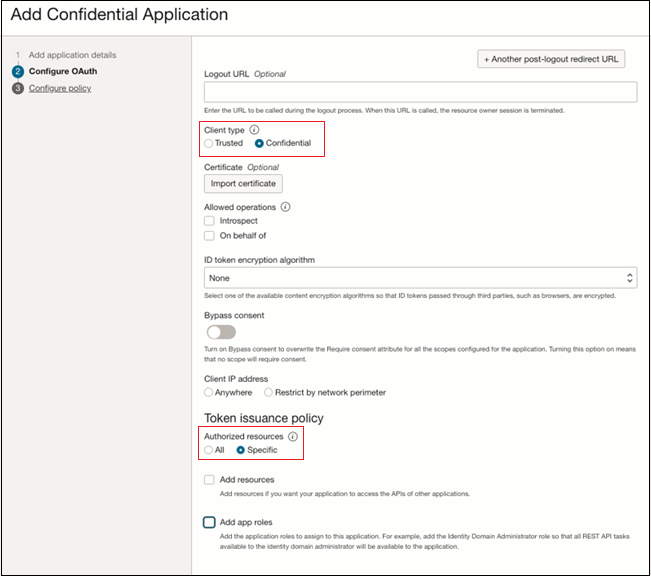
- Click Next.
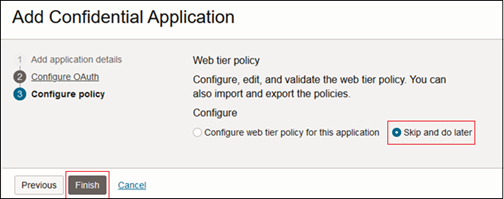
- For Configure policy, keep the default setting
Skip and do later, and then click
Finish.
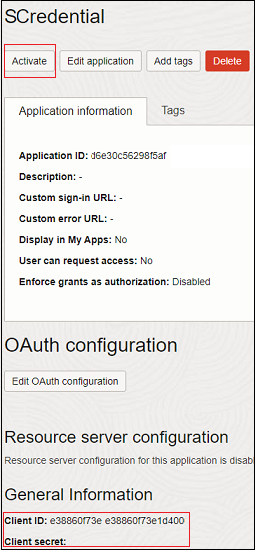
The application is added
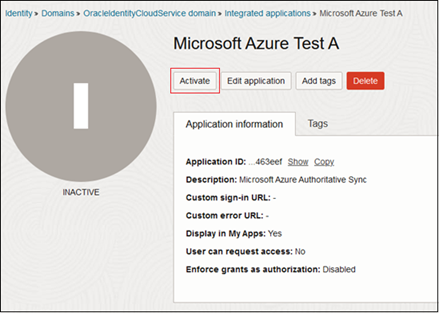
- Click Activate.
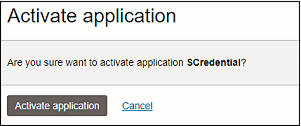
- On the Activate Application page, click
Activate application to confirm activation.
Step 3: Configuring Connectivity for Synchronization with Microsoft Entra ID
- Click Integrated applications under Identity domain.
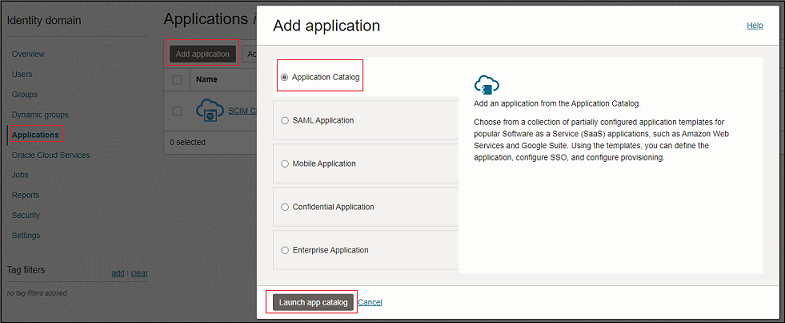
- Click Application Catalog, and then click
Launch app catalog.
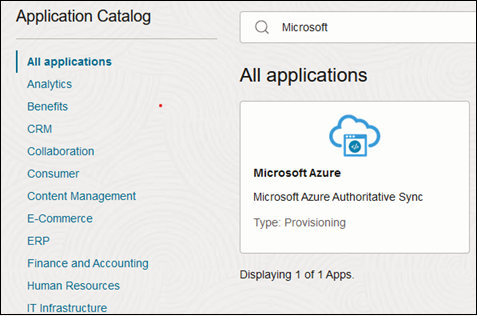
- Search for Microsoft in the App
Catalog, and click Add next to Oracle Identity
Domain.
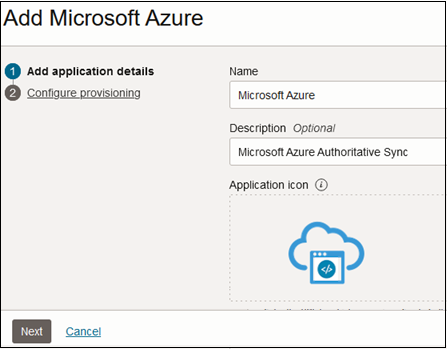
- Add application details, and click Next.
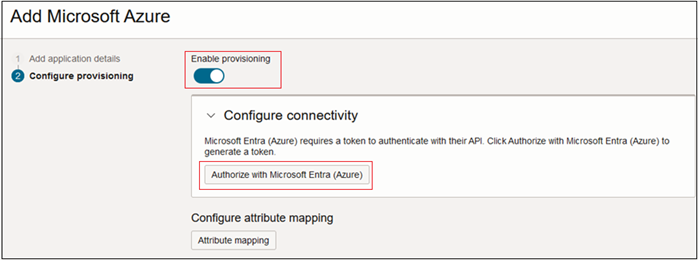
- Click Enable Provisioning. and then click
Confirm to close the confirmation message.

- Under Configure Connectivity, click Authorize
with Microsoft Entra ID Application
Name.
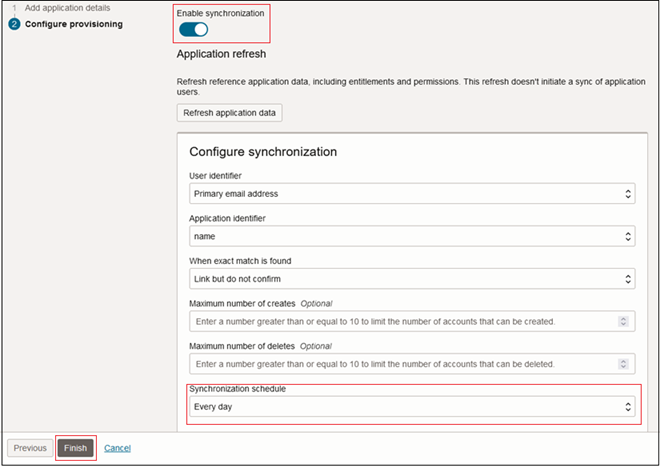
- After authorizing Microsoft Entra ID, scroll-down and click Enable synchronization.
- Under Configure synchronization, select Synchronization schedule.
- Click Finish.
- On the application page, click Activate to activate the
Microsoft Entra ID application.
Users and groups will sync automatically between Microsoft Entra ID and IAM based on the configured schedule.
