Creating a Data Export File

The data export to file feature enables you to export data from an Oracle Enterprise Performance Management Cloud application to a data file. You can use the data file to load data into an ERP application or an external system.

When creating a data export to file application, note the following:

  • When dimensions are created, the order of the column in the data file is used to assign the column order. The first column in file is assigned ACCOUNT data column.

  • It is recommended that you export only a year at a time. If date ranges cross a year boundary, data may be duplicated.

  • Data Rule—The POV category is not validated.

  • Data Load Mapping—Target values are not validated for data export to file applications.

  • Data Load Execution—When the option to export the data file is enabled, Data Management creates an output data file. The name of the data file is <Target App Name>_<Process ID>.dat, and it is written to the <APPL ROOT FOLDER>/outbox directory. You can access the data file from the Process Details page from the OUTPUT file column.

    When the data load rule is executed, Data Management exports the data.

  • Check Rules can be created from a data export file. Check rules cannot be based on target values.

  • Write-back is not applicable from data export files.

  • In this release, only numeric data types are supported.
  • The custom target application option is still available for exporting production data to external systems. Data Management supports both the custom target and data export to file application options. Eventually, the data export to file option will supersede the custom target application option due to its enhanced functions and capabilities.

    The data export to file option is largely backward compatible with the file format of the custom target application option, but small differences exist, which may cause regression issues.

    For this reason, you are urged to migrate your existing custom target applications to Data Export to File applications. To do this, select the System Maintenance process called the Upgrade Custom Application option, which can be run for one custom application or all. See Upgrade Custom Applications for more information.

    The Upgrade Custom Application process converts existing custom applications to the file formats used by the data export to file option. It retains all the existing setup. When the custom target applications have been converted, you can run same data rule as before. Before using the conversion program, reconcile any differences in the file formats. For example, the header row in the data export to file option contains the name of the dimension and not UD1, UD2 etc.

To define a data export to file target application:
  1. Create a .CSV file with the list of columns in the order that you want exported.

    Note:

    Do not include the Amount column in the data file. If its included, you can delete it after the application is created.

    The name of the file is the name of the application so name the file appropriately.

  2. On the Setup tab, under Register, select Target Application.
  3. In the Target Application summary grid, click Add.
  4. Select Local target application.
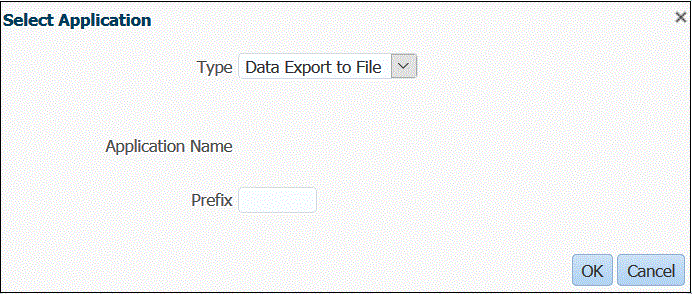
  5. From Select Application, select Data Export to File.
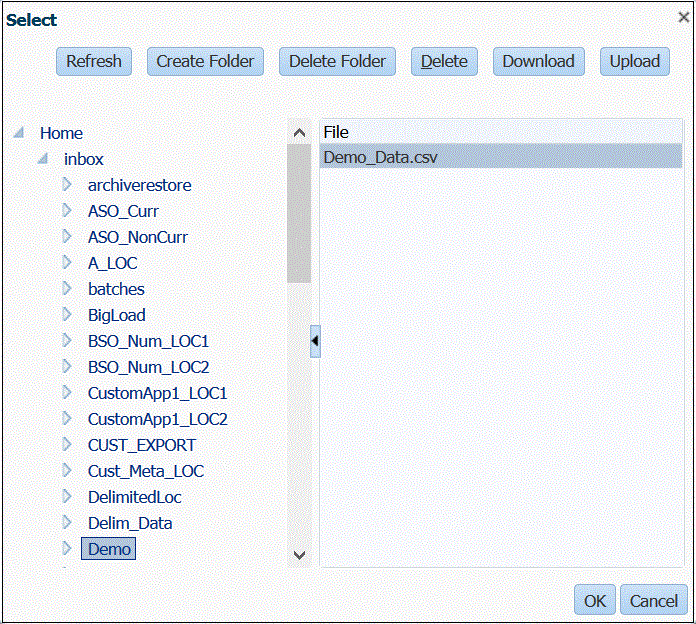
  6. From the Select screen, select the name of the source file.

    Image shows the Select screen.

  7. To register a target application with the same name as an existing target application, in Prefix, specify a prefix to make the name unique.

    The prefix name is joined to the existing target application name. For example, if you want to name a demo target application the same name as the existing "Vision" application, you might assign the Demo prefix to designate the target application with a unique name. In this case, Data Management joins the names to form the name DemoVision.

    Image shows the Select Application screen.

  8. Click OK.

    The system registers the application.

  9. In Application Details, select the Dimension Details tab.
  10. Edit the Dimension Name and Data Column Name as needed.
  11. In Sequence, specify the order in which the maps are processed.

    For example, when Account is set to 1, Product is set to 2, and Entity is set to 3, then Data Management first processes the mapping for Account dimension, followed by Product, and then by Entity.

  12. In Column Order, specify the order of each column in the data export file.
    By default, Data Management assigns the "Account" dimension as the first column in the order.
  13. Click Save.
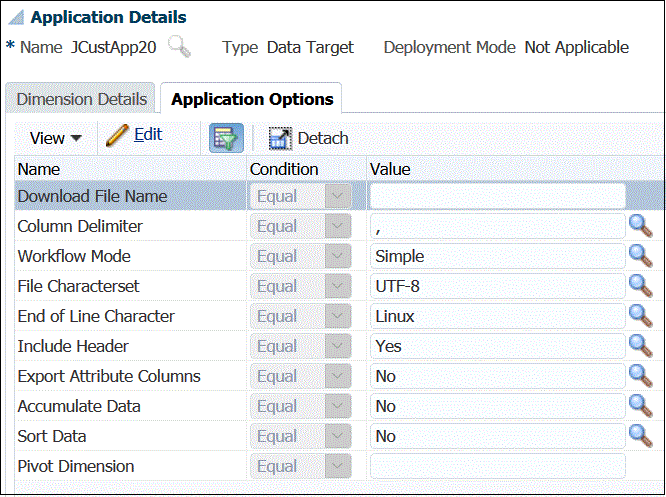
  14. Click the Application Options tab, and select any applicable properties and values for the data export file.

    For more information about data export to file properties, see Data Export to File Properties.

    Image shows the Application Options tab.

  15. Click Save.
  16. From Setup, then Integration Setup, and then Import Format, create an import format based on the source type that you want to load to the target application.

    The import format defines the layout of source data.

    For more information, see Defining Import Formats for File-Based Mappings.

  17. From Setup, then Integration Setup, and then Location, define the location to specify where to load data.

    For more information, see Defining Locations.

  18. From Setup, Integration Setup, and then Period Mapping, define any periods.

    You define period mappings to map your source system data to Period dimension members in the target application. You can define period mappings at the Global, Application, and Source System levels.

    For more information, see Defining Period Mappings.

    For information on loading multiple periods for file-based data, see Loading Multiple Periods for EPM Cloud or File-Based Source Systems.

  19. From Setup, then Integration Setup, and then Category Mapping, define any categories to map source system data

    For more information, see Defining Category Mappings.

  20. From Workflow, then Data Load, and then Data Load Mapping, define data load mapping to map source dimension members to their corresponding target application dimension members.

    You define the set of mappings for each combination of location, period, and category to which you want to load data.

    For more information, see Creating Member Mappings.

  21. From Workflow, then Data Load, and then Data Load Rule, define a data load rule for a specific location and category. The data rule determines the data imported from the source system.

    For more information, see Defining Data Load Rule Details for a File-Based Source System.

    You check the box labeled "import from source" so that you can look at the data and the mapped results in the workbench prior to loading the data from the source system. After everything is confirmed, additional data imports can be loaded to the workbench and exported to the EPM Cloud application in the same step.

  22. Execute the data load rule to define the options for running the data load rule.

    You can execute the data load rule for one or more periods. You then verify that the data was imported and transformed correctly, and then export the data to the target application.

    See the following data load rule topics: