7 Deploying the Manifest File to Office 365 Users

Once you have created the manifest file, you can deploy it to your Office 365 users.

The procedure in this chapter assumes that you have completed the steps in Creating and Saving the Manifest File and that you are ready to begin deployment to your Office 365 users.

Important! Before deploying the Oracle Smart View for Office (Mac and Browser) add-in to your Office 365 users, you should first sideload the add-in in order to perform your own testing and development tasks. For more information, see:

Note:

To deploy Smart View to your Office 365 users:

  1. Log in to Office 365 and click the Admin link to access the Microsoft 365 Admin Center.

    Office 365 interface showing the Admin menu link
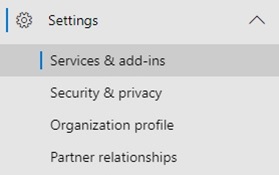
  2. In the left panel, go to Settings, then Services & add-ins.

    Setting menu displaying the Service & add-ins option.
  3. On the Services & add-ins page, click Deploy Add-In.

    Deploy Add-In button in the Services & add-ins page.
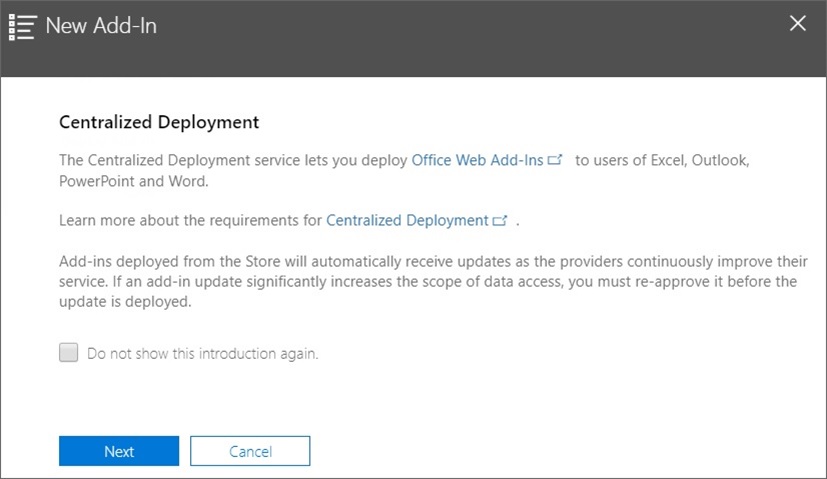
  4. In the New Add-In, Centralized Deployment wizard, click Next.

    New Add-In, Centralized Deployment wizard
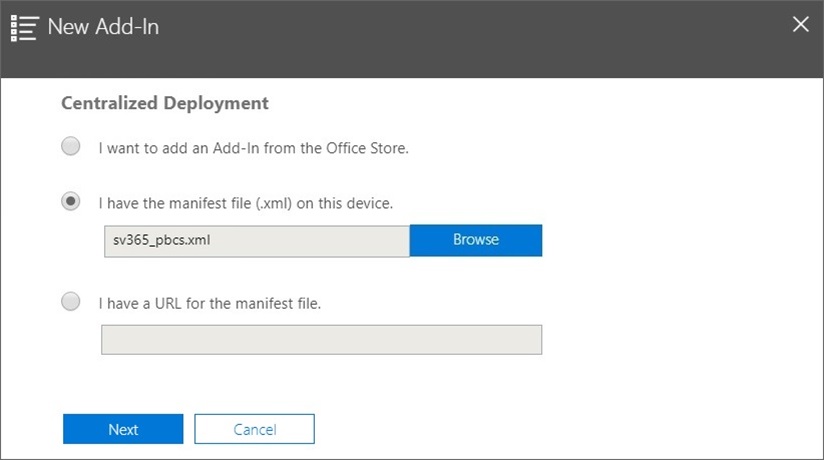
  5. In the second page of the wizard, select I have the manifest file (.xml) on this device, then click Browse, then navigate to the location of the saved manifest file and select it, then click OK, and then click Next.

    In this example, we navigated to a locally-saved manifest file called sv365_pbcs.xml.


    New Add-In wizard displaying the Browse option to upload manifest file.
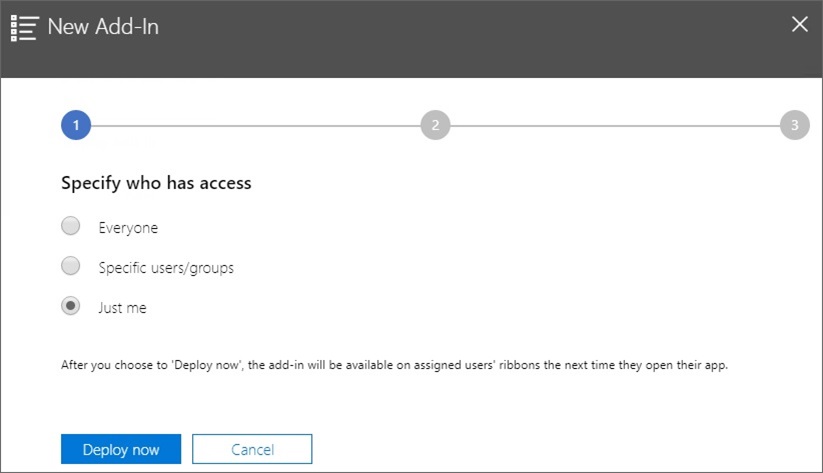
  6. Specify who should have access to the Smart View add-in for Office 365, and then click Deploy now.

    You can choose to deploy to all Office 365 users, specific users of groups that you have already defined, or just to yourself.

    Note that if you choose Specific users/groups, a search box is displayed to assist you in adding users or groups.


    Search and specify users or groups to whom the Smart View add-in should be deployed.

    For this example scenario, we’ll select Just me.


    Wizard step 1: The Specify who has access field showing options - Everyone, Specific users/groups, and Just me.

    After clicking Deploy Now, the deployment is processing.

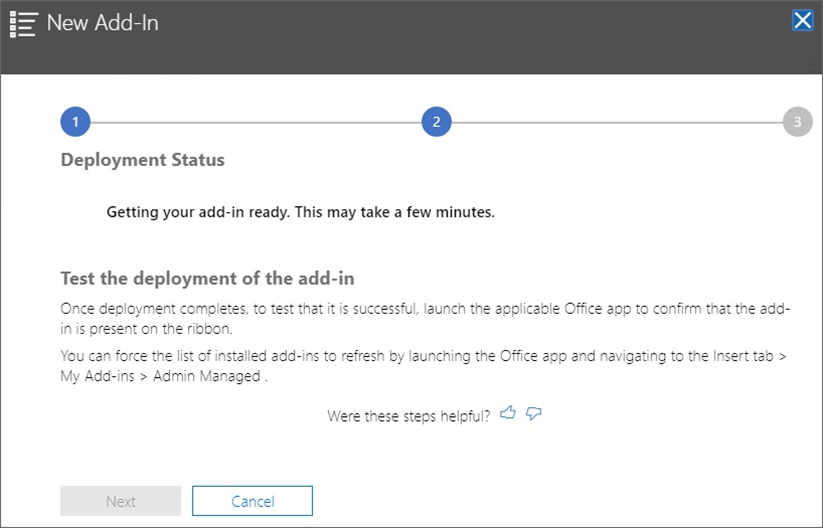
    You’re now moving to step 2 of the deployment wizard; a status screen is displayed:


    Wizard step 2: Deployment status - Getting ready

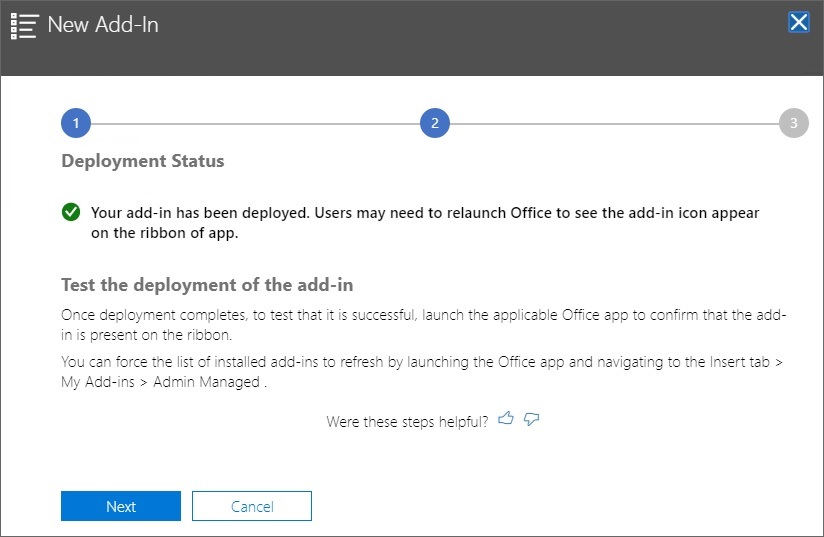
    When the deployment is finished, a green check mark should appear in step 2 of the deployment.


    Wizard step 2: Deployment status - Deployed
  7. Click Next.

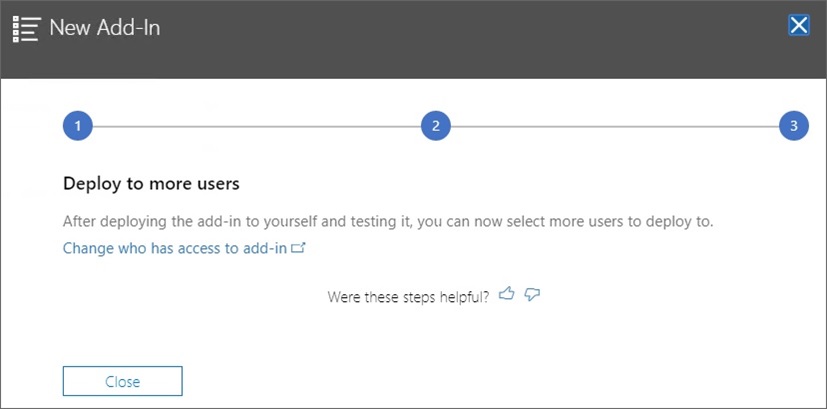
    You're now in the final step (step 3) of the deployment. Because we chose Just me earlier, you now have the option of adding more users to the deployment:


    Wizard step 3: Option to deploy to more users.

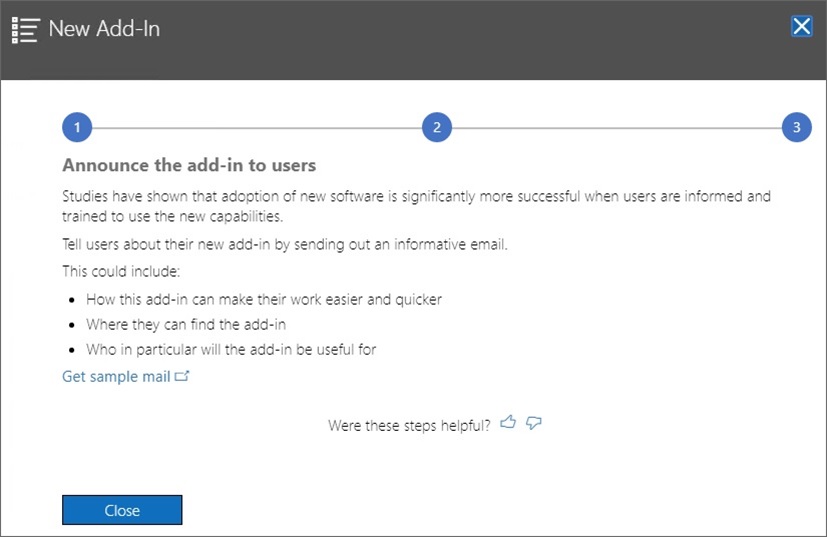
    This screen is displayed if you selected Everyone or Specific users/groups earlier, giving you the option of reviewing a sample email announcement for the Smart View add-in users.


    Wizard step 3: Information about email notification
  8. Click Close.

    Optionally, if you chose to deploy to other users, click the Get sample mail link to view a suggested email text that you can send to users to announce the new Oracle Smart View for Office add-in for Office 365.

  9. Optional: If you plan to deploy multiple manifest files, repeat the steps above for each manifest you want to deploy.

    Refer to Working with Multiple Manifest Files for information on deploying multiple manifest files.

Users should see the Smart View ribbon the next time they log into Office 365 and launch Excel on a Mac or in a browser.