Extending an SEC-based Taxonomy
After you import your template taxonomy, you can extend it by adding networks, line items, and dimensional elements. You can add elements that are already defined, such as a GAAP taxonomy member, or you can create new elements.
To illustrate extending a taxonomy, let's add a network and its associated XBRL elements to a taxonomy using Taxonomy Designer.
Adding a Network
-
Connect to your Disclosure Management instance in Smart View, and check out your template taxonomy.
-
In Microsoft Excel, right-click on the bottom worksheet tab where you want to add the network, and select Add Section.
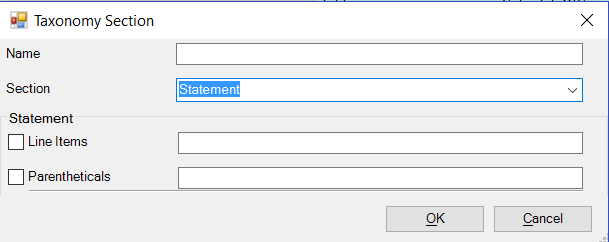
The Taxonomy Section dialog box is displayed.
-
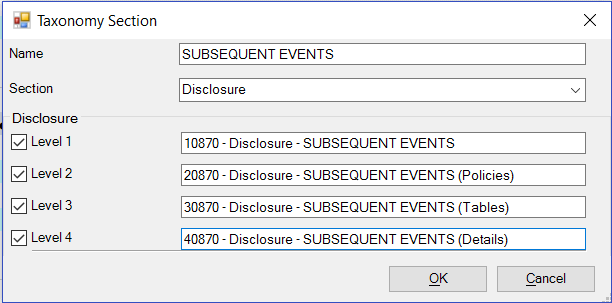
Enter a name for the taxonomy. In this example, we will enter
SUBSEQUENT EVENTS. -
In Section, select Statement, Disclosure, or Schedule. In this example, we will select
Disclosure. -
Under Disclosure, select a level for each section that you want to add. In this example, we will select all four levels.
-
Enter names for each network section. In this example, we will enter:
-
10870 - Disclosure - SUBSEQUENT EVENTS -
20870 - Disclosure - SUBSEQUENT EVENTS (Policies) -
30870 - Disclosure - SUBSEQUENT EVENTS (Tables) -
40870 - Disclosure - SUBSEQUENT EVENTS (Details)
Note:
The name of each network section must include the type of network ("Statement", "Disclosure", "Document", or "Schedule"). For example, if you are adding a schedule-type network, the names of each network section must include the word "Schedule", such as "200100 - Schedule - Valuation and Qualifying Accounts (Policies)".
-
-
Click OK to close the Taxonomy Section dialog box.
The network sections are created.
Adding, Renaming, and Removing Sections from a Network
After you have added a network, you can edit it to add, rename, or remove sections from it.
To edit a section:
-
Right-click the bottom worksheet tab that you want to edit, and select Edit Section.
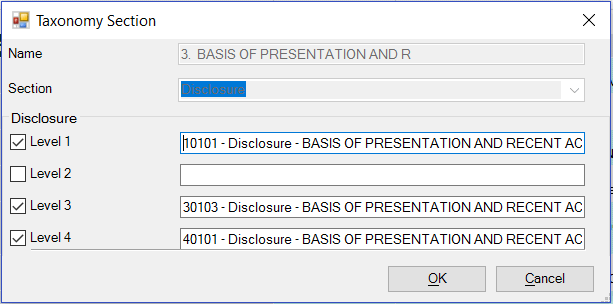
The section is displayed with checkboxes for all four levels. Levels that you have selected are checked, and levels that you did not select are unchecked. In the following example, levels 1, 3, and 4 were selected and level 2 was not.
-
Perform an action:
-
To add a level that was not previously enabled, select the check box next to the level and then enter a name for the level. The name of each network section must include the type of network.
-
To remove a level that was previously enabled, de-select the check box next to the level.
-
To rename a level, edit the name of that level. The name of each network section must include the type of network.
-
-
Click OK. The worksheet is updated with your changes.
Next, we add XBRL elements, such as abstracts or text blocks, to each section. You can add elements that already exist in the taxonomy, or you can add extended elements.
Adding an Existing XBRL Element to a Taxonomy
To add an existing element:
-
In the cell where you want to add an element, right-click and select Add Item.

The Manage Item dialog box is displayed.
-
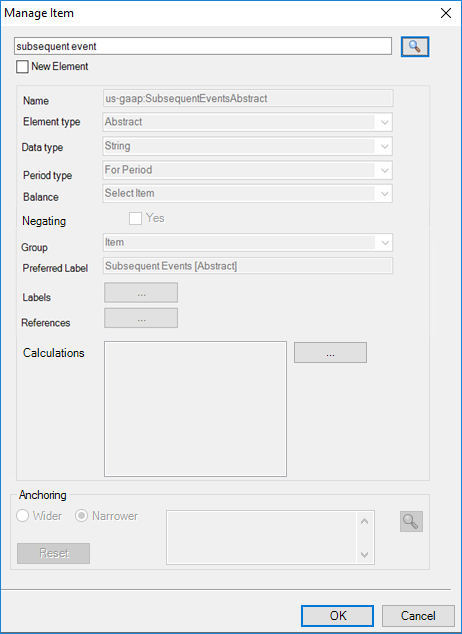
Search for an existing element by entering the element name and clicking
 . In this example, we will search for
 Subsequent Event, and then add the Abstract element.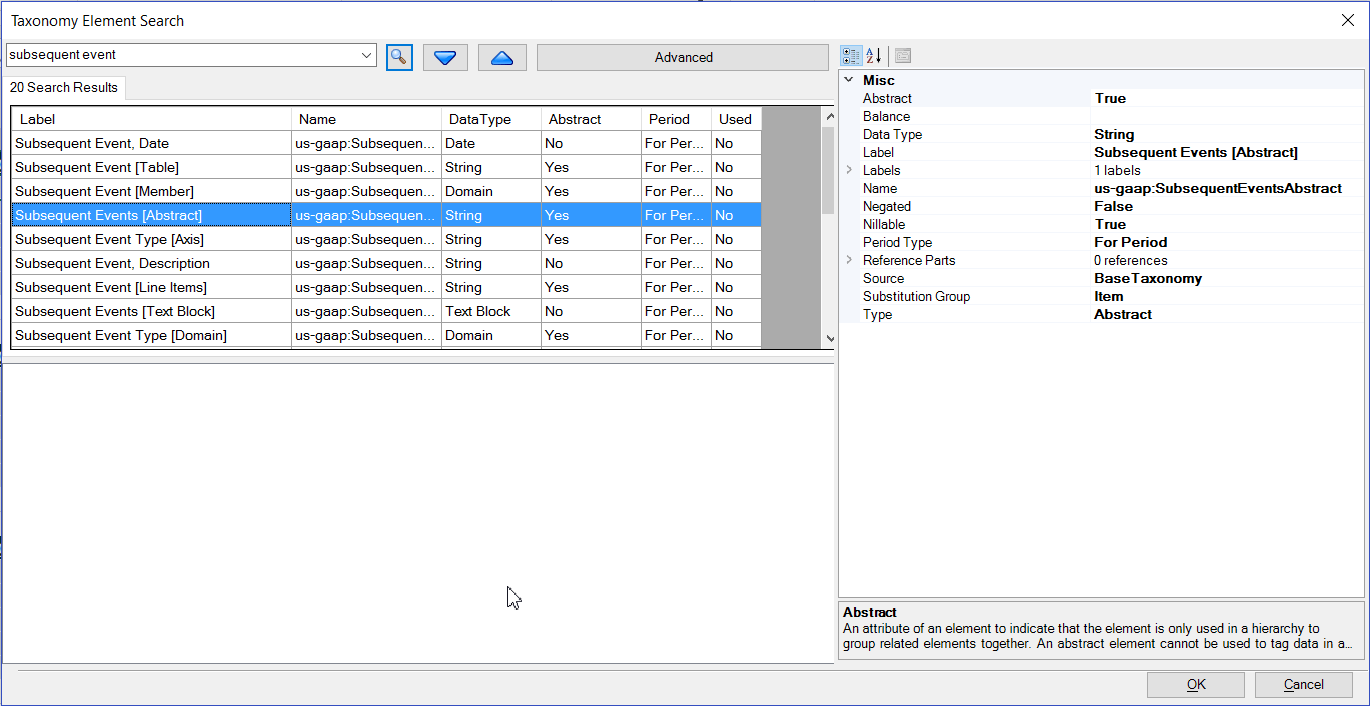
-
Click OK.
The Taxonomy Element Search dialog box is closed, and the Manage Item dialog box is displayed with the element that you selected.
Note:
The fields for GAAP elements are read-only. If you want to change the value of one of the fields, you must add a new extended element. See Adding an Extended XBRL Element to a Taxonomy
-
Click OK.
The element is added to the section.
![screenshot shows the Subsequent Events [Abstract] element added in the taxonomy. screenshot shows the Subsequent Events [Abstract] element added in the taxonomy.](img/td_add_item_taxonomy_element_abstract_2.gif)
Adding an Extended XBRL Element to a Taxonomy
An extended XBRL element is one that does not already exist in the taxonomy.
To add an extended XBRL element:
-
In the cell where you want to add an element, right-click and select Add Item.

The Manage Item dialog box is displayed.
-
In the Manage Item dialog box, select New Element.
-
In the Name field, enter a name for the element. In this example, we will enter
SubsequentEvent1Member. -
Select the Element Type from the following list:
-
Abstract
-
Axis
-
Domain
-
Line Item
-
Line Items
-
Member
-
Table
In this example, we will select Domain.
-
-
Select the Data Type. In this example, we will select Domain.
-
For Period Type, select As Of or For Period. In this example, we will select For Period.
-
For Balance Type, select Credit or Debit (if applicable).
-
For Negating select Yes.
-
For Group, select from the following:
-
Item
-
Tuple
-
Dimension
-
Hypercube
In this example, we will select Item.
-
-
Click
 next to Labels to create a label for the member. The label controls how the member will appear in the report.
Enter the label Text, Type, and Language, then select if the label is Preferred, and then click Add.
-
Click OK.
-
Click OK to add the extended element to your taxonomy.
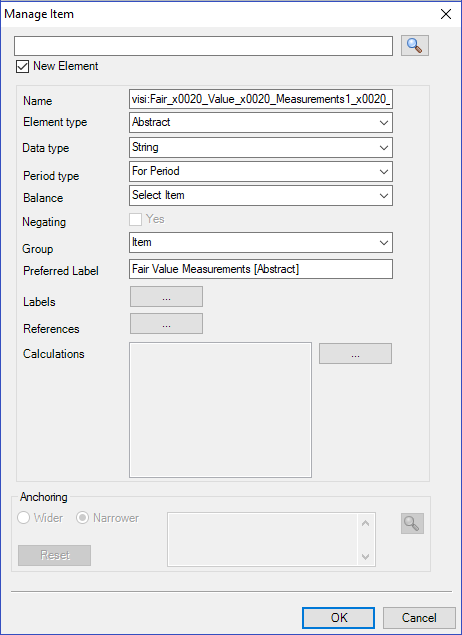
The element name should be as per W3C standards, and should not contain any space in between and avoid special character. If you create an element name that are not as per W3C standards, then Taxonomy Designer will prompt you an error message: "Element name is not XML valid. Would you like to make the name valid?"
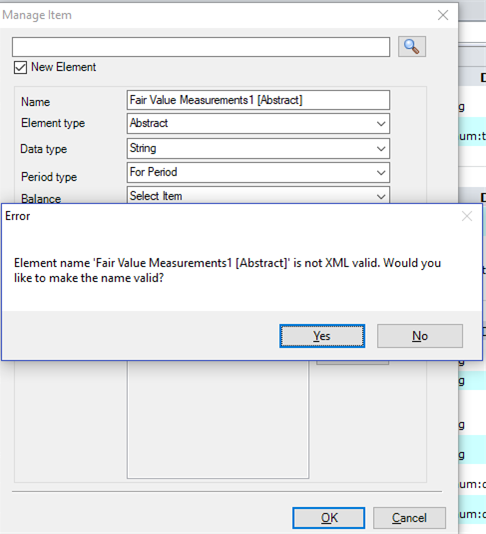
If you click Yes, then Taxonomy Designer attempts to convert them into W3C standards by removing space and special characters.

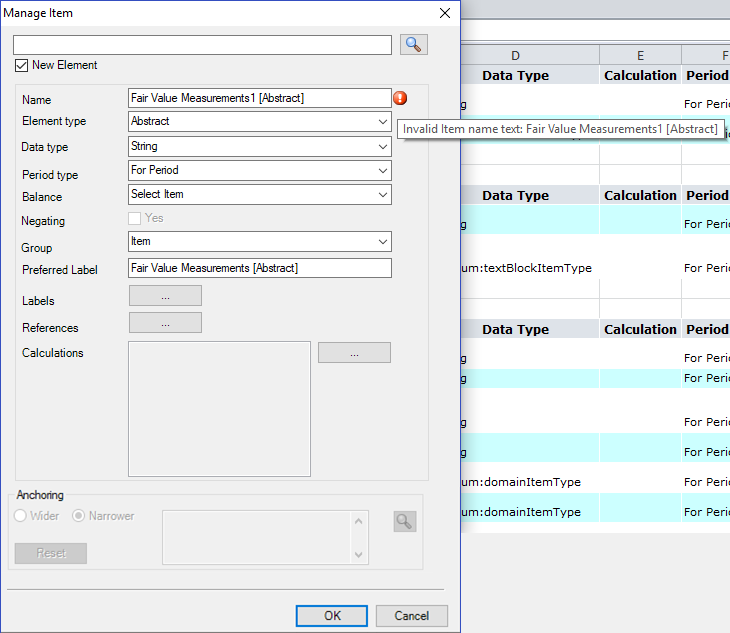
If you click No, then an exclamation point icon is displayed next to the element name field.
Example: Building a Hypercube in a Taxonomy
The following example will demonstrate how to add the elements necessary to build a hypercube, including dimensions, domains, members, and an axis. It also includes moving elements within a taxonomy.
-
In the cell where you want to add an element, right-click and select Add Item.

-
In the Taxonomy Element Search dialog box, enter the name of the element that you want to add, and click
 . In this example, we will search for
 Subsequent Event, and then add the Table element.![screenshot shows the Taxonomy Element Search dialog box with the Subsequent Event [Table] element highlighted screenshot shows the Taxonomy Element Search dialog box with the Subsequent Event [Table] element highlighted](img/td_hyper2.gif)
-
Click OK to add the table element to the taxonomy.
-
Right-click the Table element in the taxonomy and select Add Item.
-
Search for
Subsequent Event, and add the Line Items element.Notice how the elements are indented correctly under each other.

-
Right-click Line Items, and select Add Item.
-
Search for
Subsequent Event, and add a line item element. In this example, we will add the Effect of Change in Tax Status element. -
Next, add the axis element. Right-click the Table element, and select Add Item.
-
Search for
Subsequent Event, and add the Axis element. -
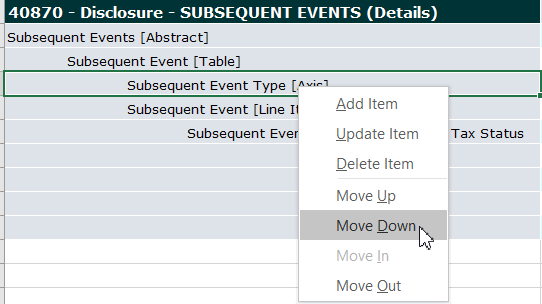
Right-click the Axis element and select Move Down to position it after the line item element.
Note:
Use Move Up and Move Down to position elements vertically within the taxonomy. Use Move In and Move Out to increase or decrease the indent of an element. If you move an element in or out, all of the elements underneath that element are moved in or out as well. This enables you to move entire branches with one action, instead of moving one element at a time.
-
Next, add the default domain to the axis. Right-click the Axis element, and select Add Item.
-
Search for
Subsequent Event, and add the Domain element. -
Finally, add a domain member to the domain. Right-click the Domain element, and select Add Item.
-
Search for
Subsequent Event, and add the Member element.The completed hypercube should look like this:

Publishing the Updated Taxonomy
After you have finished modifying your taxonomy, check it back in and then click Publish to publish it so that it can be associated with a Disclosure Management report. To automatically register the taxonomy, in the Publish Taxonomy dialog box, enter the folder and taxonomy name and click OK. If you do not want to register the taxonomy automatically, deselect the Automatically Register check box. You can register the taxonomy manually by using Taxonomy Manager. See Working With Taxonomy Manager.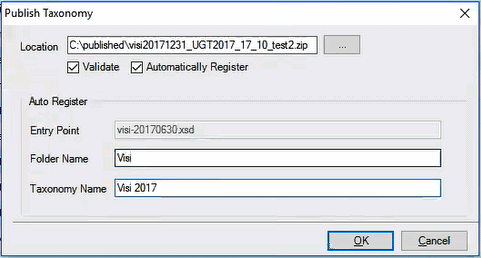
After you publish the taxonomy, use the mapping tool to associate it with a Disclosure Management report. See About XBRL Taxonomy Concepts.
Note:
If the taxonomy template was already associated with a Disclosure Management report, click ![]() in the mapping tool to update the Disclosure Management report with the new version of your taxonomy template.
in the mapping tool to update the Disclosure Management report with the new version of your taxonomy template.