Creating email groups
Note: We're updating our help center to reflect the new Redwood experience. During the transition, some content reflects the previous version of the UI.
Create an email group to easily manage content served to a targeted audience, such as email or newsletter recipients.
Before you begin
- Define who your audience is and what the purpose of the group should be.
- Create the email headers, footers, and subscription management pages with that audience in mind. While you can edit your subscription pages while creating the email group, it's best to create all of your components prior to setting up your email group.
To create an email group:
- Navigate to Assets
 > Email Setup, then click Email Groups.
 - Click

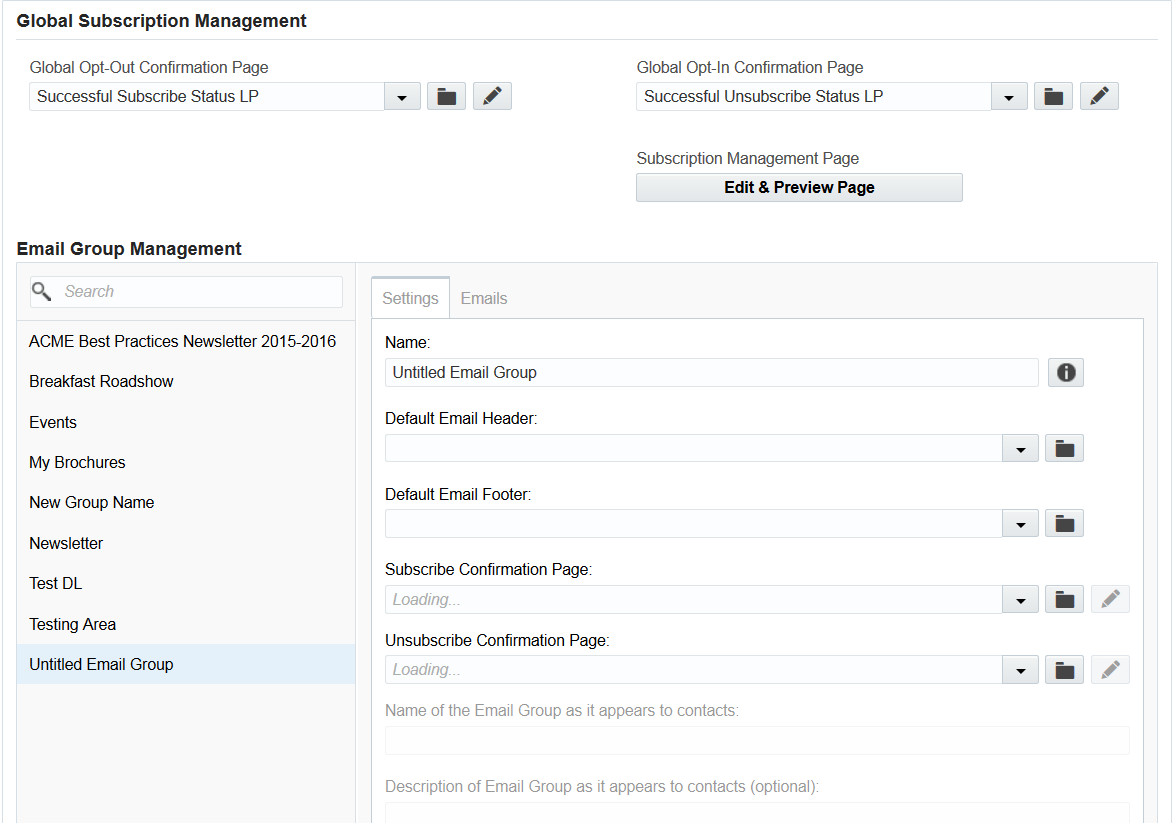
- In the classic UI, the new group appears as Untitled Email Group.
- In the new Redwood experience, click
 to open New email group tab.
Classic UI
Redwood Experience
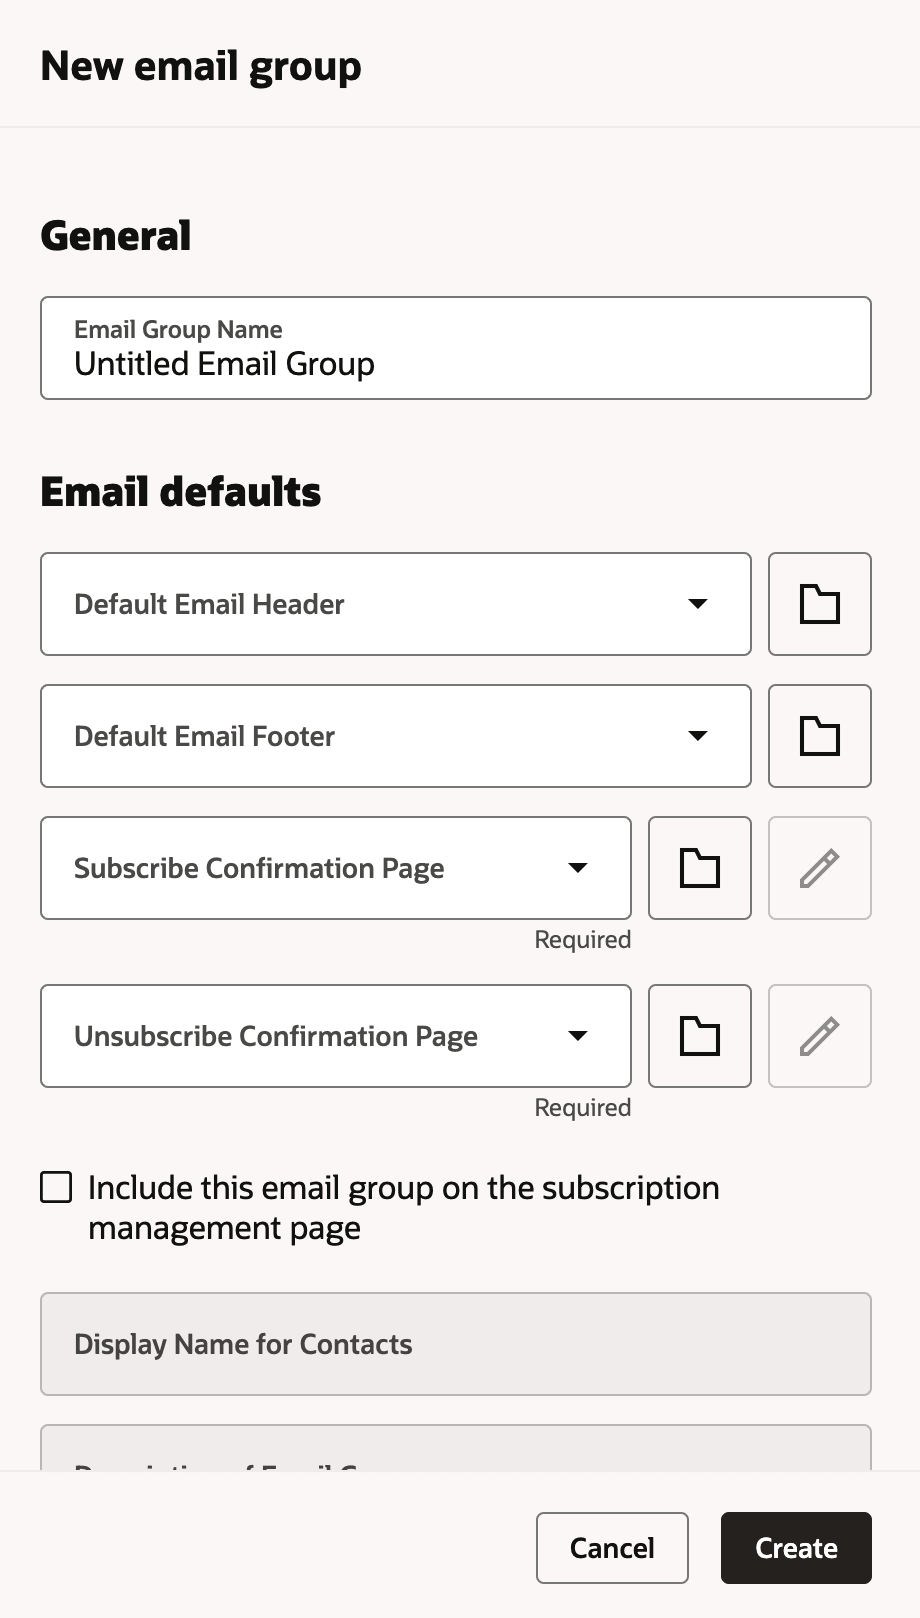
- Configure the email group settings.
- Default Email Header: Select the default header. This header can be changed on an email by email basis. Learn more about
 to browse to the page.
 - Default Email Footer: The default footer for the email group. This header can be changed on an email by email basis. Learn more about to browse to the page.
- Subscribe confirmation page: The page that displays when a contact subscribes to this email group. This is different than the global subscribe confirmation page. To choose a page, select one from the drop-down list or click to browse to the page.
- Unsubscribe confirmation page: The page that displays when a subscriber opt-outs of an email group. This is different than the global unsubscribe confirmation page. To choose a page, select one from the drop-down list or click to browse to the page.
- Make this Email Group available in Eloqua for Sales: Select this check box to make the group available to Eloqua's Sales Tools users.
Include this Email Group on the Subscription Management Page: Select this check box to include the group on the Subscription Management Page. Recipients can reach this page by following a Send to Subscription List system link added to an email.
When you click this check box the following fields become available to edit:
- Name of the Email Group As It Appears to Contacts: Enter the name of the group as you want it to be displayed on the landing page.
- Description of Email Group As It Appears to Contacts: Enter a description to make it clear what types of information this group provides. Provide a clear description to ensure that a contact who is subscribed to several different groups will not mistakenly unsubscribe from the wrong group.
Learn more about managing contact subscription pages.
- Default Email Header: Select the default header. This header can be changed on an email by email basis. Learn more about
- Click Save.
- Review and customize the template permissions. To use the email group, a security group or user must have View permissions.