Creating individual users
Administrators can create user accounts in Oracle Eloqua, place those users into security groups, and grant those users security permissions and product licenses.
Before you begin:
- Know what role each user will have in Oracle Eloqua so that you can assign the appropriate security group with the proper action permissions.
- You must create accounts for users that will be used as an email sender. For example, sending a batch email on behalf of someone or using signature rules to dynamically determine a sender. The sender's user account does not need to be active nor does the person associated to the user account need to have access to Oracle Eloqua. The user account and associated signature fields will be used to populate the email sender and sender information like a signature where applicable.
To create an individual user:
-
Under Settings
 , click Users in the Users and Security area. This will bring you to a new page.
 -
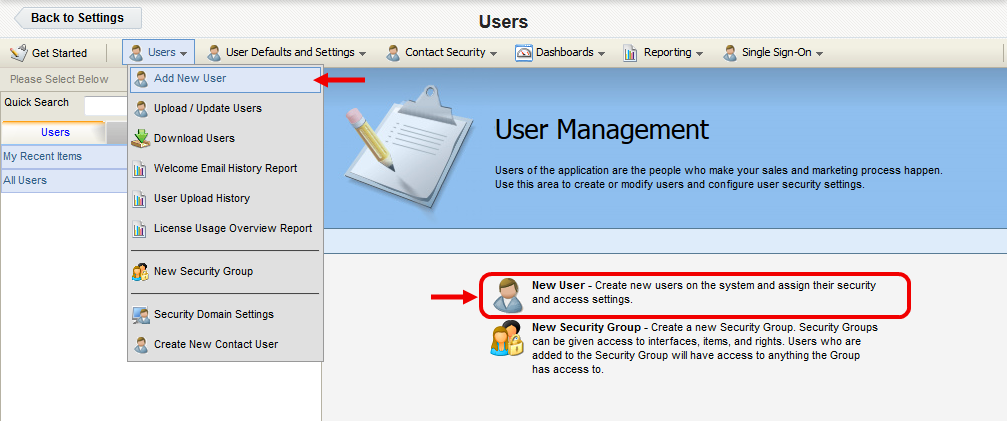
Click Users, then click Add New User.

The New User configuration window opens.
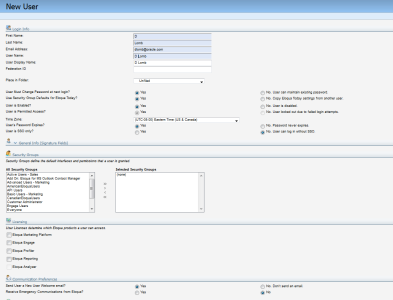
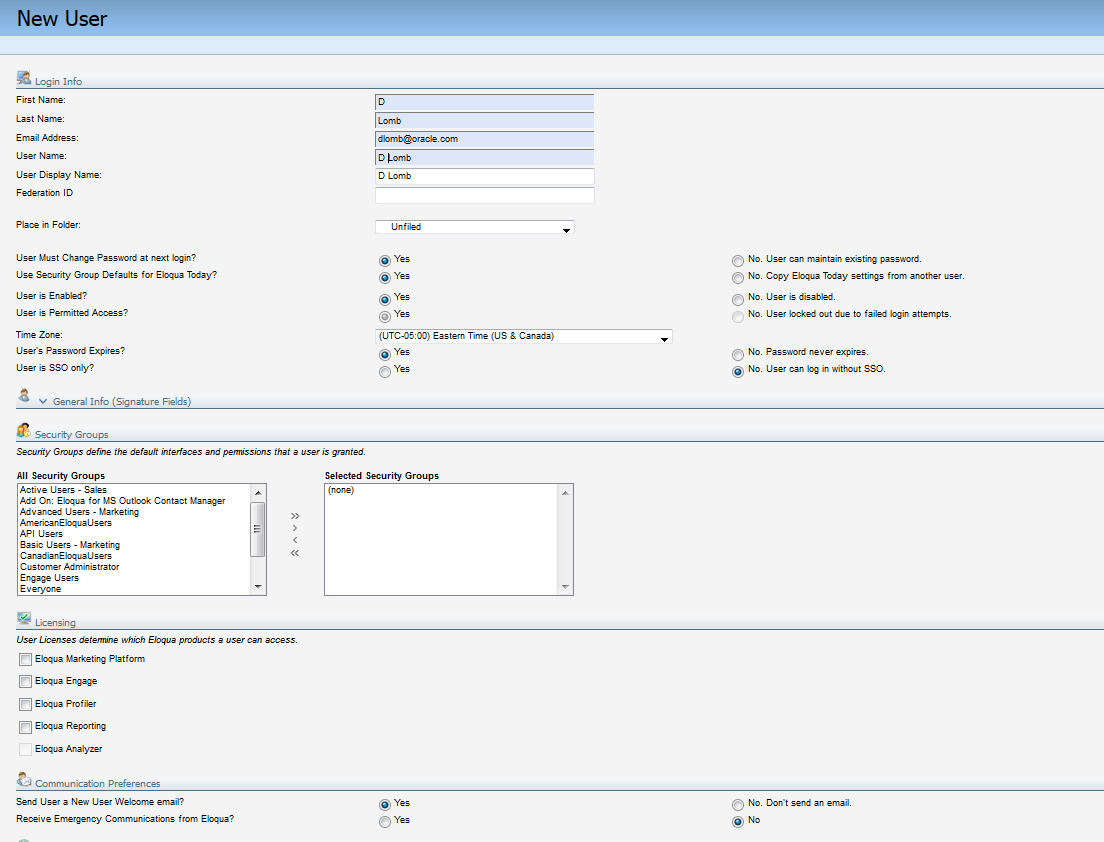
- Enter the basic user information in the Login Info section.
- The user's first and last names, email address, user, and display names are required.
- If you have implemented Single Sign-On:
- The Federation ID might be necessary to authenticate the user to your identity provider.
- Selecting User is SSO only allows you to enforce single sign-on.
Find out more about setting up single sign-on users.
- To ensure the user can access Oracle Eloqua, set the User is Enabled and User is Permitted Access options to Yes.
-
Note: After a user exceeds the number of allowed failed login attempts, the user is locked out of Oracle Eloqua. If this happens, the User is Permitted Access option changes to No and you must change the setting to allow the user to login again.
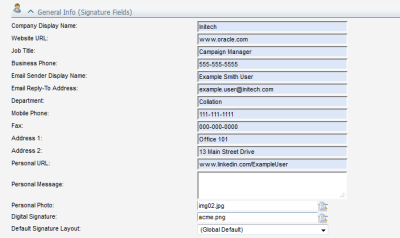
- Add personal information about the user in the General Info (Signature Fields) section. This information can be used for the following:
- In email signatures and signature rules.
- To manage these fields using their user profile.
- The message entered in the Personal Message field is part of the default message displayed when this user sends out an email from Oracle Eloqua.
-
Assign the user to security groups in the Security Groups section. Learn more about security groups.
- Assign any privileged access in the Privileged Access section.
- Asset Manager grants View, Edit, Delete, Set Security and Activate permission to all assets, bypassing the asset permissions granted by security groups.
- Grant licenses that determine which Oracle Eloqua products a user can access in the Licensing section. By default, none of the Oracle Eloqua products are selected. Learn more about licensing.
- Set any additional defaults in the Communication Preferences section.
- To send the new user a welcome email with a link to login, set the Send User a New User Welcome email option to Yes.
- To send the user any emergency communications, set the Receive Emergency Communications from Eloqua option to Yes. These messages are also posted to the Oracle Eloqua system status notification on the main Oracle Eloqua login page.
- Click Save.

Uploading multiple user accounts