Setting up personalized Recommendations for triggered emails
Personalized Recommendations for triggered emails through Responsys can be enabled by doing the following:
-
Step 1: Share captured User Behavior Tracking data with Infinity Actions/Streams
-
Step 2: Set up Infinity Actions and the Responsys Connection
-
Step 3: Configure Responsys to use user history in email campaigns
Prerequisites
Ensure that User Behavior Tracking is enabled for your account.
If a Recommendation module is already enabled, User Behavior Tracking is also enabled and data for all View and Purchase events will be flowing into Infinity IQ. You can then proceed with the following steps.
If User Behavior Tracking is not enabled for your account, follow the steps for Setting Up User Behavior Tracking before completing the following steps.
Step 1: Share captured User Behavior Tracking data with Infinity Actions/Streams
Once a Recommendation module is set up and enabled for the Oracle CX Tag after Setting Up User Behavior Tracking, the following occurs in the background:
-
The Recommendation module captures events such as View and Purchase along with the Product ID in the cookie.
-
The history data is sent across to Infinity as wt.tx_rechist1, wt.tx_rechist2, wt.tx_rechist3 on each relevant event for each view or purchase event.
Refer to the figure below, which shows the data for the View event being captured and passed to Infinity using the parameters wt.tx_rechist1, wt.tx_rechist2, wt.tx_rechist3 when a user views a product on the website.

History data is also flowing into Infinity IQ via the parameters wt.tx_rechist1, wt.tx_rechist2, and wt.tx_rechist3. However, the name of the parameters could be slightly different depending on how the tag was implemented on the website.
Assigning display names to history parameters for use in Actions/Streams
Display names can be assigned to these history parameters in Infinity IQ, which will then be used in Actions.
To assign display names to history parameters:
-
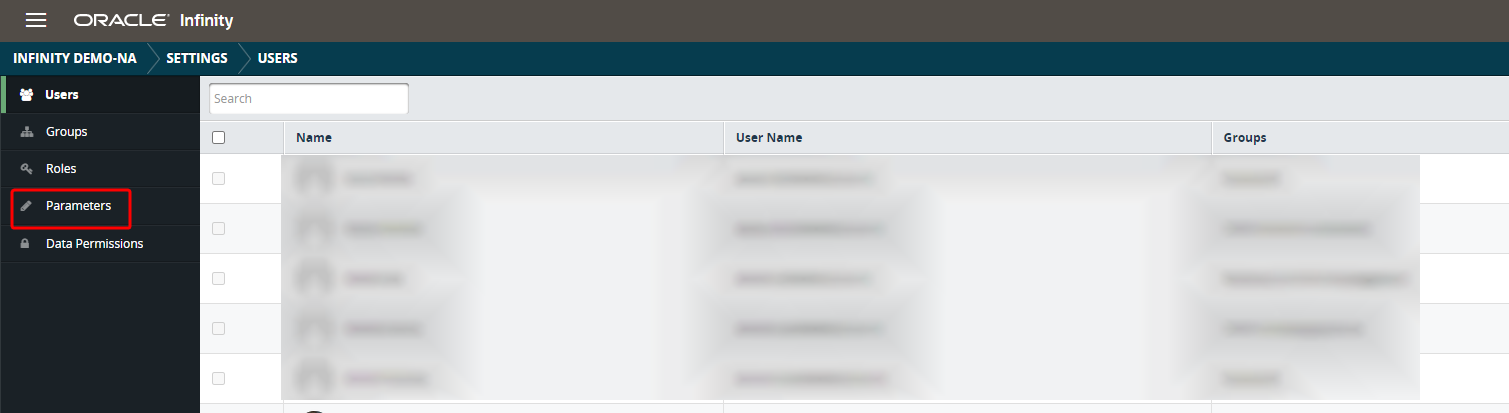
Open the Infinity IQ navigation menu and click Settings.
-
Click Parameters to view all data parameters that are flowing into Infinity IQ.
-
Make the following configurations:
-
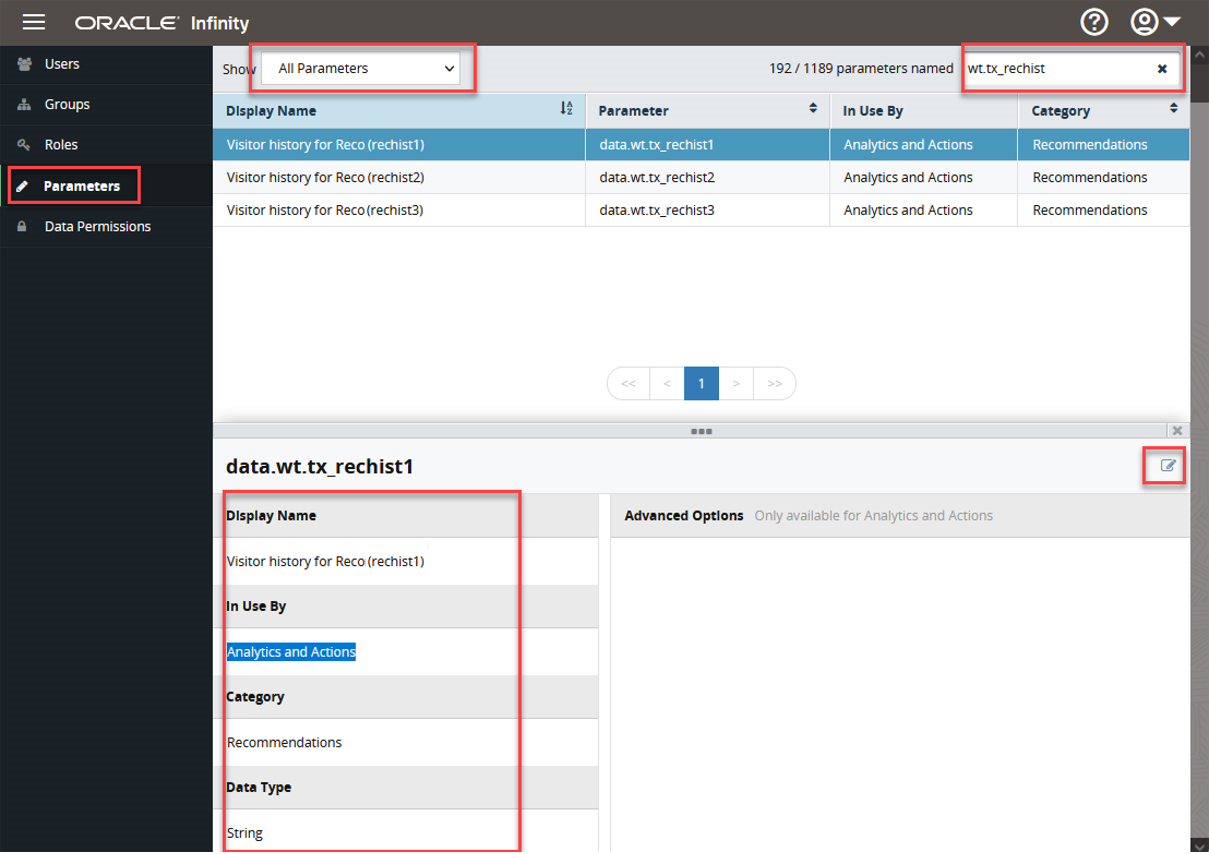
Search for the parameter names wt.tx_rechist and provide a display name for the three parameters. You have the option of assigning any names for the parameters as required. The example in the image below shows the following names are assigned:
-
User History for Reco (rechist1)
-
User History for Reco (rechist2)
-
User History for Reco (rechist3)
-
-
For the value for In Use By, ensure it is set to Analytics and Actions.
-
For the value for Category, ensure it is set to Recommendations.
-
The next step is to define Infinity Actions. The rules you configure allow the parameters containing the user history data to be passed to Responsys in the Responsys Personalization Language (RPL) variables defined in the Actions destinations.
Step 2: Set up Infinity Actions and the Responsys Connection
Now that you have provided display names to user history data flowing into Infinity IQ, you can use the parameter names for user history in Actions and send them to Responsys.
To set up Infinity Actions and the Responsys Connection
-
Follow the steps for Creating an action: Basic Details and Rules for actions. When creating the Action, do the following.
-
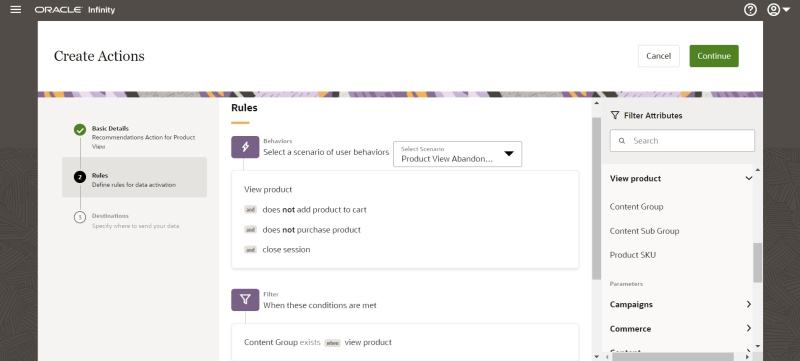
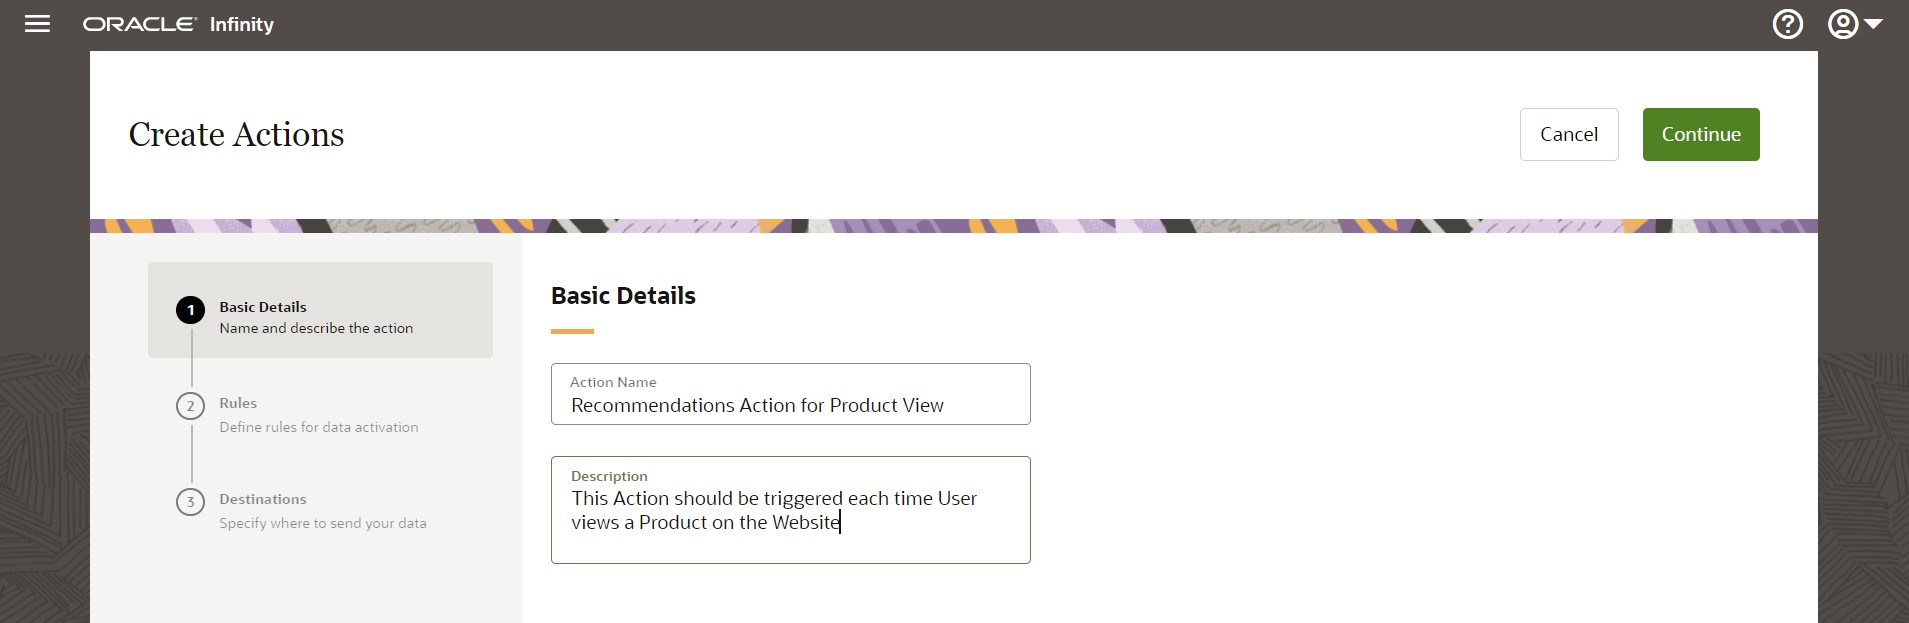
Provide a name and description for the Action. In the example below, the Action will pass user history to Responsys each time a user view a new product.
-
In the Rules section, define the scenario that triggers the Action or any filters that need to be applied for the Action to be triggered. In the example below, the Action is triggered every time a user views a product but does not purchase it or add it to their cart and closes the session.
In the Destinations section, define the destination to send the data to when the Action is triggered. You may need to first Configure a Responsys connection and destination before completing this step.

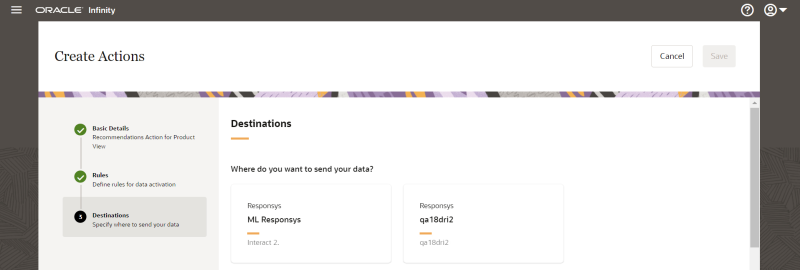
-
-
If you haven't created a Responsys connection, follow the steps for Configuring an Oracle Responsys connection. After creating the connection, it will display in the Actions screen and can be used as a destination source for the Action.


After configuring the Action and Responsys connection and destination, you can map Infinity history parameters to Responsys fields.
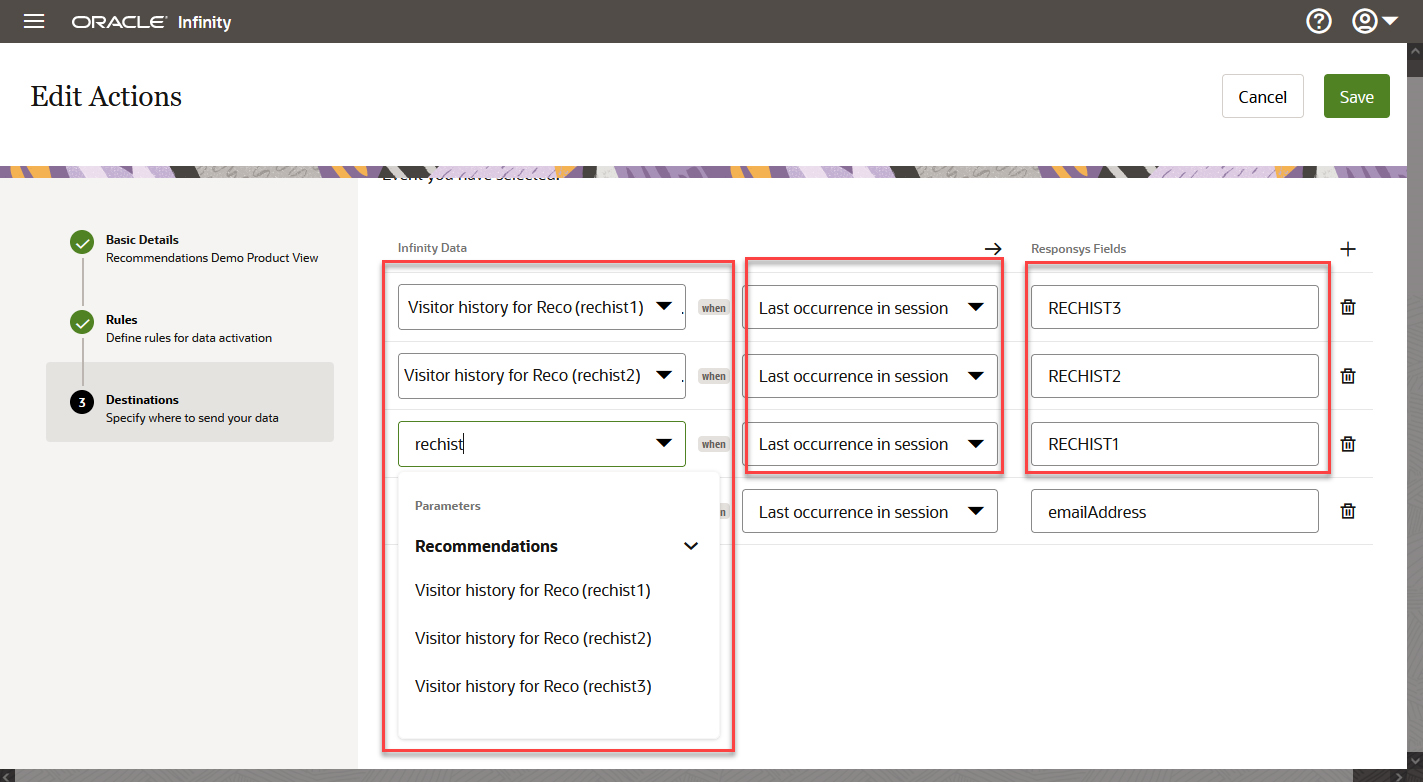
Mapping Infinity History Parameters to Responsys Fields
After choosing the Responsys connection as the destination, you can configure the mapping between the Infinity parameters for user history and Responsys fields. You can define the Responsys fields with any names as needed but the same names would then need to be used in the Responsys Program to access user history.
Example: You can use any naming convention for the variables, but it should be the same name ending with 1, 2, and 3. So, MyCustomName1, MyCustomName2, and MyCustomName 3 will work fine. However, MyCustomName_first, MyCustomName_second, and MyCustomName_third will not work because the Recommendation widget asks only for a base name (MyCustomName) and the auto-populates it with 1, 2, and 3 to identify the variables as MyCustomName1, MyCustomName2, and MyCustomName 3.
Refer to the example below.
After saving the Action, it is configured to send data to Responsys based on certain rules. Also Responsys Personalization Language (RPL) variables are populated with the user history data for use in Responsys Programs.
Step 3: Configure Responsys to use user history in email campaigns
To configure Responsys to use user history in email campaigns:
-
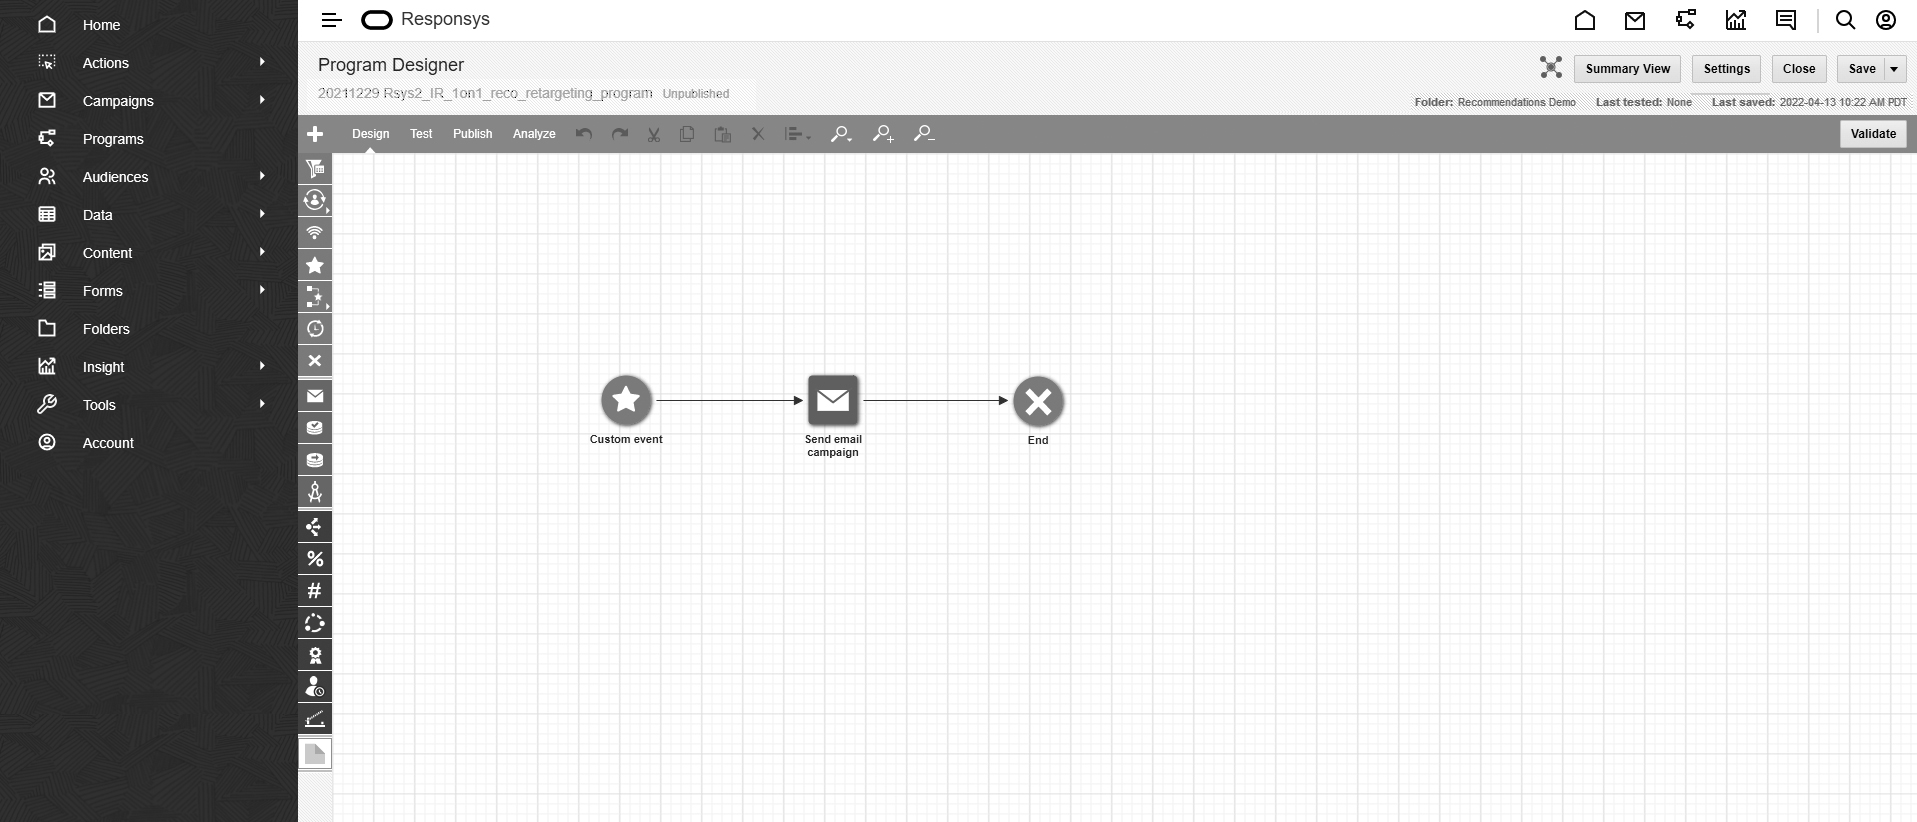
In Responsys, navigate to the Program created for re-targeting so that the history variables can be added to the Program.
-
You will need to define the custom event in the Responsys Program to trigger the email campaign. Triggering the email campaign as part of the Program depends on the custom event received from Infinity Actions. Thus, the Program should listen to the custom event came defined in the Infinity Action.
-
In the top-right corner of the Program Designer screen, click Settings.
-
In the Tracking and Variables section, define the variables being passed by the Infinity Action to Responsys for tracking.
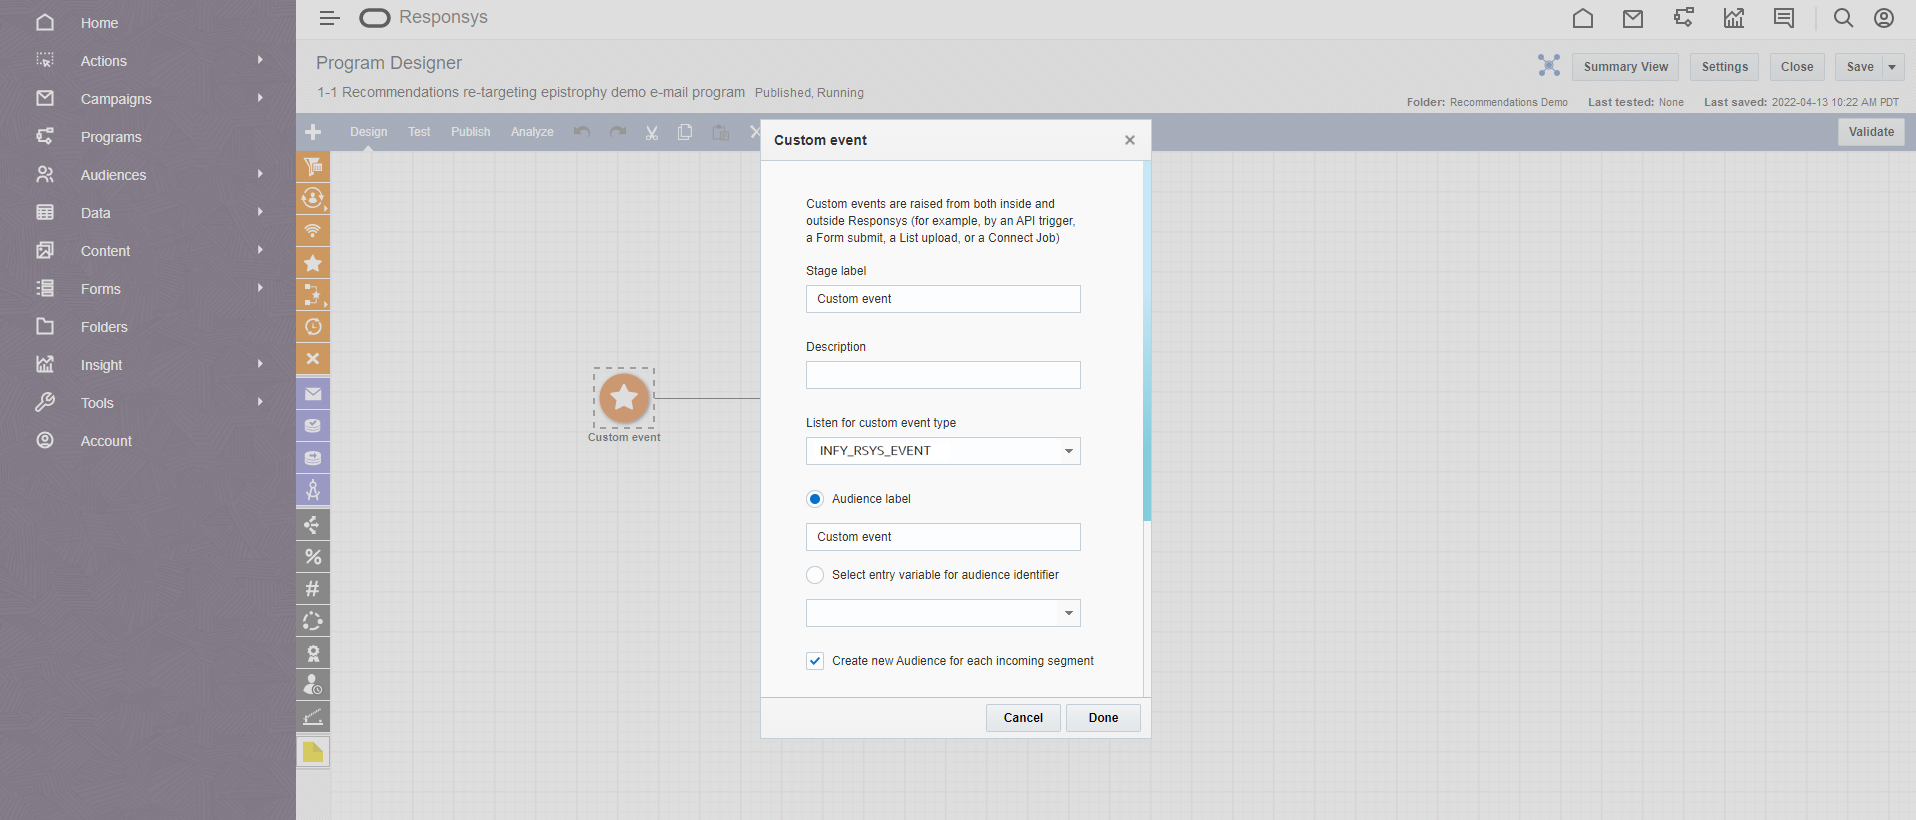
When the custom event is configured, the Responsys Program will be invoked when the Infinity Action triggers the custom event: when a user view a product but does not make a purchase or add to cart and ends the session.
On receiving the custom event, the Responsys Program will attempt to trigger the email campaign. You now need to attach user history variables to the Program.

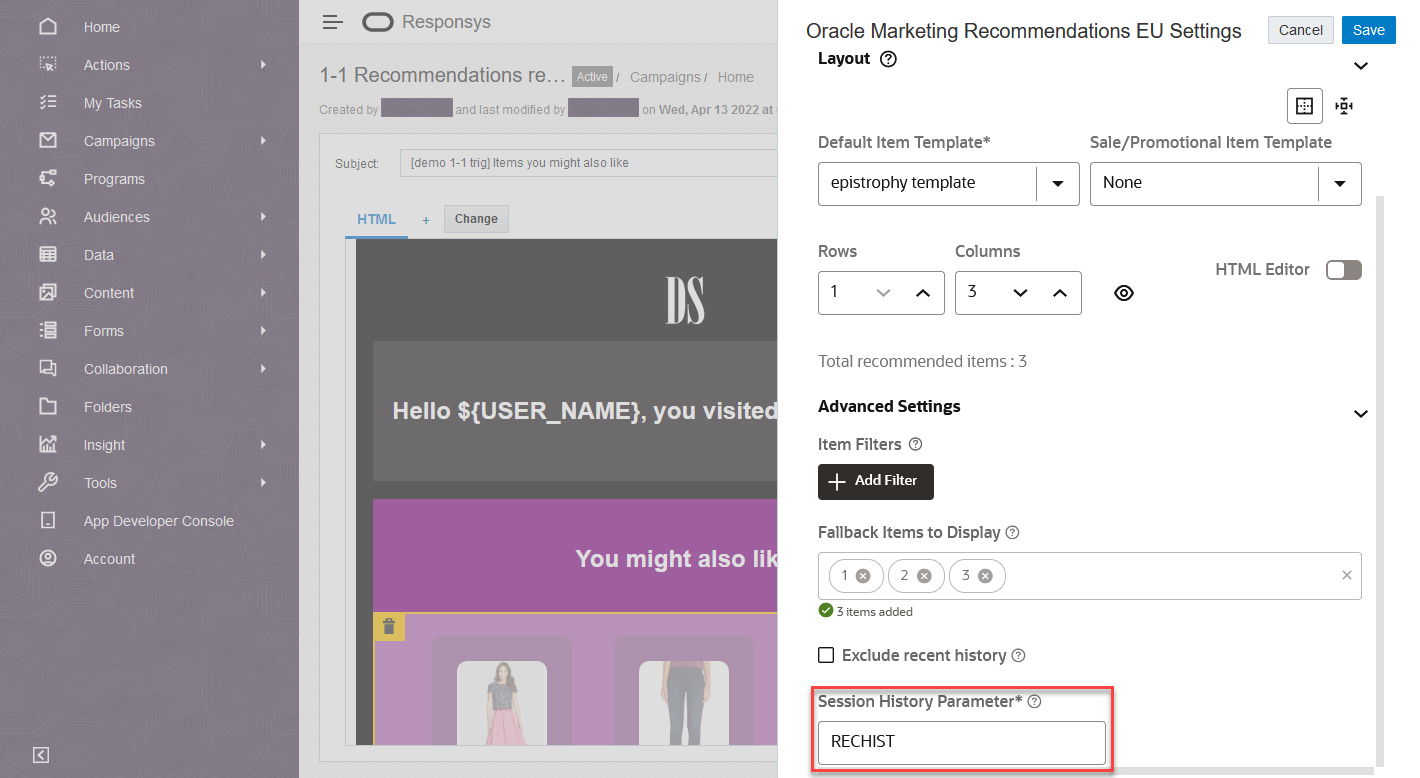
When creating an email campaign that is part of this Program, you will need to define the history variable in the campaign creation window in Responsys.
Note: The Session History Parameter field only requires one value to be entered, which is the common part of the three variables without numbers. The 1, 2, 3 numbers will be added automatically.
In the example below, the variable to be provided in the campaign creation screen is RECHIST.
Responsys is now configured to use user history in its email campaigns.
Creating Recommendations Service and Getting Recommendations Using REST API
Adding Recommendations to a Website Using Web Personalization