Adding Email Recommendations
With Recommendations for email, your Oracle Responsys email campaigns can display personalized recommendations to recipients based on machine learning. Recommendations for email is included in Oracle Infinity IQ or can be purchased separately. It also requires an Oracle Responsys account.
Before creating a first recommendations campaign, please make sure all steps of the one-off setup have been completed.
After completing these steps you can set up personalized Recommendations in emails:
Note: It is currently not possible to add multiple Recommendation widgets in the same email.
Creating an email campaign with Recommendations in Responsys
To create an email campaign with Recommendations in Responsys:
- In the message designer of the email campaign inside Responsys, drag the recommendations widget from the dynamic content editor slider on the right.
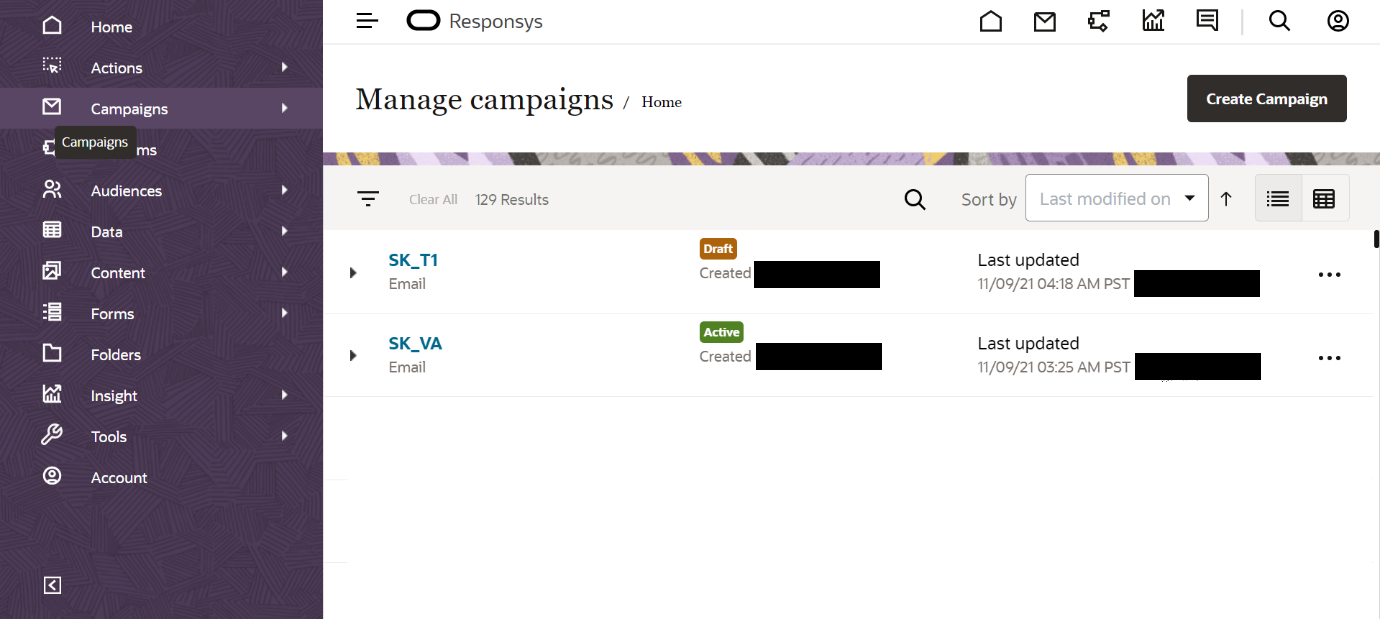
- From the side navigation bar, select Campaigns
 . (If you do not see the side navigation bar, click the navigation menu
  .)
.)
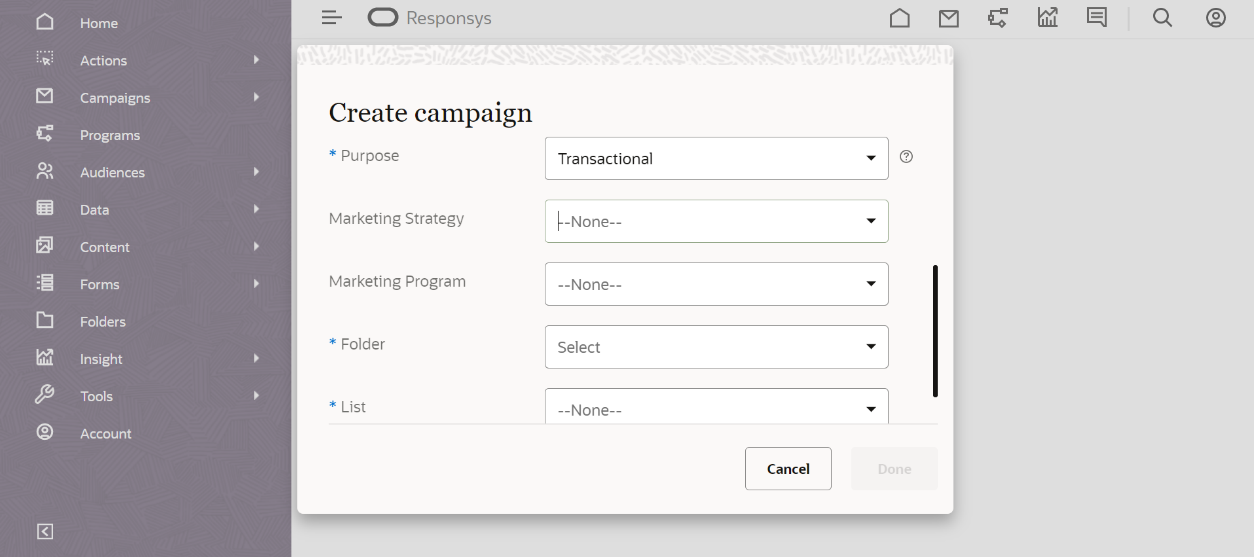
- Click Manage Campaigns > Create Campaigns.
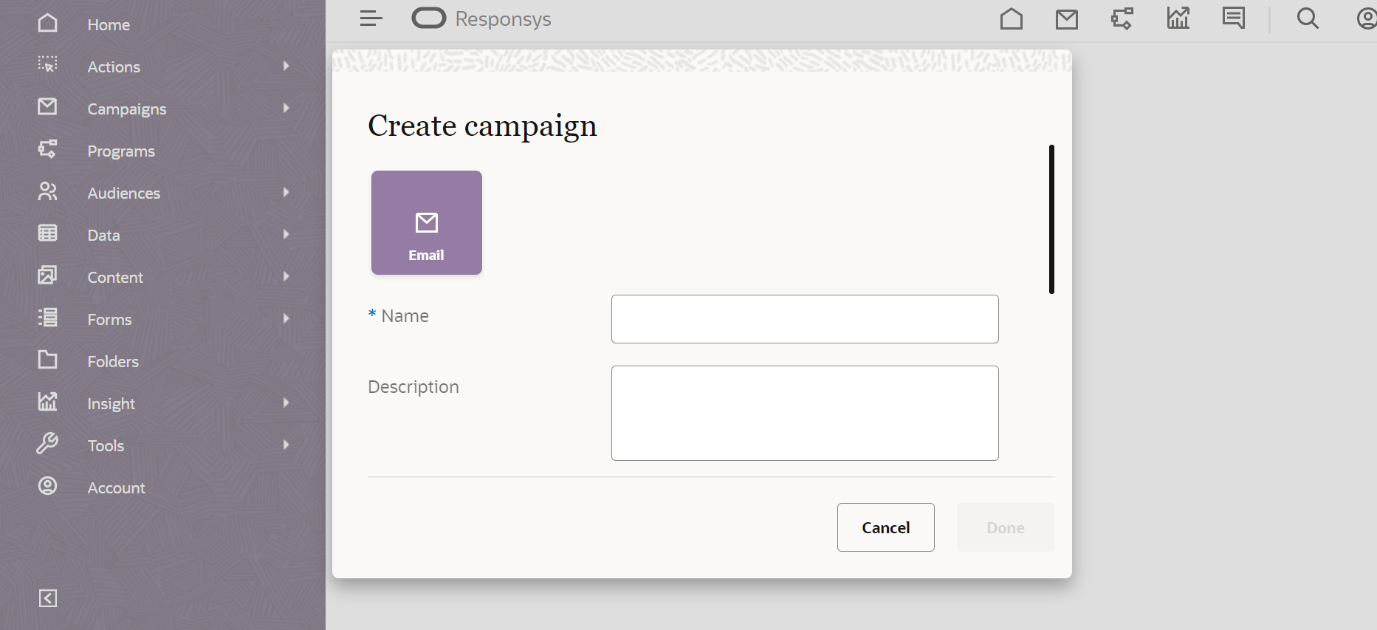
The Create Campaign dialog displays.

- Select Email and give your campaign a name.
- Select a Purpose, Folder, and List. Learn more about these settings.
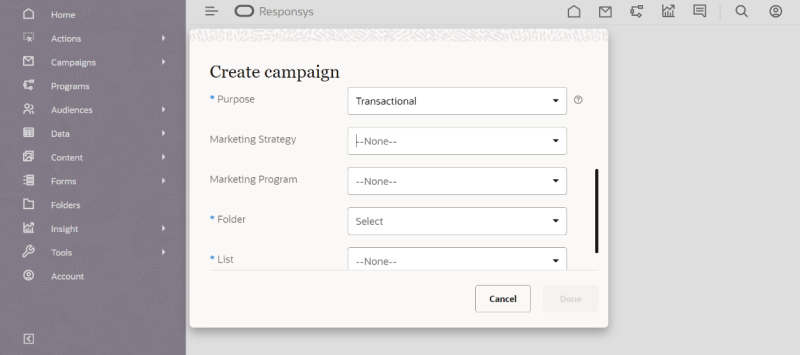
- Click Done.
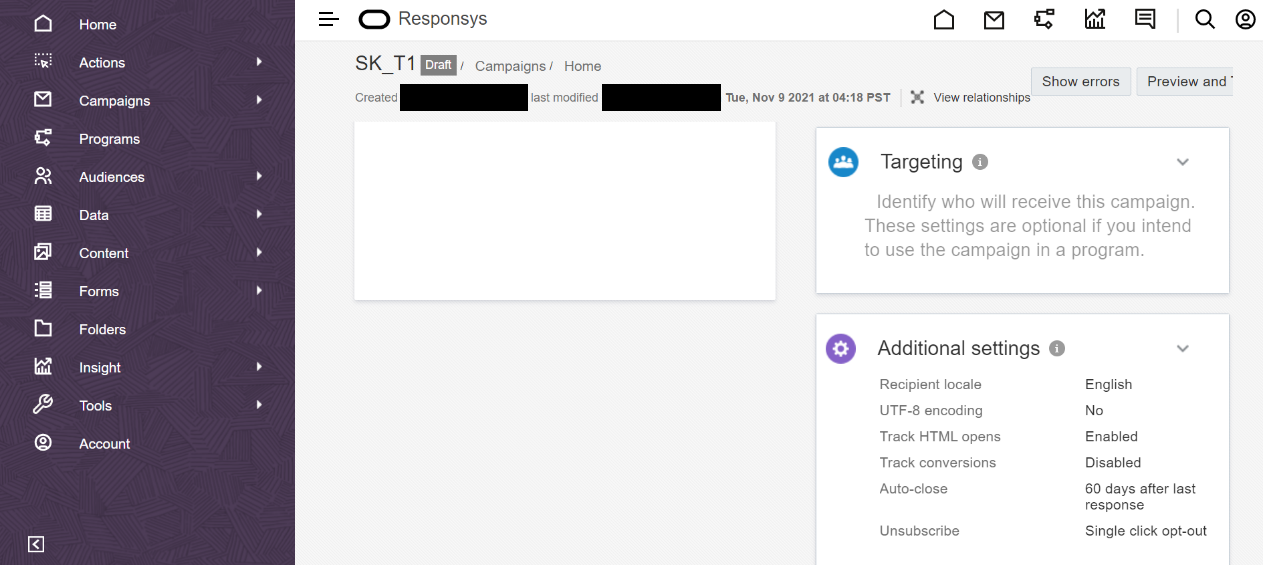
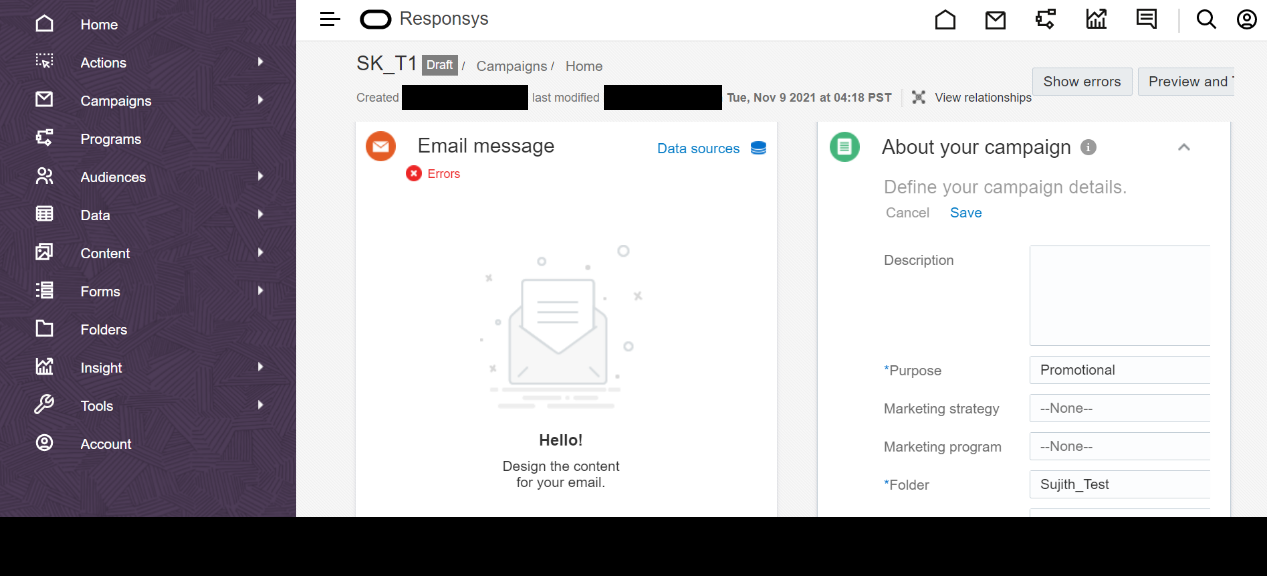
- Configure the About your campaign panel, Targeting panel, and any Additional settings.

- Click Create Message.

You'll be redirected to the Create message dialog.

- Select a template from the Saved templates tab or click Create from file to choose a file from your library, to create a new document, or to drag and drop a file from your computer.
- Click Dynamic Content Editor
 to open the widget panel.
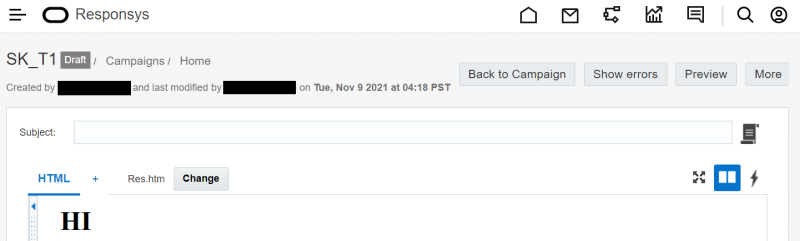
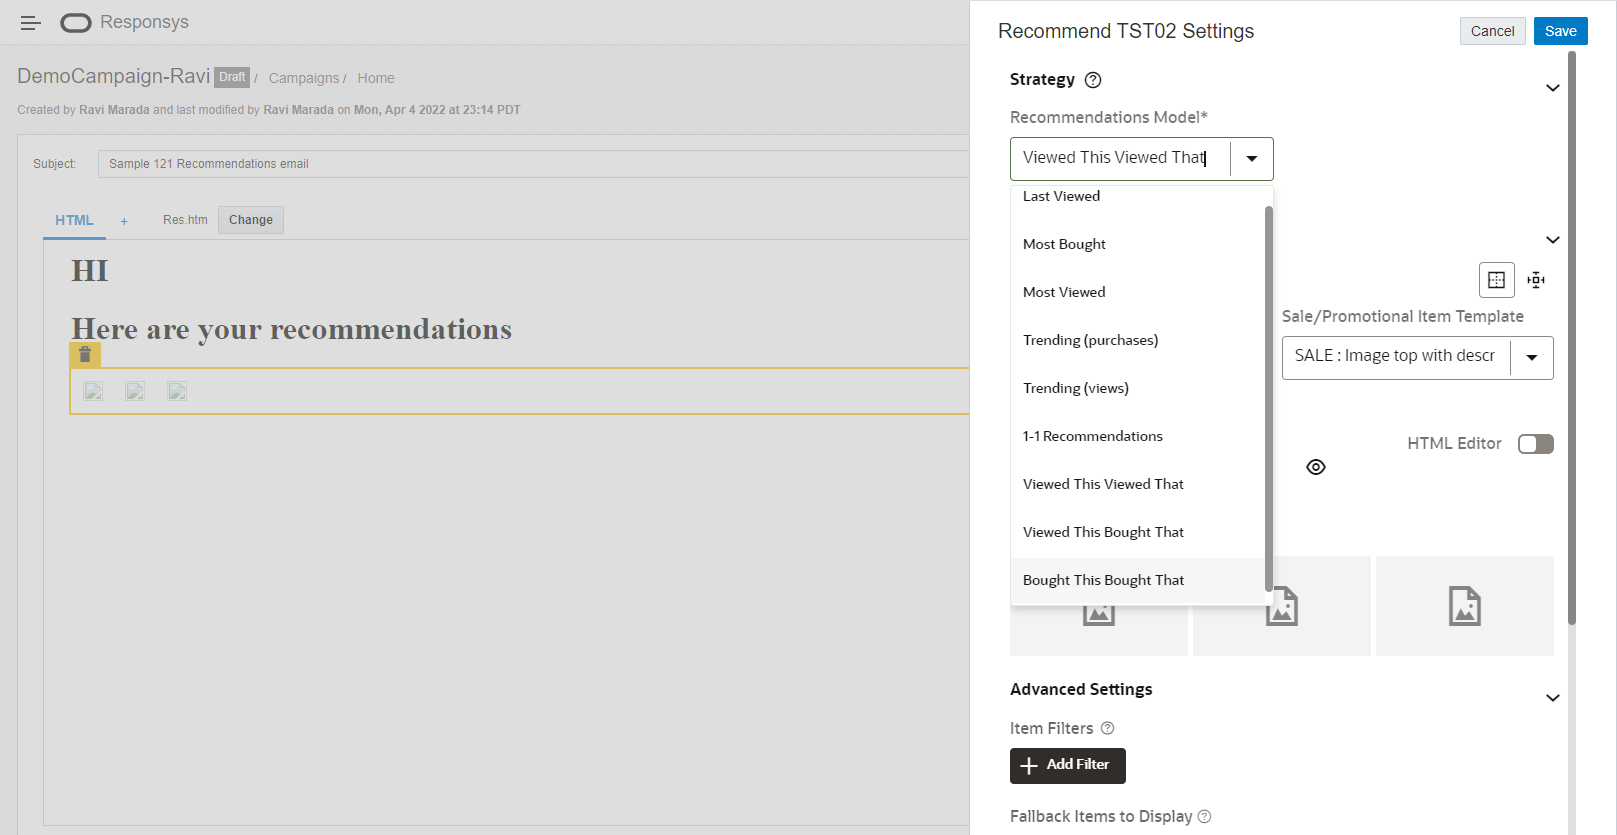
- Drag and drop the Oracle Marketing Recommender widget to the canvas.
Note: Widgets need to be dropped on a
<div>tag.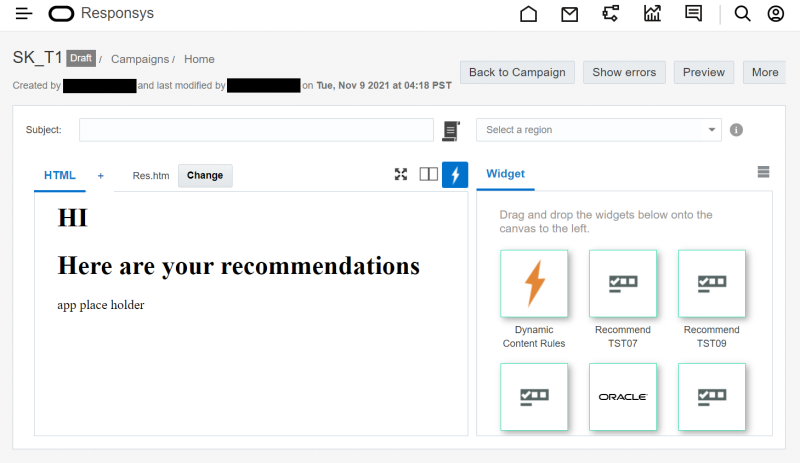
The Recommender settings panel opens.

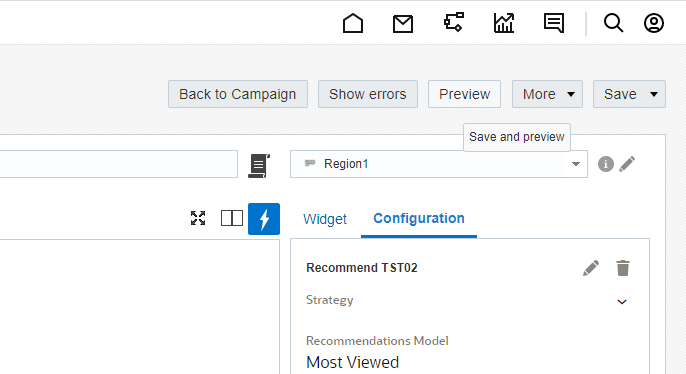
- In the Recommendations Model drop-down under Strategy, select the recommendation algorithm to be used for the Email Campaign. The selected recommendation algorithm will influence how Items are chosen for Recommendations. For more information about the various recommendations algorithms, please see here.

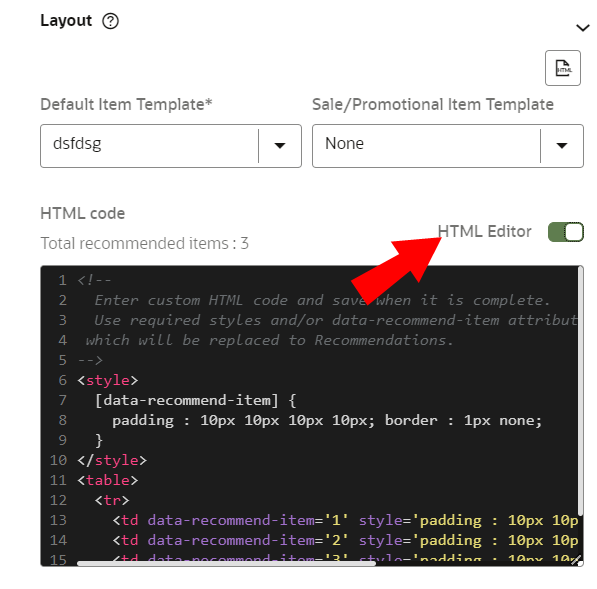
- Select a layout from the Item layout drop-down list. Only layouts saved in the Account settings will display. You can define a default layout for all items to use. There is an option to also define a Sale Price Layout for sale items so you can differentiate them from other items. Learn more about enabling the Sale Price Layout.
- Select the Item Count by defining the number of rows and columns. This will determine how many products Recommendations will display at the same time to email recipients. You have the option of previewing the layout by clicking Preview
 .
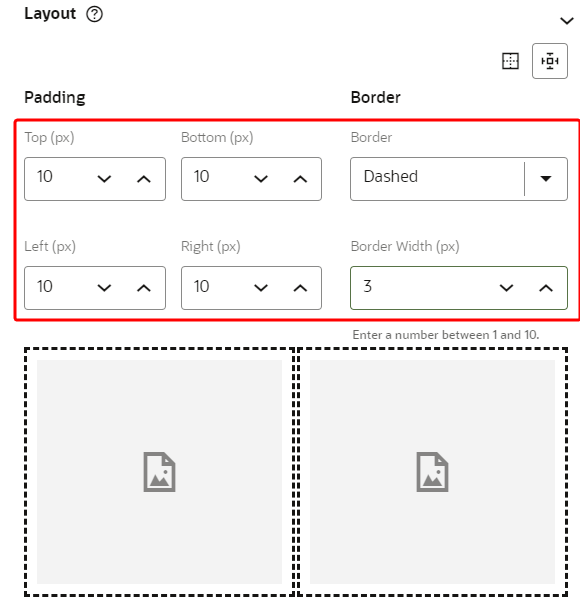
. - Update the padding and border properties in one of the following ways:
- Toggle HTML Editor and make the updates.
- Use the Visual Editor (WYSIWYG editor) to make the updates.
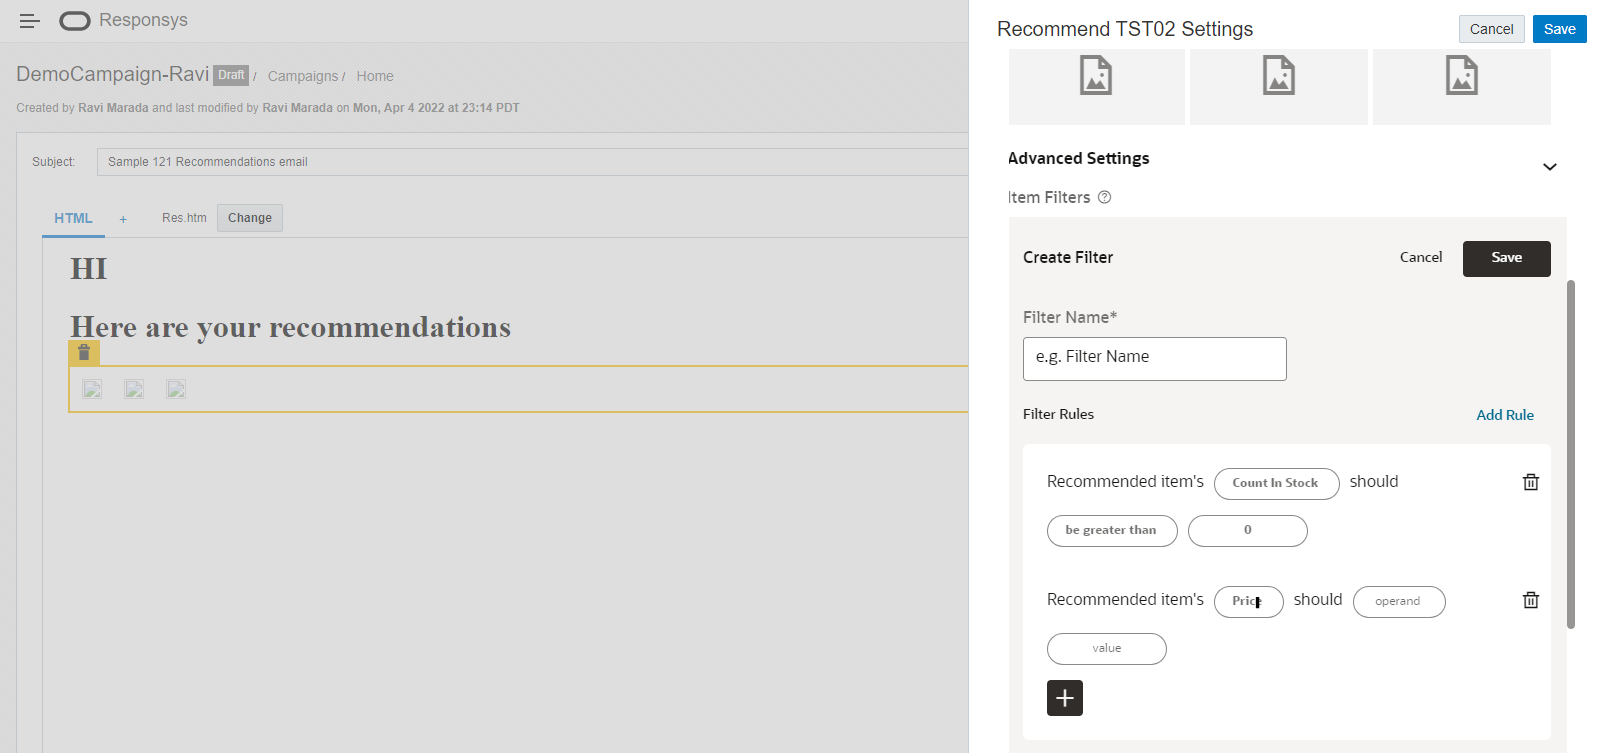
- (Optional) In Advanced Settings, click Add Filter, and give your filter a name.
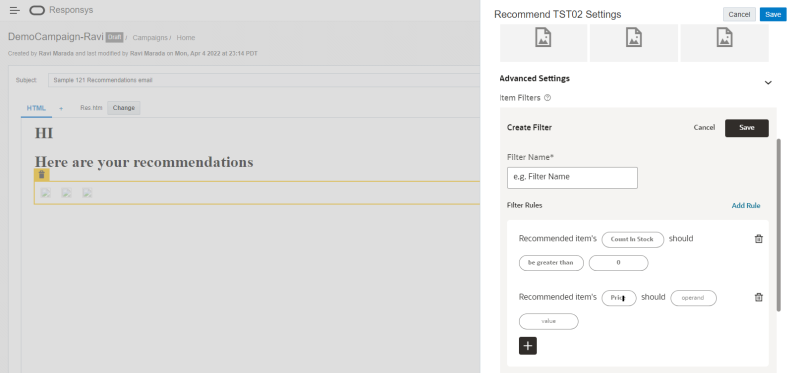
- (Optional) Click Property to indicate which property you'd like to use to filter what Recommendations display. You can use any mapped attributes such as, Product ID, Name, Price, Sale Price, Currency, Count In Stock, or a custom property.
Example: A company wants to make recommendations to their email recipients, but they have some products that tend to sell out very quickly. Because of this, they filter their recommendations by Count in Stock.
- (Optional) Click on Operand to select an operand, and enter a Value.
- Enter a product ID into the Fallback Items to Display text box, then press the Enter key.
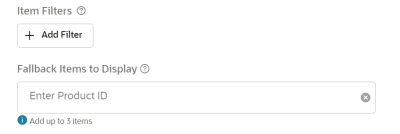
- Repeat for each product ID you'd like to add.
If Recommendations doesn't pull enough products to match the Item Count because of the filter, the products in the Fallback Items to Display text box will display instead.
Note: The number of product IDs for Fallback Items to Display must match the number in Item.
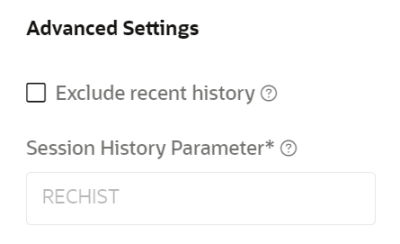
- (Optional) In Advanced Settings, Exclude recent history can be enabled. This will exclude items a user has recently interacted with from appearing in recommendations. It will avoid that items a user has just purchased or viewed appear in the list of recommendations.
In Session history parameter it is possible to enter name prefix for the RPL variables that contain historical user behavior relevant for Recommendations.
Note: Responsys Personalization Language (RPL) is the language used for generating HTML and Text for email, web and other uses based on defined templates. For more information read here.
The default value is RECHIST. This value may also come from Infinity Streams.
-
(Optional) In Advanced Settings, you can enable localized Recommendations, which ensures that customers only see items relevant to their locale.
- Click Save.
- In order to see a preview of the recommendations, save the email template.


Recommendations uses the User Locale value set in Responsys to filter recommendations specific to the customer's locale. You will need to provide the Responsys Locale Variable in the form field to provide localized recommendations. Learn how to Enable Localized Recommendations for your Email Campaign.
Setting up personalized Recommendations for triggered emails
Setting up personalized Recommendations in batch emails
Creating Recommendations Service and Getting Recommendations Using REST API
Adding Recommendations to a Website Using Web Personalization