Creating an action: Basic Details and Rules for actions
Actions are configured in four steps:
- Basic Details: You’ll provide a name and description for your action so that it is easily recognized. Learn more about the Basic Details step.
- Rules: You’ll define the behaviors and filters that make up the rules you want to listen for in real-time. Learn more about the Rules step.
- Sources: Optionally, you can choose an Oracle Unity source. This means that after the action’s rule set are met, you can send additional profile data to a destination. The destination action system can use this additional profile data to personalize the content shown to customers. Learn more about the Sources step for Oracle Unity as a source.
- Destinations: You’ll select the specific data you want to send and to which action system you want to send it. Learn more about the Destinations step for the following products:
In this topic, you'll learn about configuring the first two steps when creating an action: Basic Details and Rules.
Prerequisites:
- Before you can create an action, you must be assigned a role that includes the Manage Actions user right.
- A connection must be configured and enabled. When creating an action, you will be required to select an enabled connection and destination before you can save.
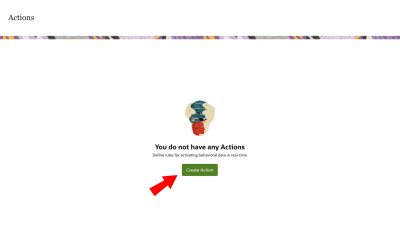
To create an action:
- From the Actions screen, click Create Action.
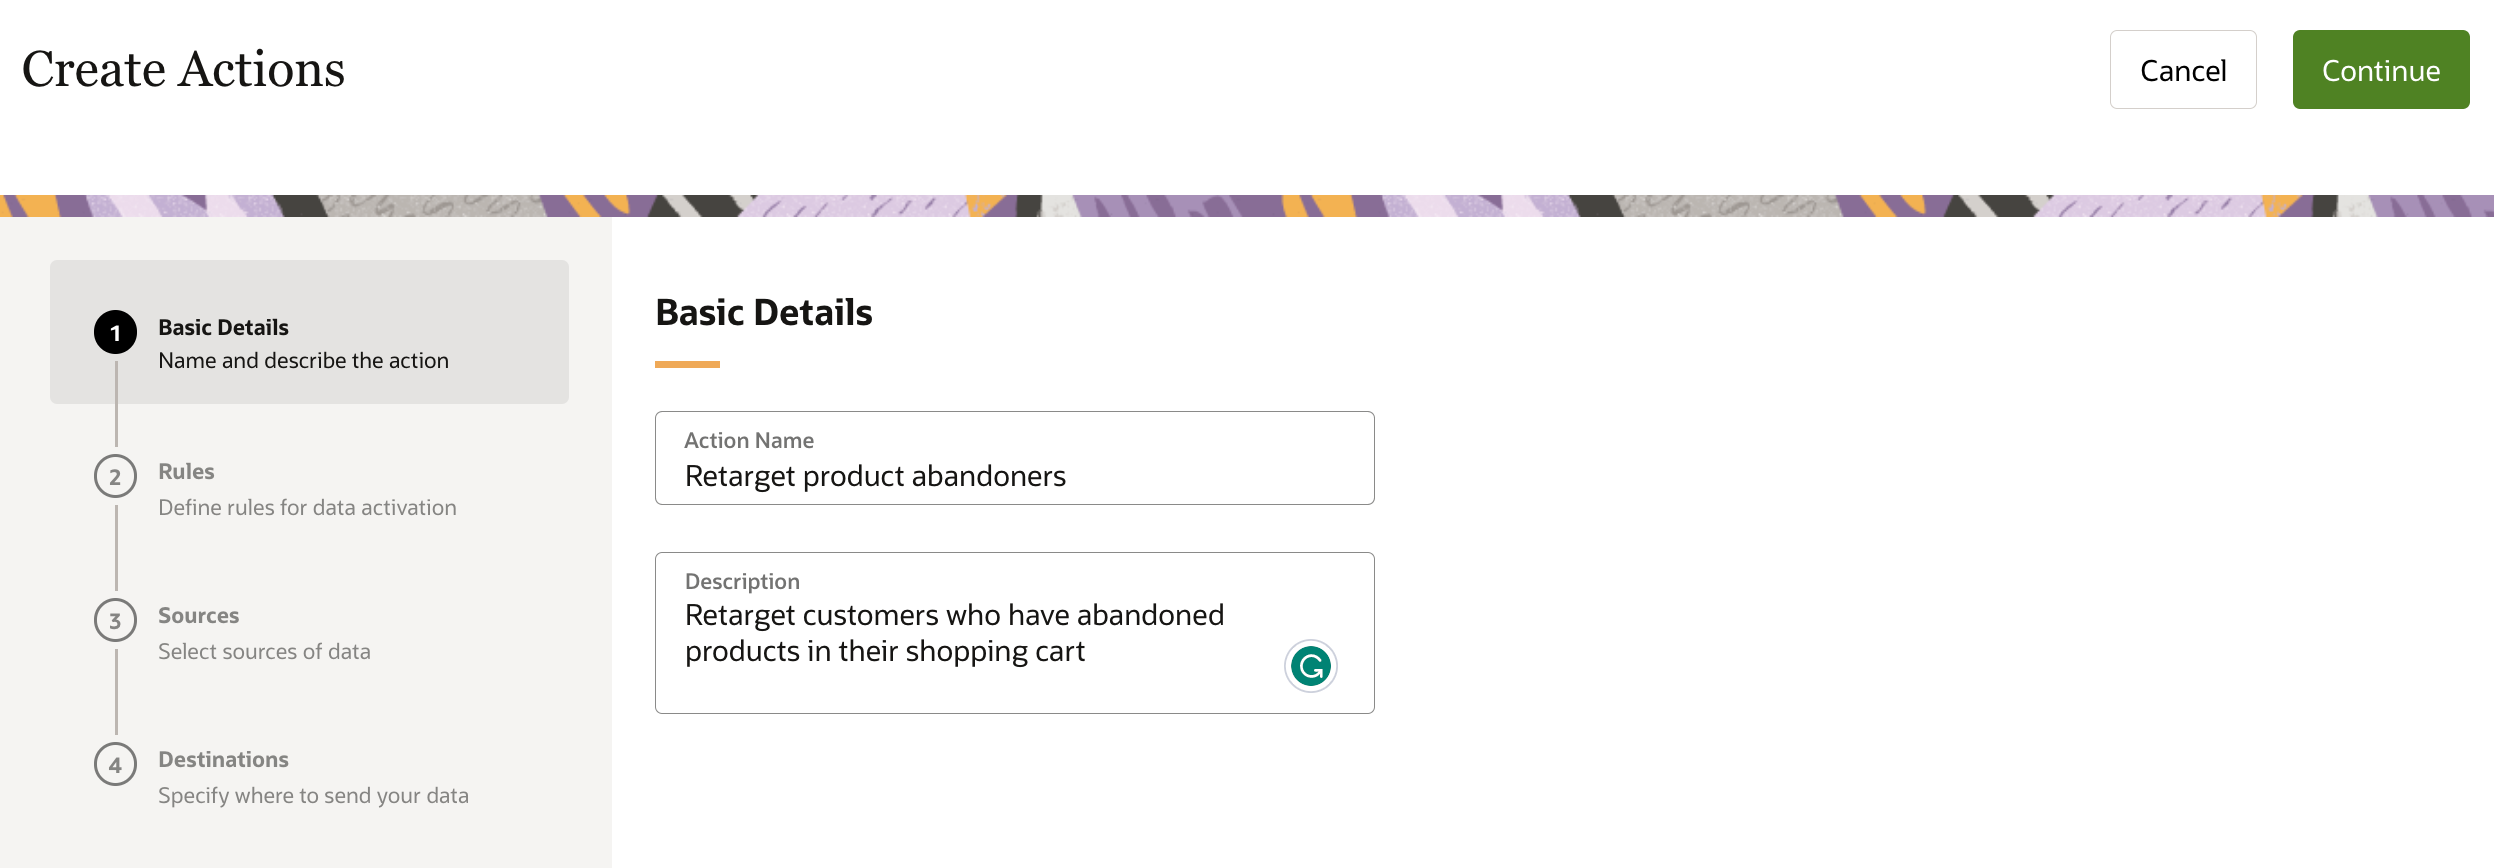
- On the Basic Details screen, enter a name and description that helps you easily identify your action.
The Action Name and Description fields are both required, and the name you enter must be unique.
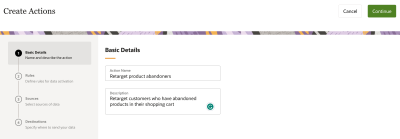
- Click Continue .
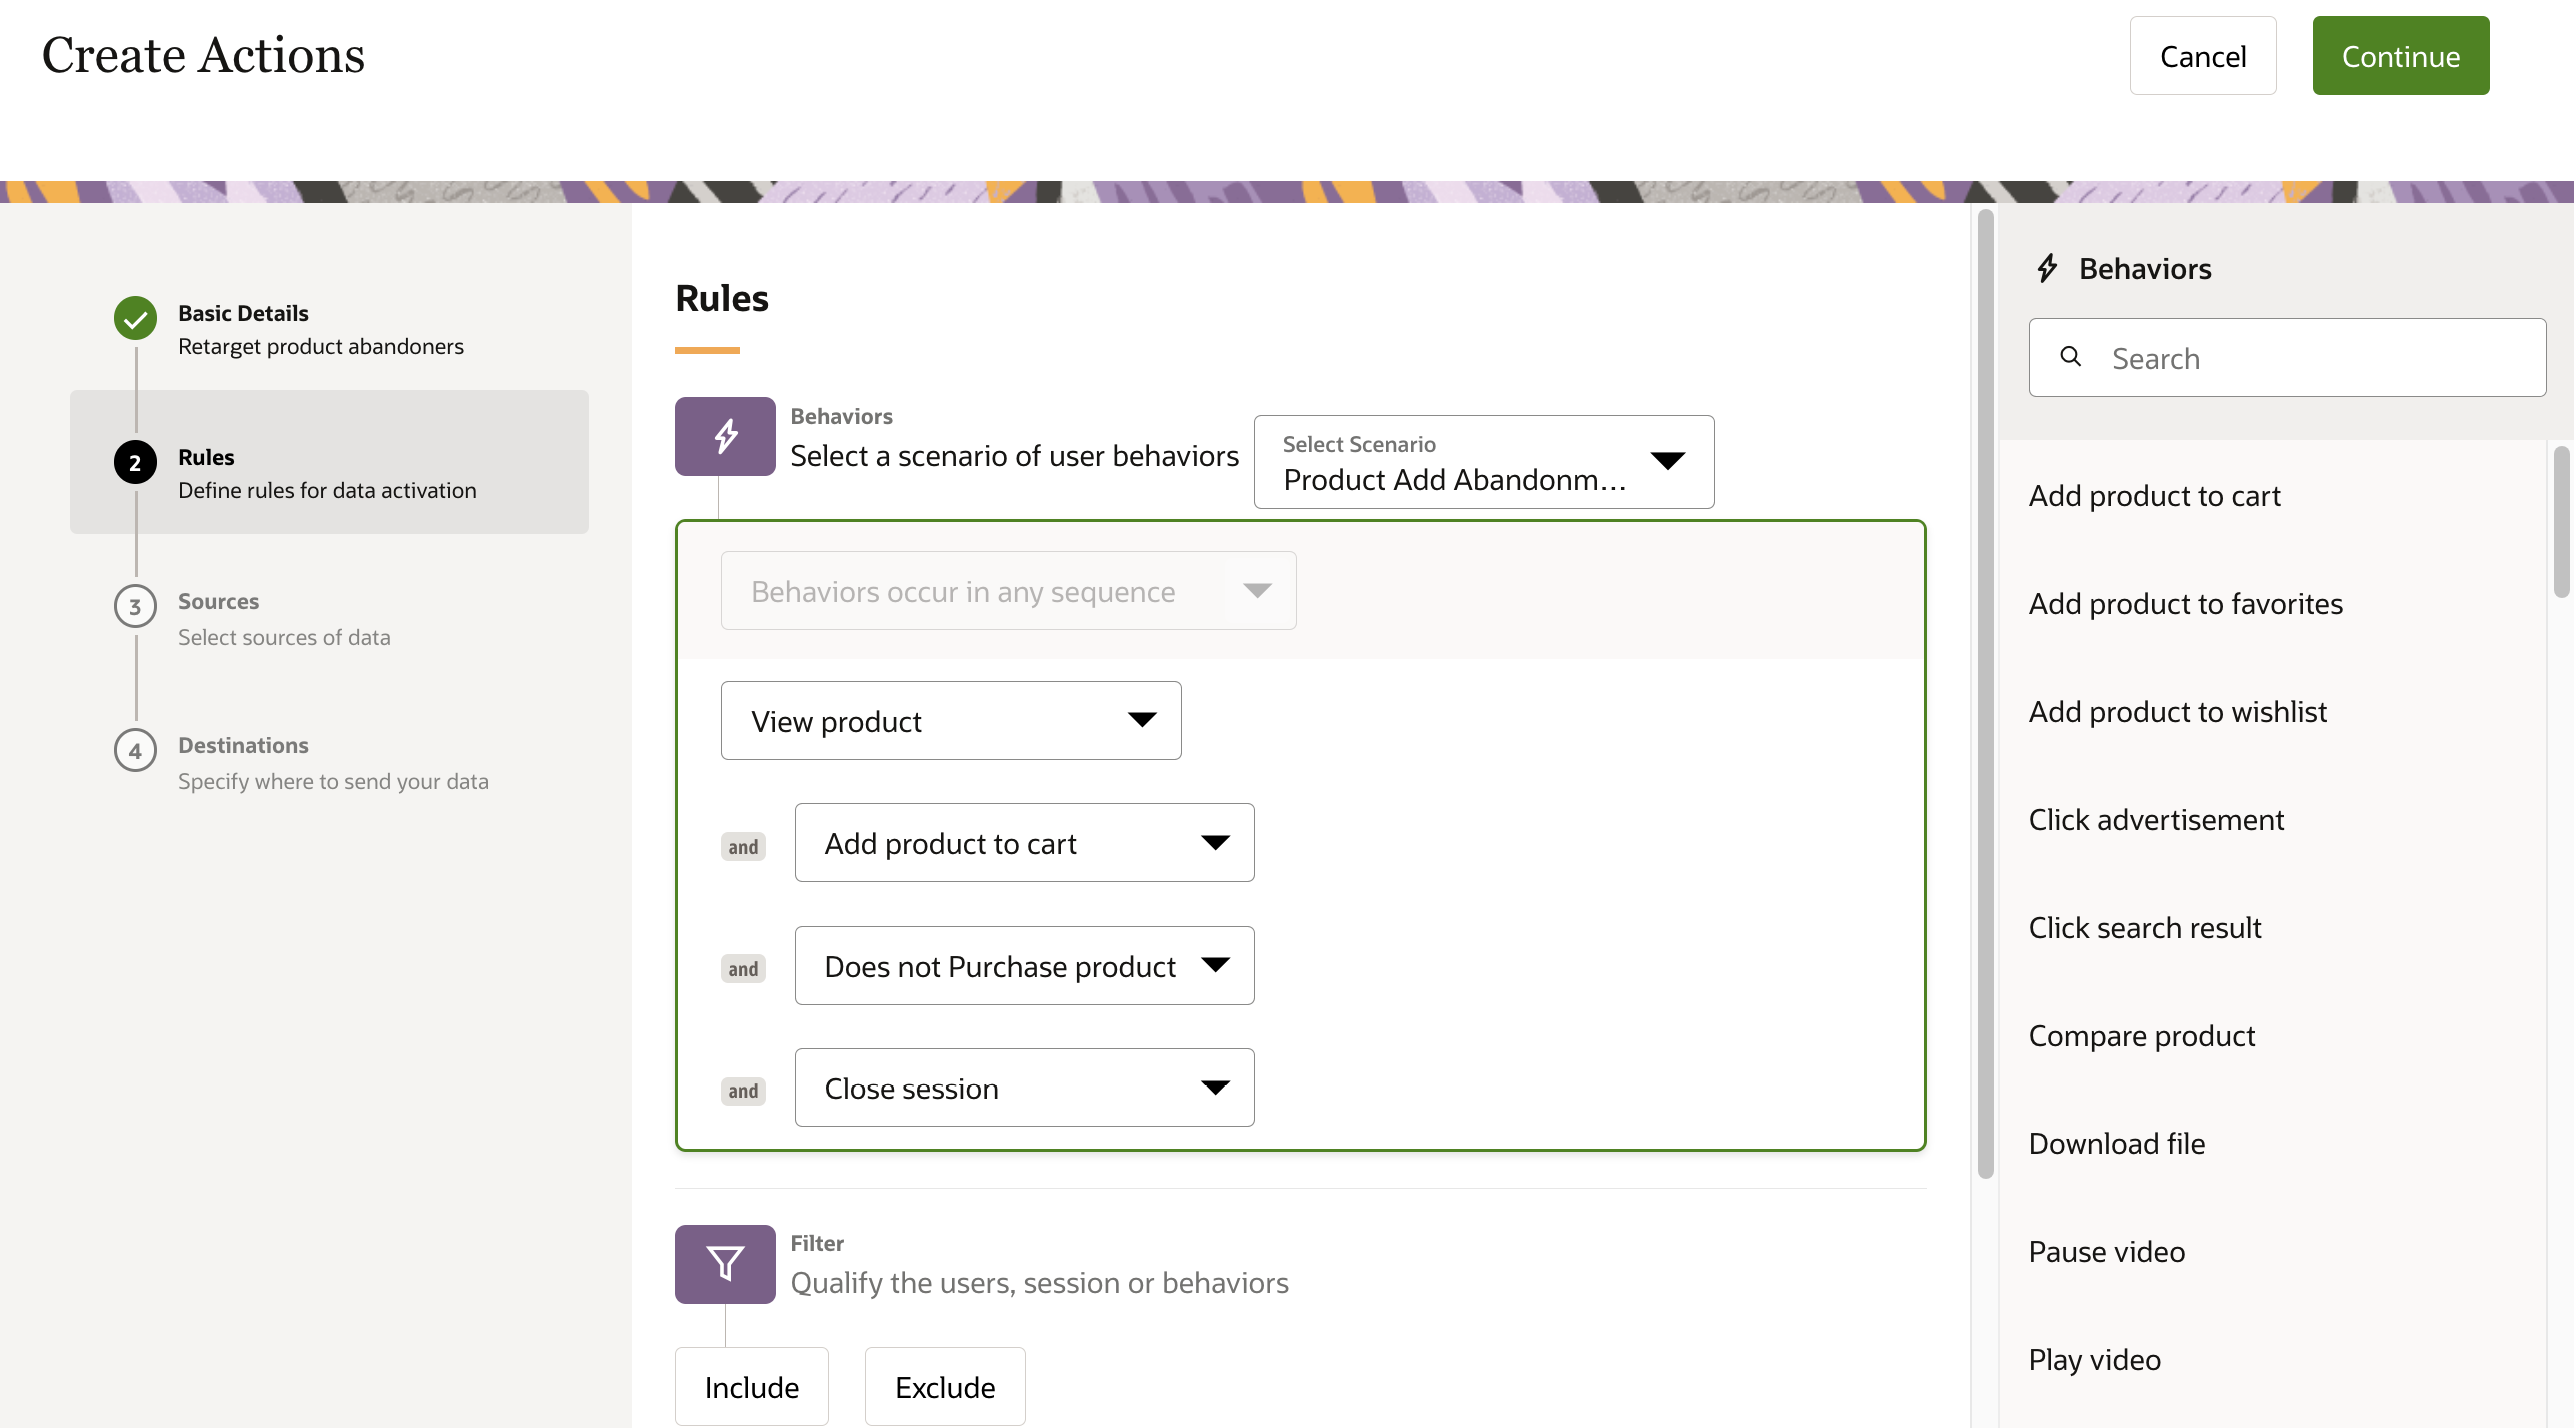
The Rules screen displays where you will be prompted to select from a list of pre-defined scenarios.
- Select a scenario from the Select Scenario, or select Custom Scenario then add Behaviors from the right-side panel. Learn more about scenarios and behaviors.
Selecting one of the following pre-defined scenarios will populate a set of behaviors that Oracle Infinity can listen for in real-time:
- Content Group View
- Form Abandonment
- Post-form Engagement
- Post-purchase Engagement
- Product Add Abandonment
- Product View Abandonment
- Search Abandonment
- Wishlist Engagement
- Custom Scenario

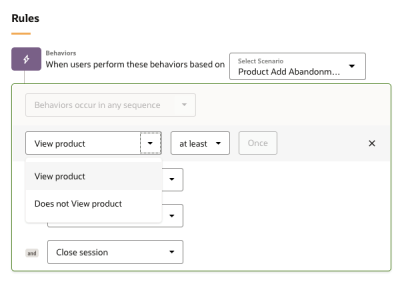
Example: The Product Add Abandonment scenario will display the following set of behaviors.

- Once behaviors have been added, you can:
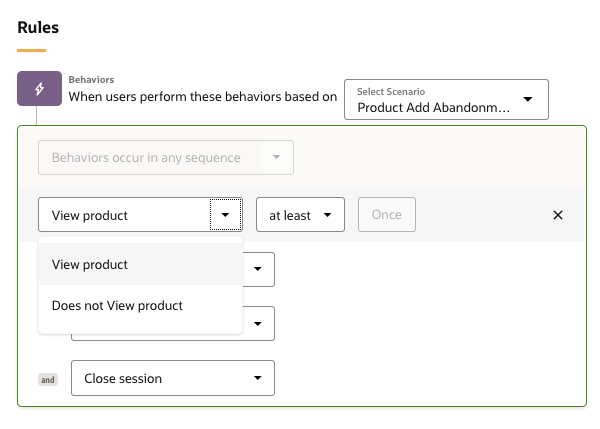
- Modify them to meet your desired conditions.
For example, you can change the View Product behavior to Does not View Product. Click the drop-down arrow next to the behavior's name to make this change.
- Specify the number of occurrences for a behavior.
For example, you may be interested in customers who View Product at least 4 times, or customers who Add product to cart exactly 2 times. Placing your cursor next to the behavior allows you to configure these options.
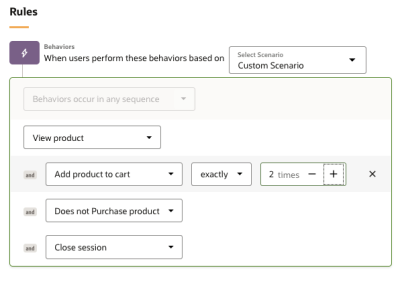
- Add additional behaviors by selecting them from the right-side panel, and remove behaviors by clicking the X.
Note: Any modifications you make to the behaviors will change your selected pre-defined scenario to a custom scenario.
- Modify them to meet your desired conditions.
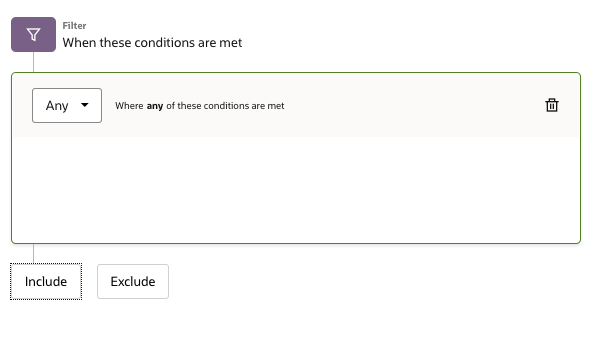
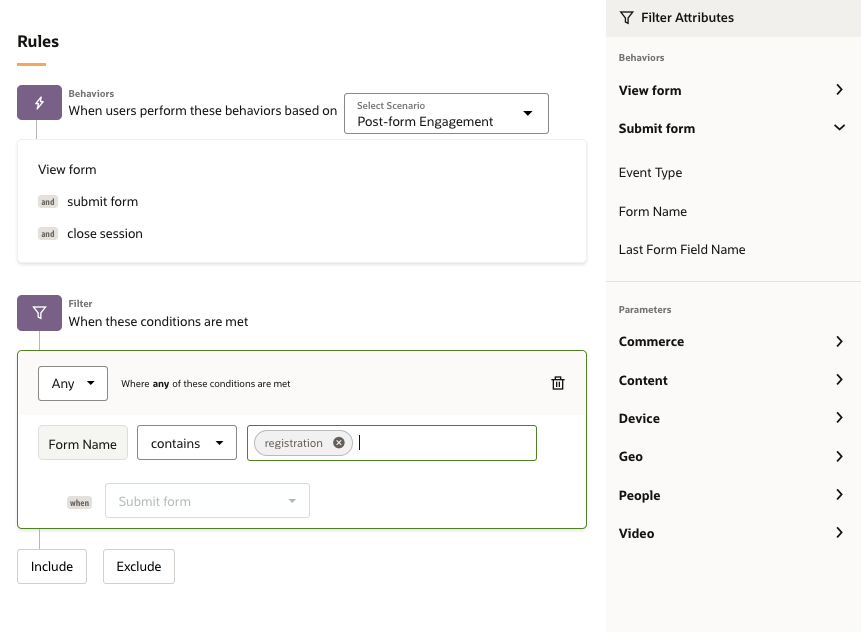
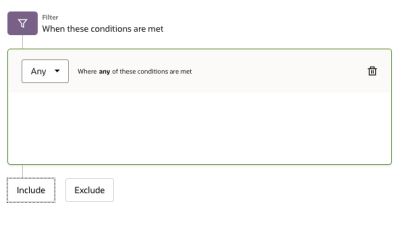
- (Optional) Still on the Rules screen, use the Filter section to further refine the conditions you want to listen for in real-time in conjunction with the behaviors you previously selected:
Example: If you wanted to retarget customers who exhibited the Submit Form behavior, you may want to include a filter with the specific form name that was submitted.
- Click Include or Exclude to define the conditions you want evaluated.
- Using the Filter Attributes in the right-side panel, select the behaviors and parameters that will define your filters, making use of the following operators: equals, exists, contains, starts with, or ends with.
Tip: If you don't see a parameter, navigate to Settings and check the Analytics and Actions option to include the parameter in Actions.
Example: If you want to filter on the specific form name for your Submit Form behavior, click Include , expand the Submit Form behavior to see its Behavior Attributes in the right-side panel, and select Form Name. Then, select an operator, and enter your form name. In this example, you want to include form names that contain registration.

In another example, you may want to include form names containing the word registration and to include when customers are located in either the country of Australia or New Zealand. You also want to exclude traffic where the page title contains the words staging or development.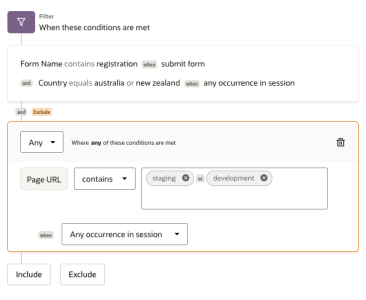
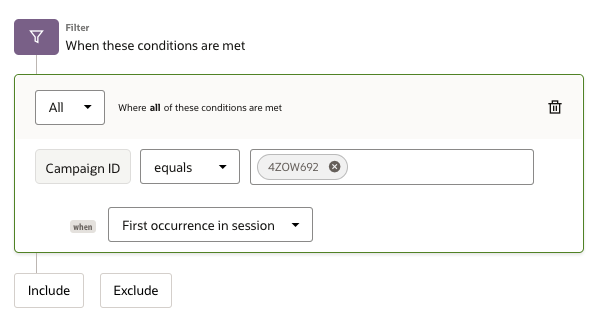
- Specify when the parameter should occur.
When you select a parameter to be used in a filter, you’ll notice an option to specify when that parameter occurs. You may choose any occurrence in session, first occurrence in session, or last occurrence in session. This option can be used in the example when you want to act on those customers whose first occurrence of a campaign ID in the session equals 4ZOW692.

- Click Include or Exclude to define the conditions you want evaluated.
-
Click Continue.
The Source screen displays. Use this screen to add an Oracle Unity source. This allows you to include additional profile data in real-time when the conditions you configured on the Rules screen are identified. Learn more about configuring the Source screen for Oracle Unity as a source.
- Click Continue.
The Destinations screen displays. The Destinations screen allows you to select where your data is to be sent when the conditions you configured on the Rules screen are identified in real-time by Oracle Infinity. Learn more about configuring the Destinations screen for an Oracle Responsys destination.