Activate product subscriptions
This guide will help you through the steps you must take to make the Oracle Responsys Express that you ordered available to you, so that you can log in to your instance(s) and complete the setup.
Oracle Responsys Express includes a subscription to Oracle Marketing Automation for Responsys and Eloqua (Responsys Express only if you're using this topic) and the starter edition of Oracle Content Management for managing content assets that you'll use when creating messages. It also includes Oracle Identity Cloud Service (IDCS), which you'll use for adding and managing users.
Use the following sections as you activate the product subscriptions:
Before you begin
Once your organization has signed up for the Oracle Responsys Express service, you will need to provide an initial contact to Oracle. This person will be assigned as the Oracle Cloud Account Administrator and the first Responsys Express Instance Administrator.
- Plan and activate your subscription and create service instance(s).
- Receive emails from Oracle Cloud Portal regarding the subscription, such as when new services have been purchased and when the new cloud account is ready.
- Receive the welcome email after Responsys Express instance has been provisioned. This email contains Responsys Express Instance Administrator login instructions.
If you are the correct person for this role, proceed to the Next steps section below.
Activating your Oracle Responsys Express subscription
To activate Responsys Express, follow these steps:
- Step 1: Activate your Oracle Public Cloud Services account
- Step 2: Sign in to Cloud Portal using the Console URL
- Step 3: Create your service instance
- Step 4: Sign in to the application
If you have trouble completing these steps or have other issues with your Oracle Cloud account, review the Oracle Cloud troubleshooting tips.
Step 1: Activate your Oracle Public Cloud Services account
After the product is purchased, the initial contact should receive an email from Oracle Cloud services. This email has the subject line "Action Required: Welcome to Oracle Cloud. Please Add Your Subscription(s) to a Cloud Account to Get Started." It provides instructions for creating a new Oracle Cloud Account or for using your existing Identity Cloud Service for the new services.
Note: The Oracle Cloud Account is not for Responsys Express itself, but for the administrative portal for the Oracle Cloud services to which you have subscribed. You will use the Oracle Cloud - My Services portal to activate Responsys Express.
To activate your account:
- Click either the Create New Cloud Account or the Activate into Existing Cloud Account button in the email that you received.

- Create New Cloud Account: The Activate My Services! page automatically opens in a web browser window. Skip to Step 2.
- Activate into Existing Cloud Account: The Oracle Cloud dashboard opens in a web browser window. Open the navigation menu and select Account.

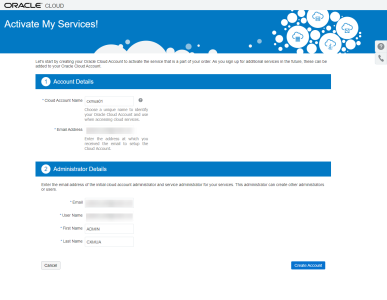
In the Activate tab, click Cloud services account setup. The Activate My Services! page opens in a web browser window.

- In the Cloud Account Name field, enter the name you would like to use for your Oracle Cloud Account.
Note: This name is used to form part of the URL you'll use to sign in to the system. Oracle recommends that the account name indicate your organization and/or division name.
-
Complete the Email Address field using the email address that received the activation email.
- Optionally, edit the Administrator Details.
Note: For example, if you will not be the Service Administrator of the service, assign a new Service Administrator here.
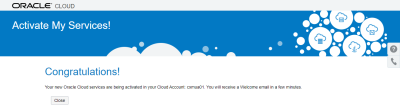
- Click Create Account. The Congratulations! page informs you that you will receive a welcome email when the activation is completed. Click Close to dismiss the window.


Step 2: Sign in to Cloud Portal using the Console URL
After your Oracle Public Cloud Service account is activated, you will receive an email with the subject line "Setup Complete. You're ready to go.”
To sign in to Oracle Cloud portal:
-
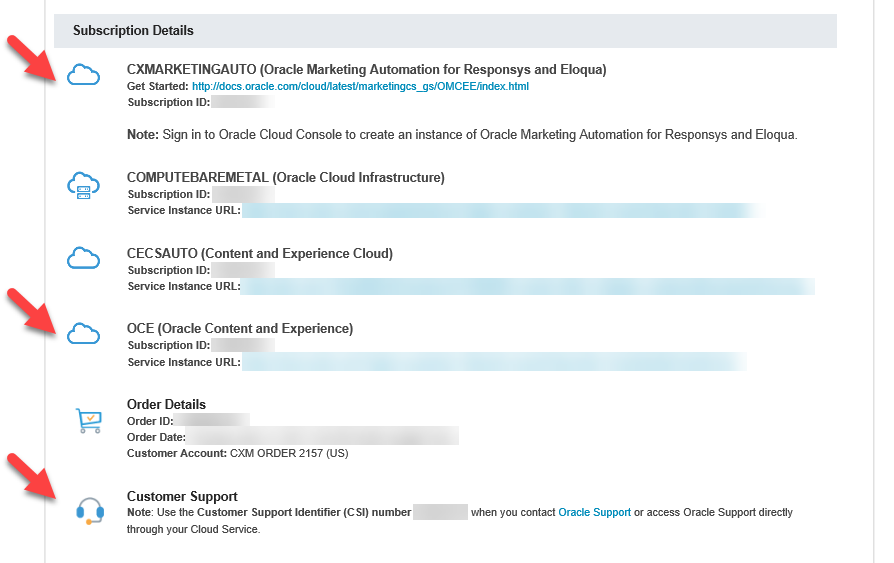
Open the "Setup Complete" email.
Locate the Subscription Details section. Verify that there are items such as "Oracle Marketing Automation for Responsys and Eloqua" and "Oracle Content and Experience". The Customer Support section contains your CSI number, which you'll need if you contact Oracle Support.

- Locate the Access Details section, and then click the Oracle Cloud Console: Console URL link. The link opens the Oracle Cloud Account Sign In page.

- To sign in, enter the Username and Temporary Password provided in the email. The Set a new password for your user account page is displayed. (Identity Cloud Service manages user access to Oracle Cloud.)
- Following the instructions on the page, change the temporary password to your new password. When you enter the new password, the password criteria checklist icons change to green when you have entered a valid new password. The Reset Password button becomes available when the New Password and Confirm New Password fields match.
- Click Reset Password to continue.


After your password is changed successfully in the system, the Oracle Cloud dashboard is displayed in your web browser.
Step 3: Create your service instance
When you create an Responsys Express service instance, this begins the process of Oracle configuring your Responsys Express account. When the new service is ready to use, you will receive an email with further details about how to sign in to Responsys Express.
To create your Responsys Express service instance:
- From the Oracle Cloud dashboard, click the Create Instance tile.
- On the Create Instance dialog, locate Oracle Marketing Automation for Responsys and Eloqua and then click Create.
- On the Create New Oracle Marketing Automation for Responsys and Eloqua Instance page, complete the instance details:
- Name: enter a unique name for your instance.
- The instance name identifies your service only within your Oracle Cloud identity domain on the Oracle Cloud portal. For example, Oracle does not use it to name your Responsys Express instance itself.
- The instance name must start with a letter, and it can have up to 25 lower case letters and numbers. You cannot use spaces, upper case letters, special characters, or non-English characters or numbers.
- Plan is pre-selected (Oracle Marketing Automation for Responsys and Eloqua). You do not need to change this field.
- Type of instance: This is pre-selected (Base Express). You do not need to change this field, unless you have already created your base instance and are creating additional instances for your organization. If your organization has ordered more than one instance, and you have already created your first instance (Base Express) choose Additional Express when you create each additional service instance.
- Default customer hosted reply-to address: Enter a valid email address to which you want Responsys Express to forward recipients' replies that the system does not identify as "out of the office" replies or as unsubscribe requests. After Oracle configures your account, you may change the address if needed or add additional addresses through the Responsys Express Settings pages.
You must host this email address.
A valid email address cannot belong to the following domains: rsys2.net, rsys2.com, rsys5.net, rsys5.com, rsys8.net, rsys8.com, rsys9.net, rsys9.com, responsys.com, oracle.com
Responsys Express attempts to identify any out-of-office and unsubscribe requests received by an Responsys Express-hosted "Reply To" address. The system forwards the remaining replies that we receive on your behalf to the reply email address that you specify as the default customer-hosted reply-to address.
- Time Zone: Select the time zone for your Responsys Express account. Ensure that this value is correct, because the account time zone can only be changed by contacting Oracle Support and only during the first 30 days after activation.

Choose your add-on resource allocation amounts: To select a resource to be configured for this service environment, type a number (in the range of those shown as available) in the field. Repeat this step for each resource you want to activate.
NOTE: The amount available is shown below the field where you enter the amount allocated.
- Name: enter a unique name for your instance.
- Optionally, change the Administrator Details, as needed. This should show your information. Unless you have already set up another Administrator user for your identity domain, we recommend that you do not change the information here.
- The administrator details show the contact information for the person who will be both the service instance administrator in the Oracle Cloud portal and the first instance administrator created for Responsys Express in Oracle Identity Cloud Service (IDCS), where system users are configured.
- Oracle Cloud sends the administrator details to Responsys Express, and the administrator shown here is set up as the Responsys Express instance administrator. This person receives the “Welcome” email after your instance is configured in Responsys Express.
- Review your changes carefully, and then scroll to the bottom of the page and click Create. The Confirmation dialog is displayed.
- On the Confirmation dialog, click Create to submit your "create new instance" request to Oracle. You can also click Cancel to go back without submitting your request and verify that the details are correct.
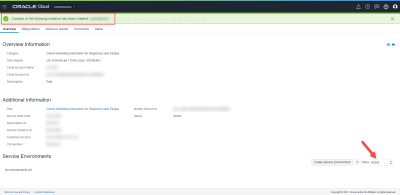
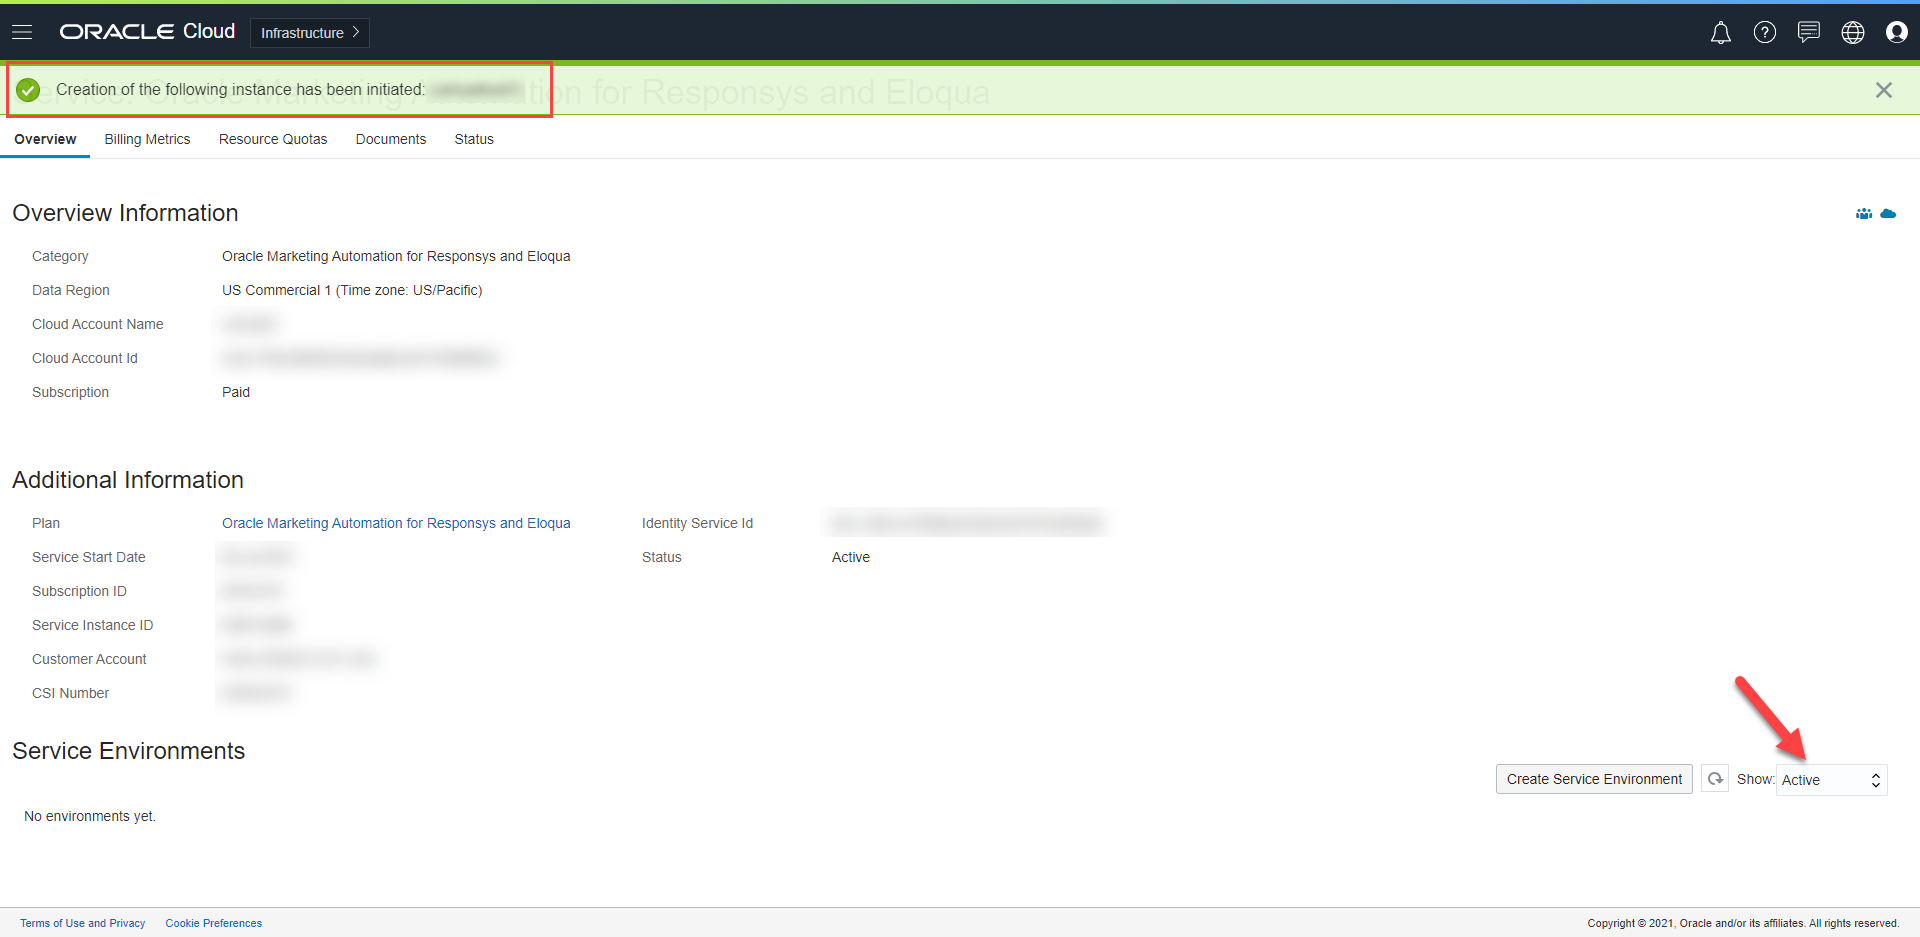
After you create the Responsys Express service instance, the Service Details - Overview page is displayed and a message banner across the top of the screen identifies the service instance to be activated. You won't see the new instance in the Service Environments section until it is in "Active" status, unless you change the filter to Show:All. If you show all, you will see the instance and its status will show "Initialized".
Important: Your Responsys Express instance (service environment) will not be available right away. It takes Oracle a few days (typically 1-3 business days) to complete the activation. Oracle notifies you by email when the new instance is ready to use, as described in Step 4: Sign in to the application. While you wait, you can proceed to Activating Oracle Content Management and begin the process to activate and set up Oracle Content Management. You can do all of the process until the task where you need to complete the configuration between Oracle Content Management and Responsys Express
If your organization has ordered multiple instances: Repeat this procedure for each Additional Express service instance you want to create.
- Log out of Oracle Cloud: When you are finished creating service instance(s), click the user menu, and then choose Sign Out.


Step 4: Sign in to the application
When the new service instance is ready to use, Oracle notifies you by email. The subject line is "Action Required: Your new Oracle Marketing Automation for Responsys and Eloqua instance in Cloud Account cloud_account_name is ready."
In the email, you will find your username, temporary password, and Responsys Express URL. Click the URL link to access Responsys Express and reset your password.

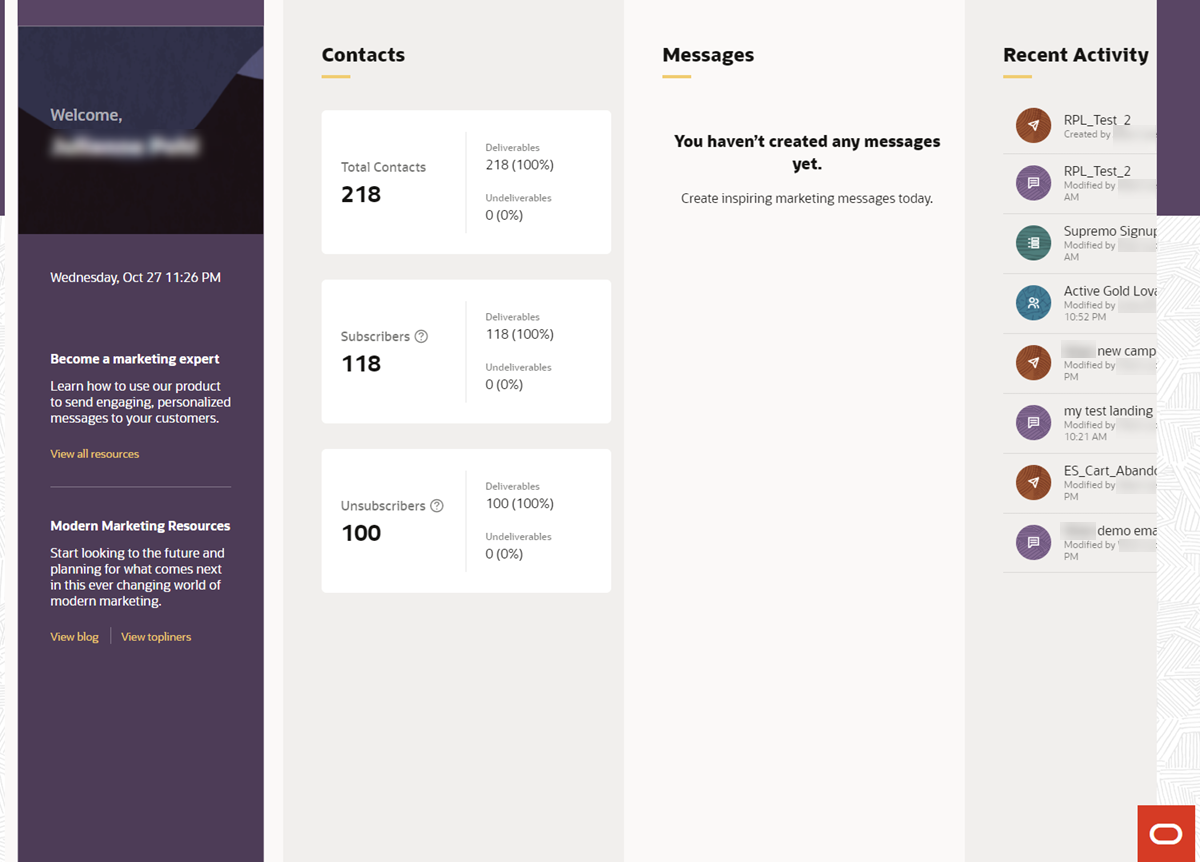
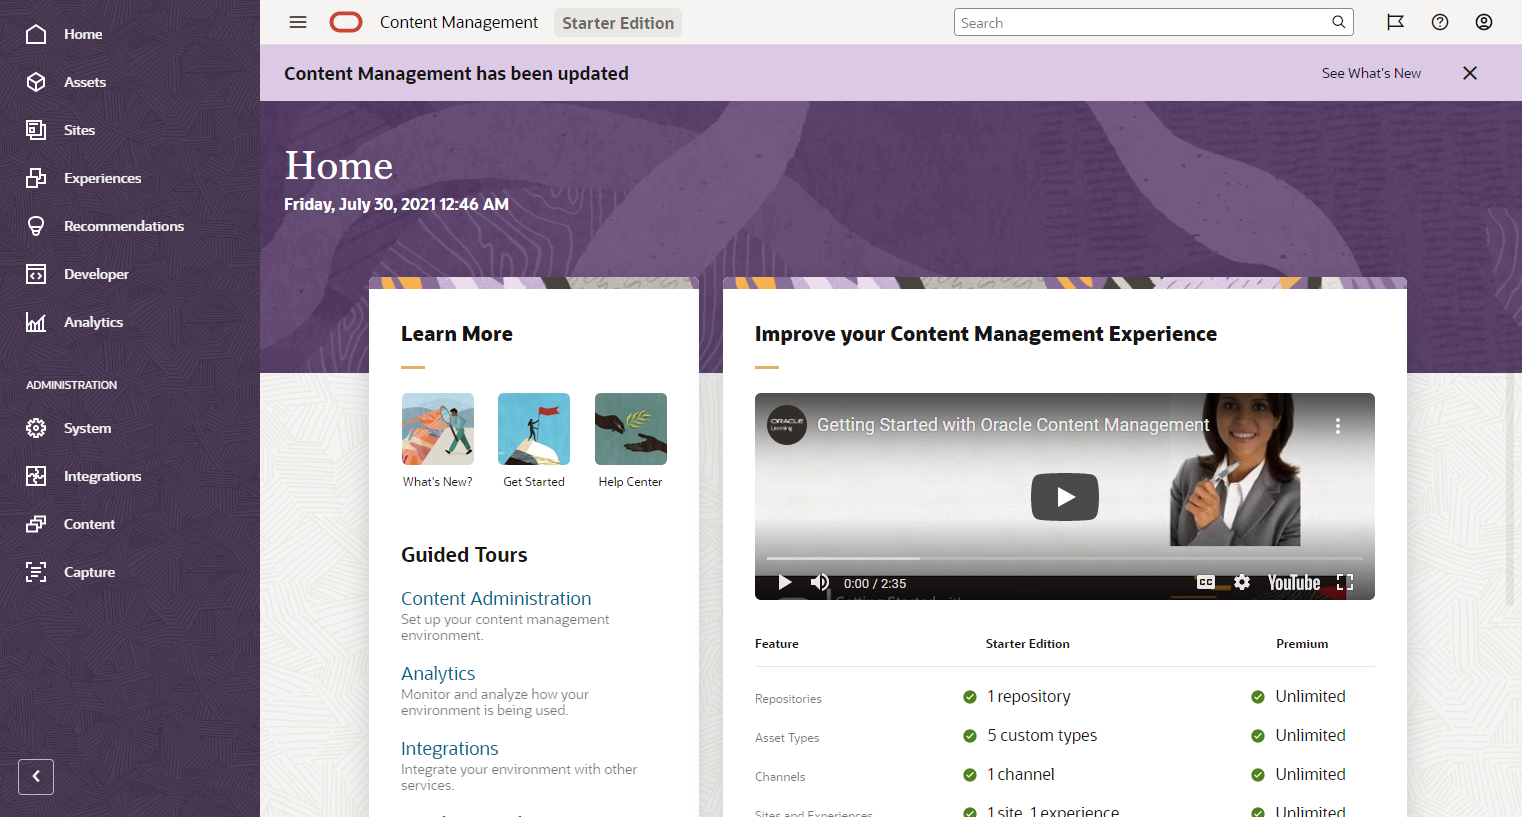
When you sign in to Responsys Express, you should see the following page:
Next step: If you have not already done so, continue following the steps in the next section to activate Oracle Content Management. This will enable you to manage the assets that marketers use when creating messages to send your customers.
Activating Oracle Content Management
Responsys Express includes Oracle Content Management for managing the assets (images and content) that you include in messages. You'll need to complete some setup steps in Oracle Cloud portal to activate it.
The main steps are as follows:
Important: If your organization has ordered multiple subscriptions to Responsys Express, you will have the corresponding number of Oracle Content Management Starter Edition subscriptions available. You'll need to repeat the procedures in this section to activate and configure each Oracle Content Management instance and perform the configuration to connect each Responsys Express instance with one Oracle Content Management instance.
Note: In setup interfaces, you may see the names "Oracle Content and Experience" or "Oracle Content Management." The current product name is Oracle Content Management.
Activate Oracle Content Management
To activate Oracle Content Management:
-
Go to the Oracle Cloud Console: Console URL link, and sign in using the user name that you received in your Setup Complete email and the password that you set in Step 2: Sign in to Cloud Portal using the Console URL.
-
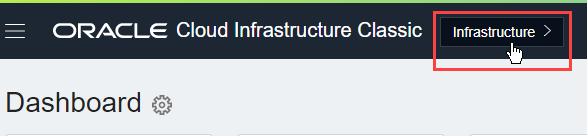
From the Oracle Cloud Dashboard page, click Infrastructure.

-
Sign in to Oracle Cloud Infrastructure, using the credentials (Username and Temporary Password in the Access Details section) sent in the "Setup Complete" email. You'll be prompted to change your password. After you successfully sign in, the Oracle Cloud - Get Started page is displayed.
Note: If you have web browser privacy blocker software running, the page may not load. Please enable or allow
*.oraclecloud.comto continue.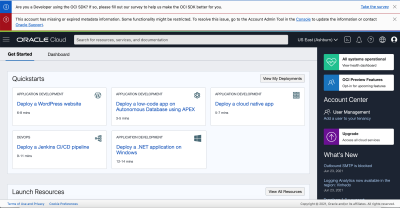
-
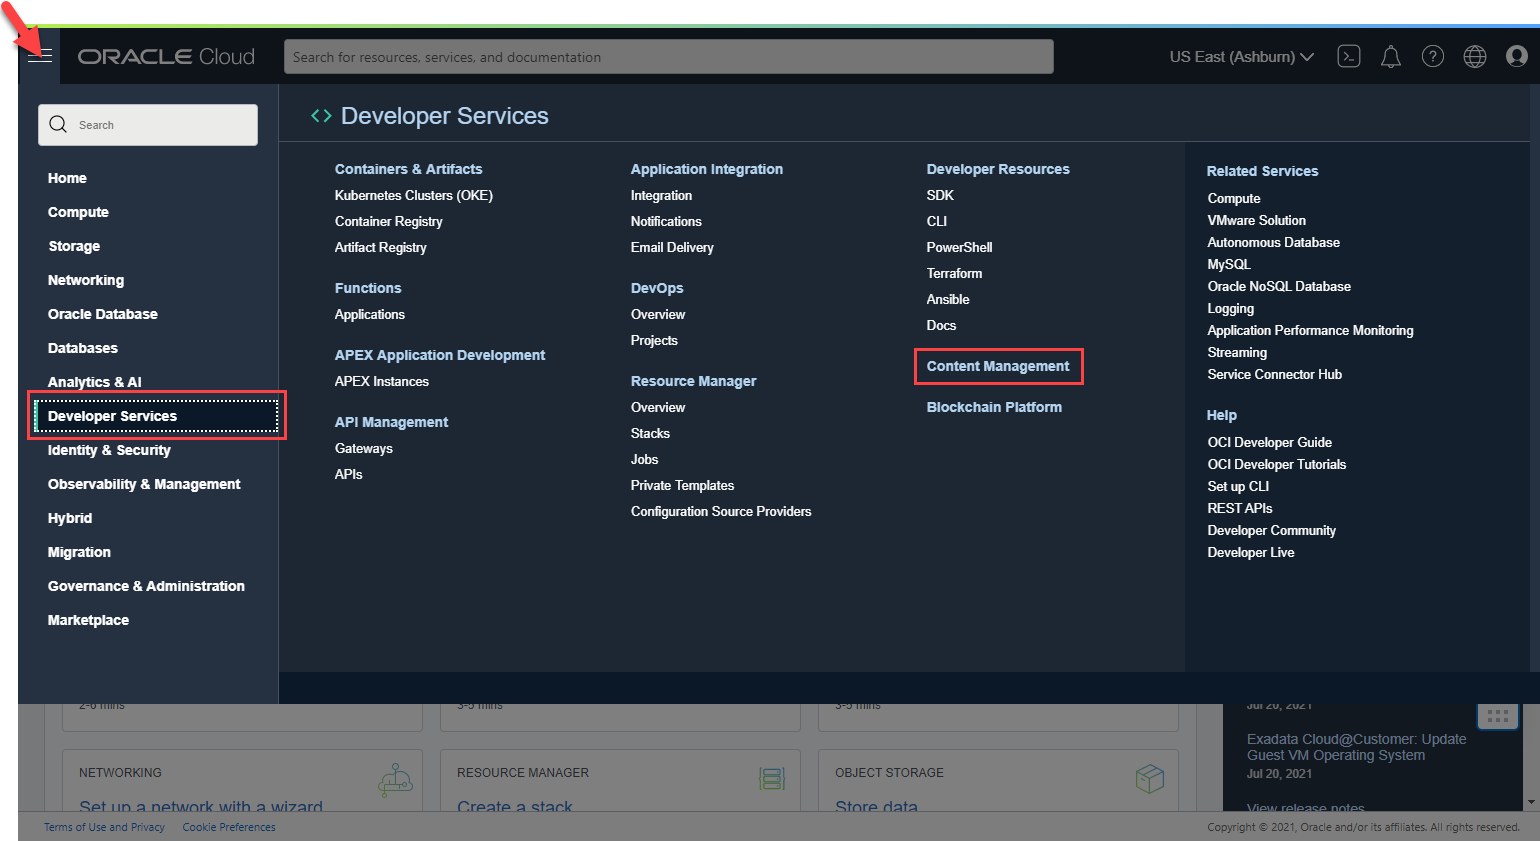
Click the navigation menu, select Developer Services, and then select Content Management.

-
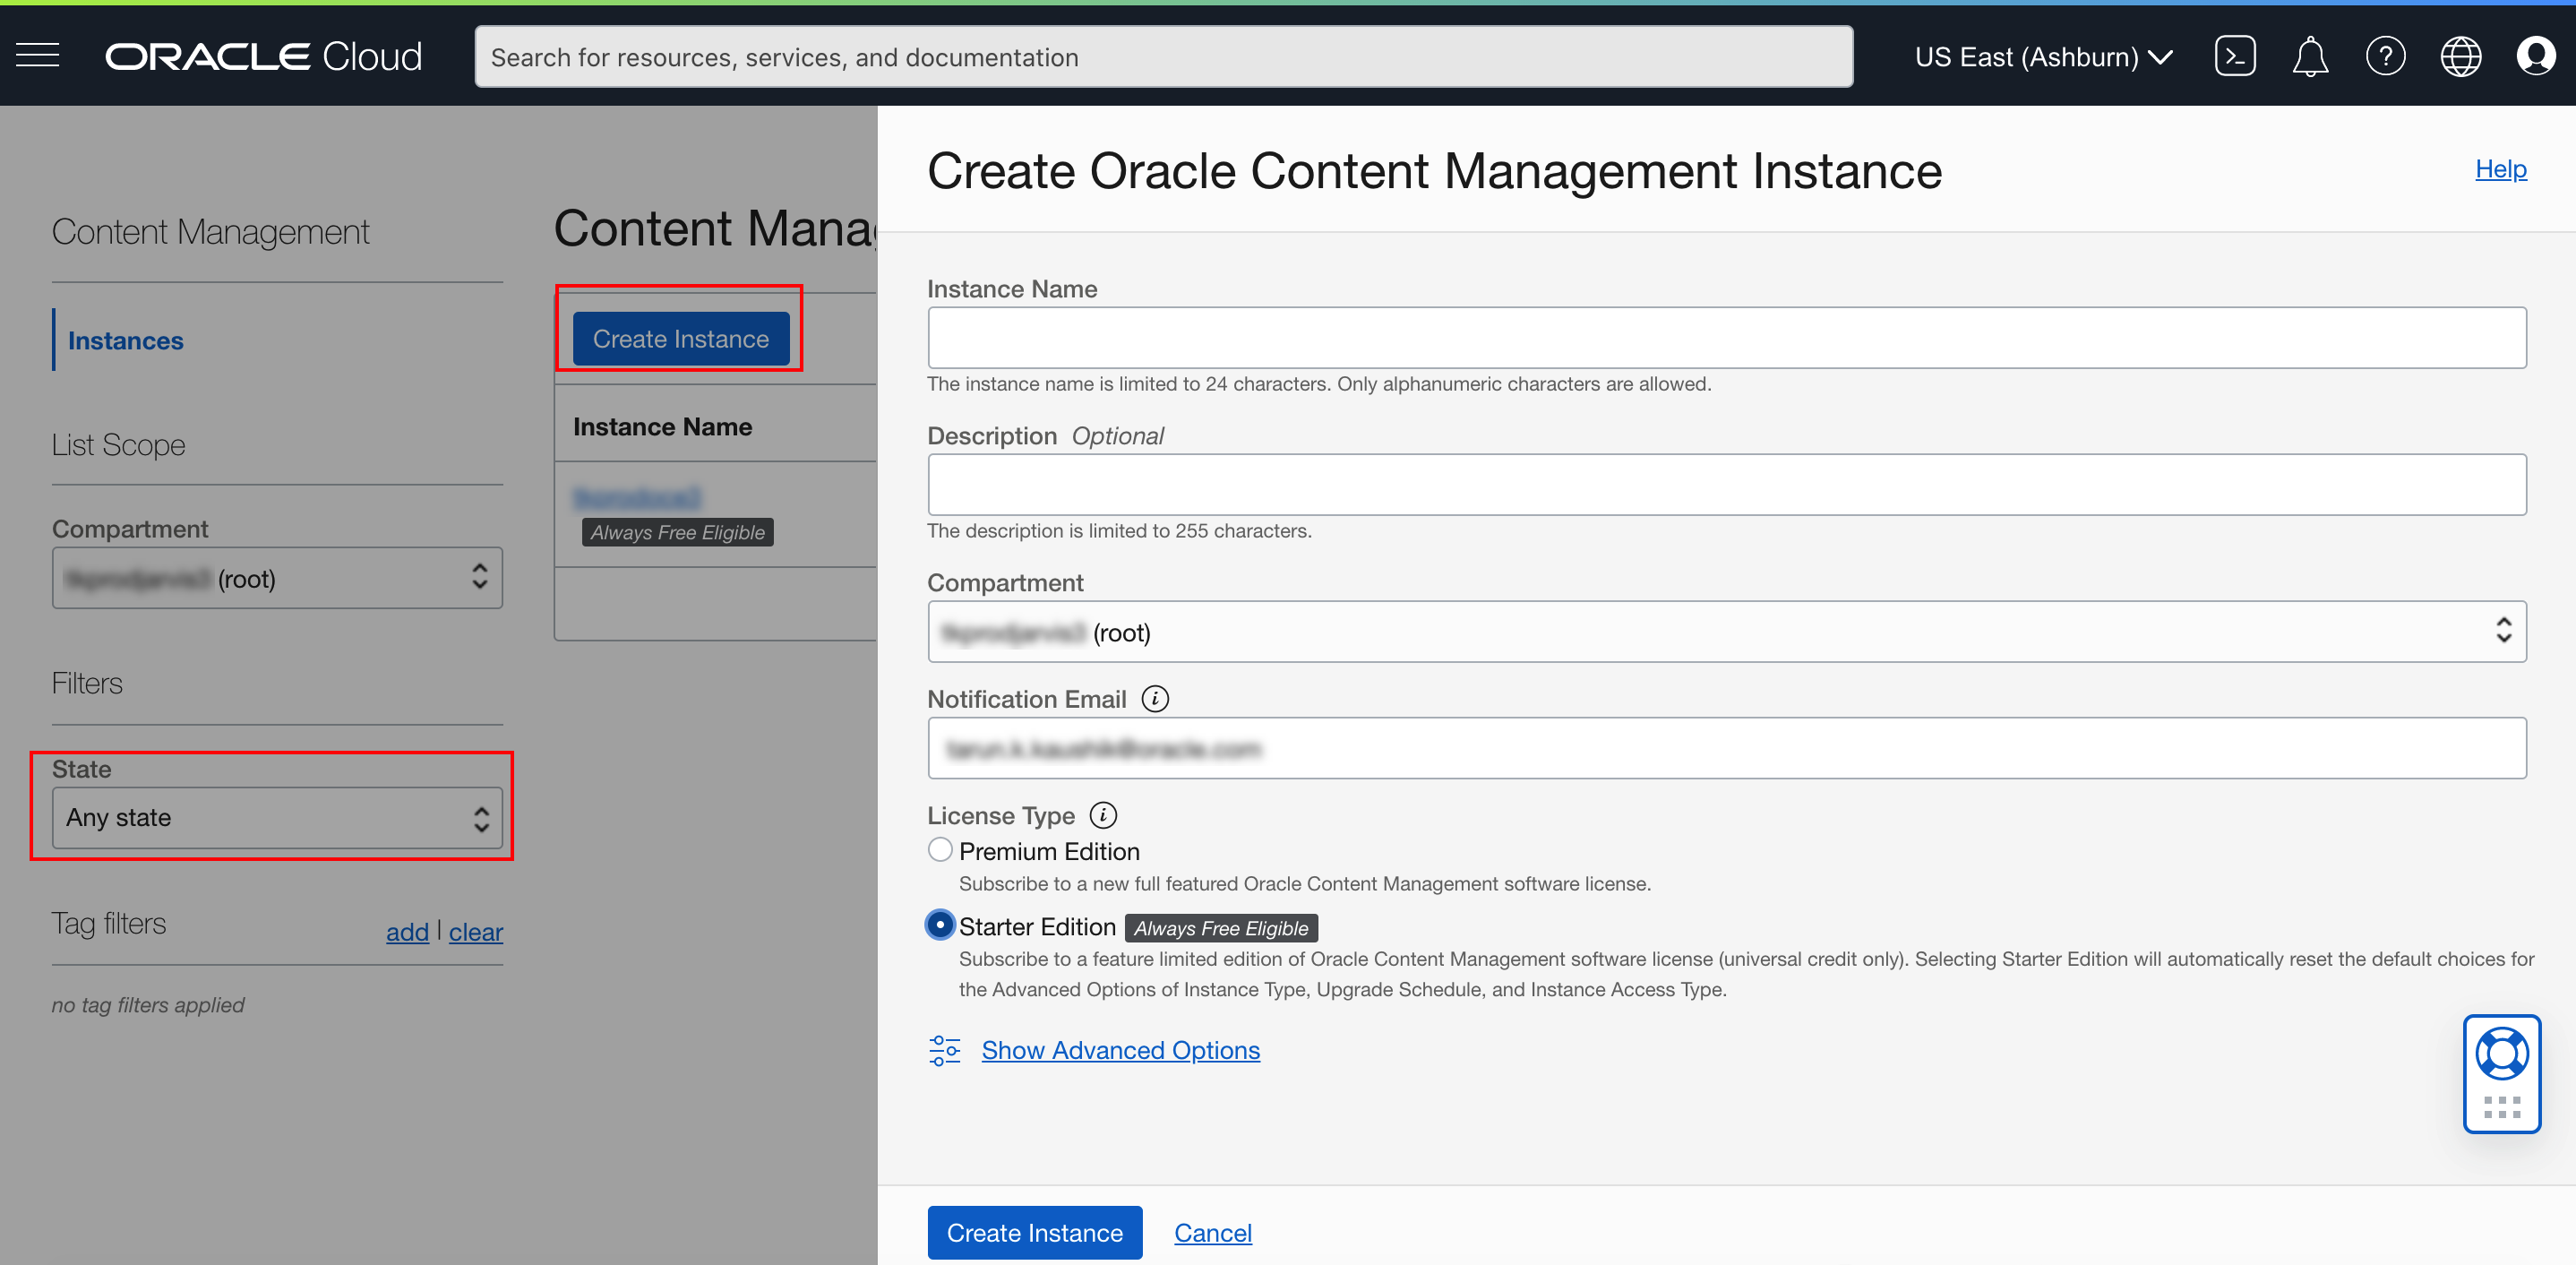
On the Content Management page, select the compartment (it's your Oracle Cloud Account name with "(root)" after the name). Click Create Instance.
-
On the Create Oracle Content Management dialog, complete the following fields, and then click Create Instance.
-
Instance Name: Enter a name for your Oracle Content Management instance.
-
License Type: Choose Starter Edition, which is included in Oracle Responsys Express, unless your organization has ordered Premium Edition. If your organization has not ordered the Premium Edition and you select it, you'll see the following error message: "The SaaS Premium Edition is not available in this tenancy. Either Choose Starter Edition or add SaaS Premium Edition entitlement to your account by contacting your Oracle Sales representative."

After you click Create Instance, a message will display in the upper right corner of the page, stating that "<instance_name> is being provisioned. This may take a while. The status will update in the instances list when it is done." For example, when the provisioning starts, the status will change to "Provisioning."
If your organization has ordered multiple instances: Repeat this procedure to create all of the Oracle Content Management service instances available for your organization.
-
-
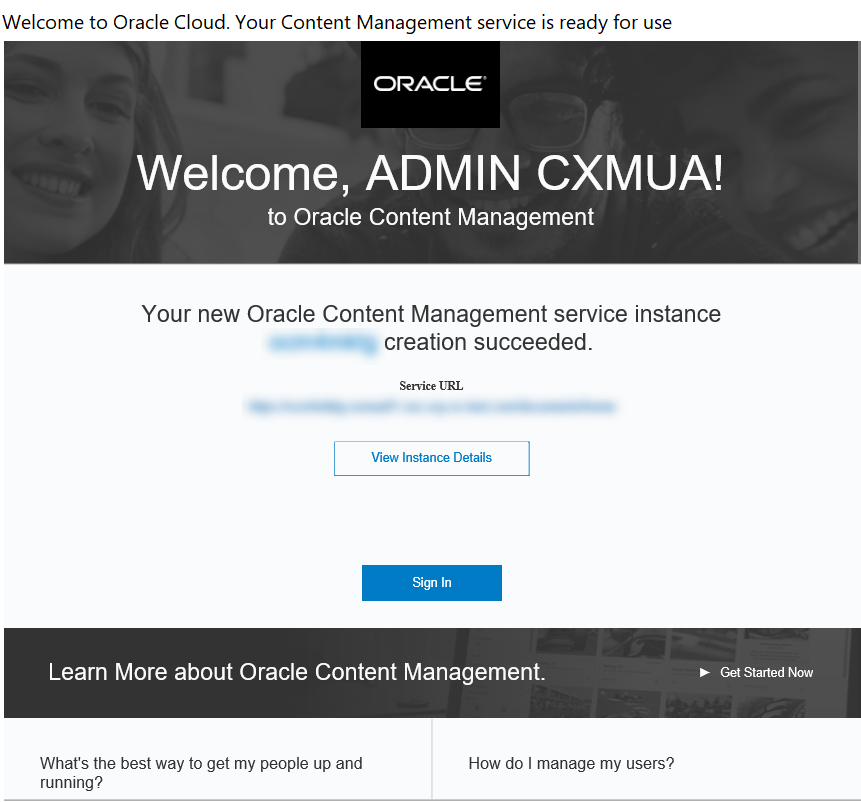
After your Oracle Content Managementinstance is created, you'll get the following notification from "Oracle Content Management". Copy the hostname part of the service URL to a text file. You'll need this information later when you configure Responsys Express to connect to Oracle Content Management.

Configure Oracle Content Management
To configure Oracle Content Management
-
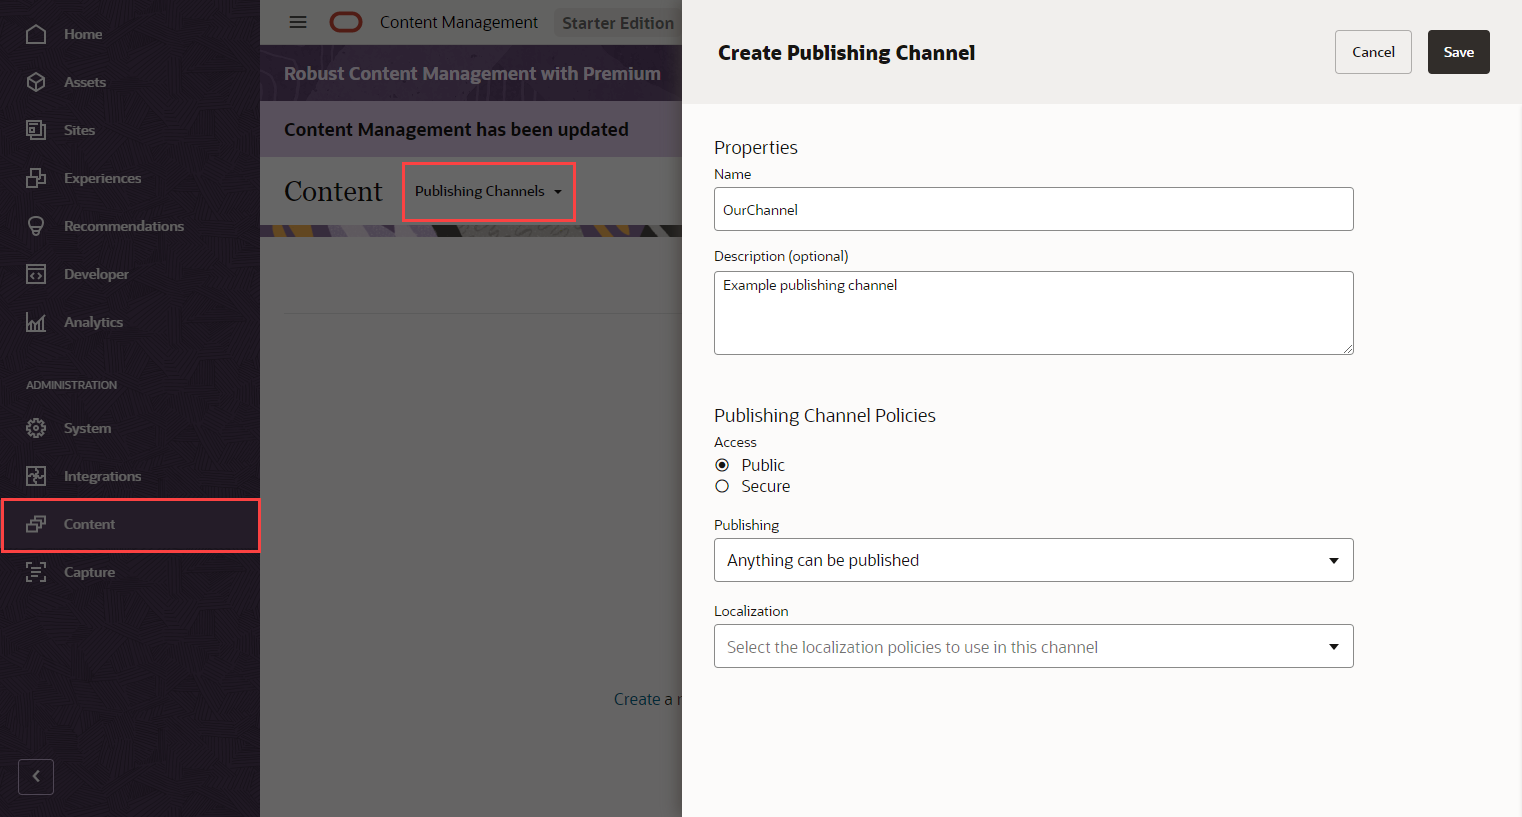
Now that you have an Oracle Content Management account, you must create a Publishing Channel in it. Click the Service URL you received in the previous email. This will sign you in to Oracle Content Management.

-
Select Content in the left navigation menu.
-
Choose Publishing Channels from the drop-down list, and then click Create. Complete the fields and click Save.

Because Responsys Express comes with Oracle Content Management Starter Edition, you can create only one publishing channel.
-
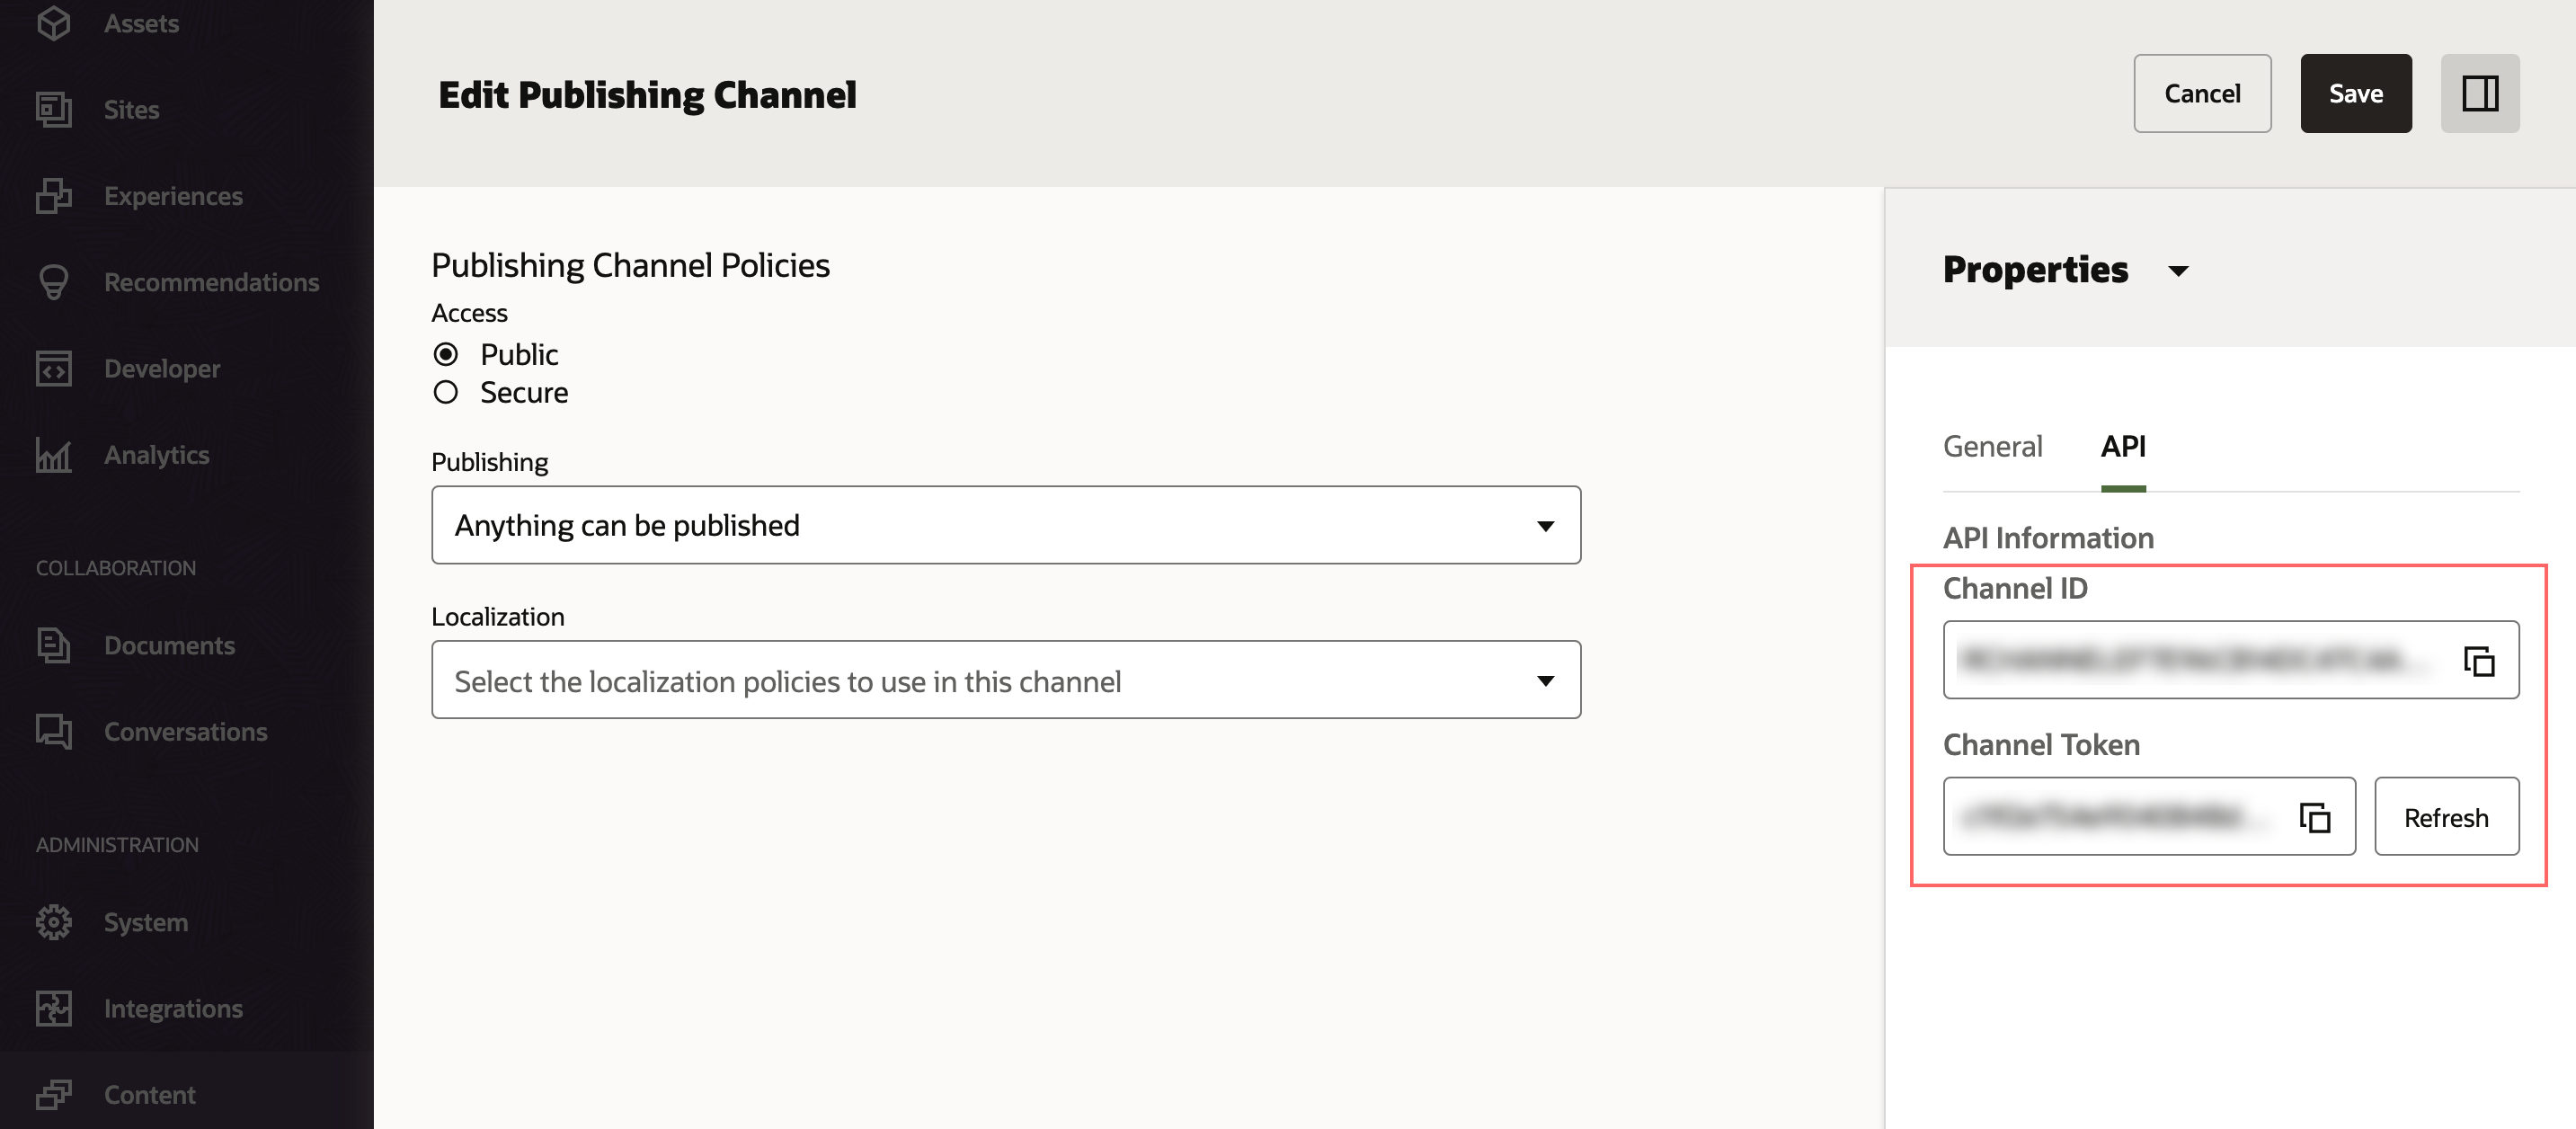
After you create the Publishing Channel, go to the edit page and find the Channel ID and Channel Token. Copy both of these values to a text file.

-
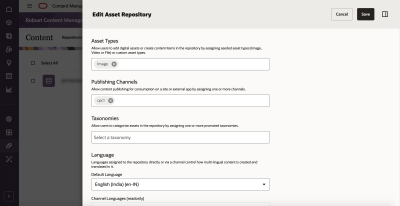
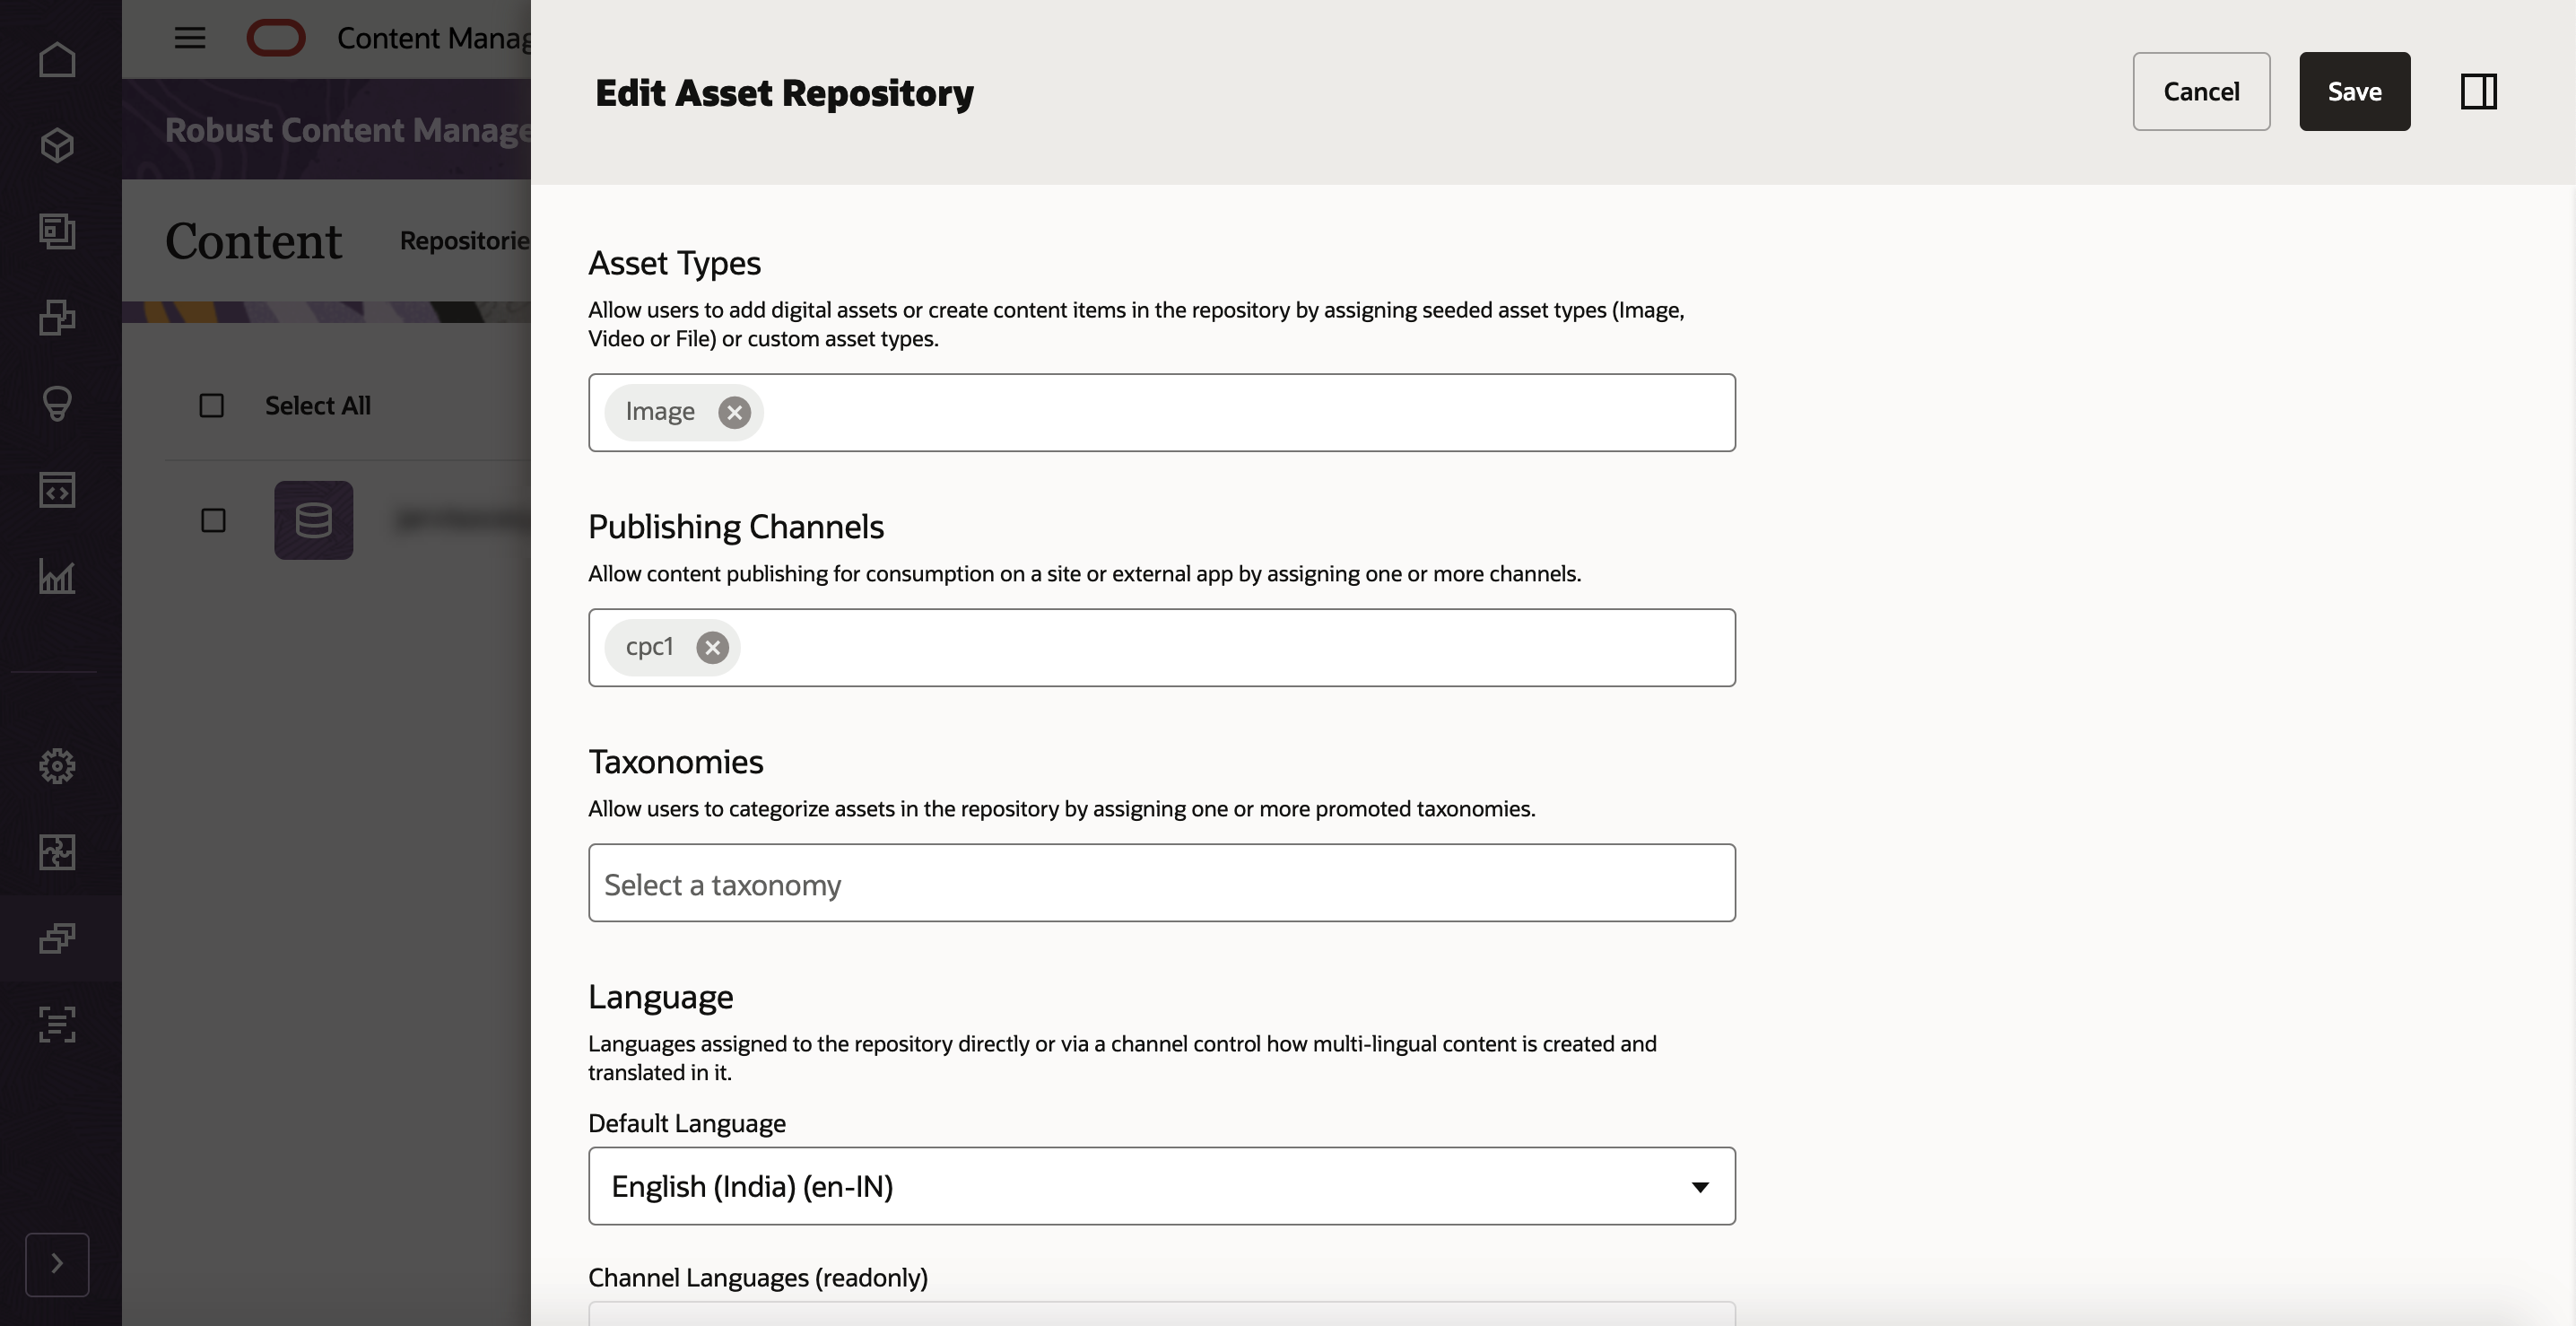
From the navigation menu, choose Content, then choose Repositories from the drop-down list, and then click Create. On the Edit Asset Repository dialog, complete the fields to create your repository. The repository will contain the assets that you'll use in Responsys Express.
-
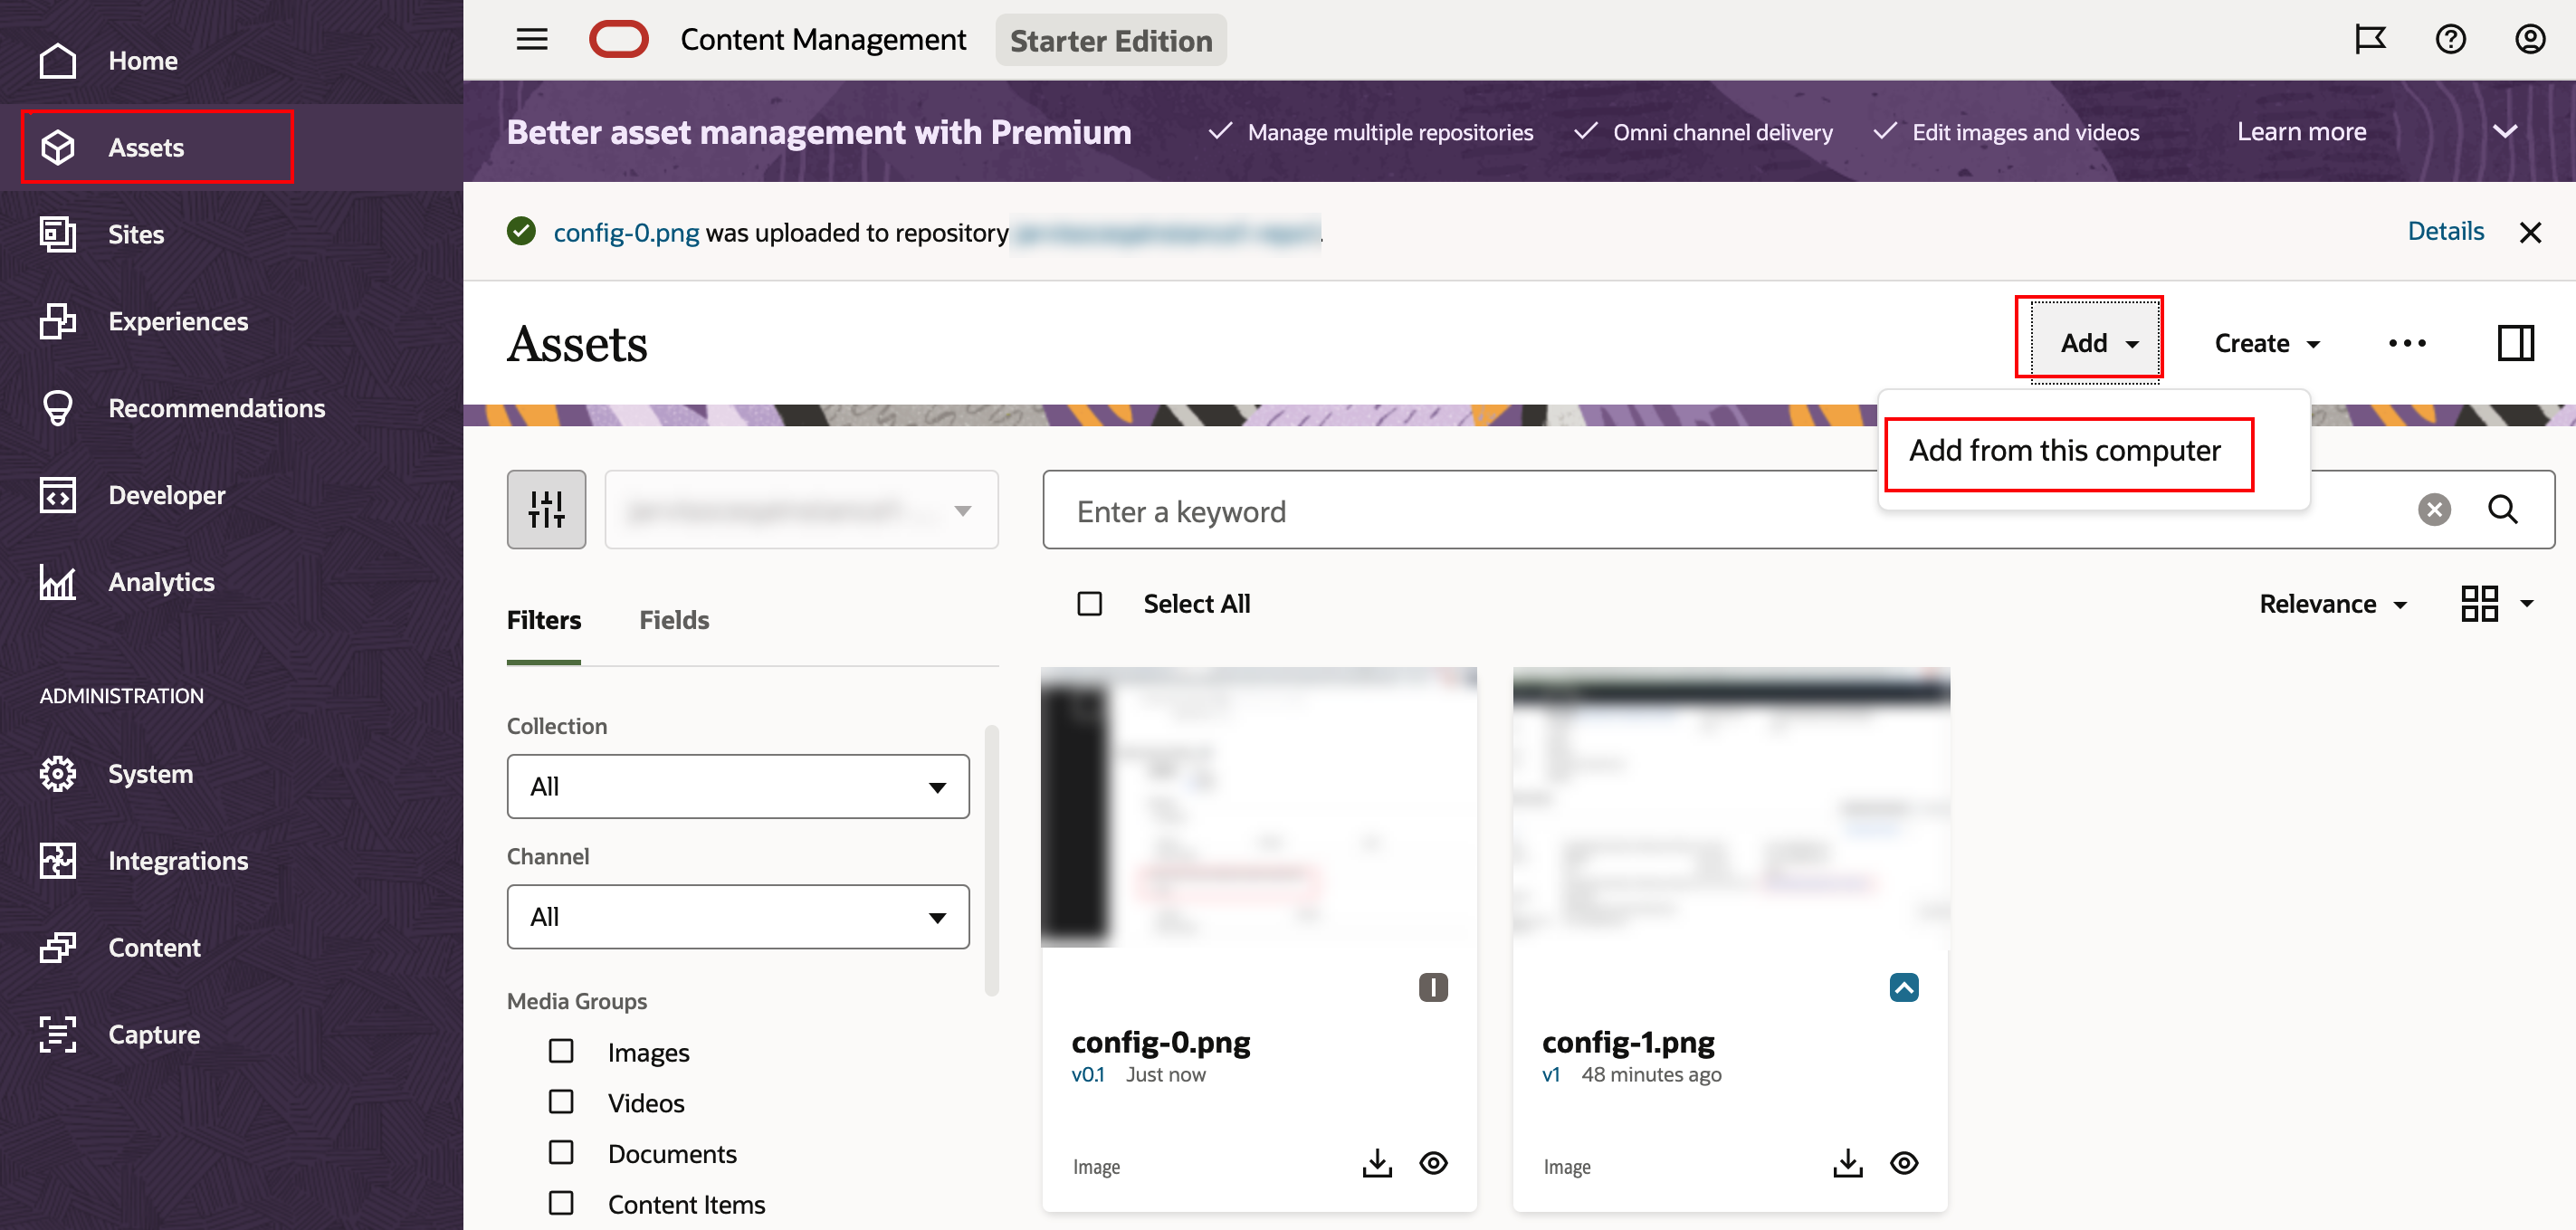
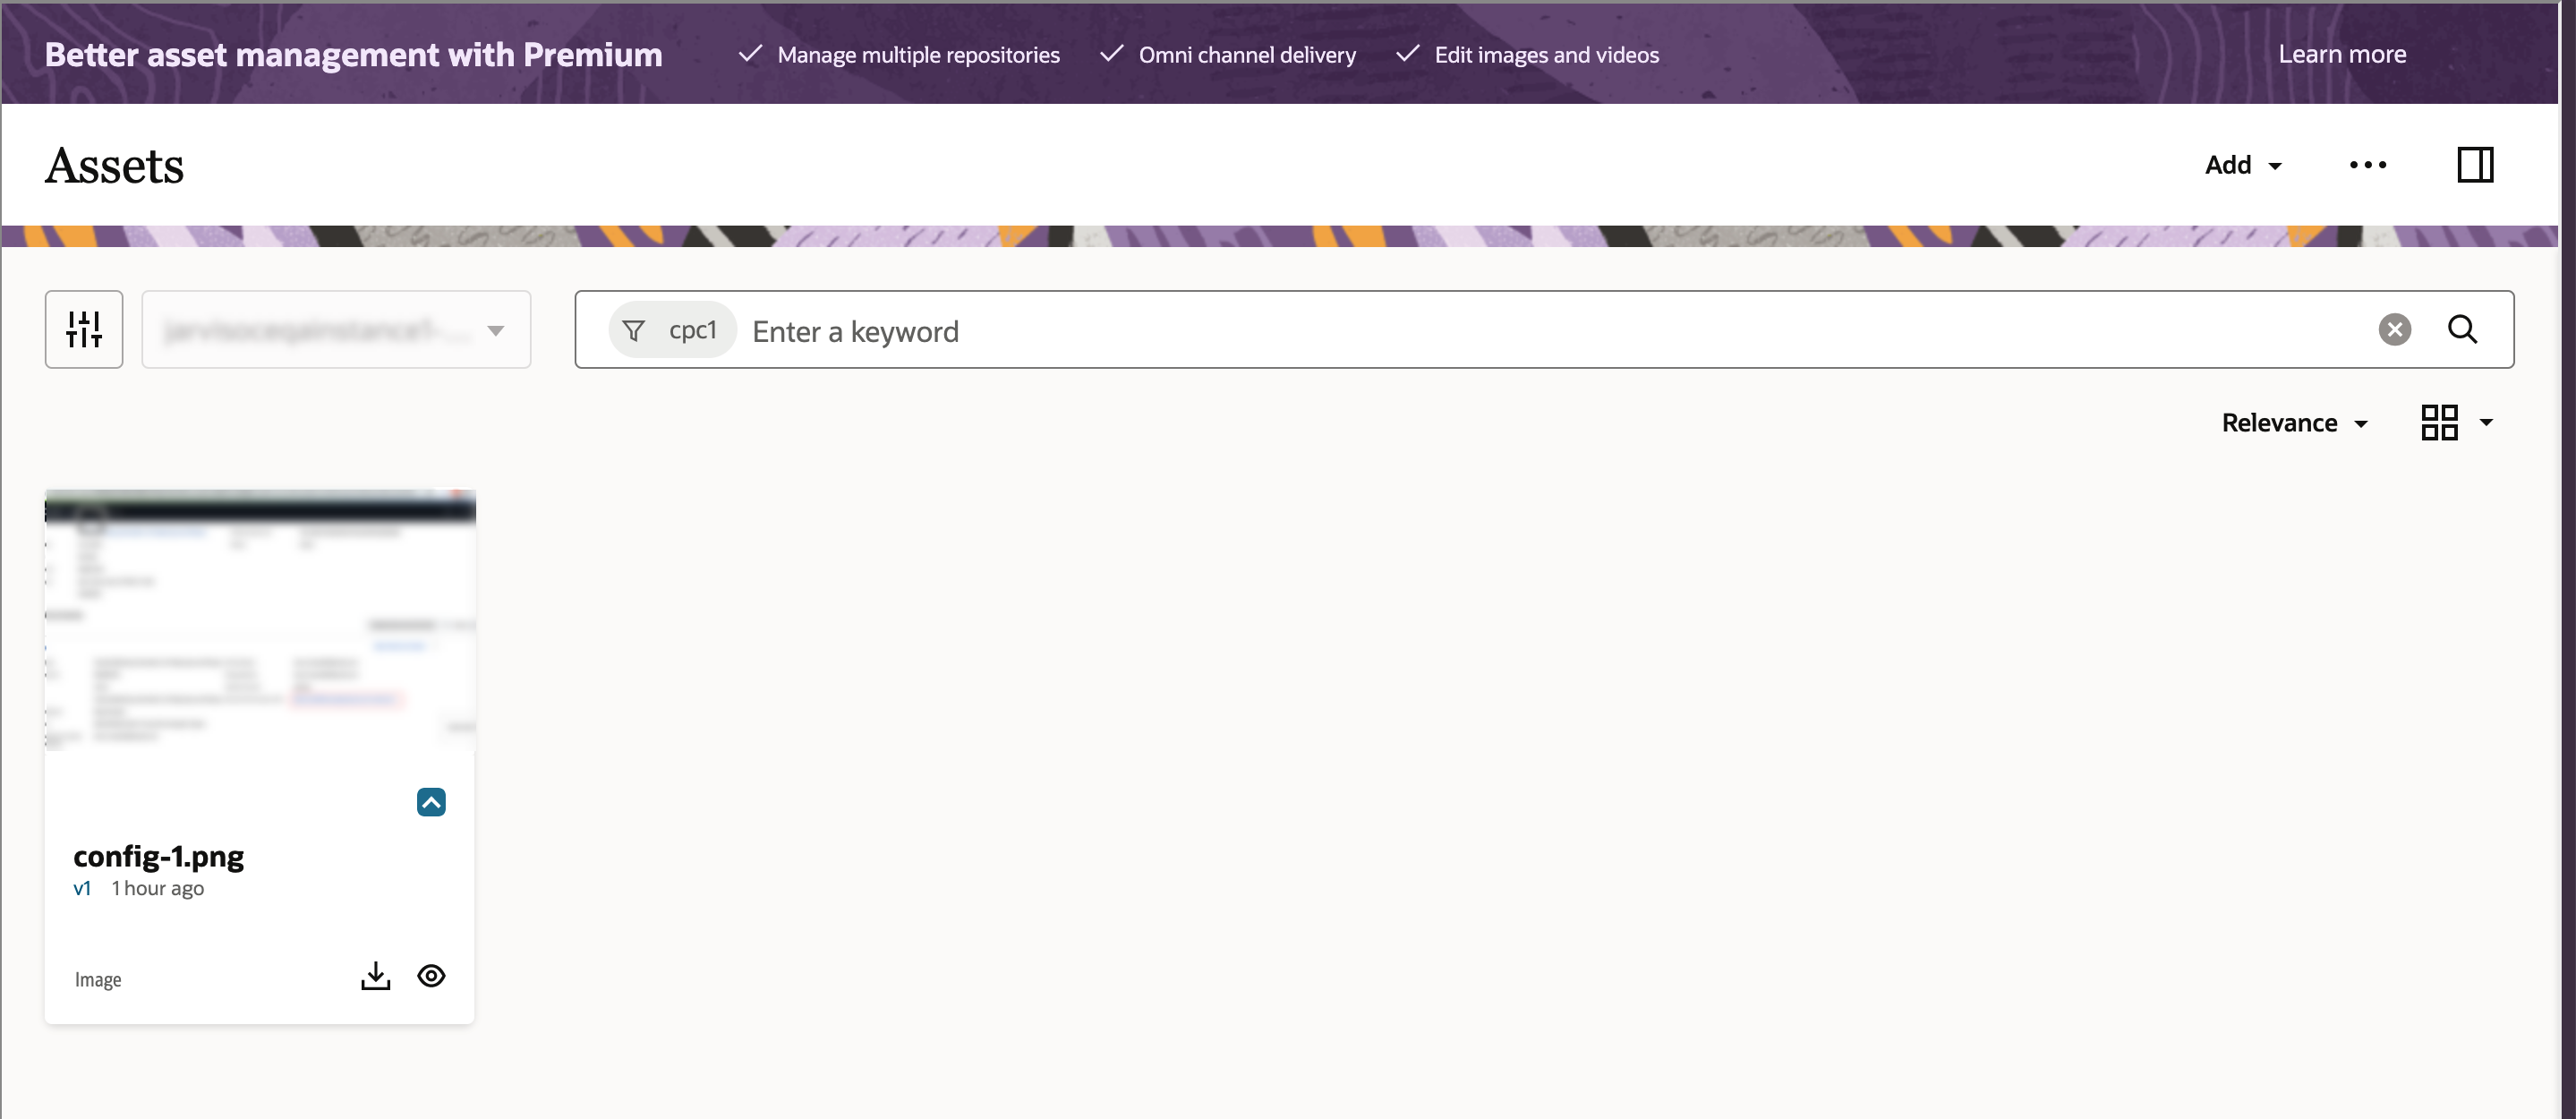
After creating a repository, you can upload an asset to test. From the navigation menu, select Assets.
-
On the Assets page, select the repository that you want to add the items to. Click Add, then select Add from this computer. Find content from your local files and drag it into the Assets page. Click Done.

-
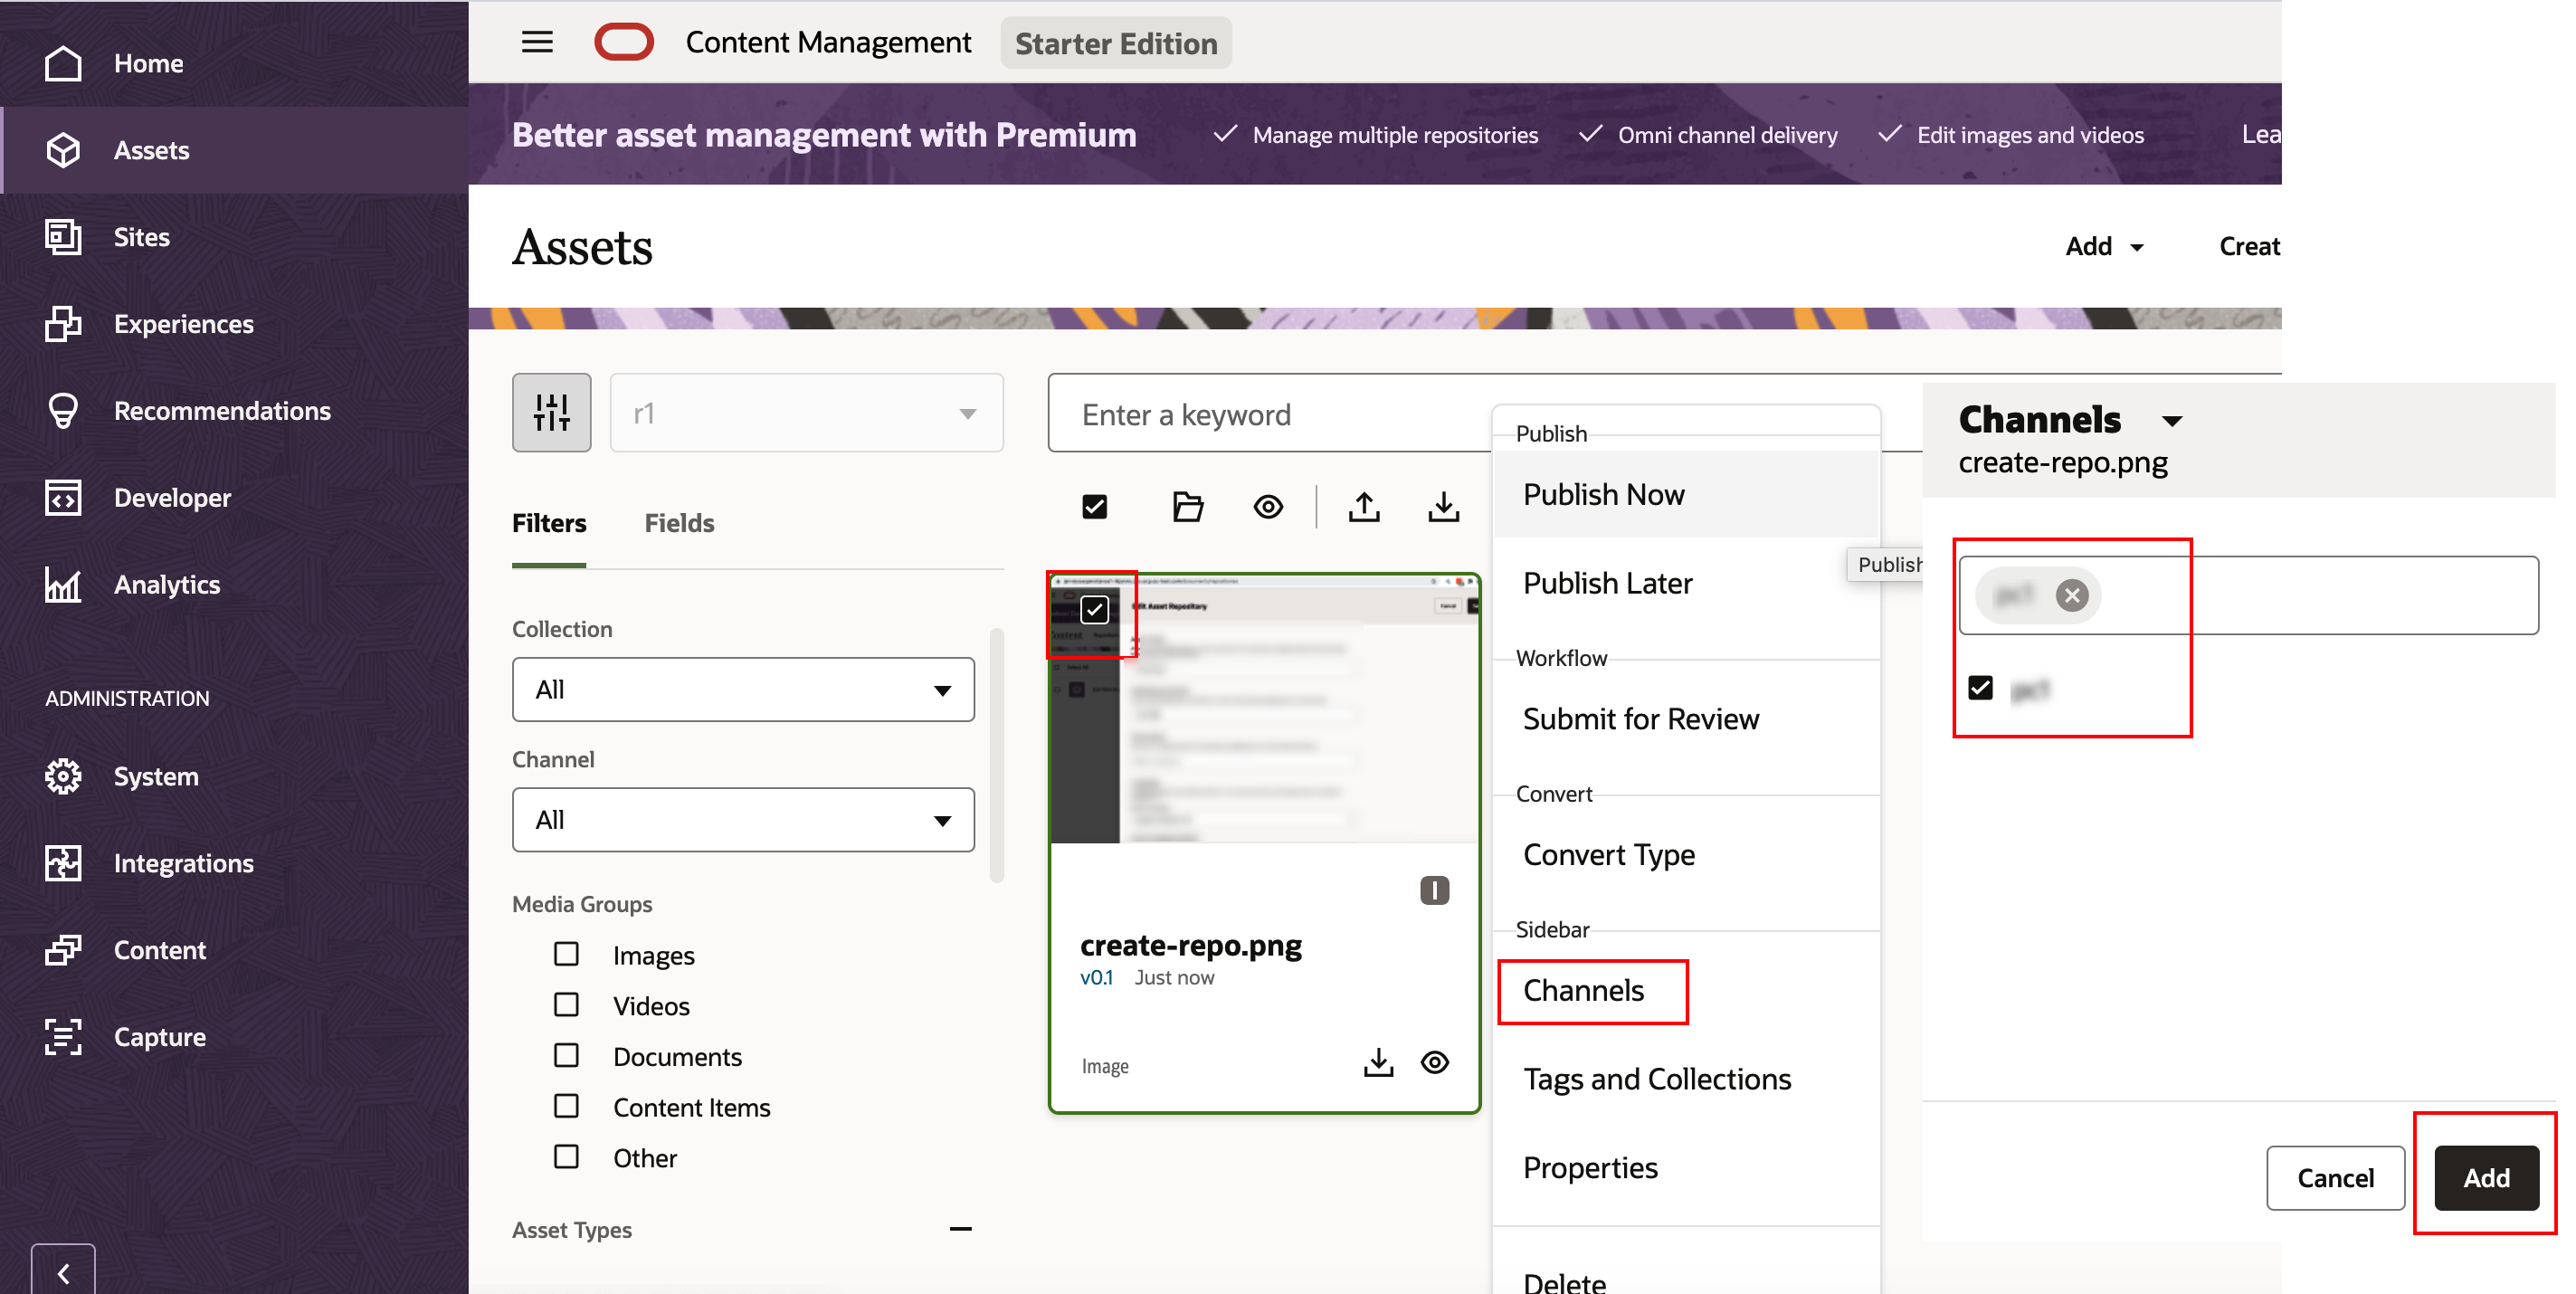
Assign your asset to the publishing channel you created: select the asset, choose your publishing channel, and click Add.

To complete the configuration in Responsys Express:
Important: Before you attempt this step, the service environments for both Responsys Express and Oracle Content Management must be active. If you were able to log in to Responsys Express and were able to log in and configure Oracle Content Management, then the service environments are active and ready for you to complete the following configuration.
-
Go to the Oracle Cloud Console: Console URL link, and sign in using the user name that you received in your Setup Complete email and the password that you set in Step 2: Sign in to Cloud Portal using the Console URL.
-
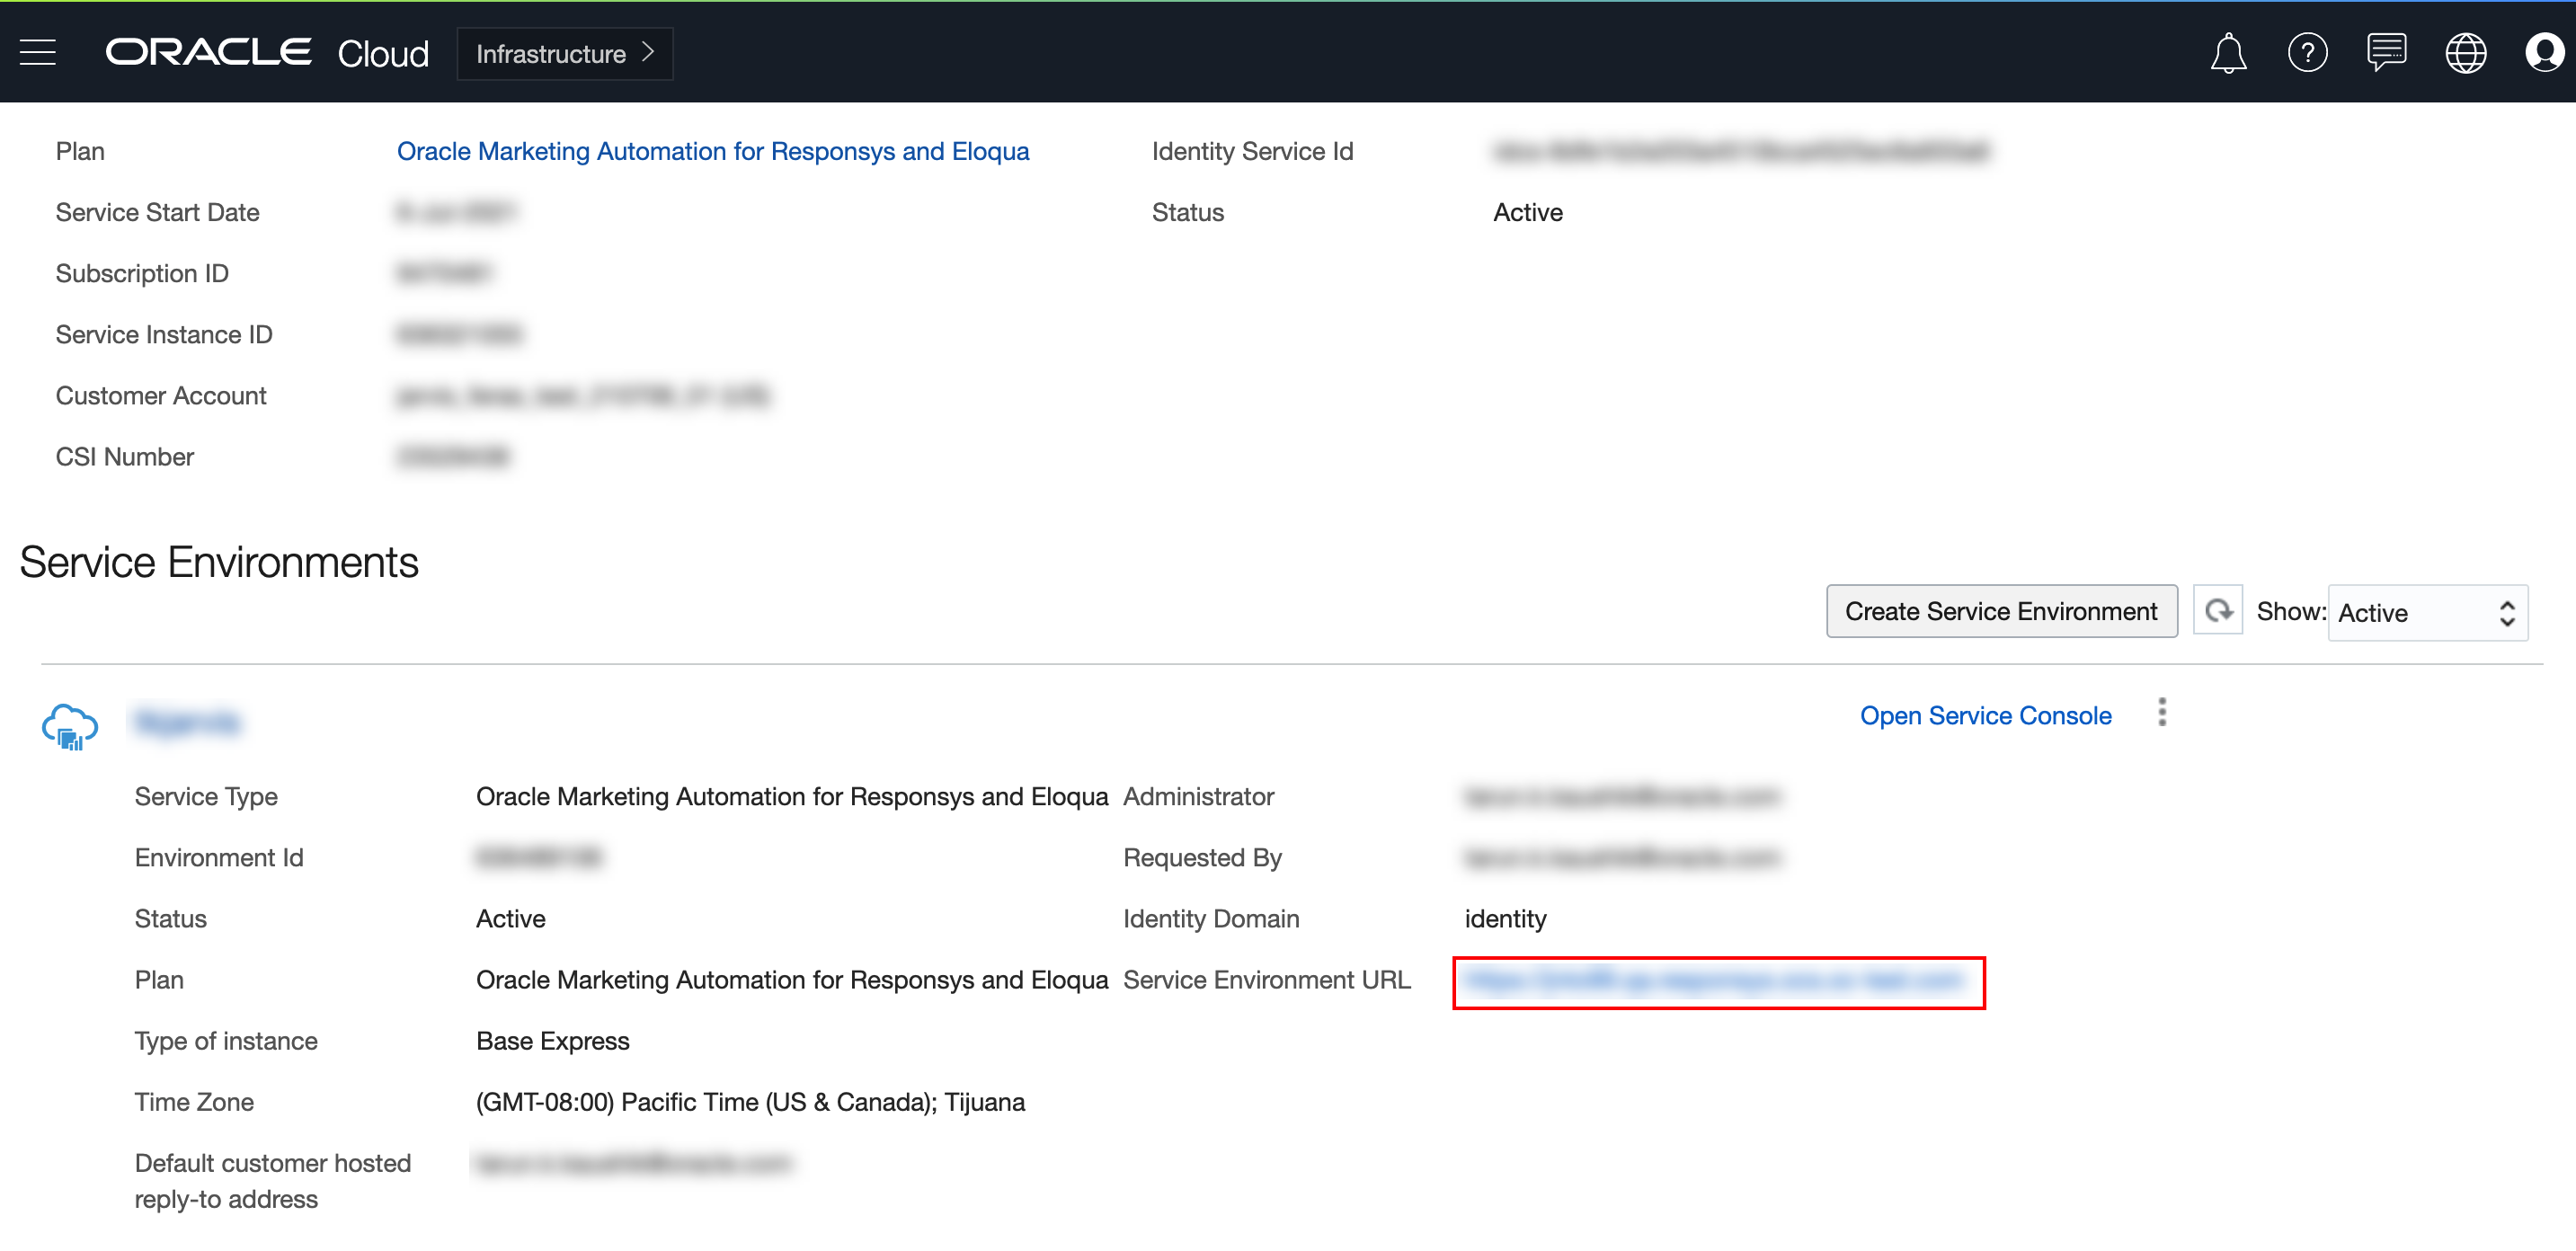
Click the Oracle Marketing Automation for Responsys and Eloqua card. Locate and copy the Service Environment URL.

-
Switch back to the tab where you logged into your Oracle Content Management account.
-
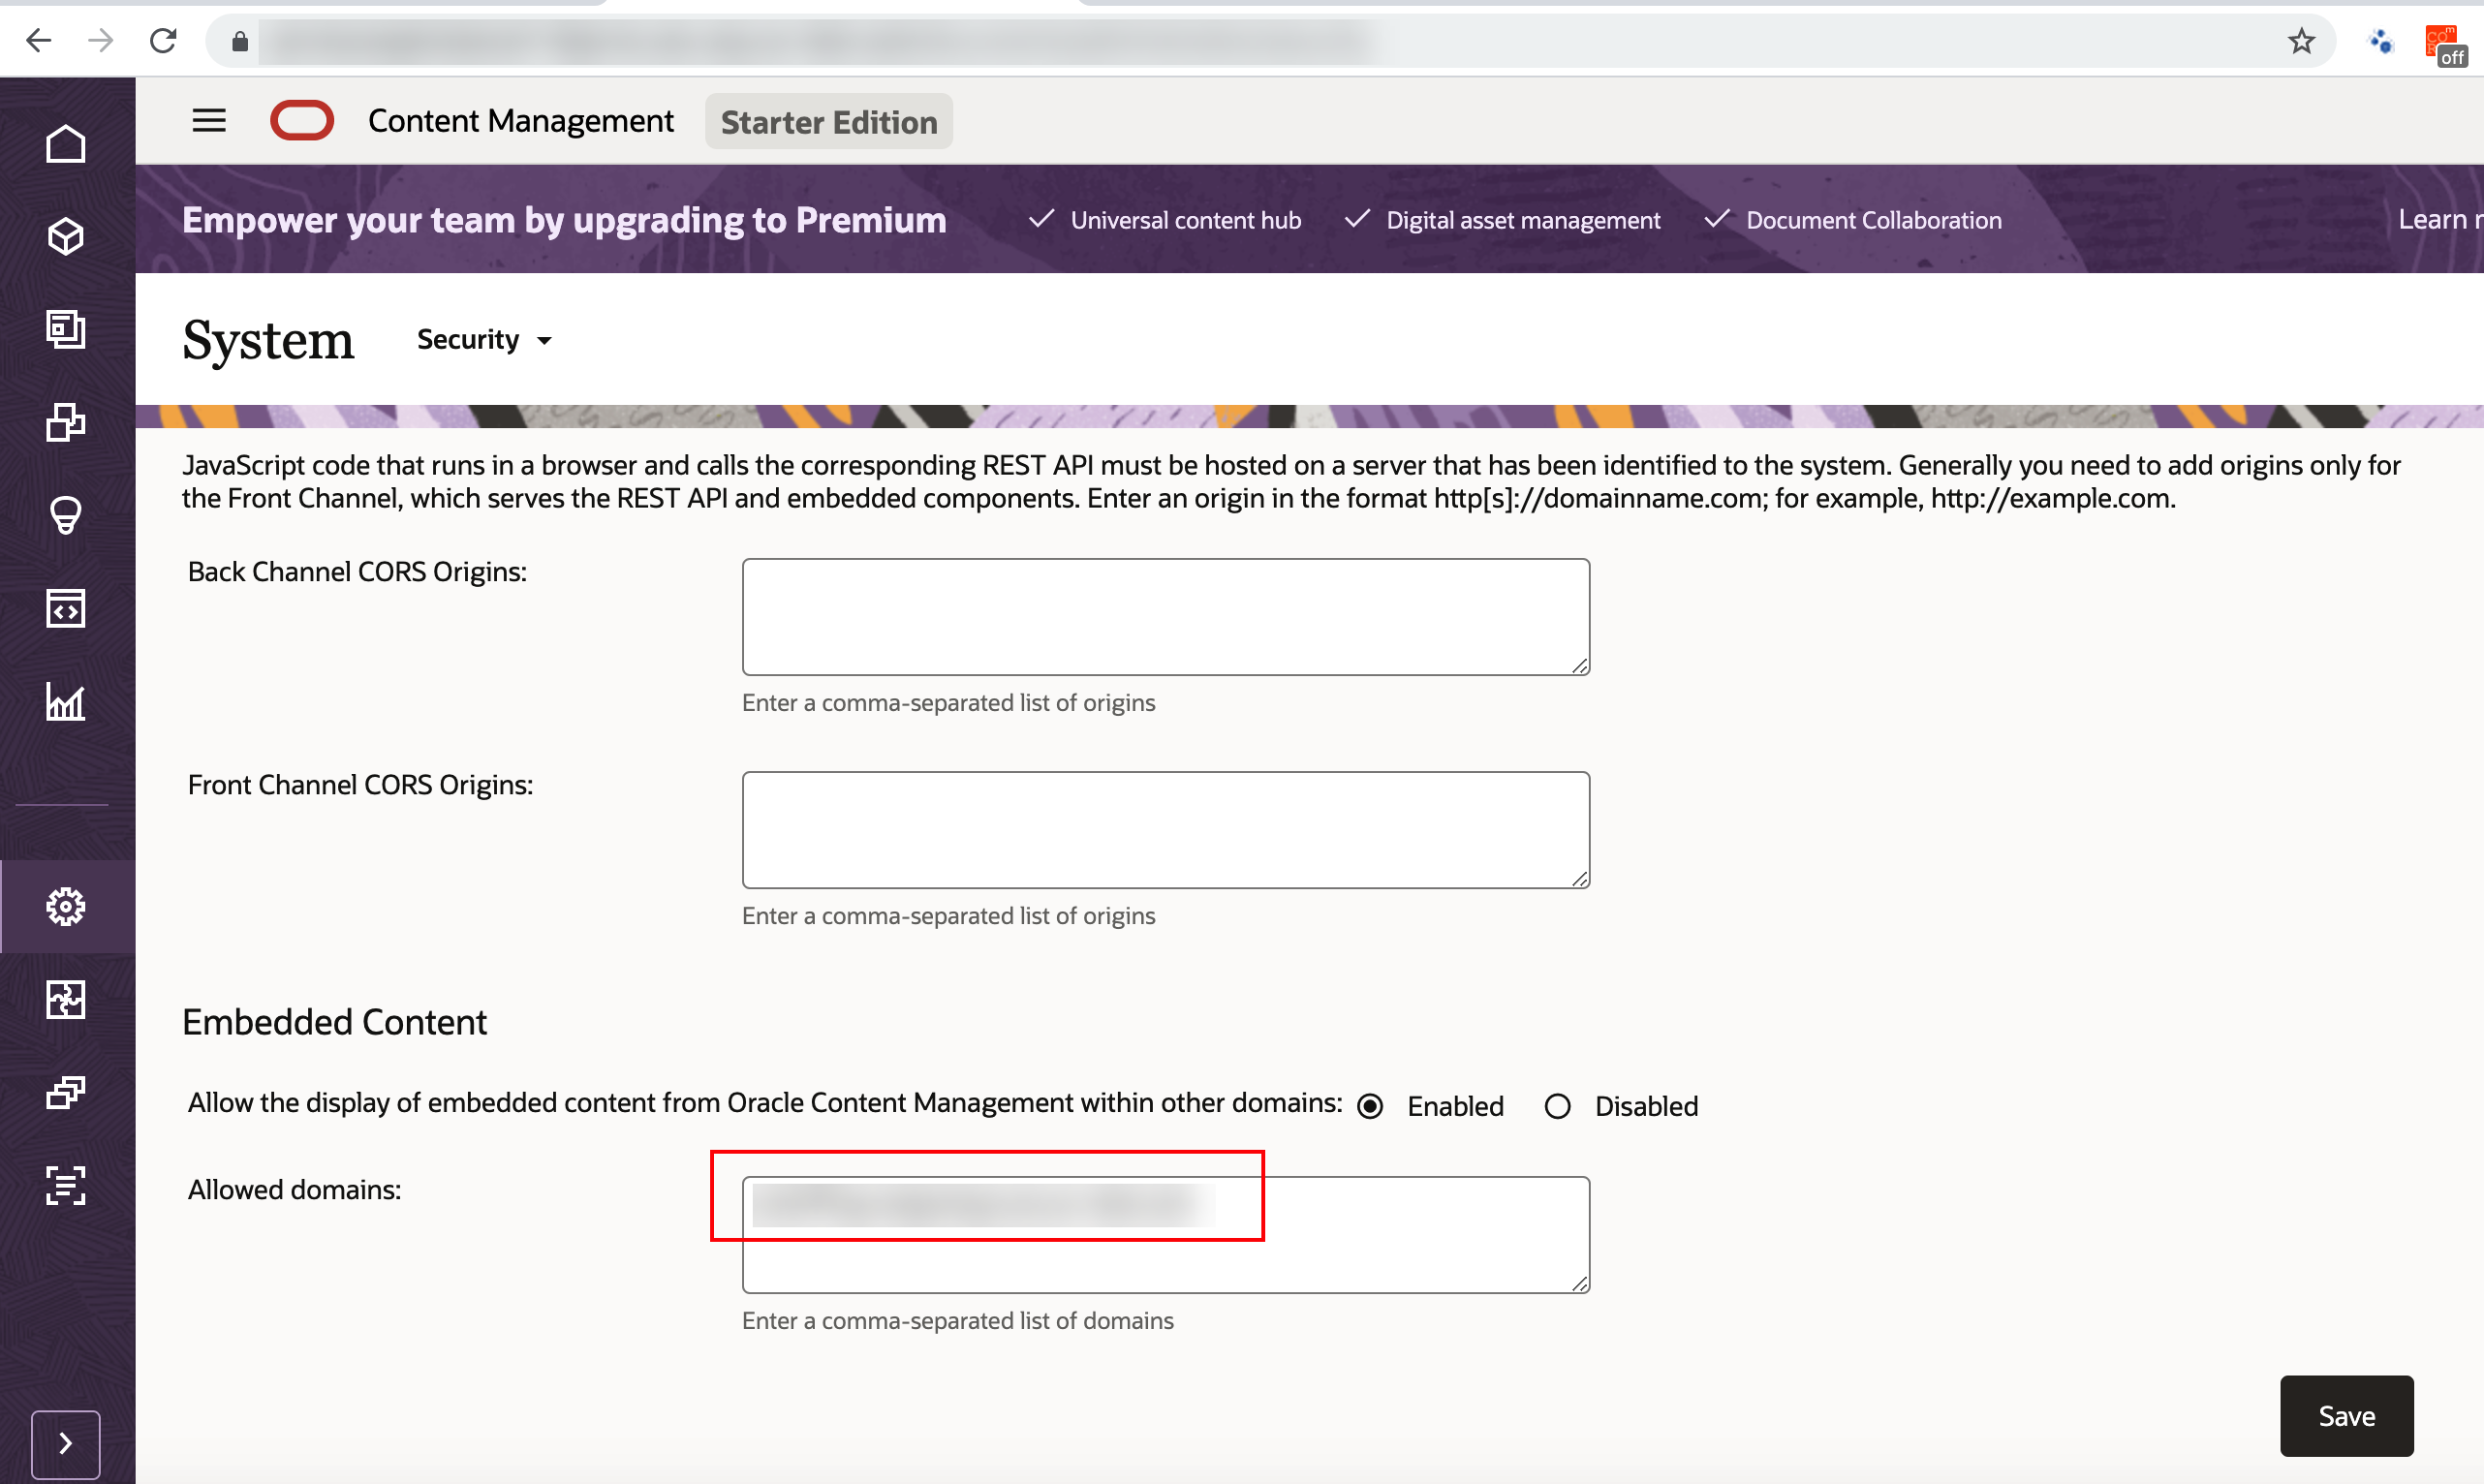
From the navigation menu, choose System, and then select Security from the drop-down list. In the Embedded Content section, add the Service Environment URL that you copied (without the
HTTPS://prefix) to the Allowed Domains field.
-
Sign in to your Responsys Express instance, and click
 .
. -
From the Ask Oracle menu page, click Settings, and then select Content Management.

-
Complete the configuration fields using the values you saved to a text file in the previous procedure. Click Save.
-
CEC Domain URL: Use the host name that you copied from the Oracle Content Management service URL .
-
Channel ID: Use the Channel ID of the Publishing Channel you created in Oracle Content Management.
-
Channel Public Token: Use the Channel Token of the Publishing Channel you created in Oracle Content Management.
-
-
Click
. On the Ask Oracle page, click Assets. You should see the assets that you loaded into Oracle Content Management.


Next steps
Now that you have access to your Responsys Express environment, you can continue with the onboarding tasks for your organization.
Prepare your organization for Oracle Responsys Express
Data privacy and security features
Welcome to Oracle Responsys Express