Creating Audiences
Important: If you have an account without Audience Designer and would like this feature enabled, please log in to My Oracle Support and create a service request. When Audience Designer is enabled for an account, existing classic filters can still be run, edited, and saved as another classic filter, but new classic filter cannot be created in the Filter Designer.
Before you begin:
Before creating an audience, you must create simple filters for the list.
To create an audience:
- Do one of the following:
- On any page, click
 Actions on the side navigation bar, and select Create Audience. (Not seeing this choice? Refer to the Side navigation bar changes topic.)
 - On the Audiences page, click Create Audience.
The Create audience dialog opens.
- On any page, click
- In the Title field, type a unique name for the audience.
- Select a folder from the Folder drop-down list.
- Select a list from the List drop-down list.
- Select the channel.
Note: The channel you select will affect which filters you see in Audience Designer.
- Optionally, type a description in the Description field.
The description appears in the About this audience section of Audience Designer.
- Click Create.
Audience Designer opens.
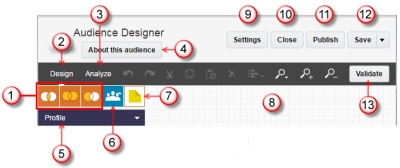
About Audience Designer
You use Audience Designer to design, test, and publish an audience.
 Operators
Select the operators for joining filters.
 Design tab
Use this tab to design the audience.
 Analyze tab
Use this tab to run the audience and view results.
 About this audience
View and edit the audience description.
 Filters
Select the filters for the audience. The filters you see vary based on the channel you selected for your audience.
 Final audience
Create Final Audience. This must be the last stage in the audience.
 Note
Note
Add comments.
 Canvas
Design the audience by dragging filters, operators, and Final Audience to the canvas.
 Settings
Select audience settings, such as when the audience is automatically unpublished.
 Close
Close
Close Audience Designer and return to the Audiences page.
 Publish
Publish the audience.
 Save
Save
Save your changes, or save a copy of the audience with a different name.
 Validate
Validate the audience to ensure that it is constructed correctly.
Note: The audience is automatically validated when you attempt to publish it, but you can use this button to validate the audience while designing it.
About filters on the canvas
Filters help personalize your audience based on your marketing goals. To add filters on the canvas, first select the filter type, and then drag and drop available filters. What you see for available filters depends on the channel selected for the audience. You can see the channel from Settings in Audience Designer.

Filters are identified on the canvas as follows:
 Profile filters: These filters select profiles based on data about customers, such as location, age, gender, and more. Depending on the channel selected, filters can also take into account information about channel specific information, such as mobile device platforms or web browser.
 Behavior filters: These filters select profiles based on behavior, such as opening an email within a certain time, conversion, and clicking a link. Behaviors differ based on channel. For example, if you're creating an audience based on the Web Push channel, you would see only Web Push behavior filters.
 Others: These filters select profiles based on other criteria, such as presence or absence in a published program. For more information, see Filters Attributes.
The filter name is displayed below the filter and its description inside the filter.
About operators
You can join filters using the AND, OR, or MINUS operators.
The default maximum for the total number of filters in an audience is 10. This means that all filters combined using different OR, AND, or MINUS operators cannot exceed 10, but it’s possible to combine up to 10 filters with a single AND or OR operator (MINUS operator can only have two filters).
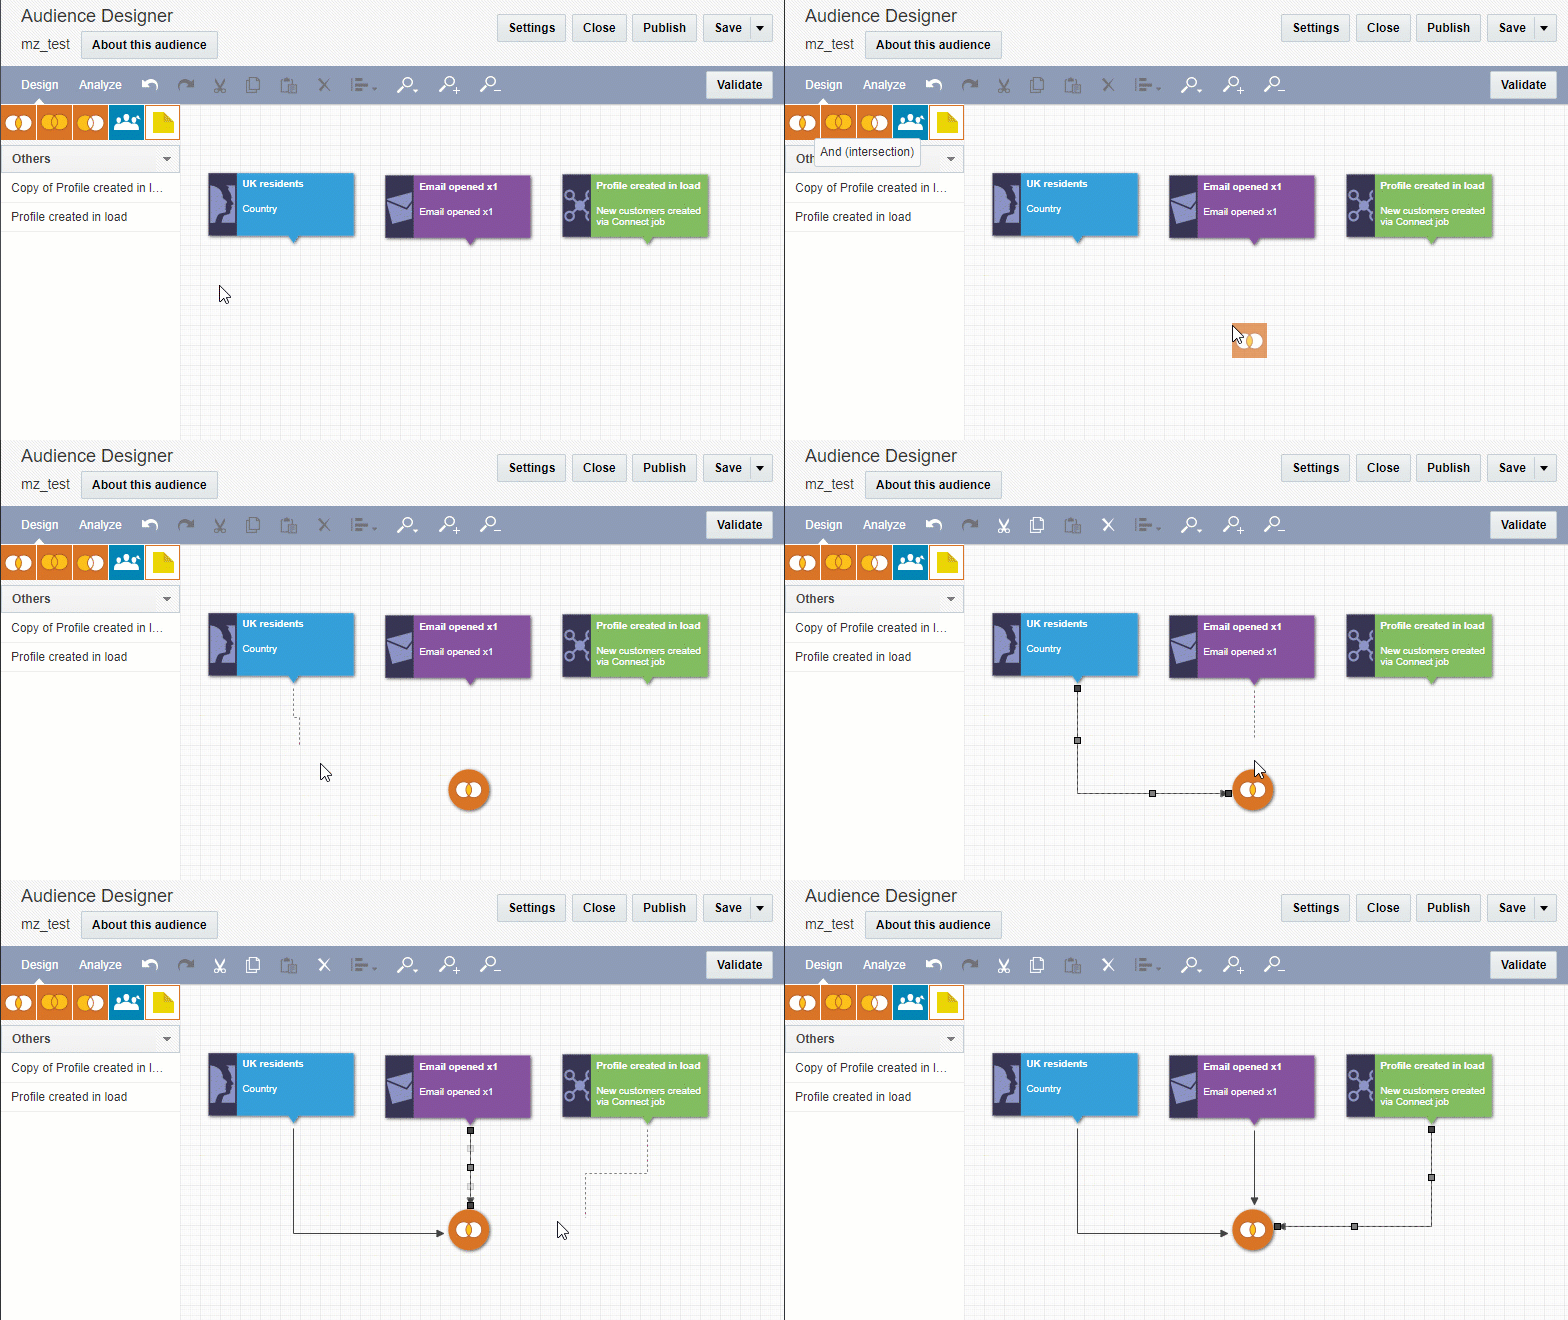
 AND
AND
The AND operator finds only the items common in the result sets of all filters.
 OR
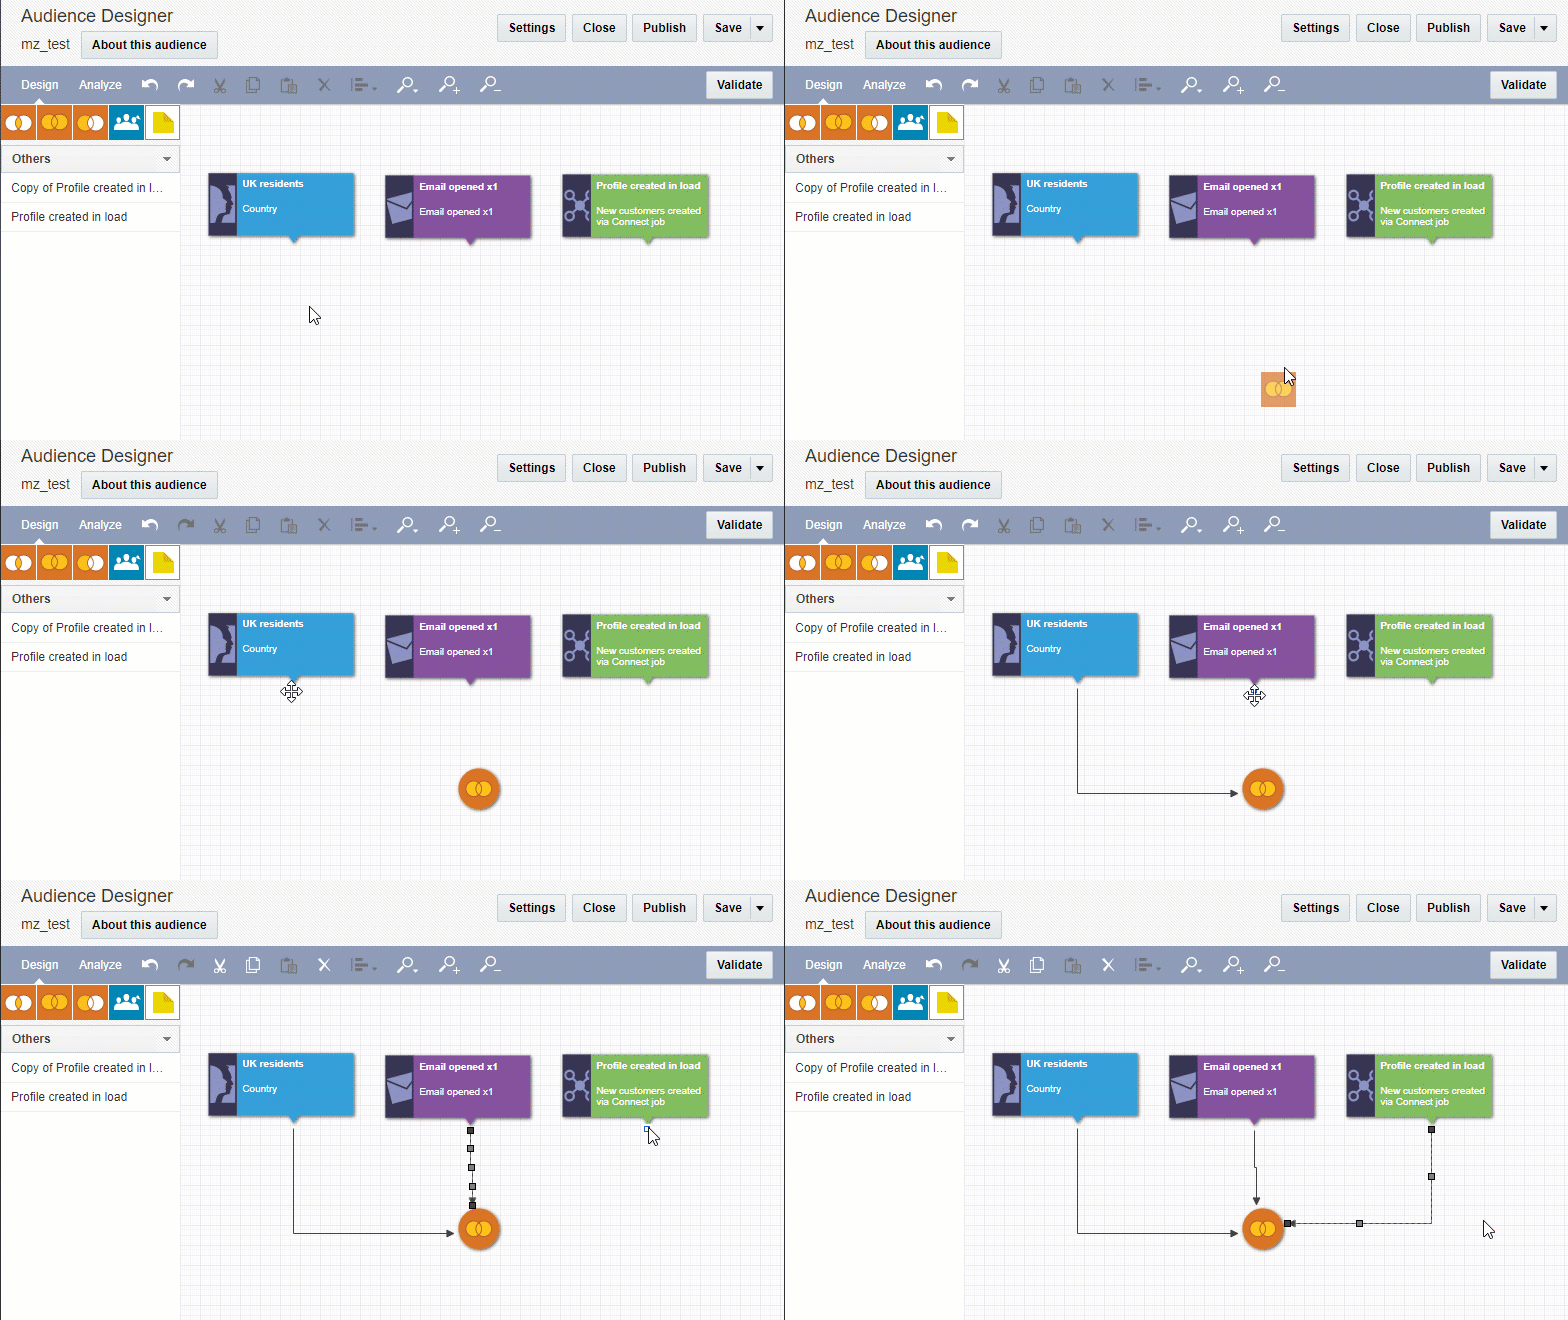
OR
The OR operator finds the items in the result sets of all filters.
 MINUS
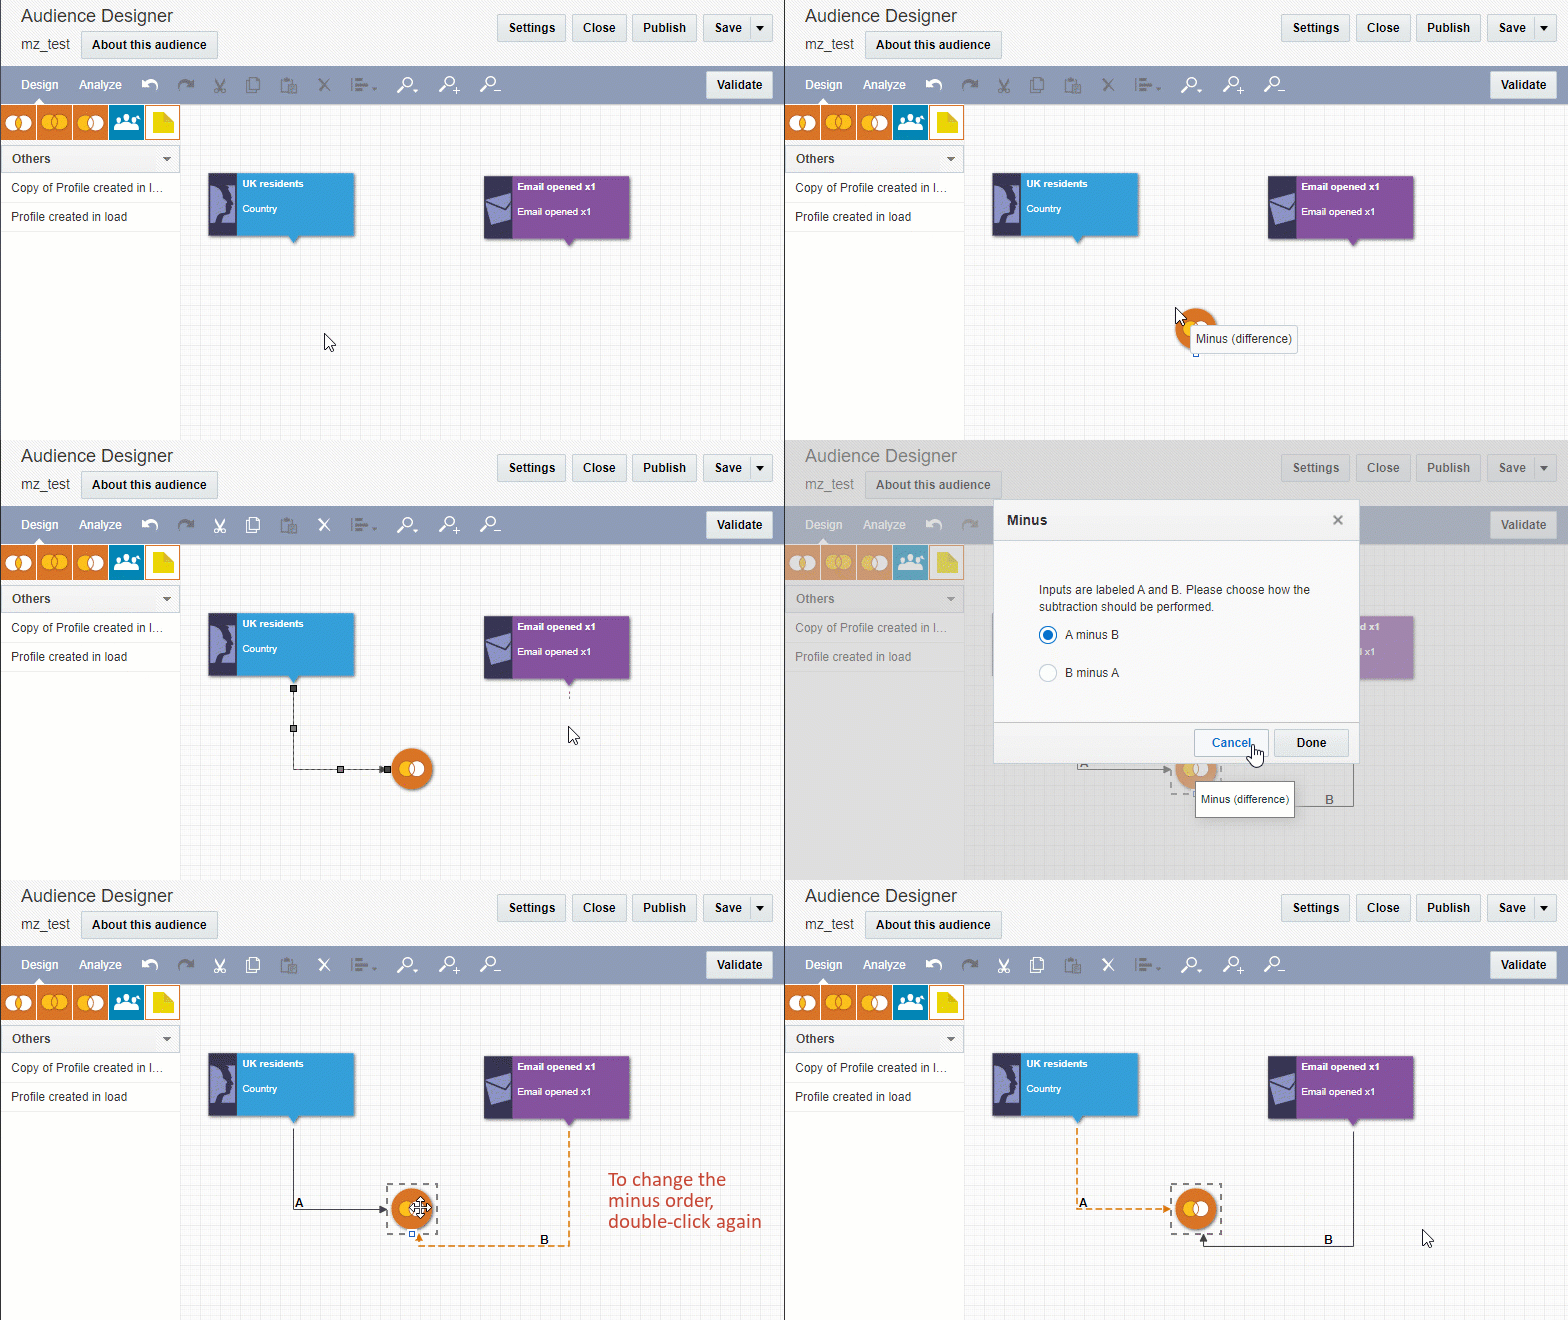
MINUS
The MINUS operator gets the members as a result of subtracting the result set of one filter from the result set of another filter.
For this operator, you may select only two filters (paths). You must also specify the way subtraction should be performed, path A-B, or path B-A.
About Final Audience
Final Audience terminates the flow and provides the final result set for the audience. This must be the last stage in the audience definition. You may have only one Final Audience in an audience definition.
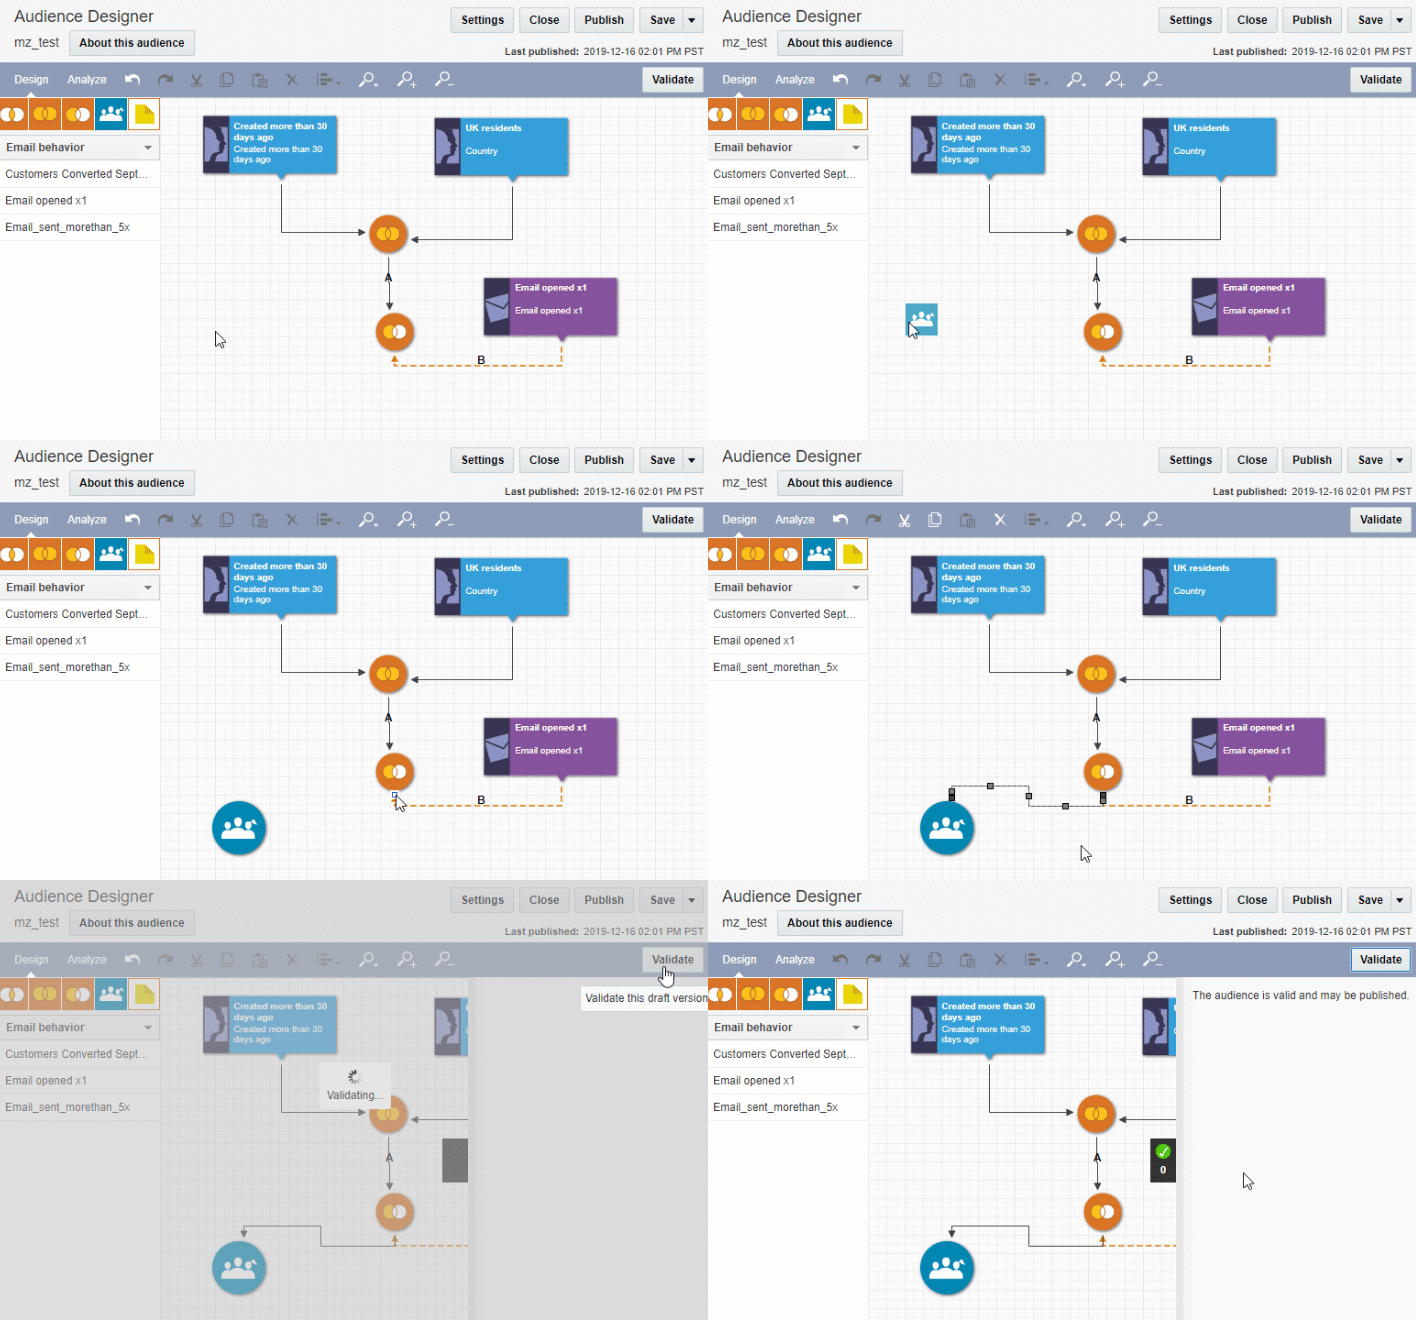
Designing an audience
To design an audience:
- Select the filter type and the filter from the list of filters.
You may use up to 10 filters in an audience definition by default.
Note: Available filters depend on the audience channel. If you do not see a filter, check the channel under Settings.
Tip: To preview a filter definition, double-click the filter on the canvas.
- Join the filters using the AND, OR, or MINUS operators.
- For the MINUS operator, specify the way the subtraction should be performed:
- Double-click the operator on the canvas and select the option you want.
- Click Done.
- Add the Final Audience stage.
- Specify when the audience should be unpublished and the email addresses to receive notifications about the audience:
- Click Settings and expand Options.
- Select the auto unpublish option you want from the Lifecycle options list.
- Type the email addresses in the Enter email address to receive notifications about this audience field.
Separate multiple addresses with commas or semicolons.
- Click OK.
- Click Validate to ensure that your audience is constructed correctly.
Any errors are displayed in the Validate section. To continue, fix the errors and re-validate the audience.
To select access control:
For information about access control, see Organizational Access and Targeting by Organization - Overview.
- Click Settings.
The Settings dialog opens.
- Select the organizational units you want.
Next step:
