Working with Data Sources
Important: The Web Push feature is currently released under our Controlled Availability program. To request access to this feature, please log in to My Oracle Support and create a service request.
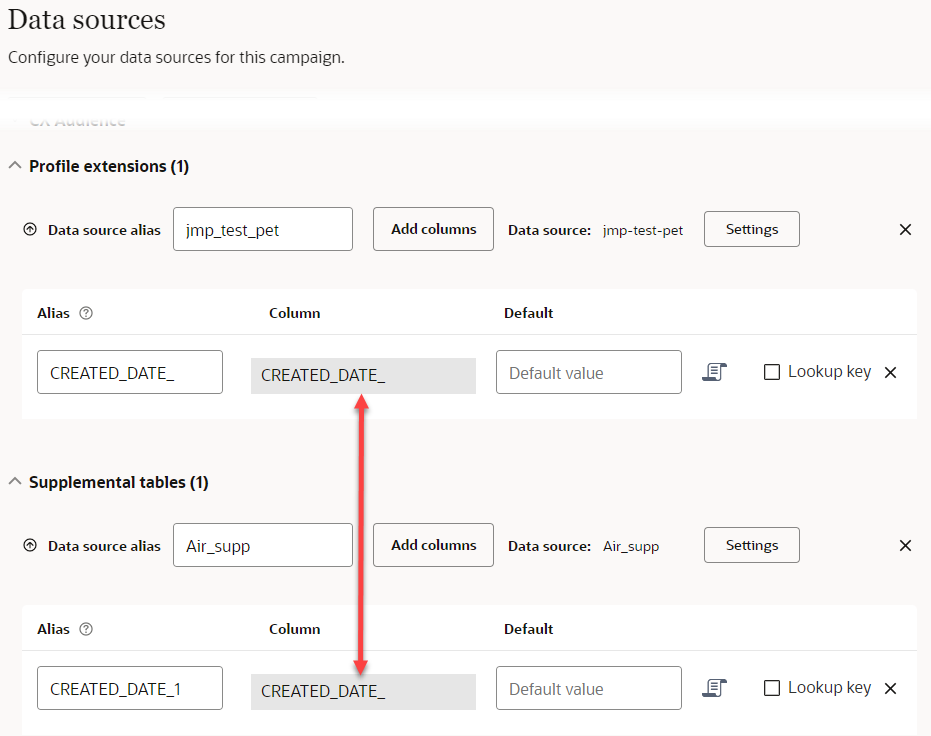
You must add all data sources that the message references, including those used for personalization. In addition, you must select all columns that you need from the data source. If the column exists in the data source but is not selected, the column will not be available for use in the message.
Each selected data source and column is assigned an alias. Oracle Responsys uses these aliases to reference data sources and columns. When you select a data source or column, Oracle Responsys automatically assigns an alias to it, but you can change that alias.
Warning: If you change the app or data source for a Web Push campaign, all messages defined for the campaign will be deleted.
What do you want to do?
-
In the Campaign Designer, click Data sources in the Web Push message panel.
The Data sources page opens
- Click Add new source.
- Select the data source type from the drop down list and click Select.
- To add columns, click Add columns, select the columns you want and click Select.
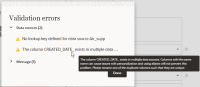
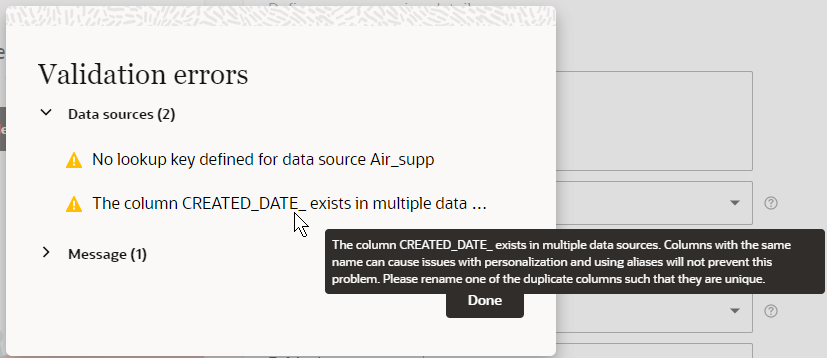
Important:Make sure the field names you use for personalization are unique across data sources. Duplicate columns from different data sources with different values can result in missing personalization in campaign messages. Choosing two field names with the same name will prompt a warning message in the validation section. If these columns have the same set of values, this will not be an issue. This warning message will not impact your campaign launch.

However, when a supplemental data source is used as a look-up table, those columns may have duplicate names, and will not cause a personalization error. - Click Save.
- On the Data sources dialog, click Settings beside the supplemental table.
The Settings dialog opens.
- Select the Data source is used only as a lookup table checkbox.
- Click Done.
- On the Data sources dialog, click
 for the data source you want to remove then click Yes on the confirmation message.
- In the Campaign Designer, click Data sources > Add columns for the data sources you want to add one to.
- Select the columns you want to add.
Use the Ctrl and Shift keys to elect multiple columns.
- Click Select.
When personalizing a column, you can insert a token. A token is a placeholder for a value of a field.
- On the Data sources dialog, click
 .
.The Script page opens.
- Type the text of the script you want.
- To insert a token:
- Click
 .
.The Insert personalization token dialog opens.
- Drag the column you want to the right pane.
To add columns, click
 . To add a data source, click Add table.
 - Optionally, select a formatting style from the Style drop-down list.
- Click OK.
- Click
- Click Apply.
- On the Data sources dialog, select the Lookup key checkbox in the column row.
- On the Data sources dialog, type the default value in the Default field of the column.
- On the Data sources dialog, click in the column row.
- In the Dynamic variables section of the Data sources dialog, enter the number of variables you want to add and click OK.
- Specify the Alias for the variable and, optionally the Default value.
Aliases cannot start with a digit and can contain only the following characters: a-z A-Z 0-9 _ $ @.