Working with Message Content
Important: This information applies to the Email Message Designer. Speak to your Account Administrator about access to this feature.
Note: The Email Campaign Workbook now has an updated interface and is now called the Email Campaign Designer. Campaign Designer is now enabled for all accounts, and it replaces Campaign Workbook for this channel. Unlike the Campaign Designer, there were no major changes made to the Message Designer's interface.
Using the Message Designer, you can add HTML and text content to your email campaign. In this topic, you'll learn about:
- Creating a message from a file
- Message plain-text content
- Editing HTML source code
- Personalize the email message
- Working with the message header
- Inserting images
Creating a message from a file
The Email Message Designer makes it easy to use a template for your email message. However, you can build your email using a file instead. You can use content from the Content Library, a file from your computer, or create a new document from scratch. New documents are added to the Content Library.
The Email Message Designer supports the following file types:
- HTML
- TXT
- JPG
- GIF
- PNG
- BMP
- SWF
The file size must not exceed 1,000 KB. To use larger files, please log in to My Oracle Support and create a service request.
Note: The following steps assume you do not have the rich text editor enabled. Learn more about the rich text editor settings.
To create an email message from a file:
- On the side navigation bar, click
 Campaigns and select Manage Campaigns.
The Manage campaigns page opens.
- Click Create Campaign.
- In the Create campaign dialog, select Email.
- Provide the basic information about the email campaign. Click Done.
- Click the Create from file tab.
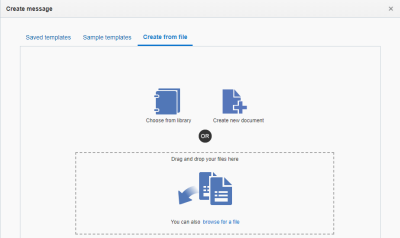
- Choose how you want to create your message content.
You can choose a file from your Content Library or from your computer. To create a file from scratch, click Create new document. New documents are added to the Content Library

Message plain-text content
In the email Message Designer, plain-text email messages can be personalized, contain links to HTML-based campaigns, and support clickthrough conversion tracking. To create the plain-text version of the email campaign, you can use an existing text file from the Content Library or from your computer. You can also automatically create one from the HTML message content.
To create a plain-text message:
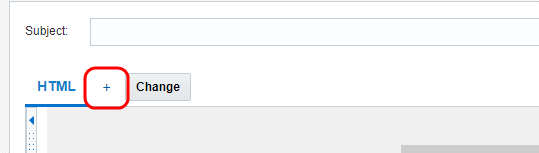
- With the email open in the Message Designer, click + next to the HTML tab.

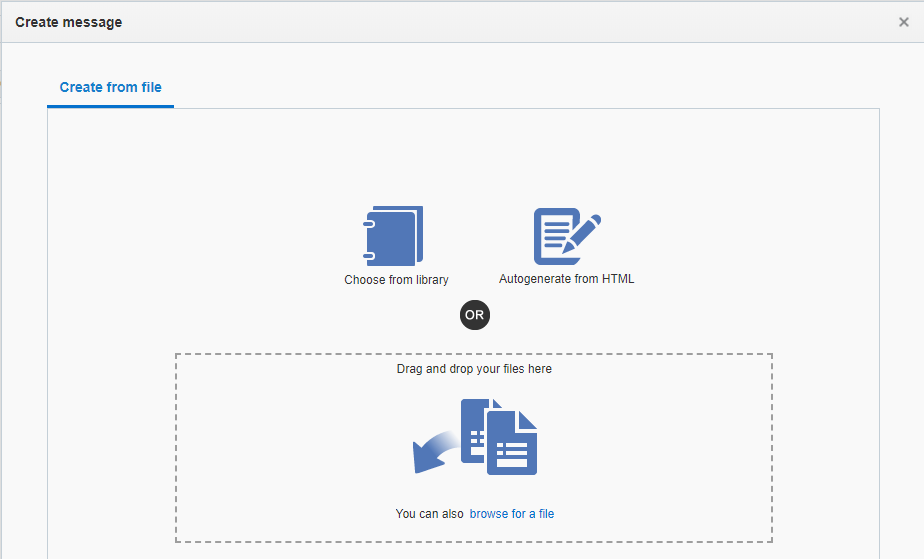
- Choose how you want to create the plain-text message content.
You can choose a file from your Content Library or from your computer. To autogenerate the plain-text message, click Autogenerate from HTML. New documents are added to the Content Library.

After you create the plain-text message, you can toggle between the HTML and text versions using the tabs.
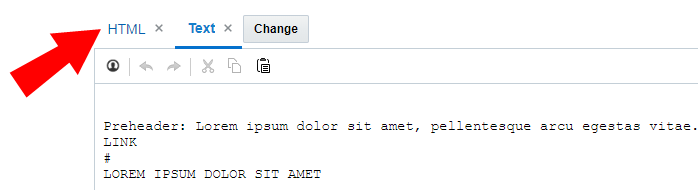
Editing HTML source code
Note: The following steps assume you do not have the rich text editor enabled. Learn more about the rich text editor settings.
You can use the Email Message Designer to view the HTML source code and the live view of your email side-by-side.
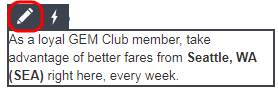
Personalize the email message
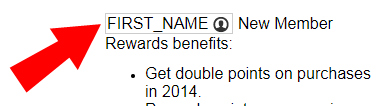
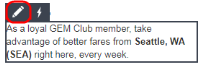
You can personalize an email's subject line or content using subscriber's data by inserting personalization tokens. A personalization token is the selection of a column whose value should be dynamically inserted in the email with the subscriber’s unique values. Data from columns in a PET, supplemental table, segment group, or dynamic variable can be used for personalization as well.
You can personalize the campaign further using dynamic content. Learn more about working with dynamic content .
To add a personalization token with the classic user interface:
Note: If your account has the classic personalization token user interface, learn how to configure your token with the classic user interface.
- With the email open in the Email Message Designer, choose an option:
- To personalize the body of the email message, click the content you want to personalize. Click Edit
 .
. 
- To personalize the subject line, click Edit subject line
 .
.
- To personalize the body of the email message, click the content you want to personalize. Click Edit
- Place your cursor where you want to place the personalization token and click Insert personalization token
 .
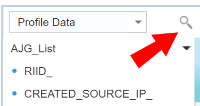
. - Choose the list you want to use. If a profile list is not assigned to the campaign, Oracle Responsys will prompt you to select a profile list. After you select a profile list, a personalization token can be created based on the list columns.
- Locate the column from the list and drag it to the right pane.
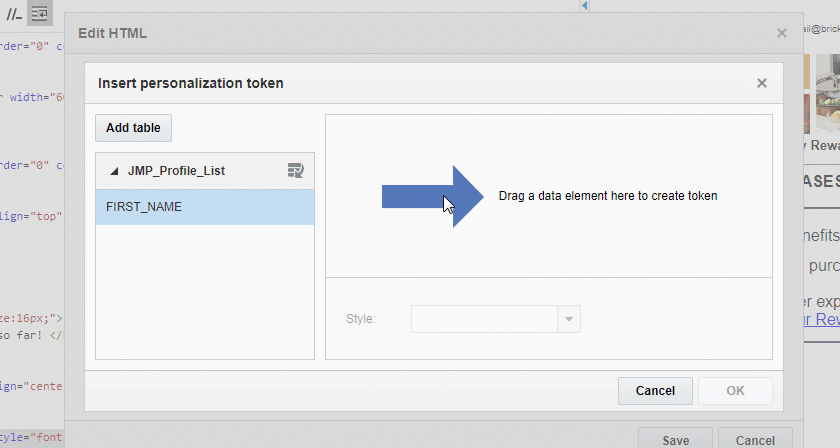
Tip: If the column isn't showing in the list, click Add columns
 . To add a data source, click Add table. For more information about adding columns and data sources, see Email Message Designer - Working with Data Sources.
 - Optionally, select a formatting style from the Style drop-down list.
- Click OK.
To add a personalization token with the new user interface:
Note: If your account has the classic personalization token user interface, learn how to configure your token with the classic user interface.
Important: The new personalization token user interface simplifies the user experience for marketers.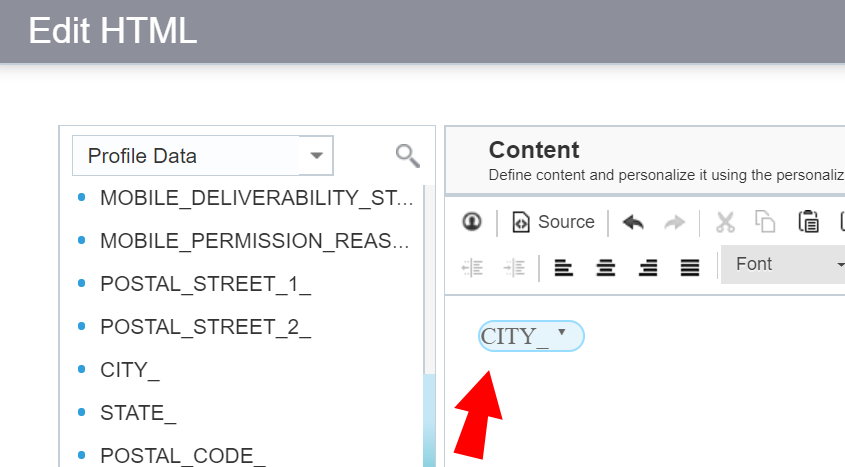
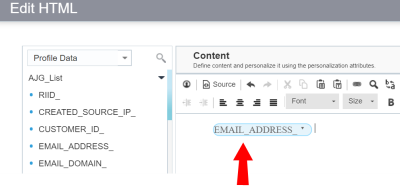
- With the email open in the Email Message Designer, click the content you want to personalize then click Edit.
- Locate the column from the list and either drag it to the right panel or double click it. Or click the '+' sign that shows up when you hover on the column name.
You can use the search functionality to locate specific columns belonging to a data source.
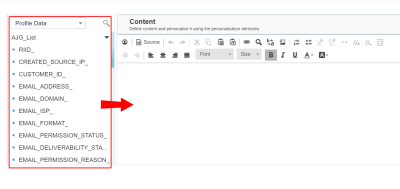
Tip: If the column you want isn't showing in the list, expand profile extension tables or change the data type from the drop-down. The drop-down allows you to choose between Profile Data, Supplemental Data, and Dynamic Variables. If you would like to add a column from a supplemental table or to add a dynamic variable, select Supplemental Data or Dynamic Variable from the drop-down, then click
 .
. - Optionally, click on the token to select from Styling Options or delete the token.
- Click OK.


The following video shows how to personalize campaign messages using the new personalization token user interface.
You can use profile extension table (PET) data to personalize campaign messages.
You can also use the new interface to personalize subject lines of your campaign messages.
Working with the message header
The message header includes From Name, From Address, Reply to Address, and BCC address (if defined for the account).
The From Name and From Address are displayed at the top of the canvas. To see the Reply to and BCC address point at the header section.
To edit the header:
- With the email open in the email Message Designer, click More > Manage Header.

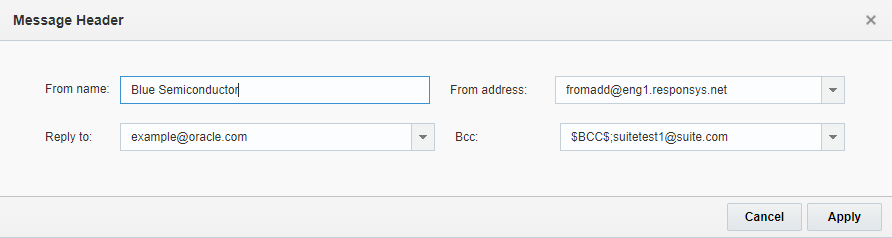
The following header fields can be configured:
- From Name
By default, this is the sender name that the Account Administrator defined for all campaigns. You can change this to any name and use Responsys Personalization Language (RPL) to personalize it. Learn more about RPL. - From Address
The email address to which bounced messages are returned. This list includes the email addresses of all account users. - Reply To
The email address to which manual replies are sent. Depending on the way your account is set up, you might be able to enter any reply-to address. Otherwise, your choices are limited to the addresses of all account users. Options are set by the Account Administrator - BCC
If BCC addresses are enabled and defined for the account, you can select the email addresses to which to send the BCC. BCC addresses are managed at the account level by submitting a Service Request (SR) through My Oracle Support (MOS).
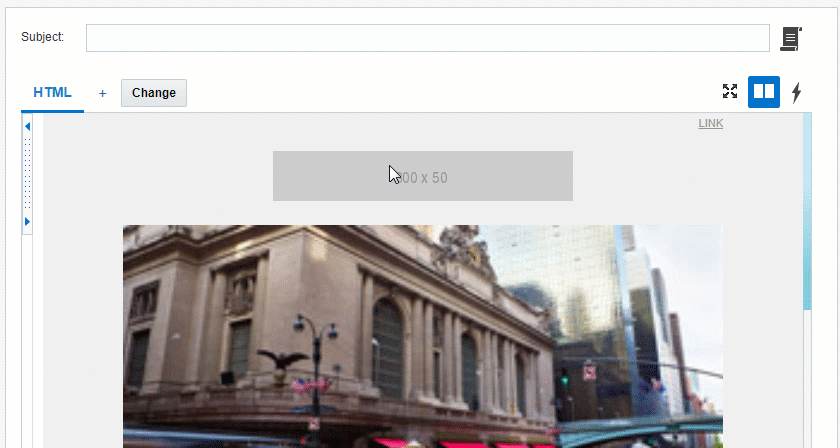
Inserting images
You can insert images to campaign messages that include HTML content components. This applies to Email, In-App, Rich Push Messages, and Message Center Campaigns. Images can be inserted from the Content Library or Oracle Content Management.
Important: Oracle Content and Experience Cloud or Oracle Content Management are now known as Oracle Content Management. This change in name may not immediately reflect everywhere in the Oracle Responsys user interface.
To insert images:
- In the email Message Designer, select the HTML component for which you want to add the image.
-
Click Edit.
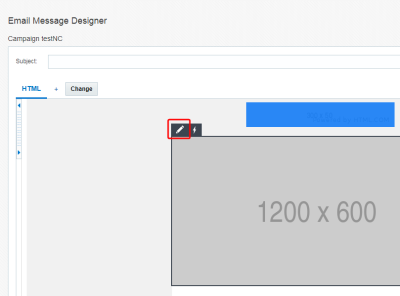
- Click Image in the toolbar.
-
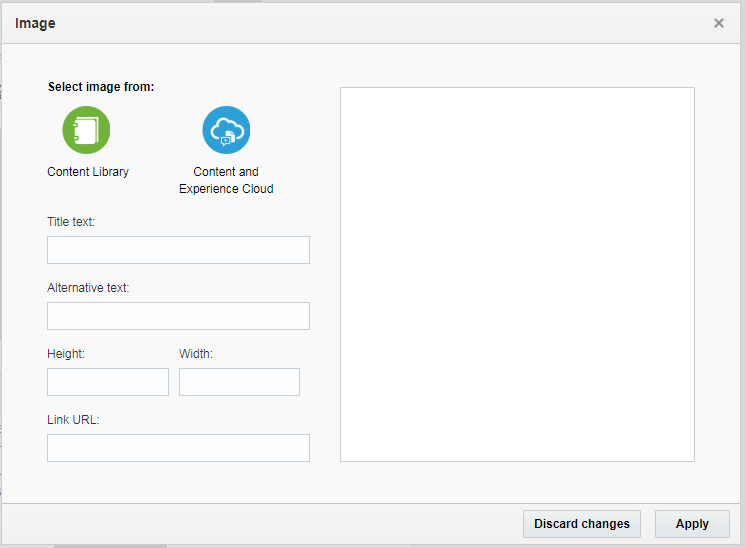
Select a source for the image.
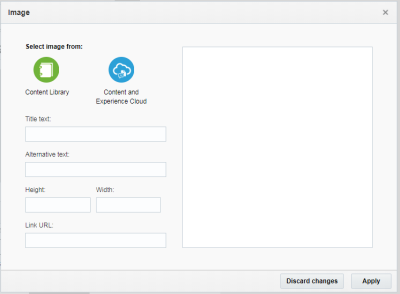
-
To insert an image from the Content Library or external URL:
- Click Content Library.
-
Select a method to insert an image.
- From Content Library: Select to browse your Responsys images or upload an image from your machine.
- Enter URL: Select to enter a web location of an image to insert.
- Click Select.
-
To Insert an image from Oracle Content Management:
- Click Content and Experience Cloud.
- Enter your Oracle Content Management credentials in the modal that appears.
-
The images for the campaign type will appear.

If your images are not displaying, see Configuring Oracle Content Marketing Publishing Channels to ensure you have setup your Publishing Channels correctly.
-
-
If applicable, specify image details:
- Title text: Enter a title for your image.
- Alternative text: Enter alternative text for your image. This is helpful in the event your image cannot be found or displayed.
- Height: Enter a height to resize the image.
- Width: Enter a width to resize the image.
- Link URL: Enter the image's web location.
- Click Apply.