Working with Data Sources
Important: This information applies to the Email Message Designer. Speak to your Account Administrator about access to this feature.
Note: The Email Campaign Workbook now has an updated interface and is now called the Email Campaign Designer. Campaign Designer is now enabled for all accounts, and it replaces Campaign Workbook for this channel. Unlike the Campaign Designer, there were no major changes made to the Message Designer's interface.
To personalize a campaign, you must add all data sources that the message references. Data sources can then be used for dynamic content rules and personalization, and by Responsys Personalization Language (RPL). After adding a data source, you can access the data columns that you need.
Each data source and column is assigned an alias. Oracle Responsys uses these aliases to reference data sources and columns. When you select a data source or column, Oracle Responsys automatically assigns an alias to it, but you can change that alias.
Data sources
To add a data source with the Campaign Designer:
- In the Campaign Designer, click Data sources in the Email message panel. (Not seeing this choice? Refer to the Email Campaign Designer changes, mobile Campaign Designer changes (In-app, Push, or Message Center), or SMS Campaign Designer changes.)
The Data sources dialog opens.
- Click Add new source.
The Add new source dialog opens.
- Select the data source type from drop down list.
- Click Select.
To use a supplemental data only as a lookup table:
-
In the Campaign Designer, click Data sources in the Email message panel. (Not seeing this choice? Refer to the Email Campaign Designer changes, mobile Campaign Designer changes (In-app, Push, or Message Center), or SMS Campaign Designer changes.)
The Data sources dialog opens.
- Click Settings beside the supplemental table.
The Settings dialog opens.
- Select the Data source is used only as a lookup table checkbox.
- Click Done.
To remove a data source:
-
In the Campaign Designer, click Data sources in the Email message panel. (Not seeing this choice? Refer to the Email Campaign Designer changes, mobile Campaign Designer changes (In-app, Push, or Message Center), or SMS Campaign Designer changes.)
The Data sources dialog opens.
- Click
 beside the data source you want to remove.
 - Click Yes on the confirmation message.
To add a dynamic variable:
-
In the Campaign Designer, click Data sources in the Email message panel. (Not seeing this choice? Refer to the Email Campaign Designer changes, mobile Campaign Designer changes (In-app, Push, or Message Center), or SMS Campaign Designer changes.)
The Data sources dialog opens.
- In the Dynamic variables section, enter the number of variables you want to add.
- Click OK.
- Specify the Alias for the variable and, optionally, the Default value.
Aliases cannot start with a digit and can contain only the following characters: a-z A-Z 0-9 _ $ @.
- Click Save.
Columns
To add a column with the Campaign Designer:
-
In the Campaign Designer, click Data sources in the Email message panel. (Not seeing this choice? Refer to the Email Campaign Designer changes, mobile Campaign Designer changes (In-app, Push, or Message Center), or SMS Campaign Designer changes.)
The Data sources dialog opens.
- Click Add columns beside the data source you want to take the column from.
The Select columns dialog opens.
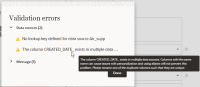
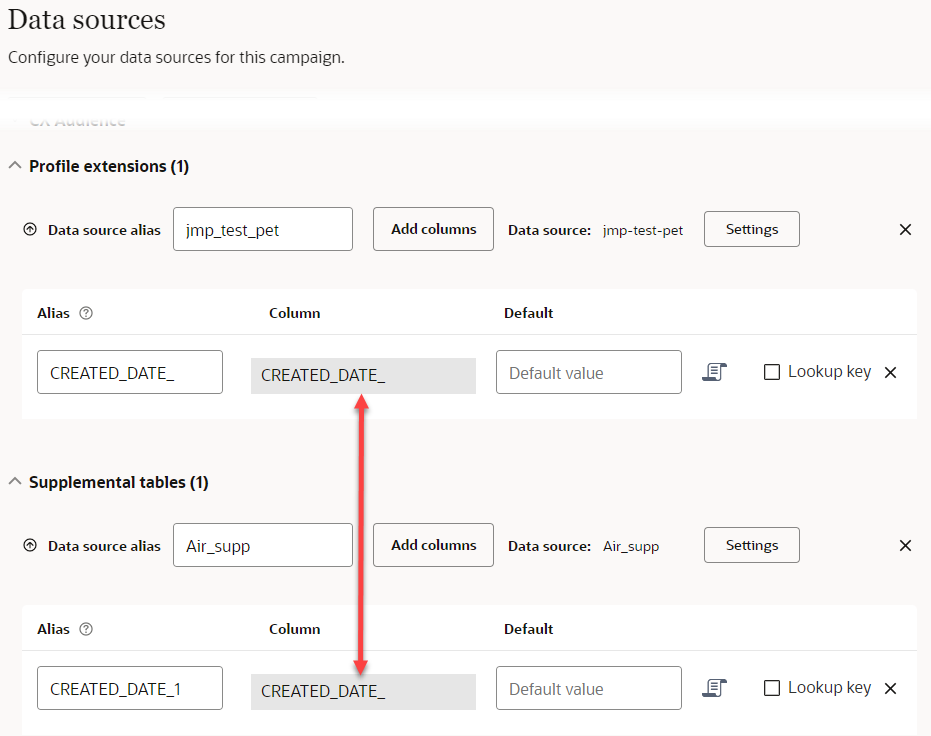
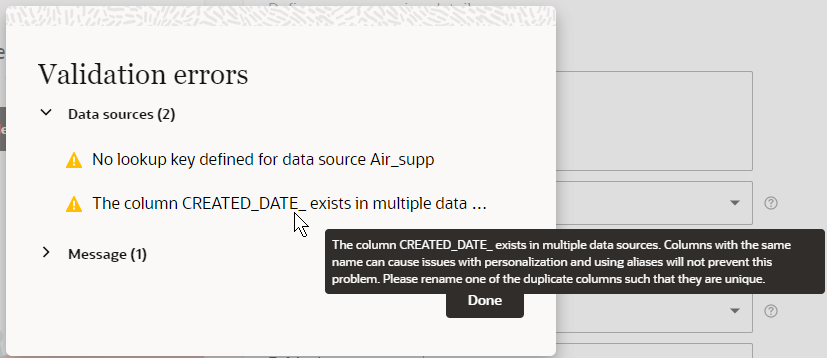
Important:Make sure the field names you use for personalization are unique across data sources. Duplicate columns from different data sources with different values can result in missing personalization in campaign messages. Choosing two field names with the same name will prompt a warning message in the validation section. If these columns have the same set of values, this will not be an issue. This warning message will not impact your campaign launch.

However, when a supplemental data source is used as a look-up table, those columns may have duplicate names, and will not cause a personalization error. - Select the columns you want to add.
Tip: Use the Ctrl and Shift keys to elect multiple columns.
- Click Select.
To personalize a column:
Tip: When personalizing a column, you can insert a token. A token is a placeholder for a value of a field.
-
In the Campaign Designer, click Data sources in the Email message panel. (Not seeing this choice? Refer to the Email Campaign Designer changes, mobile Campaign Designer changes (In-app, Push, or Message Center), or SMS Campaign Designer changes.)
The Data sources dialog opens.
- Click
 beside the column you want to personalize.
The Script page opens.
- Type the text of the script you want.
- Optionally, add a personalization token. To do so:
- Click
 .
.The Insert personalization token dialog opens.
- Drag the column you want to the right pane.
Tip: To add columns, click Add columns
 . To add a data source, click Add Table.
 - Optionally, select a formatting style from the Style drop-down list.
- Click OK.
- Click
- Click Apply.
To use a column as a lookup key:
-
In the Campaign Designer, click Data sources in the Email message panel. (Not seeing this choice? Refer to the Email Campaign Designer changes, mobile Campaign Designer changes (In-app, Push, or Message Center), or SMS Campaign Designer changes.)
The Data sources dialog opens.
- Select the Lookup key checkbox for the column you want as a lookup key.
To set a default value for a column:
-
In the Campaign Designer, click Data sources in the Email message panel. (Not seeing this choice? Refer to the Email Campaign Designer changes, mobile Campaign Designer changes (In-app, Push, or Message Center), or SMS Campaign Designer changes.)
The Data sources dialog opens.
- Type the default value in the column's Default field.
To remove a column:
-
In the Campaign Designer, click Data sources in the Email message panel. (Not seeing this choice? Refer to the Email Campaign Designer changes, mobile Campaign Designer changes (In-app, Push, or Message Center), or SMS Campaign Designer changes.)
The Data sources dialog opens.
- Click beside the column you want to remove.