Reloading Your Data to NetSuite Analytics Warehouse
Data transfers from NetSuite to the Analytics Warehouse happen daily by incremental updates. This means only new data added after the last transfer is uploaded. To keep your data consistent, especially when records are modified, you need to reload your data to the Analytics Warehouse. You can reload the standard fields of your active functional areas as well as any custom and supplemental data you've transferred to the Analytics Warehouse.
To remove personal information (PI) from your Analytics Warehouse instance, reload the data in both your active functional areas and custom fields after removing the PI from your fields in NetSuite. This ensures that any PI removed from NetSuite is also deleted from the Analytics Warehouse, maintaining data privacy and security. For more information about removing PI from your fields in NetSuite, see Personal Information (PI) Removal.
Only users assigned the NSAW Administrator role can complete the following steps.
To reload the data in your active functional areas:
-
Go to the Data Transfer Setup page. This is where you manage the data transfers between your NetSuite account and the Analytics Warehouse. For more information, see Setting Up the Data Transfer.
-
Hover over the Reload button located at the top of the page.
-
Click Functional Area to open the Functional Area Reload Configuration page.
-
Check the box next to the functional areas you want to reload. Then, click Reload. This starts the full data transfer for all the functional areas you've selected.
To reload your custom and supplemental fields data:
-
Go back to the Data Transfer Setup page.
-
Hover over the Reload button located at the top of the page. Then, click Augmentations.
-
Select the custom and supplemental fields you want to reload.
Note:Use the search bar and filters to make selecting fields easier, especially if you have a long list.
-
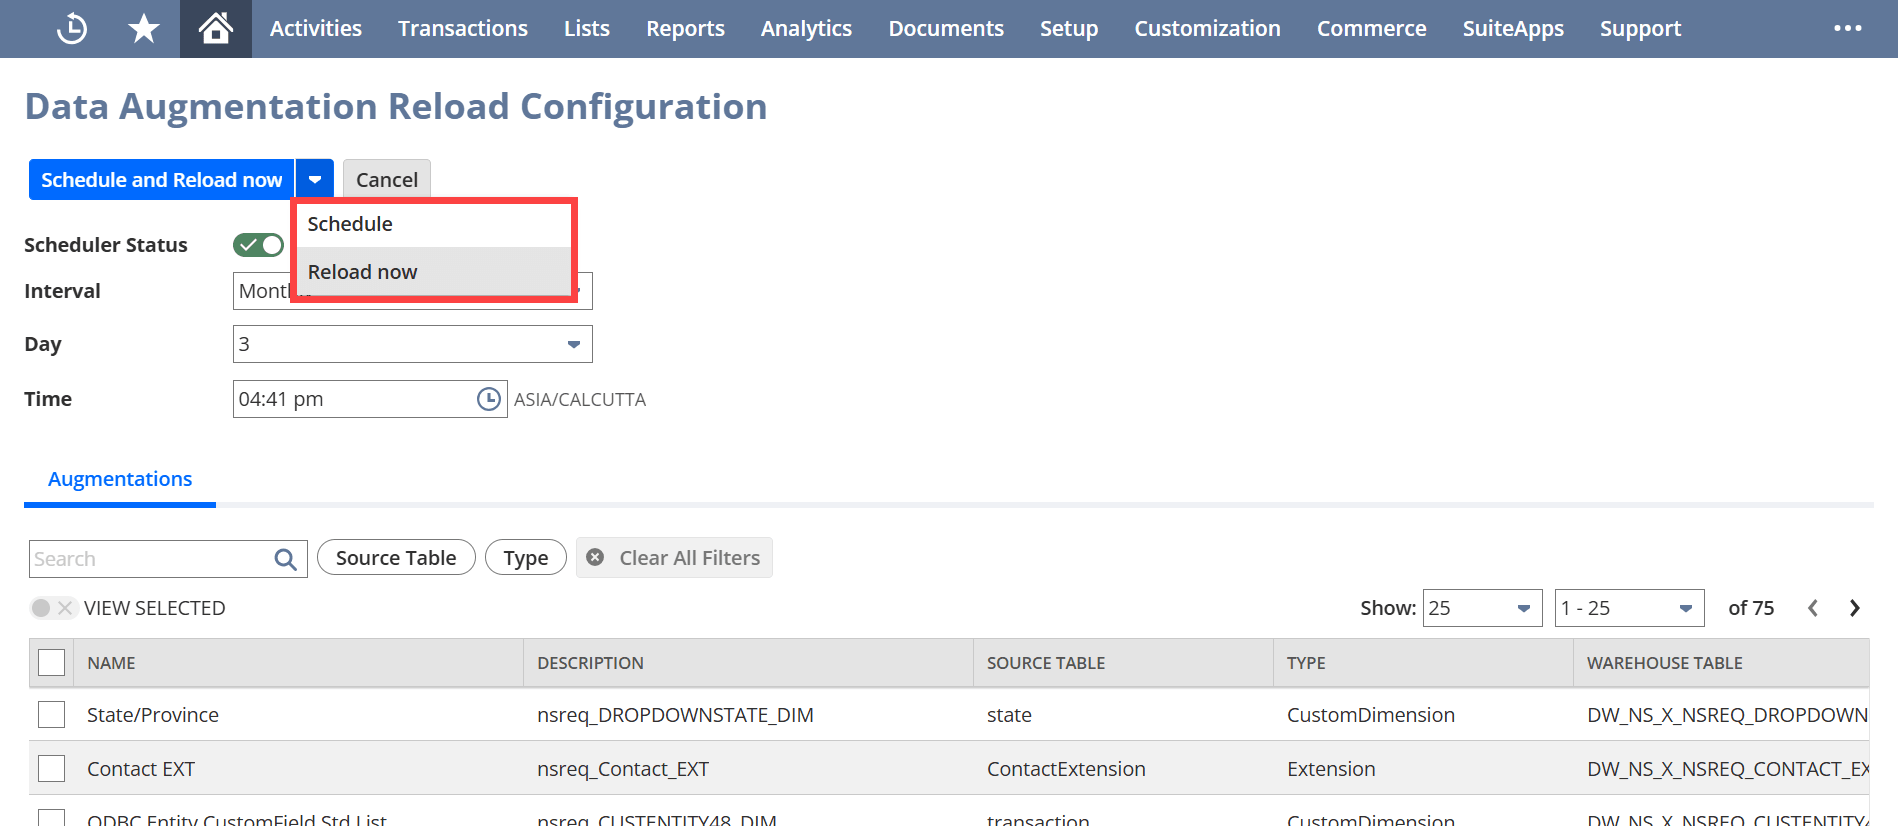
To automate future reloads for custom and supplemental fields, turn on the scheduler:
-
Click the Scheduler Status switch at the top of the page to activate it.
-
In the Interval field, set how often you want reloads: daily, weekly, monthly, or yearly.
-
In the fields below, set the day and time for the reload. If it's yearly, choose the month too.
-
-
Hover over the Schedule and Reload now button, then choose Schedule to set up future reloads with the parameters specified in step 4 or Reload now to initiate an immediate data reload. This starts a full data transfer for all the custom and supplemental fields you've selected.