Setting Up NetSuite Analytics Warehouse
NetSuite offers a hub that lets you access and set up your Analytics Warehouse instance. From here, you can also find resources that help you understand and work with the Analytics Warehouse more efficiently. This hub is called the Configuration page.
Users with the NSAW Administrator role can manage users, set up the data transfer, reset transfer credentials, and update the notification email from the NetSuite Analytics Warehouse Configuration page.
Accessing the NetSuite Analytics Warehouse Configuration Page
To open the Configuration page, go to Setup > Integration > Configuration, or Analytics > NSAW.
-
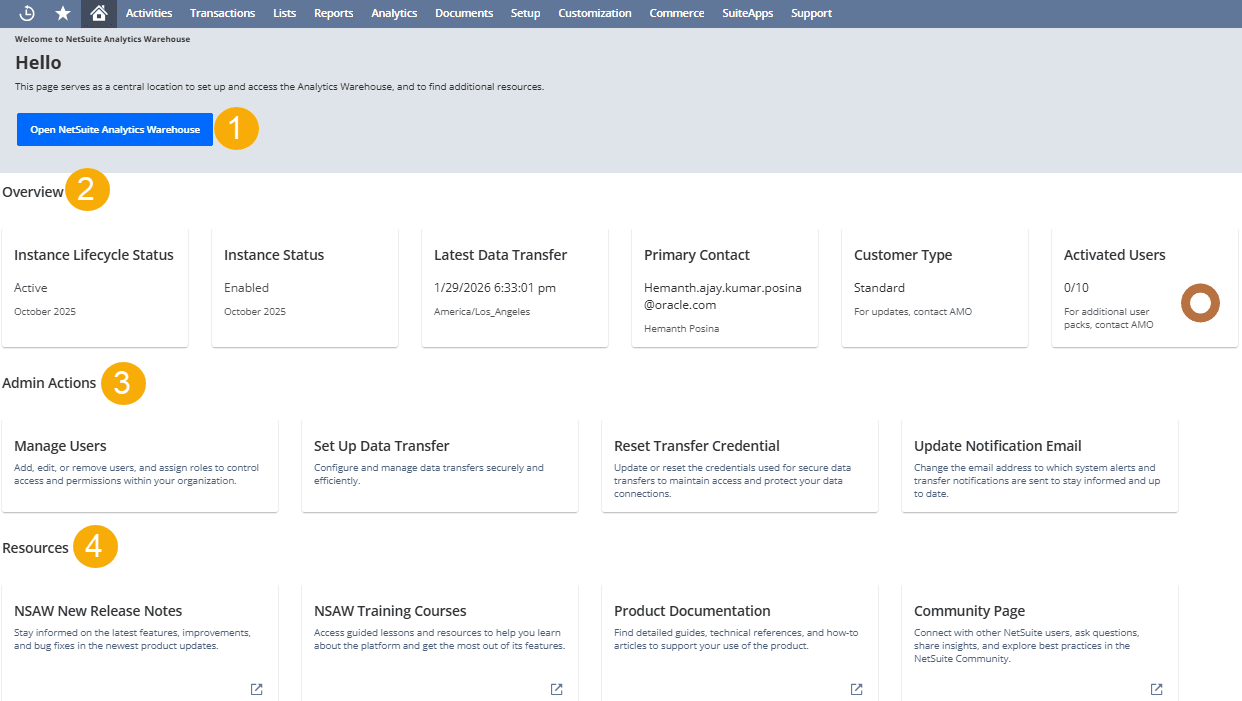
Open NetSuite Analytics Warehouse - Click this button to access your Analytics Warehouse instance.
Note:If you have the NSAW Administrator role assigned, the Administration console for NetSuite Analytics Warehouse opens. You can then click Go to Home Page to access your Analytics Warehouse instance.
-
Overview - This section shows tiles with key details about your instance, including pipeline status, last incremental data transfer, service tier, current active users, and storage usage.
-
Admin Actions - Users with the NSAW Administrator role can do the following:
-
Manage users - Add, edit, remove, and assign roles to users. For more information, see Adding Users to NetSuite Analytics Warehouse.
-
Set up data transfer - Configure and manage the data transfers. For more information, see Setting Up the Data Transfer.
-
Reset transfer credentials - Update or reset the credentials for data transfers. For more information, see Resetting NetSuite Analytics Warehouse Transfer Credentials.
-
Update notification email - Change the email address for system alerts and transfer notifications. For more information, see Updating the Notification Recipient Email.
Note:Only users with the NSAW Administrator role can see this section.
-
-
Resources - All users can access these tiles for more information:
-
NSAW release notes - Learn about the latest and key features.
-
NSAW training courses - Access training and courses related to NetSuite Analytics Warehouse.
-
Product documentation - Find help articles and guides for using NetSuite Analytics Warehouse.
-
Community page - Access the community, where you can interact with other users, ask questions and share insights.
-