Set the Customer Status Internal ID
Set up the Customer Status Internal ID so customers can make a purchase from a quote.
After a customer submits a quote request, links to the Review or Purchasing pages are turned off. This prevents customers from making a purchase from the quote before the merchant allows it.
In NetSuite, the Estimate/Quote record's Status field lists all available Customer Statuses for a quote. When the merchant manually changes this field to the Customer Status with an Internal ID matching the Purchase Ready Status ID field in your site configuration, all website links to the Review or Purchasing pages are enabled. The customer can then make a purchase.
The Customer Status List displays the Internal IDs for all Customer Statuses set up in your account. The Customer Status you choose can't be a closed status. A closed status is one that indicates the customer either already purchased (100% probability) or won't purchase (0% probability). Open Estimate/Quote records can only be given open Customer Statuses. See Customer Statuses for information about creating a Customer Status.
Before you set the Customer Internal ID, keep in mind:
-
The customer needs the right Customer Center role permissions. See Give Customers Permission to Request and View Quotes.
-
The customer needs a shipping address and method set up. See the Marketing topic Setting Preferences on the Customer Record.
-
The merchant must assign a sales representative to the quote. See Customize Sales Representative Information.
The Customer Status List (Setup > Sales > Customer Statuses) displays the Customer Statuses configured for your account and their associated Internal IDs. You enter the Internal ID of the Customer Status in your site configuration.
If you don't see the Internal ID in the Customer Status List, see Setting the Internal ID Preference for instructions to display internal ID values in the NetSuite UI.
See the following sample Customer Status List:
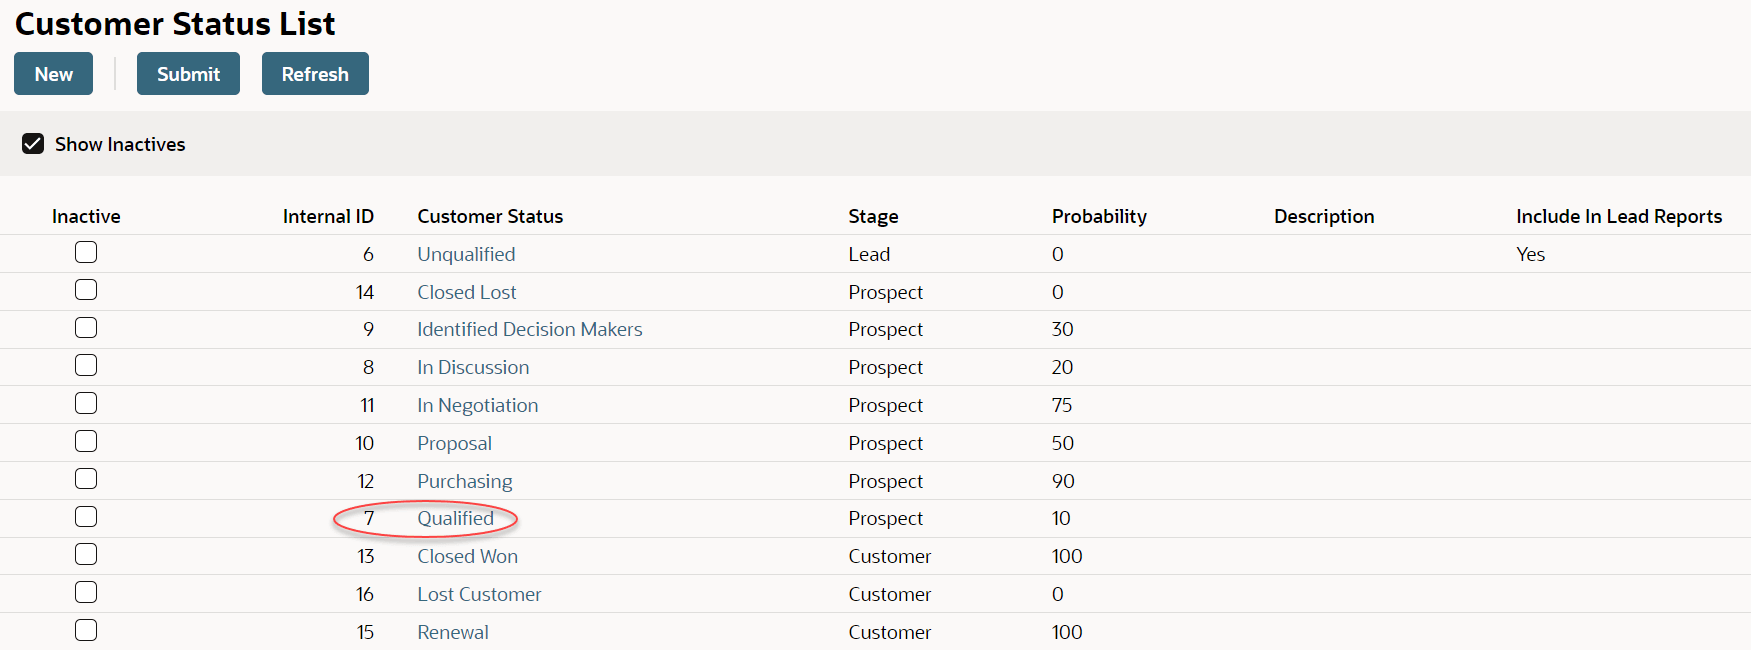
Example
You want customers to be able to make a purchase from a quote when it reaches the Qualified Customer Status.
In NetSuite, you set up your account to include the Qualified Customer Status. Go to Setup > Sales > Customer Statuses and see that NetSuite has assigned an Internal ID of 7 for this status. You update the Purchase Ready Status ID field in your site configuration to 7.
After a customer creates a quote on your site, your sales team changes the associated Estimate/Quote record's Status field to Qualified. Now the Purchase Ready Status ID field matches the Customer Status record's Internal ID. The Review and Place Order button is enabled, and the customer can finish the purchase. After they place an order, the quote becomes a Sales Order record in NetSuite.
For detailed information about working with sales orders and customizing sales order forms, see the Order Management topic Sales Orders.
To configure the Customer Status Internal ID:
-
Go to Setup > Sales > Customer Statuses.
-
Note the Customer Status Internal ID you want to use to let customers make purchases from quotes. You'll use this Internal ID to configure the Purchase Ready Status ID field in Step 6.
-
Go to Commerce > Websites > Configuration.
-
Select your website and domain and click Configure.
-
Go to the My Account tab and the Quotes subtab.
-
Enter the Customer Status Internal ID in the Purchase Ready Status ID field.
Important:The value in the Purchase Ready Status ID field must match a valid Customer Status Internal ID as defined in NetSuite. If you leave it empty, quotes can't become purchases. By default, this field is set to 12, which matches the Purchasing Customer Status.
-
Click Save.
To configure the Customer Status Internal ID (SuiteCommerce Advanced pre-Vinson):
-
Go to Setup > Sales > Customer Statuses.
-
Note the Customer Status Internal ID you want to use to let customers make purchases from quotes. You will use this Internal ID to configure code in Step 4.
-
Create a custom module that includes the SC.MyAccount.Configuration object as a dependency. See Create a Custom Module for instructions.
Note:Don't edit the original Configuration.js source file. See Best Practices for Customizing SCA for information and best practices for customizing JavaScript.
This task requires developer experience.
-
Update the
purchase_ready_status_idproperty in the custom module. Enter the value of the Customer Status record's Internal ID as noted in Step 2. -
Save and deploy to your site. See Deploy SCA Customizations to NetSuite for more information.