Record Types

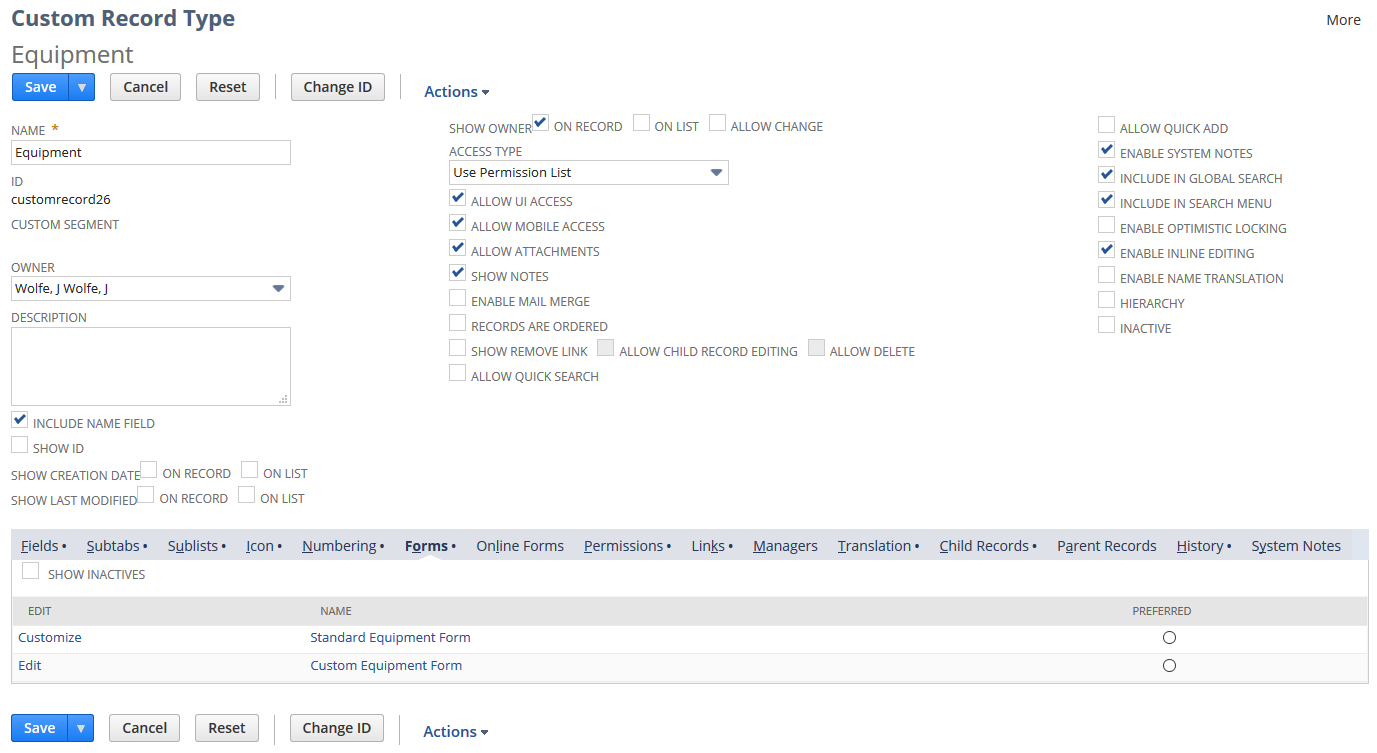
You can create custom record types to collect and store information that is not included in NetSuite. For example, your company may need to track information about computer and electronic equipment. If there is no such standard record type in NetSuite, you can create a custom record type called Equipment. Then you can add custom fields to collect and store the equipment information needed. For more information about the platform tools supported by custom record types, see SuiteCloud Supported Records.

Custom Record Type page customization.

Custom records can be attached to standard records and other custom records making them child record types. These child record types can be used to track specific information that requires multiple fields on a record. For more information, see Parent-Child Record Relationships.

Similar to standard transactions and records, you can customize the forms used to enter custom record instances and set up forms for various roles. Customizing a form involves determining which fields appear, how these fields are arranged, and which roles use the form.

Equipment Service Example using Custom Record Types

This section provides a high-level overview of the process for creating a custom record type. In this scenario, we’ll assume your company needs to track information about computer and electronics equipment.

Complete the following steps:

  1. Creating the Equipment Custom Record Type

  2. Creating the Parent-Child Relationship

  3. Creating a New Service Record Instance

  4. Customizing the Form Used to Enter Custom Records

Creating the Equipment Custom Record Type

Your company needs to track information about computer and electronic equipment. Because there is no such standard record type in NetSuite, you create a custom record type called Equipment. Then, on the Equipment record, you add custom fields in which you enter serial numbers, location, purchase date, and service and warranty information.

Sample Equipment custom record type.

Your custom records can be attached to standard records and other custom records. For example, on the Equipment record type, you want to track details each time you service your equipment, so you create a new custom record called Equipment Service.

Creating the Parent-Child Relationship

To create the parent-child relationship, you add a custom field to the Equipment Service record in which you can select the associated Equipment record. You select a field type of List/Record and select Equipment in the List/Record field. To create the parent-child relationship, check the Record is Parent box.

Sample Equipment Service Field record with Record is Parent box checked.

Creating a New Service Record Instance

When service is performed, the technician opens the Equipment record, clicks the Service subtab, and clicks a button to create the Equipment Service record instance.

In our example, you click New Equipment Service and enter the service information in the new record. The equipment field fills in automatically. The child service record shows on the parent Equipment record.

Sample Equipment record Service subtab highlighting the New Equipment Service button.

The equipment record in this example is most useful to the IT staff who purchase, maintain, and track the equipment. But there is some information that is generally useful to others in the company.

Customizing the Form Used to Enter Custom Records

When you create a new custom record, a custom form for that custom record is automatically created.

You can customize the forms used to enter custom records in the same way that you customize standard transactions and standard records. You can set up forms for various roles. Customizing a form involves determining which fields show, how these fields are arranged, and which roles use the form.

To customize the forms

  1. On the Custom Record Type page on the Forms subtab, click Customize next to the standard form.

  2. On the Custom Entry Form page, clear the boxes in the Show column next to the Warranty and Service subtabs. Then click Save.

  3. In the Access Type field, ensure that Use Permission List is selected.

  4. On the Permissions subtab, select the roles that should use the new custom equipment form only. In this example, we add all non-IT roles. When someone with a non-IT role views the equipment record, the hidden fields and subtabs are not shown.

With the preceding custom record form, employees outside of your IT department can view basic information about the equipment, like manufacturer and model. They cannot see information related to service and warranty that is relevant to only your IT staff.

For more information, see Custom Records and Adding Custom Forms for a Record.

Related Topics

General Notices