Stage a Self-checkout Kiosk
Follow these procedures to stage an NSPOS kiosk, set up a kiosk welcome page image, and work item images. For topics that describe using the kiosk, see Self-checkout Kiosk.
Provisioning a Kiosk
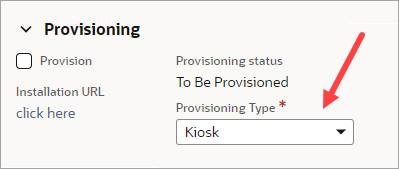
Staging a kiosk works the same way as staging an NSPOS workstation. The only difference is the Provisioning Type you select on the RA-Workstation record.
-
Locate the RA-Workstation record set up for the kiosk
-
Click Edit
-
Select Kiosk as the Provisioning Type and click Save
-
Wait a few minutes.
-
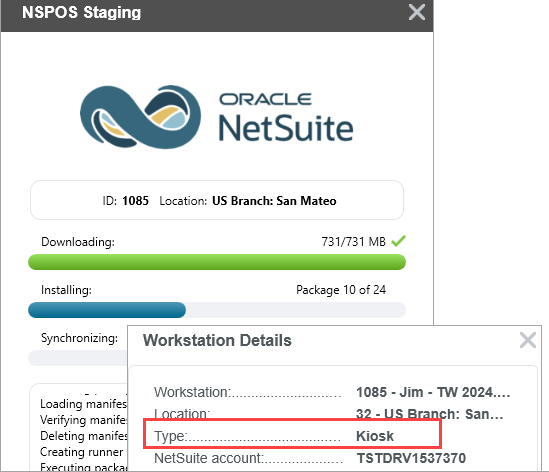
Click View and then click the Installation URL
-
The staging package download begins
See Add an RA-Workstation Record in NetSuite or see Set up a Register for a complete guide to staging.
You should use and configure FreedomPay in NetSuite ERP before staging your first kiosk.
Because FreedomPay is the only payment gateway NSPOS kiosk supports, staging a kiosk without first configuring FreedomPay will result in a non-functioning kiosk.
Working with Images for the Kiosk
You can customize an image to use as your NSPOS kiosk "welcome" page while the kiosk is in idle mode. You can also add item images that display with line items as the shopper adds their purchases to the kiosk journal. Both procedures include adding images to the File Cabinet.
Changes made to certain areas of the File Cabinet can affect performance. You should limit who has access to the File Cabinet and contact Customer Support if you're unsure about making a change.
Kiosk Image Specifications
Images to be used for your welcome page or items should meet these specifications:
-
Formats Supported:
-
PNG
-
JPG/JPEG
-
PJPEG
-
BMP
-
TIFF
-
-
Maximum File Size: 10 MB
File sizes over 10 MB - File Cabinet will accept these images for upload, but NSPOS will not use those images at the kiosk. If an image is missing from the kiosk, verify the file size used.
Setting Up Your Kiosk Welcome Page Image
Use these steps to set up your kiosk idle-mode welcome page image, which greets the shopper as they begin the self-checkout process.
The welcome page is the left-hand pane as shown in this example.
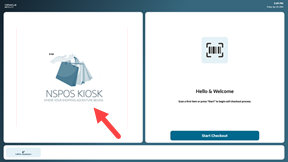
Image Size
Welcome page images should have a resolution of 480 x 560 pixels, height x width.
-
If you use a smaller image, NSPOS centers it on the page and leaves the remaining area empty.
-
If you use a larger image, portions of the image may be hidden.
File Name
The default welcome image is IdleLogo.png.
-
Your replacement for the default image must be named IdleLogo.* where * is any one of the supported formats.
For example, IdleLogo.png or IdleLogo.jpg.
-
The IdleLogo file name must use an upper-case I for "Idle" and L for "Logo."
To set up your kiosk welcome page image:
-
Create an image file named IdleLogo.*, such as IdleLogo.png.
-
Log into NetSuite ERP as an administrator.
-
Go to Documents > Files > File Cabinet.
-
Go to the folder NSPOS > File System > RAPOS > Kiosk.
-
Click Add File.
-
Select your IdleLogo.* file.
-
Click Open.
-
Click OK if you are prompted about replacing the existing image file.
Important:If your IdleLogo.* file isn't in PNG format, you should delete the default PNG file. For example:
-
Upload IdleLogo.jpg
-
Delete IdleLogo.png (default)
-
To use a different version of the image at certain locations or workstations, set up a folder structure for those areas and add your versions of IdleLogo.png to those folders.
For example: NSPOS > File System > RAPOS > Kiosk > Store ##
Adding Kiosk Item Images
Use this topic to add item images and associate images with individual item records. Item images appear as the shopper adds items to the kiosk journal.

Image Size
Item images should have a resolution of 256 x 256 pixels, height x width.
-
If an image has a resolution greater than 256 x 256, NSPOS downsyncs the image to the kiosk, converts the image to be 256 x 256 and saves the converted image to the kiosk database. This process can delay the time needed for an image to become available.
Tip:To ensure performance for NSPOS synchronization updates with your kiosks, always use a resolution of 256 x 256 for item images.
Upload and Use Kiosk Item Images
Follow this procedure to add multiple images to the File Cabinet. To add a single image or to learn more about uploading images, see Upload Images to the File Cabinet.
Uploading a large quantity of images or using large file sizes can increase the time it takes to downsync images to each kiosk.
To upload multiple images to the File Cabinet:
-
On your computer, create a ZIP file of the images to upload.
Don't include folders in your zip file. Folders can complicate unzipping your images in the File Cabinet.
-
Log into NetSuite ERP as an administrator.
-
Go to Documents > Files > File Cabinet.
-
Open the Images folder. (Your setup may use a different folder name.)
-
Click Advanced Add.
-
From the Zip Archive to Add field, select the ZIP file you created on your computer and click Open.
-
Check the Unzip Files box. Checking this box unzips your files directly into the images folder.
-
Click Add.
Note:New and changed images are synchronized to the kiosk with the next downsync, usually within one hour. However, due to caching requirements, an image update may take up to two hours. Uploading multiple images can increase the time needed to downsync and update.
To associate an item with its image:
-
Log into NetSuite ERP as an administrator.
-
Go to Lists > Accounting > Items.
-
Locate the item and click Edit.
-
Open the Custom subtab.
-
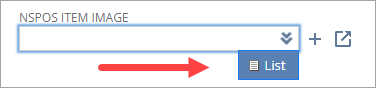
Locate the NSPOS Item Image field.
-
Click the list icon and select the item's image.
-
Click Save.
Use Your Web Store Item Images at the Kiosk
You can use item images set up for your web store for journal line items on the kiosk. The Use Web Store Image for NSPOS option overrides any NSPOS item image already set up on the item record.
To set an item to use a web store image at the kiosk:
-
Log into NetSuite ERP as an administrator.
-
Go to Lists > Accounting > Items.
-
Locate the item and click Edit.
-
Open the Custom subtab.

-
Check the Use Web Store Image For NSPOS option.
-
Open the Web Store subtab.
-
Verify the image to use in the Item Display Image field.

-
Click Save.
The web store item image will be used for the item at the kiosk. If a web store Item Display Image is not selected, no item image will be used at the kiosk.
New and changed images are synchronized to the kiosk with the next downsync, usually within one hour. However, due to caching requirements, an image update may take up to two hours.