Stage a Register in NSPOS 2020.1.X or 2024.1.X
Follow these steps to bring a NSPOS register online in your store. The process installs the latest NSPOS application package from the replication server. In NetSuite, staging is also called Partner Provisioning. Use staging to:
-
Set up a new register.
-
Bring disconnected registers up to date.
-
Correct issues where a release upgrade was unsuccessful.
The process sequence is:
-
Configure the Security GUID (one time)
-
Follow the Default Staging Procedure for NSPOS 2020.1.X
To go directly to the steps to stage a register, use the default staging link.
The RA-Workstation record for the register must already exist. See Add an RA-Workstation Record in NetSuite.
If the install fails due to a lost internet connection or any other reason, you can repeat these staging steps.
Also see:
Other staging-related tasks:
Staging Time-line Considerations
When opening new stores, it's important to consider the time needed to prepare the registers with current information from your NetSuite ERP setup. Make sure all registers are ready 24-48 hours prior to using them in sales transactions. This also applies to registers that were previously active but have been turned off for a long time.
Staging is an effective method for preparing registers in a short amount of time. When you stage a register, all information is fully loaded and up to date. After staging, registers receive only the information needed to keep them current.
Staging is an option for restoring a register that was offline and not in use. When a register is turned off, NetSuite holds all new transactions, price changes and customer information for download to the register later. If a register is turned off for an extended period, the size of the update can be large and take extra time to download. This might delay a register from being ready when you need it. Staging is generally faster than waiting for large downloads to complete.
Preparing items and prices for new locations is a factor to consider. If new item setups require mass updates to NetSuite ERP, it's better to perform the updates before staging your registers.
To make sure your new registers are ready for business, you should do the following:
-
Review the register's Normal State Monitor to see if data is pending to be downloaded from the server.
-
Stage registers 24-48 hours before first use. If no major changes to NetSuite ERP data will occur before using the register, the time between staging and first use can be longer without a significant impact on performance.
-
If you need to add new items or customers, try to add or import the information to NetSuite ERP before staging new registers. Then the new information will be included during staging.
-
To avoid impacting existing registers, large item and customer changes in NetSuite ERP should be performed in small increments. A good guideline is limiting changes to 60,000 records or less per day, performed outside of business hours.
If you're not sure how to limit the number of records or if this guideline doesn't fit your rollout schedule, contact NetSuite Customer Support for assistance.
The browser types supported for staging a register depend on the NSPOS release. For NSPOS 2020.1.x or later, you can use any browser. For example, you can use Internet Explorer, Microsoft Edge, Mozilla Firefox, or Google Chrome.
Before restaging a register workstation that was set to Inactive in NetSuite ERP, clear the Inactive box on the NetSuite RA-Workstation record, Save and then wait 15 minutes for the active status to sync between the server and the workstation.
30-day Offline Register Termination
Applies to NSPOS 2020.1.X and later.
If a register is offline for more than 30 days, it's terminated on the replication server. Any synchronization data held for the register is deleted. Restaging is required to bring a terminated register online.
For more information, see Viewing Workstation/Register Status From the Register.
Replication Server Version/Staged From Version
Applies to NSPOS 2020.1.X and later.
After you upgrade your server to the latest version, you might notice different version numbers between a workstation (register) and its NetSuite ERP > RA-Workstation record. This is a result of the server update and doesn't affect register operations or status.
Version numbers appear in these NSPOS-related areas:
-
NSPOS Enable Features - The bundle version is found in the upper left of this custom record in NetSuite ERP.
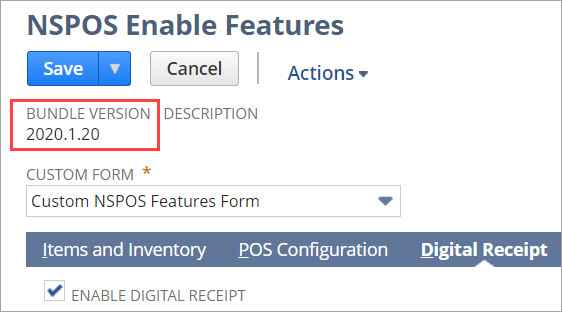
-
RA-Workstation - On the workstation custom record, both the server version and the staged from version appear.
The Replication Server Version is the version installed on the server. The Staged From Version is the version that was used to install NSPOS on the workstation.
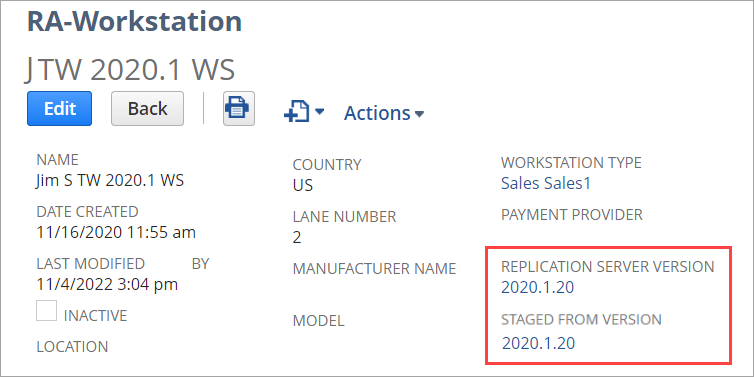 Note:
Note:Infrastructure upgrades that do not affect the workstation can cause the Staged From Version to be different from the NSPOS version installed on the register.
-
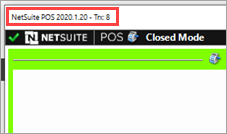
NSPOS workstation - When you log into a register, the version number of the last update appears in the top-left. If the server has been upgraded but the workstation hasn't, the earlier version is listed there.
-
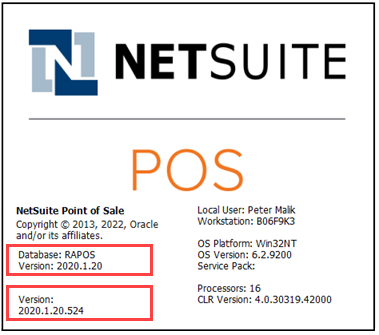
NSPOS workstation "about" page - When you press or tap Ctrl+F1 on a register, the database version and the POS (workstation) version appear.
Configure the Security GUID
Configuring a Security GUID in NetSuite ERP is required for the initial staging process. This one-time setup configures the encrypted security token used to authenticate NSPOS communication over secure connections. The random characters you enter supplement the encrypted token characters automatically assigned by NetSuite.
To ensure only qualified personnel make this important setup, access is restricted to all roles except administrator.
Configure the Security GUID in this order:
-
Install the NSPOS bundle
-
Configure the Security GUID
-
Stage your registers
This one-time setup must be performed before staging any register to NSPOS 2020.1.X or later.
To configure your Security GUID:
-
Log in to NetSuite as an administrator.
-
Go to Setup > Integration > Setup Security GUID.
-
Enter 32 random characters. You can enter letters, numbers, or a mix of both.
Tip:No need to count the characters. Entries will stop when you reach the 32-character limit.
-
Click Save.
Restricting Access to the Security GUID Setup
You need a 32-character GUID in place before you stage registers for the first time. After it's set, the GUID doesn't need further updates. To prevent unauthorized personnel from changing the GUID and possibility causing an error, you can block access to all roles except administrator.
The restriction is set up automatically when you install NSPOS 2024.1.10 or later.
To restrict Security GUID access by role:
-
Log into NetSuite ERP as an administrator.
-
Go to Customization > Scripting > Script Deployments.
-
Locate the script RA-SU-SecurityGuidSetup and click Edit.
Tip:Click the Script column heading to sort the list alphabetically.
-
On the Audience subtab, set these values:
-
If checked, clear the Roles - Select All box.
-
In the Roles list, make sure that Administrator is the only role selected.
-
If checked, clear the Employees - Select All box.
-
-
Click Save.
Database Application
NSPOS 2020.1.X and later uses the MySQL database. MySQL sets up automatically when each register is staged.
After a register is upgraded to NSPOS 2020.1.X or later, the Microsoft SQL Server application used in prior NSPOS releases is no longer needed. You can remove that database application from the register or leave it installed, depending on your storage needs.
Nightly Staging Packages
To save time normally spent waiting for the provisioning process to build a staging package, NetSuite builds a new package for each register every night at midnight in your time zone. Packages include all information current at the time they're created. The next night, NetSuite removes yesterday's packages and builds new packages.
After the package is installed, synchronization starts automatically to check for and copy any changes that may have occurred since midnight.
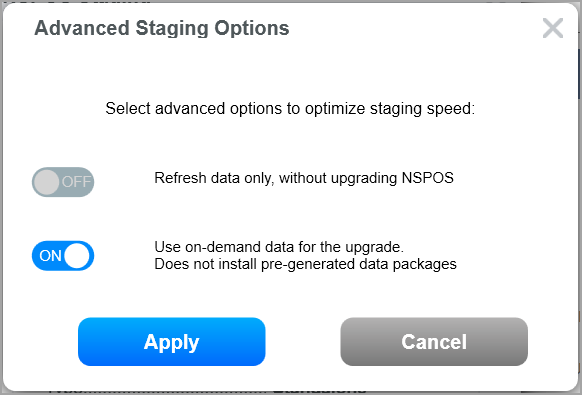
Advanced Staging Options
NSPOS staging includes two staging options you can use in specific scenarios to optimize the staging process.
You shouldn't use these options for all workstations (registers) because it could impact overall performance. Only use them if you understand the benefits and limitations.
|
|
Refresh data only
-
What it does: Reviews and refreshes only the data that is replicated to the workstation, ensuring information saved locally is up-to-date. No staging components are installed and the process does not recreate data that is already current.
-
Limitations: Workstation needs to be on the latest NSPOS release and successfully communicating with application server. The workstation can't be inactivated or in a terminated status.
-
When to use: Often used for workstations only turned on sporadically (like on weekends), when many updates for similar records have occurred since the workstation was last online. These updates commonly involve large volumes of item and price changes.
Use on-demand data
-
What it does: Prompts the server to generate new data packages now so that the workstation gets staged with the most recent data. Most staging uses last night's package data, and then waits for the staging synchronization phase to get the current data.
-
Limitations: This option is available to most staging scenarios. However, due to system performance impacts from generating data packages on demand, staging services default to a maximum of five parallel on-demand staging events at any one time.
-
When to use: Use when the staging synchronization phase doesn't seem to be working or is running slow. Another use is when massive updates occurred in NetSuite ERP after the packages were generated last night at midnight.
Extension Synchronization Selection for NSPOS 2020.1.X
The NSPOS 2020.1.X Manage Extensions in NetSuite ERP feature provides a method to load and manage extensions using the RA-Workstation record in NetSuite ERP. After installing the NSPOS bundle, the NetSuite extension list on the record is 'empty,' with no extensions selected.
However, a business can choose to set up the list in NetSuite. If a register being staged:
-
Is being upgraded from an earlier NSPOS release
-
Has its NetSuite extension list populated, and
-
The NetSuite extension list doesn't match what is on the NSPOS register now
Then a prompt displays during staging asking how to synchronize the extension list. So that you can compare lists, the prompt provides the NSPOS extensions on the register now and the extensions set up on the register's NetSuite workstation record.
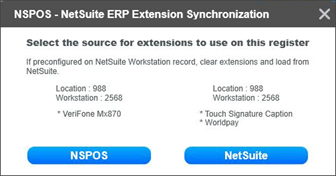
Using the NetSuite RA-Workstation record to load extensions helps you keep extensions consistent across all your registers.
The prompt only displays if the lists in NSPOS and NetSuite ERP are different.
Most staging events won't use the extension source prompt.
Default Staging Procedure for NSPOS 2020.1.X
These steps provide the default process for staging a register to NSPOS 2020.1.X.
To stage a register to NSPOS 2020.1.X:
-
Provision the register's workstation record.
-
Use the register you want to stage to log into NetSuite as an administrator.
-
Go to Customization > Lists, Records, & Fields > Record Types.
-
Find the RA-Workstation row and click List.
-
Find the workstation record associated with the register to stage and click Edit.
-
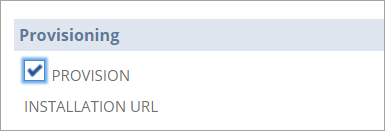
Scroll to the Provisioning section and check the Provision box.
-
Click Save.
When you save the record with the Provision box checked, NSPOS creates a staging link to download a staging package created specifically for that register and location.
-
Scroll to the workstation record again and click View.
-
In the Provisioning section, click the link below the Installation URL field. This action starts the package download.
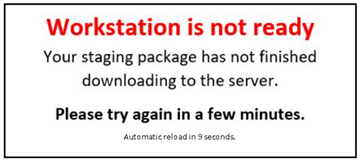
 Tip:
Tip:If you're told that the package hasn't finished downloading to the server, wait a few minutes and then click the link again.
-
Wait for the download to complete.
-
-
Open the staging package .EXE file from your browser or download folder.
If a Windows protection warning appears, click More Info and then Run Anyway.
-
The verification process begins. Wait for it to complete.
Verification ensures the register meets all specifications needed for the update. The checks include ensuring the correct operating system is installed and that enough free space exists for the setup and for day-to-day operations.
-
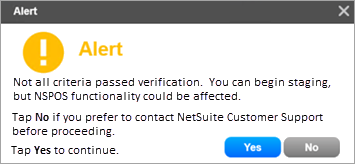
If NSPOS finds a verification issue, you're shown the issue and possible solutions.
-
For smaller issues, you're given the choice to continue.
-
Bigger issues, such as an incorrect operating system, require you to tap Cancel and try again after the issue is fixed.
-
-
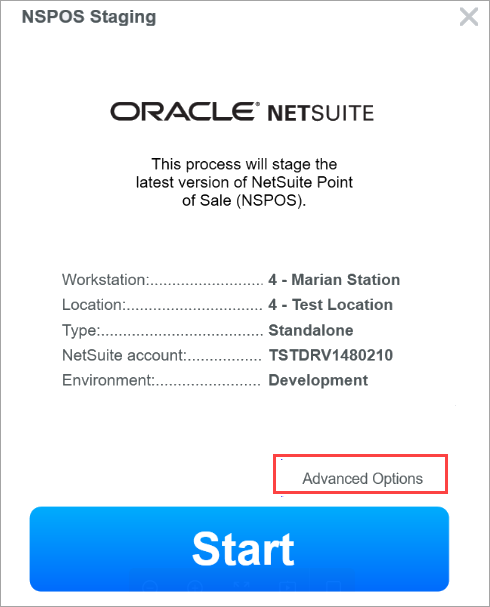
The NSPOS Staging application opens. The app lists the Workstation ID and name, the register's Location, workstation Type, and NetSuite Account.
You can tap the information panel at any time to expand it. Note also the Advanced Staging Options with refresh data only and on-demand choices. See Advanced Staging Options for details.
-
Tap Start to begin.
The NSPOS components download and install, with progress bars showing overall status.
Tip:If you need to stop the process, tap Cancel. You can restart the it later.
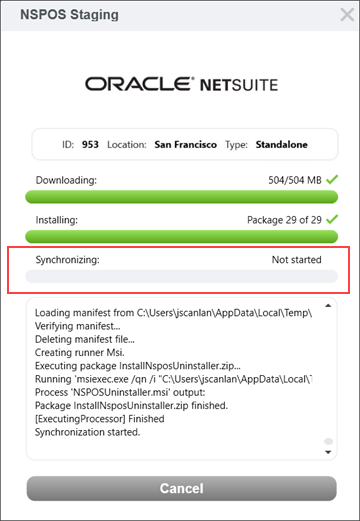
When the components finish installing, NSPOS starts synchronizing the data. This process is also called 'replication,' and is used to load the latest information from NetSuite, including today's item and price data.
Note that the Cancel button changes to Continue.
-
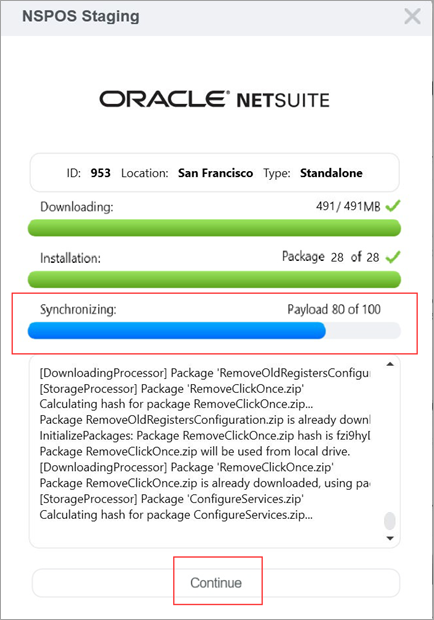
It's best to wait for synchronization to complete. However, if you need to use the register immediately, tap Continue and let synchronization work in the background.
If you choose to continue, you're warned that some data may be missing and that you should use caution. Your sales associate can open the register's Normal State monitor to view the synchronization status.
-
When the Continue button changes to Close, staging is finished.
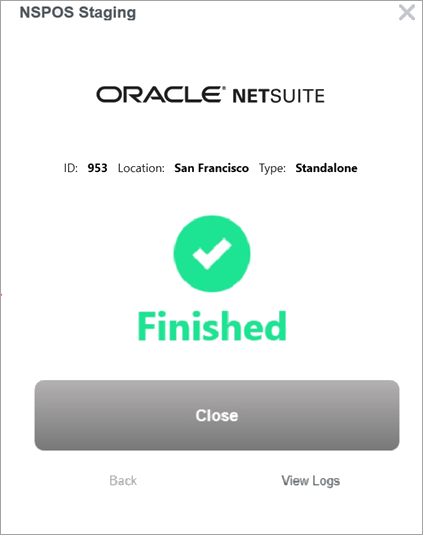
Tap Close.
Disable PO/TO Integration Downsync
The default NSPOS setup includes synchronizing any purchase order (PO) and transfer order (TO) data created in NetSuite ERP down to the register. This synchronization is part of the legacy integration with NetSuite. However, NSPOS doesn't use PO or TO data for any core functionality.
"Downsyncing" or copying this unneeded data from the server to individual workstations impacts synchronization performance. The extra data clogs server resources and could delay important register updates.
To prevent delays, you can disable synchronizing PO and TO information to NSPOS registers. See the following optional steps.
Don't set up a purchase order (PO) or transfer order (TO) in NetSuite ERP for use with NSPOS.
To disable Purchase Order and Transfer Order synchronization
-
In NetSuite ERP, go to Customization > Lists, Records, & Fields > Record Types.
-
On the NSPOS Enable Features row, click List.
-
Click Edit.
-
Open the Transactions subtab.
-
Check the Disable Purchase Orders Data Downsync and Disable Transfer Orders Data Downsync boxes.
-
Click Save.
Inactivate an NSPOS Register
You can inactivate an NSPOS register/workstation by checking the Inactive box on the RA-Workstation record in NetSuite ERP. This removes it from synchronization updates. However, it also removes all data about the register from your replication server.
Bringing an Inactive Register Online
Applies to NSPOS 2020.1.X or later.
To bring an inactive register back online:
-
Clear the Inactive box on the register's NetSuite RA-Workstation record.
-
Restage the register. See Stage a Register in NSPOS 2020.1.X or 2024.1.X.
Uninstall NSPOS From a Register
To uninstall NSPOS from a computer used as a register, use the Windows 10 uninstall tools. Use either:
-
Control Panel > Apps & features or
-
Control Panel> Programs > Programs and Features
