Creating Billing Accounts
A billing account record shows all billing information, including the billing schedule, default payment terms, ship-to address, and currency, for a customer or sub-customer.
To enable billing accounts, first set the Consolidate Projects on Sales Transactions preference and enable the Charge-Based Billing and Billing Accounts features. For more information, see Setting the SuiteBilling Preferences and Enabling SuiteBilling Features.
If you have multiple billing accounts for a customer, the default billing account is used to create transactions. For example, when creating a new invoice or new subscription, the default customer billing account is used. You can change the start date of a billing account on the billing account record only if it isn't yet used in an active subscription.
A company can set up multiple billing accounts to set different billing schedules. For example, they can bill annual charges in advance and bill usage monthly, each with a separate billing account.
Example:
Consider a coffee shop franchise that buys software using multiple billing accounts as follows:
-
The licensing fees and maintenance are billed to the parent company annually January 1. This is the first billing account, with a fixed bill date of January 1 and the ship to and bill to address is the parent company address.
-
The usage for the service is billed to the individual locations. For each location, there is a separate billing account with a monthly billing schedule. The bill to and ship to address for each account is the individual franchise location.
To create a new billing account:
-
Go to Lists > Relationships > Billing Accounts > New.
-
If required, from the Subsidiary list, select a subsidiary or change the subsidiary from the primary subsidiary to a secondary subsidiary.
-
Indicate the customer for the billing account:
-
For an existing customer, select the customer name.
-
To create a new customer, click the plus icon.
-
-
From the Currency list, select the customer's currency.
-
From the Billing Schedule list, select a billing schedule.
-
Enter or select a Start Date.
Note:After you click Save, you can't:
-
remove the subsidiary from this customer
-
delete billing accounts for this customer and their secondary subsidiaries
-
-
Click Save.
The following screen shows a completed Billing Account record.
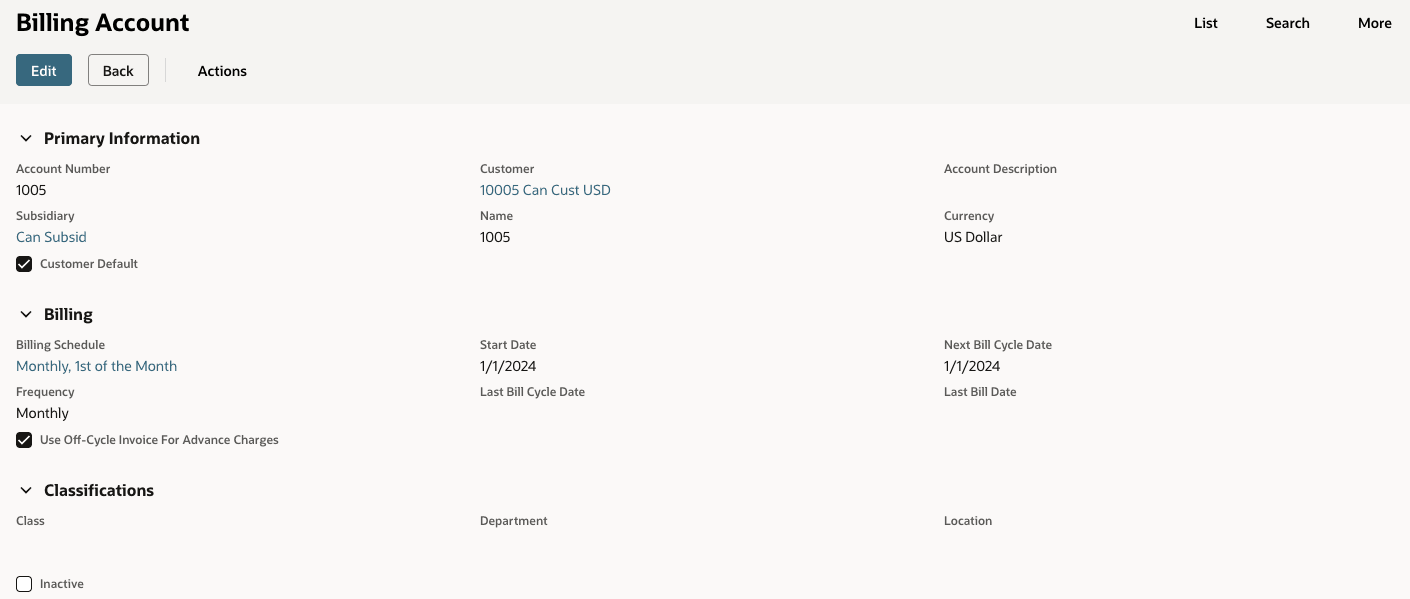
You can also create a new billing account from other records, such as the Customer record or Subscription record. To create a create a new billing account from the Customer record, on the Billing Account subtab, click -New-. Follow the previous instructions. To create a new billing account while creating a new subscription, see Creating a New Stand-alone Subscription.
Viewing Records Related to the Billing Account
You can view records related to the billing account, such as subscription records, charge records, and billing schedules.
To view records related to the billing account:
-
Go to the Billing Account page.
-
Click the Related Records tab.
Billing Addresses
The billing account's Bill-To Select list sets the account's invoice, cash sale, and credit memo billing address. If you don't select a billing address, the default billing address on the customer record is used. You can change the billing address on the billing account if needed.
Customers with multiple subscriptions on the same billing account get one invoice based on the billing account's schedule.
The Ship-to Select list sets the shipping address. If you don't select a shipping address, the default shipping address on the customer record is used.
Billing Schedules
Billing accounts use charge-based billing schedules. Charge-based billing schedules have two recurrence patterns:
-
Fixed bill date schedules generate invoices on a set date. Billing is based on the bill date, frequency, recurrence frequency, and repeat every settings. Fixed date billing schedules work best for invoicing on a specific day of the month, or other set frequency.
-
Anniversary bill date schedules generate invoices on an annual basis. Billing is based on the billing account start date, frequency, recurrence frequency, and repeat every settings. Use anniversary billing to invoice on the same date each year as the service start date.
If you set a billing schedule with a date that isn't in every month, the billing schedule adjusts. For example, if you specify billing on the 31st, for months that have fewer days, the bill is on the last day of that month. February 28 and April 30 are two examples.
Changing the Billing Date for Future Invoices to a Billing Account
You need edit permissions for billing accounts to change the next bill cycle date.
To change the billing date for future invoices to a billing account:
-
Go to a saved billing account with a billing schedule.
-
In the Next Bill Cycle Date list, change the date for the next bill cycle.
The list shows possible dates to advance the billing date, up to 10 billing cycles.
You can move the next bill date back, but only to the next date after the last recurring invoice. For example, if you generate a bill run too early and need to run bills for the first bill cycle date, you can move the next bill date back.
Creating Recurring Invoices for Subscriptions with Billing Accounts
You can create subscription invoices that automatically recur with a set frequency.
Usage and overage must be billed in arrears, but recurring, committed, and one-time charges can be billed in advance. For example, electricity bills are based on your usage and is billed in arrears. To get paid as early as possible, most SuiteBilling users bill their customer's recurring charges in advance. For example, cable and internet service companies bill their customers for the coming month at the beginning of the billing cycle. Charges begin the day the service is activated.
There are several ways to create a recurring invoice with a billing account.
To create a recurring invoice with a billing account:
-
Go to Lists > Relationships > Billing Accounts.
-
Click View next to the billing account you want to invoice.
-
Click Next Bill.
Note:You can also create a recurring invoice from the customer record's Billing Account subtab by clicking Next Bill.
The Create Invoice page opens with Recurring Bill checked. The invoice date defaults to the billing account's next bill date.
You can also create recurring invoices in these ways:
-
Invoicing billable customers from the Invoice Customers page
-
Using billing operations (Process Billing Operations and Schedule Billing Operations)
-
Creating invoices from the Invoice page
Each customer's billing accounts that are eligible for a bill run are reviewed. If there are charges, one recurring invoice per billing account per period is generated. You can send invoices to customers by generating a bill run statement.
The billing account's next bill cycle date is the invoice date. When the invoice is created, the Last Bill Cycle Date and the Last Bill Date change to the invoice date. The Next Bill Cycle Date moves to the next billing date. If you delete the invoice, the Last Bill Cycle Date and Next Bill Cycle Date revert to their previous dates. The Last Bill Date also changes to the previous bill date.
Using Billing Accounts with Off-Cycle Invoices
Use off-cycle invoices for mid-cycle billing of immediate charges. The invoice date is set to the date when you manually enter the invoice.
To create an off-cycle invoice using a billing account:
-
Go to Transactions > Sales > Create Invoices > List.
-
Click Edit for the invoice you want to use for the off-cycle invoice.
-
Clear the Recurring Bill box.
When you create the invoice, the Last Bill Date updates to the invoice date. When you delete the invoice, the Last Bill Date reverts to the previous bill date.