Configuring NetSuite Chargeback Workflow
When you install the NetSuite Chargeback Workflow SuiteApp, you can configure the default accounts to be used by your subsidiaries.
To edit a Chargeback Workflow configuration:
-
Go to Setup > Accounting > Financial Statements > Set Up Chargeback Workflow.
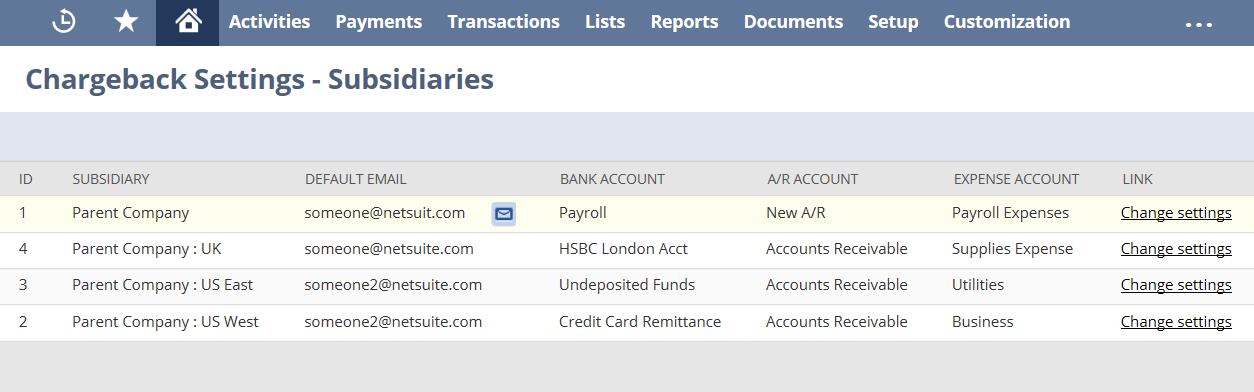
Note:If you have a OneWorld account you will open the Chargeback Settings - Subsidiaries list. Click the Change Settings link next to the chargeback configuration that you want to edit.
-
In the Default Email field, enter the default email address where you want to send notifications.
-
In the Bank Account field, enter your bank account where the funds are located. If the gateway delays depositing your funds, you can select Undeposited Funds from the list and reconcile the transaction later.
-
In the A/R Account field, enter the Accounts Receivable account that will be affected by the chargeback.
-
In the Expense Account field, enter the Expense account that will be affected by the chargeback.
-
Click Save.
Each set of configuration values will be associated exactly with one subsidiary. If you have a OneWorld account, the configuration will only apply to a single subsidiary. Therefore, you will have to configure all other subsidiaries separately.
All subsidiaries are automatically included in the Chargeback Settings - Subsidiaries list.
When chargeback workflow settings are missing, the system displays an error message and a daily email is sent to system administrators.
For more information regarding subsidiaries, see Subsidiaries in OneWorld.