Updating Asset Records Using CSV Import
You can use the CSV Import Assistant in NetSuite to update existing data in the Fixed Assets Management SuiteApp. If the updates affect the original cost, depreciation start date, or cumulative depreciation, then you may also need to update the original asset history records.
On the Fixed Assets Management System Setup page, you can set which roles can edit asset values. For more information, see Restricting the Editing of Asset Values.
Before you import asset data, it's best to perform a test import. Create a test CSV file with a few assets and review the formatting to ensure that data is imported with correct values. Make sure the asset type in the CSV file matches exactly how it's set up in your NetSuite account.
To ensure that FAM bundle scripts run on newly imported assets, enable Run Server Scripts on CSV Import (Fixed Assets > Setup > System Setup) and Run Server SuiteScript and Trigger Workflows (Setup > Import/Export > CSV Import Preferences).
To update asset records using CSV import:
-
Prepare an import file by creating a custom view from the existing Fixed Asset list in NetSuite.
-
Go to Fixed Assets > Lists > Assets.
-
Click Customize View.
-
Set Criteria to filter the list as necessary.
-
Choose the fields to update and add them to the Results subtab of the new custom view.
Important:The NetSuite Internal ID of the Asset is required to link the updated information to the correct asset.
-
Click Preview.
-
Click Export - CSV and save the CSV file.
-
-
On Fixed Assets > Setup > System Setup, make sure that the Run Server Scripts on CSV Import box isn't checked. If this box is checked the Cumulative Depreciation, Last Depreciation Date, and Last Depreciation Period will be automatically set to 0 even if your import file includes the correct amounts. For more information, see General Guidelines for Importing Fixed Asset Records.
-
Go to Setup > Import/Export > Import CSV Records. In the Import Assistant Step 1 - Scan & Upload CSV File screen:
-
From the Import Type list, select Custom Records.
-
From the Record Type list, select FAM Asset.
-
Select the CSV file to upload.
-
Click Next.
-
-
In the Import Assistant Step 2 - Import Options screen:
-
Set Data Handling to Update.
-
From the Custom Form list, select Standard FAM Asset Form.
-
Click Next.
-
-
In the Import Assistant Step 4 - Field Mapping screen:
-
Map the fields in your CSV file to the NetSuite fields.
-
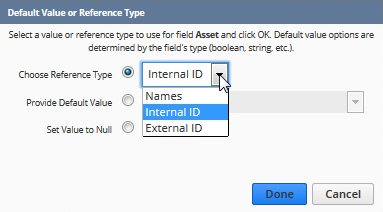
Set the Internal ID mapping type to Internal ID.
-
Review the CSV fields and NetSuite fields to ensure that all required fields are mapped.
-
-
Click Next.
-
-
In the Import Assistant Step 5 - Save Mapping and Start Import screen:
-
Enter an Import Map Name and Description.
-
Click Save & Run.
-