Creating Center Links
Administrators and users with the Creating Center Links permission can create center links.
You can create links for your custom categories as well as for standard NetSuite categories. Center links can go to other pages within NetSuite (including public saved searches for which a role has access), custom records, Suitelets, or external websites. You need to enable the Custom Records feature to customize center links.
You can create links to NetSuite pages and web pages. For more information, see Creating Links to NetSuite Pages and Creating Links to Web Pages.
Creating Links to NetSuite Pages
You can create center links to NetSuite pages.
To create links to NetSuite pages, custom records, and Suitelets:
-
Go to Customization > Centers and Tabs > Center Categories.
-
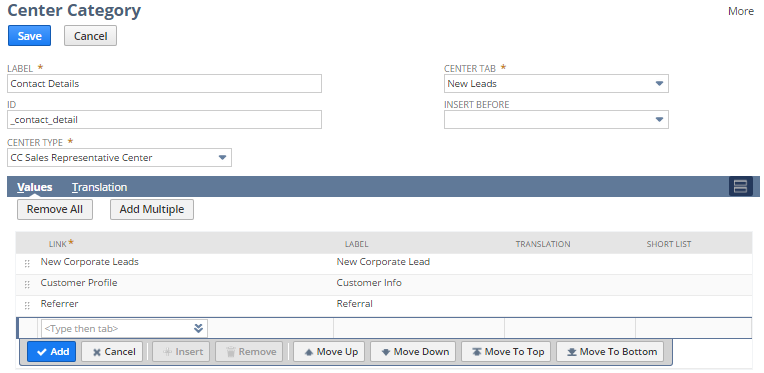
On the Center Categories list page, click Edit next to the category where you want to add links. On the Center Categories list page, click Edit next to the category where you want to add links.

-
On the Values subtab, from the Link list, select the NetSuite page, custom record, or Suitelet to link to. Use an account-specific domain for NetSuite page links. For more information, see Account-Specific Domains in Custom Center Links
Note:For custom records, you can also create links using the Links subtab on the Custom Record Type definition page. To have a link appear on a standard category, you must set the link on the Custom Record Type definition page. Also, to copy the center link and custom record to another account, you must set the link on the Custom Record Type definition page. See Creating Links to Custom Records for details. Note that a link to a custom record type does not display for users who do not have permission to access that custom record type.
-
In the Label field, enter a UI label for the link. The label appears off to the side of the category in the UI.
-
Use the short list setting for eligible center types. In the Short List column, you can indicate that the link should appear in a portlet when the link is in a narrow column of the dashboard. To do so, check the box.
Note:If the link is on a custom tab, the short list setting does not control whether the link is included on the links portlet. For custom tabs the link is always included.
-
Click Add.
Note:The link will open in the existing window. You cannot set up a link to open in a new window.
-
On the Translation subtab, enter translated labels for the custom link. The Translation subtab is available only if the Multi-Languages feature is enabled in your account. For more information, see Configuring Multiple Languages.
-
For centers that support it, you can indicate that the link should appear in a portlet when the link is in a narrow column of the dashboard. To do so, check the Short List column box. Note that for custom tabs, the link always displays on the links portlet regardless of the Short List setting.
-
Add and reorder values as needed. To change the order, select an item in the list and drag it to another place in the order. Or select a item and click Move Up, Move Down, Move to Top, or Move to Bottom.
-
Click Save.
Creating Links to Web Pages
You can create center links to web pages.
To create links to web pages:
On the Translation subtab, enter translations for the custom center link. The Translation subtab is available only if the Multi-Languages feature is enabled in your account. For more information, see Configuring Multiple Languages.
-
Go to the website or NetSuite page for which you want to create a link. Right-click the address bar and select Copy.
-
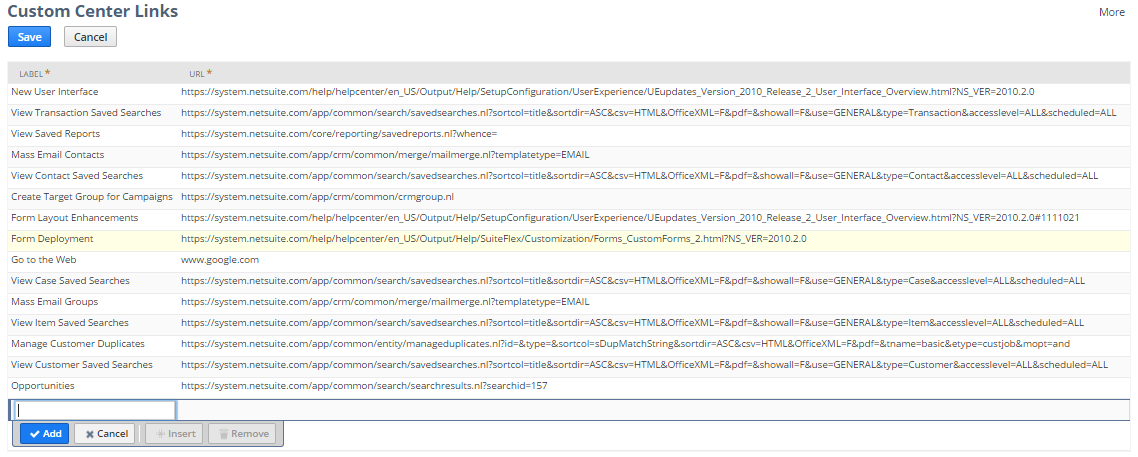
Go to Customization > Centers and Tabs > Center Links > New.

-
In the Label column, name your custom link.
-
In the URL column, enter the URL for the link.
-
In the Script ID field, enter a unique alphanumeric ID for the custom center link.
-
Click Add.
Note:The link will open in the existing window. You cannot set up a link to open in a new window.
-
Click Save.
-
To add the link to a custom category, go to Customization > Centers and Tabs > Center Categories.
-
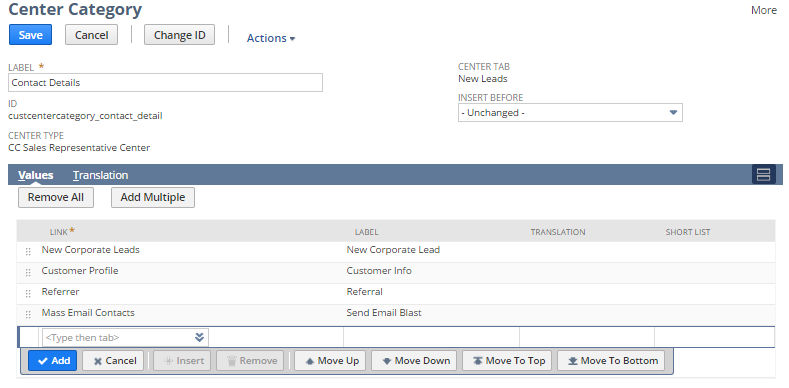
Click Edit next to the category where you want to add the link.

-
From the Link list, select the custom link label.
-
Click Add.
-
Click Save.