Step 3 Select Objects
On the Select Objects page of the Bundle Builder, select the objects to be included in the bundle. The available objects vary, depending on whether you are creating a customization bundle or a configuration bundle. See Objects Available in Customization Bundles and Objects Available in Configuration Bundles.
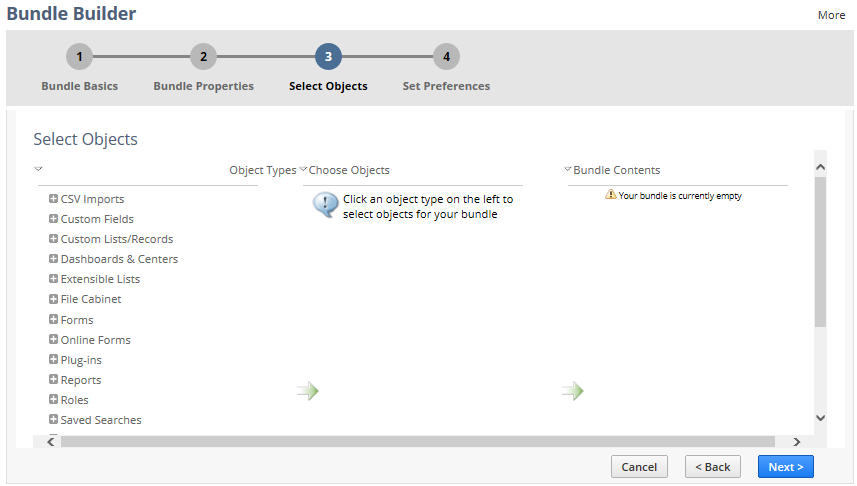
To complete Step 3 Select Objects in the Bundle Builder:
-
If you have not already done so, complete Step 2 Bundle Properties.
-
In the Object Types list, expand the folder for the type of object that you want to include in the bundle.
The Choose Objects list displays available objects of the selected type, if any.
-
In the Choose Objects list, check the box next to each object you want in the bundle, or check the Select All box to check all of the objects listed for the object type.
Each time you check a box, NetSuite updates the Bundle Contents list.
Warning:Enabling the Include Data option for a bundled custom record object with an extremely large number of custom records may result in bundle installation failure due to network connection problems. To ensure installation success, do not enable the Include Data option for the custom record object. Then run a bundle installation script that executes after installation to import custom record object data into the target account through CSV import. For information, see SuiteScript 2.1 Bundle Installation Script Type and task.CsvImportTask.
Note:If there are existing custom records for a bundled custom record object, check the Include Data box under the object to include this data in the bundle. Even if you do not check the Include Data box, NetSuite may still pull data for a custom record, if another object in the bundle depends on the data in the custom record.
-
To de-select an object, select its object type in the Bundle Contents list and clear its box in the Choose Objects list.
-
Click Next.
To continue creating a bundle in the Bundle Builder, go to Step 4 Set Preferences.
General Guidelines for Selecting Objects
-
When you add most types of custom objects to a bundle, all of the necessary elements referenced by that object are also automatically added to the bundle, so you do not need to explicitly add them. However, some referenced objects are not added automatically, and you'll need to add them manually. For more information, see Referenced Objects in Customization Bundles.
-
For customization bundles, use unique script IDs for each object to prevent installation conflicts. If a bundle object's ID matches one in the target account, the bundle object's ID will be appended with a number. For more information, see Resolving Conflicting Objects.
-
If your bundle includes server SuiteScripts, you can check the Hide in SuiteBundle box on their File Cabinet file records to prevent users who install the bundle from viewing the script files. See Protecting Your Bundled Server SuiteScripts. Client SuiteScript files or files referenced in client SuiteScript files cannot be hidden.
-
If you see configuration objects (Company Preferences, Features, Other Lists, and Renaming) on the Select Objects page, you have set the bundle to be a configuration bundle. To define the bundle as a customization bundle, go back to the Bundle Basics page and clear the Configuration Bundle box.
-
Including a configuration object in a configuration bundle does not create a new instance of that object in the target account when the bundle is installed. Configuration bundle installation simply copies the settings for included configuration objects from the source account to the target account.