Emailing a Report
You can click the Email button  in the footer of any report to email the report to any employee, vendor, customer, partner, or group entered in your account.
On the Email Report page, you can:
-
Select a primary recipient and choose to Cc or Bcc additional recipients on the Recipients subtab. Each recipient can be an individual user or a group.
-
Enter custom subject and body text for email messages on the Message subtab.
-
Choose to send the report as an attachment by checking a box on the Message subtab.
-
Select additional attachments to include on the Attachments subtab.
Email messages of reports display your company name and email address in the From: line. You can enter this email address at Home > Set Preferences, on the General subtab, in the User Profile section, in the From Email Address field. If this field is blank, the email your NetSuite login email address is used. The preference you set for Nickname, and the From Address for Emailed Forms entered at Setup > Company > Email Preferences, don't apply to report email.
To email a report:
-
On the Reports page, click the name of the report you want to email, to run the report.
-
Click Email in the report footer.
The Email Report page opens.
-
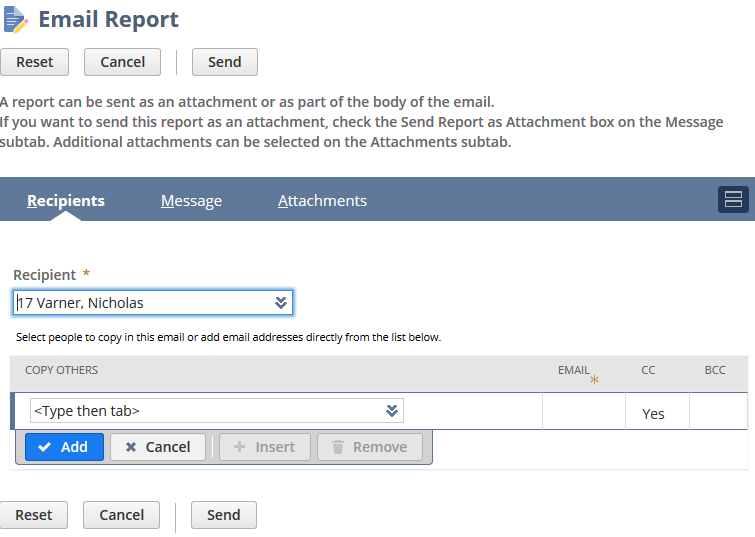
On the Recipients subtab:
-
Select the primary recipient from the Recipient list.
-
Select an additional recipient from the Copy Others list. Choose whether to include in the Cc or Bcc list, and click Add.
Important:For security reasons, you can only pick email addresses that are tracked in your NetSuite account as report recipients. To send the report to an email address that's not yet in your account, create a Contact entity. You can also create Customer, Employee, Group, Partner, or Vendor entities, but Contact is the preferred option. If you create a Group, reports are sent by default to the group email only. If you want the report sent to every group member individually, check the All individual group members box.
For information about how to create each entity type, see the following topics:
-
Repeat step 2 for each additional recipient to be copied.
Note that a primary or copied to recipient can be either an individual user or a group. Lists include each group that has a group email address.
Note:You can send emailed reports only to active entities. Recipients marked inactive don't receive emailed reports.
-
-
On the Message subtab:
-
Enter a custom subject and message text for email messages.
-
If you want to send your report as an attachment, check the Send Report as Attachment box. The attached report will be in HTML format.
If you don't choose to send the report as an attachment, the report is included as part of the message and appears below the text you enter in the Message field.
-
-
On the Attachments subtab:
-
In the Attach File field, select a file from your computer or File Cabinet to attach to the email, and click Add.
-
Repeat to attach additional files.
-
Check the Zip attachments box if you want to attach a zip file of all selected attachments.
-
-
Click Send.
Expand/collapse settings are ignored when you email a report: the report results are always expanded in the attachment.