1 Navigation
Getting Started
User Options are accessed by clicking the User Name after a successful login.
They include:
Figure 1-1 User Options

-
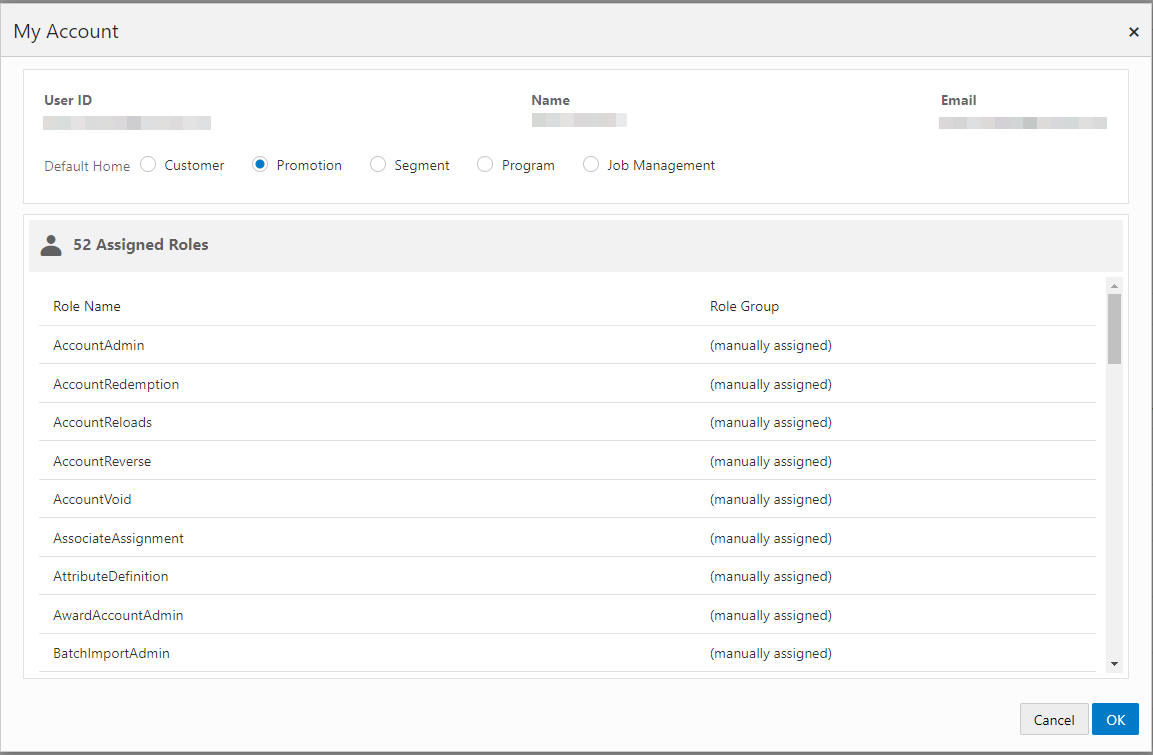
My Account - Displays your profile and the assigned roles. Depending on your access privileges, you may be able to change your Default Home. If available, select the desired Home Page and click OK to confirm the selection.
-
Logout- Logs you out of the application. Click Yes to logout, or No to return to the application.
Figure 1-2 My Account
Navigation
Navigation Icons
When you first log in to the application, it displays a menu and toolbar that you can use to navigate to other areas of the application. Your administrator can assign a roll to determine your start page. Roles include:
-
If you have the Customer Home user role, the Customer Home landing page displays.
-
If you have the Promotion user role, the Promotion Home landing page displays.
-
If you have the Segment user role, the Segment Home landing page displays.
-
If you have the Program user role, the Program Home landing page displays.
-
If you have the Job Management user role, the Job Management Home landing page displays.
Note:
If a user has multiple "home" roles, this will be the priority of the home window the user lands on after login.
-
Customer Home
-
Promotion Home
-
Segment Home
-
Program Home
-
Job Management
-
|
Icon |
Description |
|
The Menu icon provides links that correspond to icons on the toolbar, and returns you to the Home page. |
|
|
The Favorite icon displays frequently used Tasks and Reports. See Adding or Removing a Favorite for more information. |
|
|
The Tasks icon displays a Search for a task search box, where you can enter text to search for Task submenu options, along with links to the Home and Customer pages. See Note below for more information. |
|
|
The Notifications icon alerts you to items needing your attention.. Click the icon to open the Notifications Panel Menu. See Notificationsvaavi for more information. |
|
|
The Customer Search icon displays the Customer Search page. See Customer Search for more information. |
|
|
The Segments icon displays the Segment search which allows you to select more criteria that are not available in the Segment Quick Search box. You can also Create Segments. See Segments for more information. |
|
|
The Offers icon displays the Offers Advanced search which allows you to select more criteria that are not available in the Offer Quick Search box. You can also Create Offers. See Offers for more information. |
|
|
The Promotions icon displays a Promotion Search which allows you to select criteria to search promotions. You can also Create Promotions. See Promotion Search for more information. |
|
|
The Card icon displays a Card Search which allows you to select criteria to search Cards. See Card Search for more information. |
|
|
The Program icon displays a Program Search which allows you to select criteria to search Programs. See Advanced Program Search for more information. |
|
|
The Reports icon displays a list of reports that can be run. See Reports for more information. |
|
|
The Overflow Menu provides additional options including Edit, View, and Delete. |
Task Priority
Icons displayed are based on what the user has access to. However, if the user has access to more than 6, there is a priority order for the icons to display. The ones further down the list will then only be accessible from the Main menu or from favorites section if they are marked as a favorite.
The Priority Order is:
-
Customer Search
-
Segment Search
-
Offer Search
-
Promotion Search
-
Card Search
-
Program Search
-
Reports
Note:
Displays only if the user does not have one of the first six features, otherwise it is not a menu option, but can be saved as a favorite
Task Lists
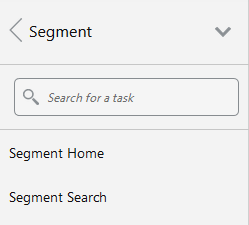
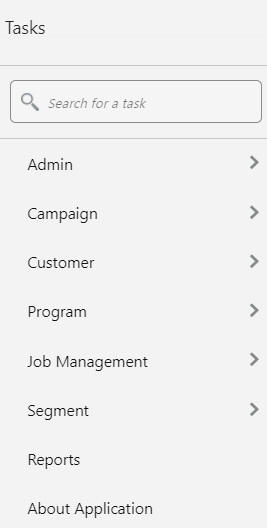
The following tasks are available in the Customer Engagement Modern View.
Figure 1-3 Task LIst
Admin Task List
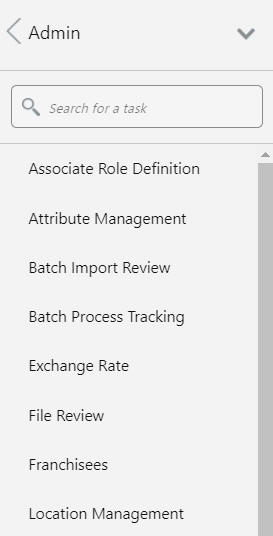
The Admin Task List contains the following tasks:
-
Associate Role Definition
-
Attribute Management
-
Batch Import Review
-
Batch Process Tracking
-
Exchange Rate
-
File Review
-
Franchisees
-
Location Management
-
Manage External Application Access
-
Preference Types
-
Role Groups
-
Security Groups
-
System Configuration
-
System Logs
-
Task Management
-
Web Service Tracking
-
Users
Figure 1-4 Admin Task List
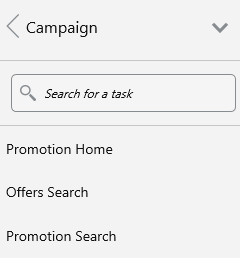
Campaign Task List
The Campaign Task List contains the following tasks:
-
Promotion Home
-
Offers Search
-
Promotion Search
Figure 1-5 Campaign Task List
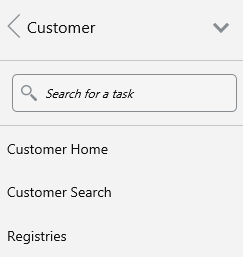
Customer Task List
The Customer Task List contains the following tasks:
-
Customer Home (Role Dependent)
-
Customer Search
-
Registries
Figure 1-6 Customer Task List
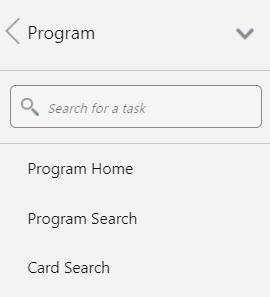
Program Task List
The Program Task List contains the following tasks:
-
Program Home
-
Program Search
-
Card Search
Figure 1-7 Program Task List
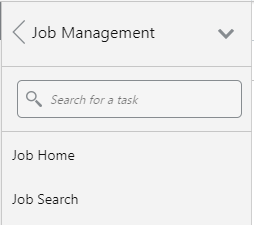
Job Management Task List
The Job Management Task List contains the following tasks:
-
Job Home
-
Job Search
Figure 1-8 Job Management Task List
Favorites
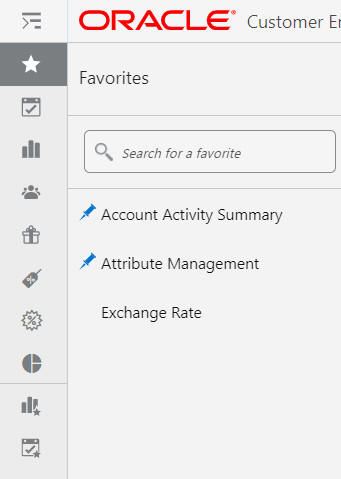
Favorites provide the ability to designate certain Tasks or Reports as Favorites that allow quick and easy access to frequently menu selections. You may also Pin or Unpin favorites to the Main Navigation Menu.
Adding or Removing a Favorite
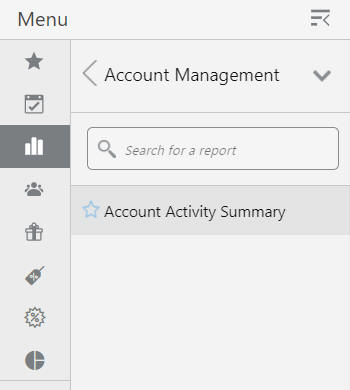
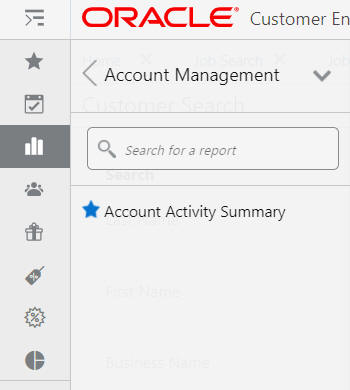
A full blue star indicates which Task or Report is a Favorite and conversely, an empty blue star indicates which Task or Report is not a Favorite. To add a Favorite do the following:
-
Navigate to the desired Task or Report.
Figure 1-10 Menu Item - Favorites
-
To designate the Task or Report as a Favorite, click the empty star icon to change it to a full blue star icon.
Result: The specific task or report is designated as a Favorite.
Figure 1-11 Favorite
-
To remove the Task or Report as a Favorite, click the full blue star to change it to an empty star icon.
Note:
You can also remove a Favorite that has been designated as a Pin. See Pin or Unpin Favorite Tasks fore more information.
Viewing Favorites
From the Navigation bar, click the Star icon to view all Favorites.
Figure 1-12 Favorites
Group View
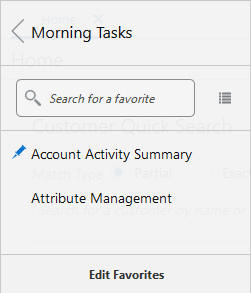
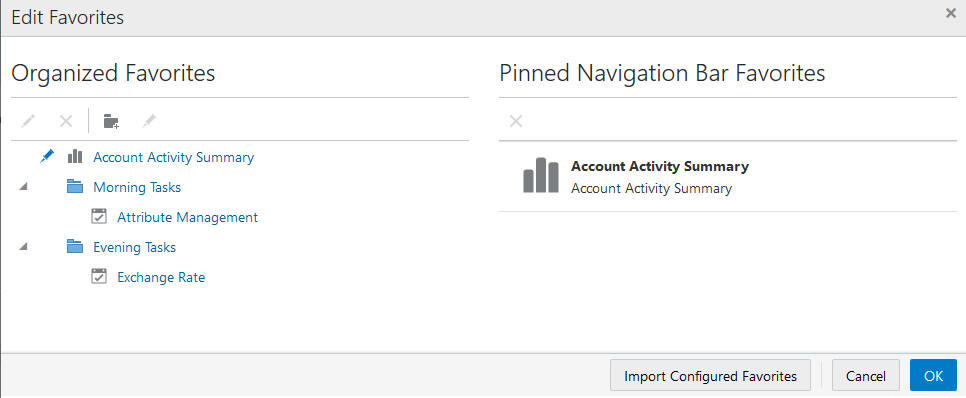
By default, nested Favorites are contained inside folders within the Group View. Figure 1-13 displays top level directories containing one more more Favorites. Figure 1-14 displays the Favorites included in that directory. See Organized Favorites for details on how to create folders.
Figure 1-13 Nested Favorites
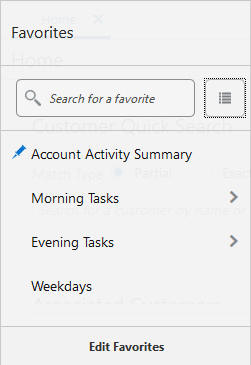
Figure 1-14 Nested Favorites - Drill Down
List View
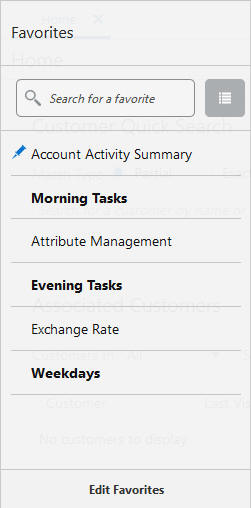
Folders and their contents display as a flat list in the List View. Click the Group View or List View icon to toggle the display options.
Figure 1-15 Nested Favorites - List View
Pin or Unpin Favorite Tasks
Favorite Tasks can pinned or unpinned to the Navigation Bar for quick access. To Pin or Unpin a Task, do the following:
-
Click the Favorites icon.
-
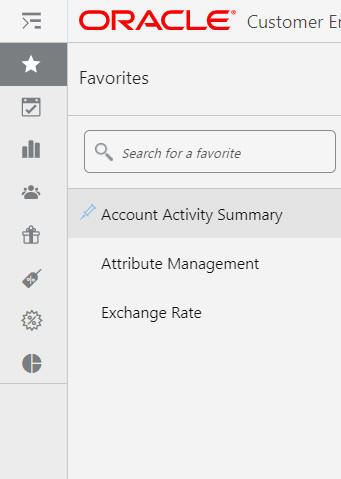
Hover over the Task to display an empty blue pin icon.
Figure 1-16 Pinning a Favorite
-
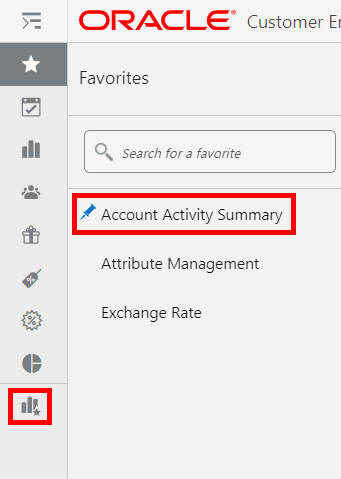
Click the Pin icon.
Result: The Pin icon is filled in and a corresponding icon for the Task appears in the Navigation menu as noted in Figure 1-17.
Figure 1-17 Pinned Favorites
-
Click any filled Pin icon to unpin.
Editing Pins - Navigation Menu Icons
Favorites that are pinned appear on the Navigation Bar as icons. The following options are available when you right-click a Pinned Favorite:
-
Unpin Favorite - Removes the Task or Report from the Navigation Bar.
-
Unpin and Remove Favorite - Removes the Task or Report from the Navigation Bar and Favorites List.
-
Edit Favorites - Opens Edit Favorites. See Editing Favorites for more information.
Editing Favorites
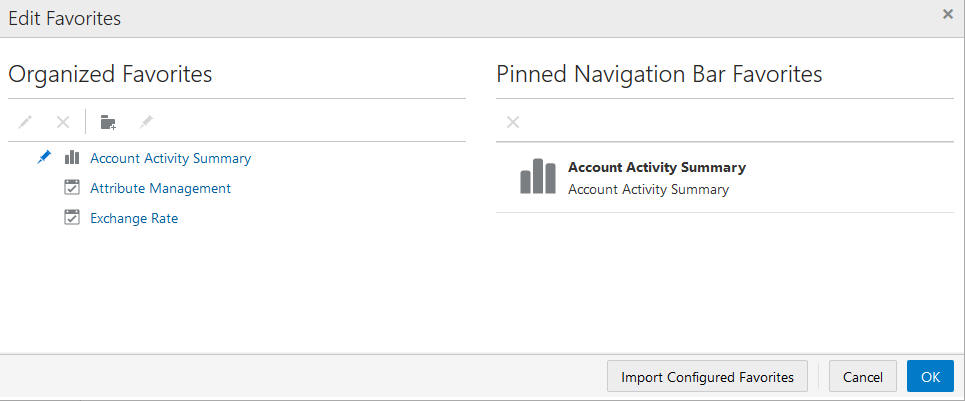
From the Edit Favorites window, you can edit, organize, rename, pin, and unpin favorites. In Edit Favorites, you can manage which Favorites display and in which order the Favorites display.
-
From the Context Menu of the Pinned Navigation Bar Favorites, right-click and then select Edit Favorites.
-
Click Edit Favorites from the Favorites Menu.
Figure 1-18 Editing Favorites
Organized Favorites
The following options are available after highlighting a Favorite:
-
Edit Favorite - Enter a Custom Favorite Name and click OK to save the changes or click Cancel to close the window without saving any changes.
-
Delete Favorite - Click the X icon to remove (unpin) the task from the Navigation Bar and Favorites task list.
-
Toggle Pin - Click the Pin icon to Add or Remove (Pin or Unpin) Favorite Tasks from the Navigation Bar.
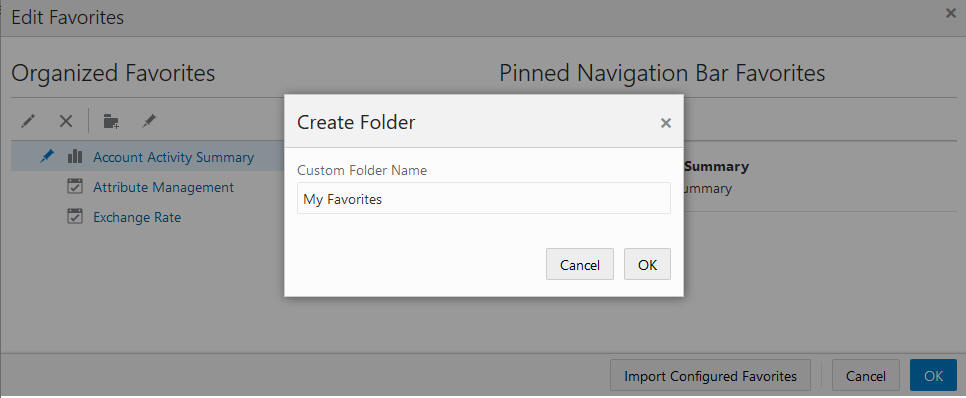
At anytime, you can click Create Folder to organize your Favorites into directories. Once created you can drag and drop favorites into these directories. To create a folder do the following:
Figure 1-19 Creating Folders
-
Click the Create Folder icon.
-
Enter a Customer Folder Name.
-
Click OK to create the folder or Cancel to close the window without saving changes.
-
Drag and drop the desired Favorites into the folders. See Edit Favorites - Working with Folders for more information.
Figure 1-20 Organized Favorites - Folders
Pinned Navigation Bar Favorites
Press Shift + F10 or right-click a Pinned Favorite to display the following options:
-
Cut
-
Paste Before
-
Paste After
Note:
In addition to the cut and paste options, you can reorder the pinned favorites from the Pinned Navigation Bar Favorites section on the Edit Favorites window by clicking a folder or favorite and dragging it to a new position.
-
Unpin Favorite
Note:
You can also highlight a Pinned Task and click the X icon to unpin a favorite.
Edit Favorites - Working with Folders
You can edit, organize, rename, pin, and unpin favorites from the Edit Favorites window. The favorites displayed and the order in which the favorites are displayed are managed in Edit Favorites.
Note:
See Organized Favorites for information on how to create a folder.
Press Shift + F10 or right-click a folder to display the following options:
-
Edit - Enter a new name for the previously created folder. Click Ok to accept or click Cancel to close the window without saving.
-
Cut
-
Paste Before
-
Paste After
-
Paste Inside - Use this option on Favorites to move them into a folder.
-
Delete - Deletes the folder and the contents. A warning message appears. Click Yes to delete the folder and its contents or click No to close the warning without deletion.
Figure 1-21 Delete Folder - Warning

Searching Favorites
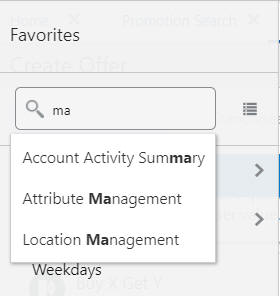
The Favorites Menu provides a smart search feature to enable you to quickly find and open a task or report that is marked as a Favorite.
-
Enter any part of a task or report name and the list automatically populates with matching results as shown in Figure 1-22.
-
Select one of the items in the list to open that task or report.
Figure 1-22 Smart Search Feature
Notifications
The Notifications icon serves as a quick access point for all notification activity and provides an initial view of Job Status. The notification icon on the sidebar displays a badge with the total number of unread notifications.
Figure 1-23 Notification Icon
Notifications Page
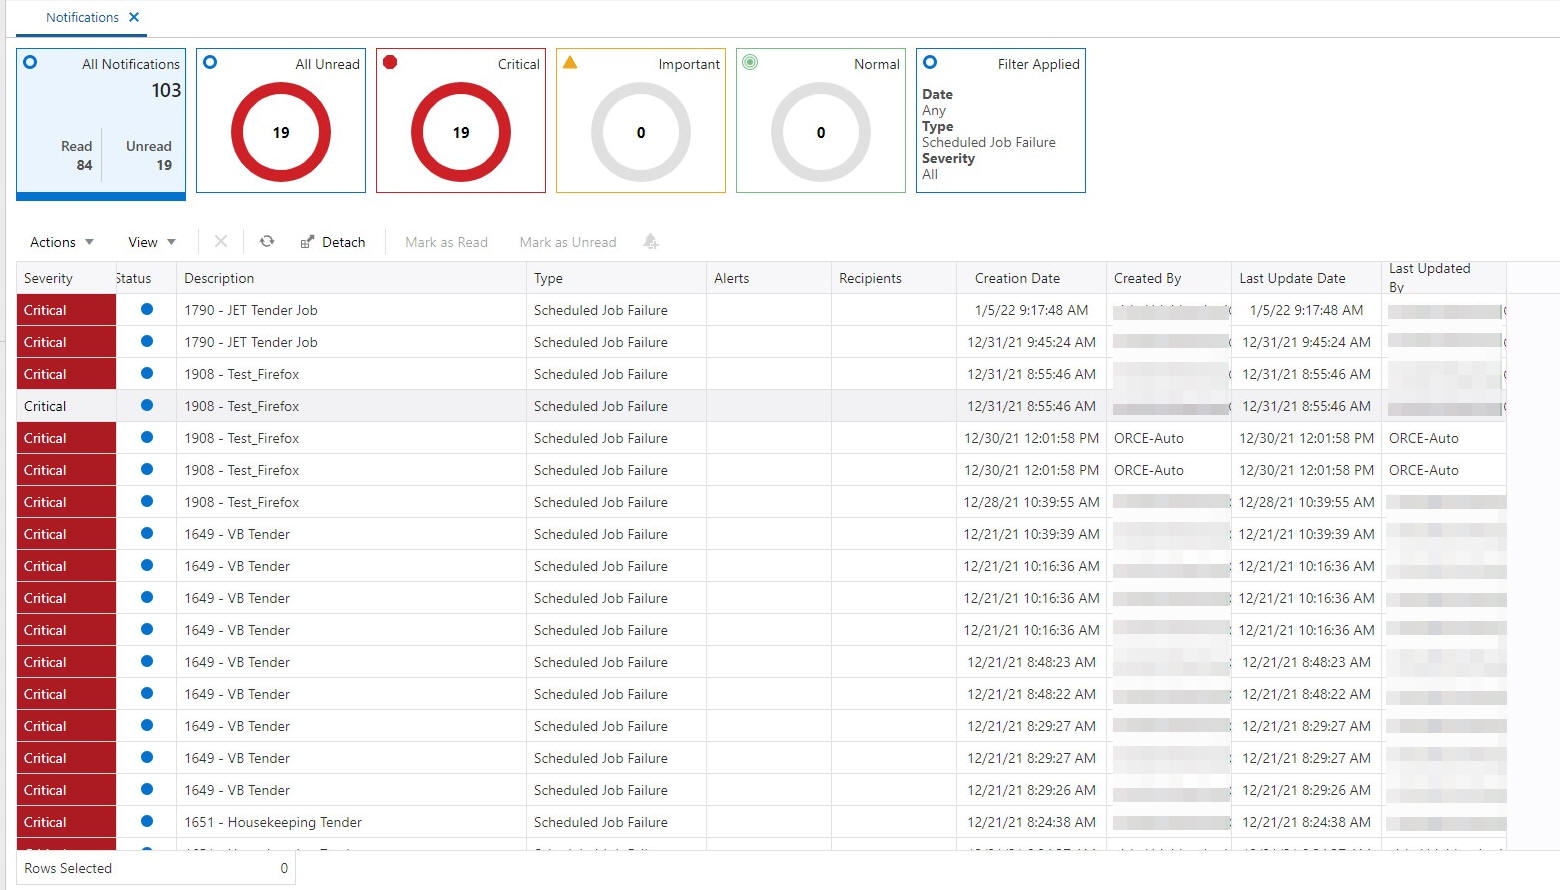
The Notifications Page provides more details about the notifications.
Figure 1-24 Notifications Page
Accessing the Notifications Page
To view the Notifications Page do the following:
-
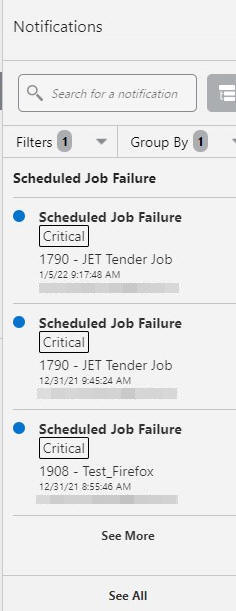
Click the Notifications icon. The Notifications panel appears.
Figure 1-25 Notifications Panel
-
Click See All. The Notifications page appears.
Using the Notifications Panel
The active view in the panel depends on which filters are selected and whether the grouping toggle is activated. The filter view is active when the grouping toggle is off. The grouped view is accessed by turning the grouping toggle on.
Filter View
The Filter view shows each notification individually. Click the Filters down facing arrow to expand the filter options.
Figure 1-26 Filter VIew
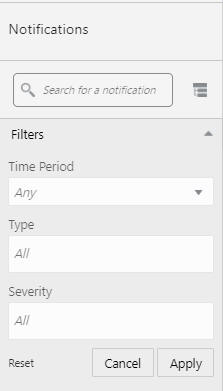
The filter view supports three search criteria. The Time Period, Type, and Severity inputs allow filtering on the respective fields of the notification.
Click Apply to fetch the Notifications that match the set values. Click Cancel to revert to the previously used values, and Click Reset to reset to the default values (but does not close the tab or save them).
In this view, individual notifications are listed out in detail. In order, the notifications: Type, Severity, Description, and Last Updated values are displayed.
Clicking a notification with launch able context will mark it as read and open the context. For other notifications, they can be marked as read by clicking the filled blue circle in the upper-left corner; clicking the rest of the notification will have no effect.
Group View
Figure 1-27 Group View
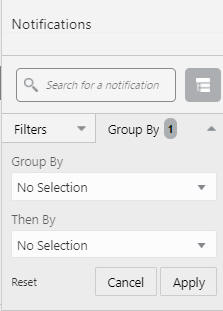
The Group view shows notifications grouped by hierarchy values. The group view is active by clicking the Grouping Toggle to on and only one grouping option at a time can be selected.
The grouping options allow the selection of up to two hierarchy levels to organize the notifications by. The first selection is required while the toggle is active; the second is not. Also, the group by and then by lists are mutually exclusive - selecting an option in one will remove it from the other. The buttons on the tab work in the same manner as those on the filter tab.
This view is similar to the first, save that the notifications are organized by hierarchy value. Initially, the three most recent notifications for each hierarchy value will be displayed. Click See More to load up to twenty five notifications. Clicking a notification in this view behaves the same as in the filter view.
Working with Notifications
The Notifications page provides more details about the notifications. It also displays read notifications and the ability to reassign notifications.
Metric Tile Section
The Notifications Page has the following five tiles in this section. Clicking on any tile will filter the table to the content for that tile (for example, unread critical notifications). The Filter tile only shows up in certain cases: when there are filters set on the sidebar menu.
-
All Notifications
-
All Unread
-
Critical
-
Important
-
Normal
-
Filter Applied - Displays only when Filters are applied.
Data Display Section
The following options will display in the toolbar of the data display section:
Figure 1-28 Toolbar Options
-
Action Menu
-
Delete
-
Refresh Notifications
-
Mark as Read
-
Mark as Unread
-
Reassign Notification
-
-
View Menu
-
Manage Columns
-
Detach
-
Sort
-
-
Icons
-
Delete
-
Refresh
-
Detach
-
Mark as Read
-
Mark as Unread
-
Reassign Notification
-
Click on one or more rows and then select the desired option from the Toolbar options.
