Pick Up an Order
To perform a pickup of an order:
Note:
If you enter the customer's information at the beginning of a sale and the customer's order item has been received at the store, a message may display indicating the order has been received and is ready for pickup. Press Enter to acknowledge the message and continue with Step 1 below.
-
Open an Order Broker Order, see Opening an Order Broker Order.
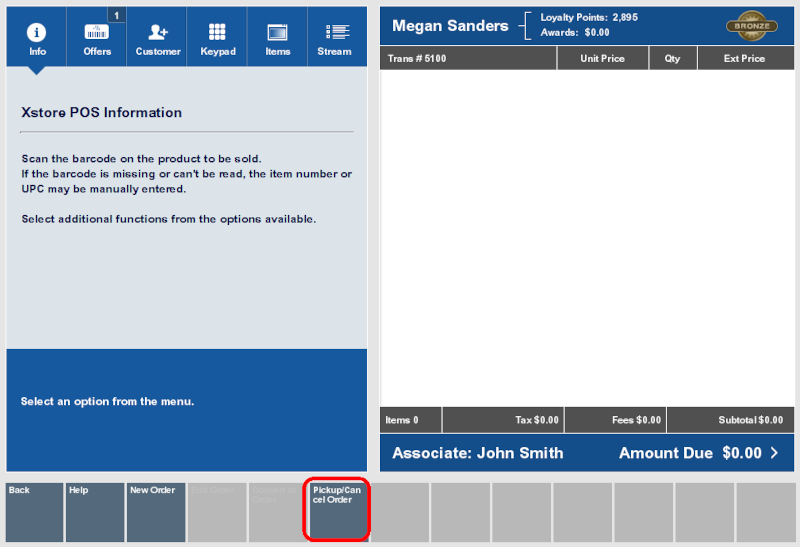
Figure 15-8 Order Screen
-
Select Pickup /Cancel Order.
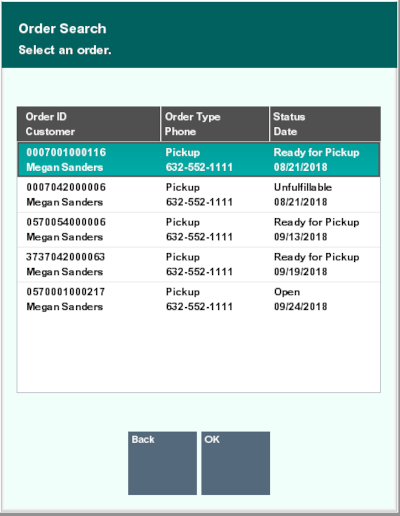
Xstore Point of Service displays a list of orders for that customer.
Figure 15-9 List of Orders
-
Select an order from the list.
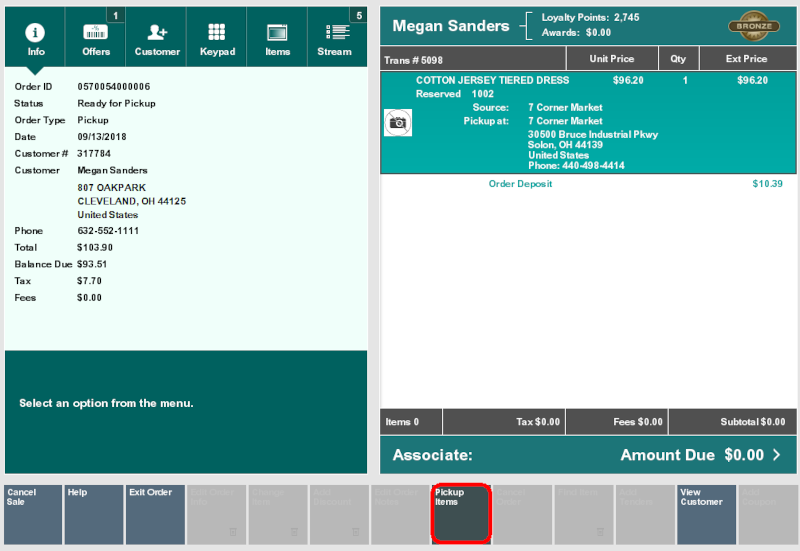
Figure 15-10 Order Ready for Pickup
-
Select Pickup Items.
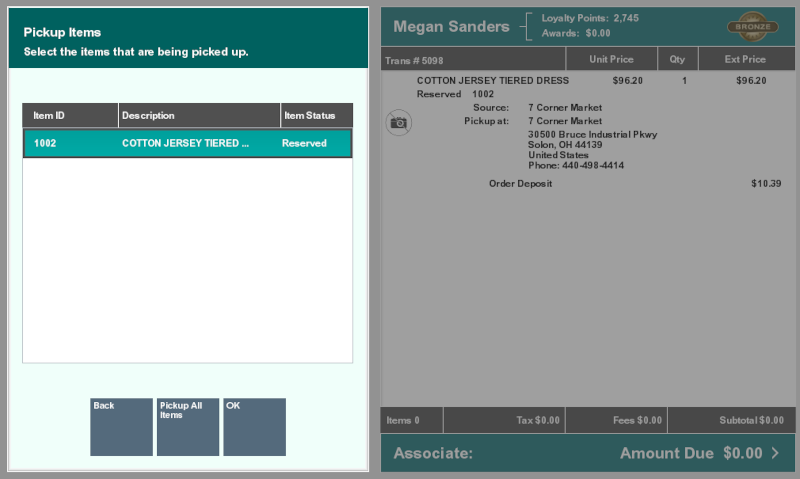
Xstore Point of Service displays a list of items in the order that are ready to be picked up.
Figure 15-11 Pickup Items
-
Select the items to pick up:
-
Click the items.
-
Use the up and down arrows to highlight the correct items and press the Spacebar.
-
Click Pickup All Items to pick up the entire order.
-
-
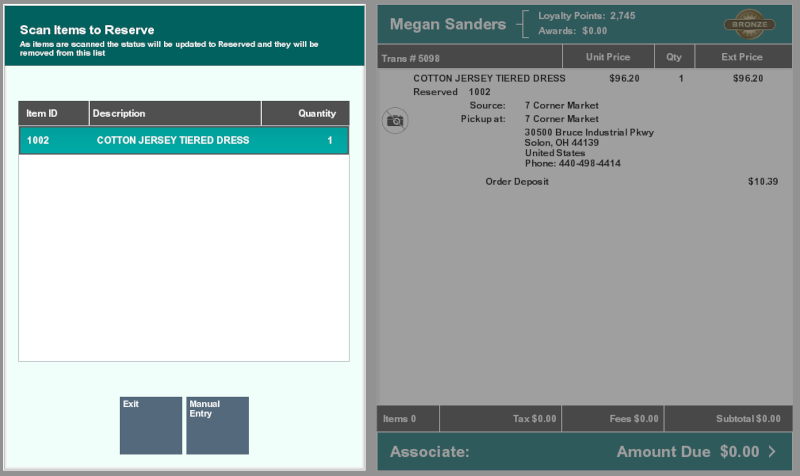
If your system has the Scan Items Prior to Adding to Transaction setting configured, the items display in a list to scan from, to confirm they are the correct items.
If your system does not have the Scan Items Prior to Adding to Transaction setting configured, no scanning is required. Continue at step 9
Figure 15-12 Scan Items to Reserve
-
Scan the items from the list. The items will be marked Reserved and removed from the list.
If the item does not scan, select Manual Entry and enter the ID of the item.
Figure 15-13 Manual Entry
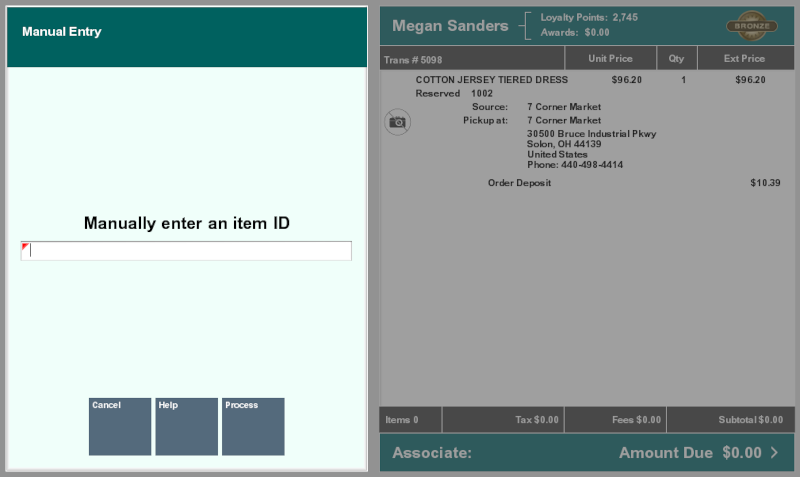
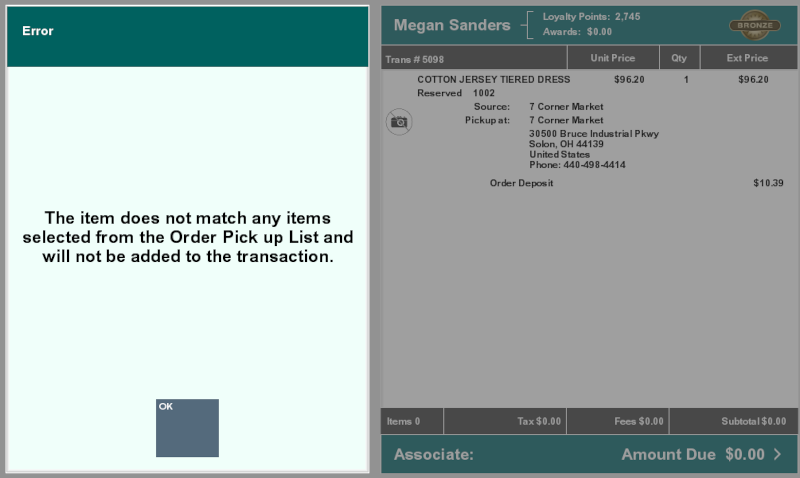
If an item is scanned or entered that does not match any items selected from the order pickup list, a warning message is shown, and the item is not added to the transaction. Select OK to continue.
Figure 15-14 Reserved Wrong Item Scanned
-
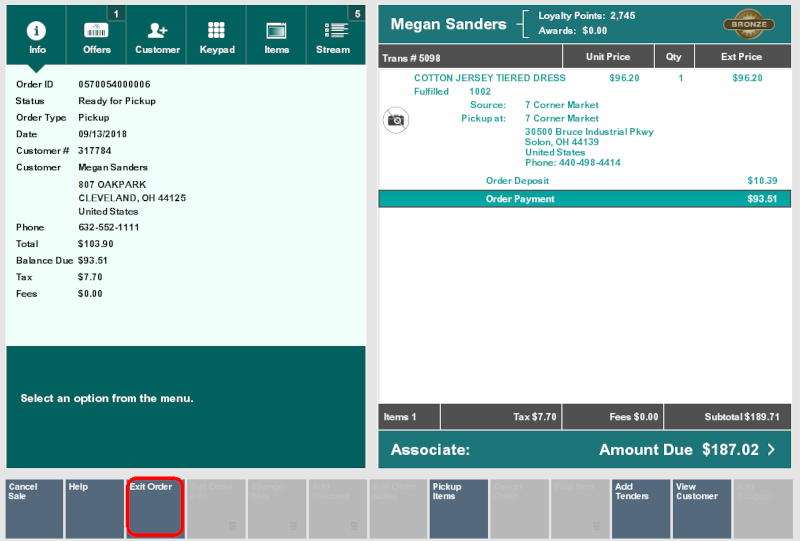
After an item has been scanned or manually entered, it is added to the transaction.
Figure 15-15 Scanned Item Added to Transaction
-
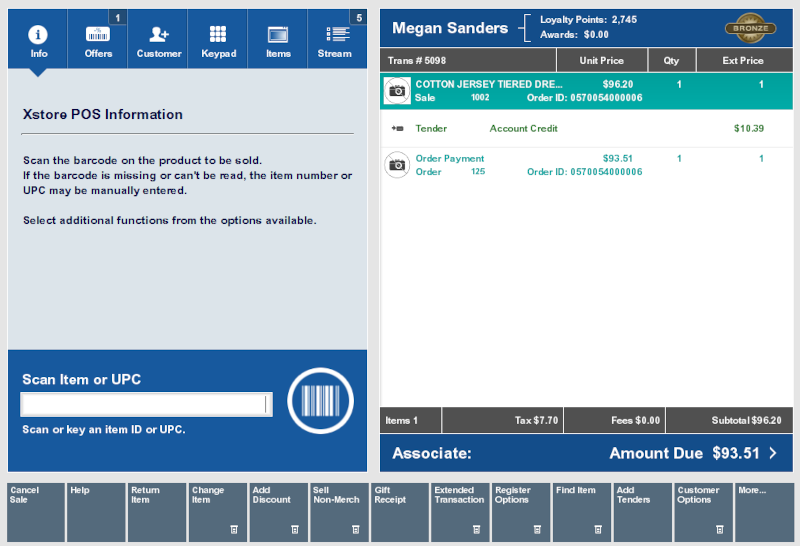
When all items have been added, select Exit Order.
Figure 15-16 Order Ordered
-
Continue the transaction:
-
Click Add Tenders to tender and complete the transaction.
-
Click Exit Order to exit the order and continue the transaction.
-