Install a CMOD
Use this procedure to install a CMOD after replacing it or after servicing its internal components.
Before You Begin
-
For component information, see About System Components.
-
Ensure that the CMOD lever is in the fully-open position.
- Squeeze together the green tabs on the end of the lever.
- Rotate the lever downward and away from the CMOD.
-
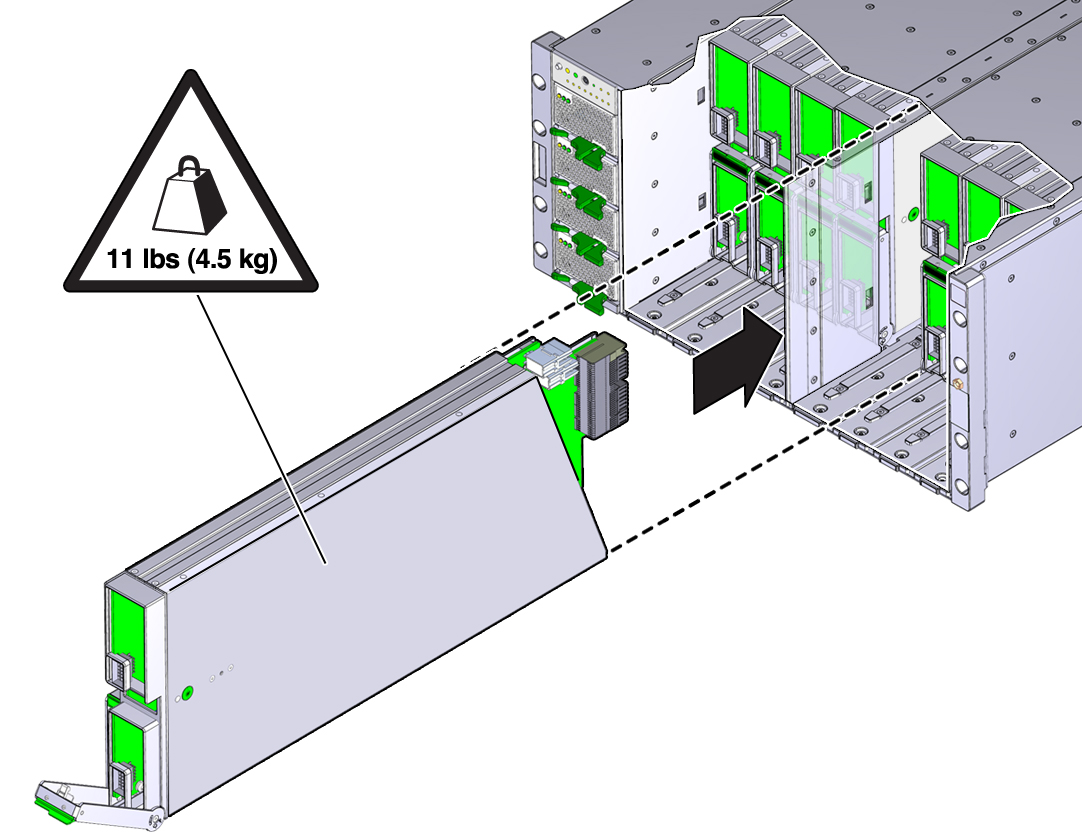
Position the CMOD in the slot.

-
On the front-facing side, ensure that the hinge for the lever is at the
bottom.

-
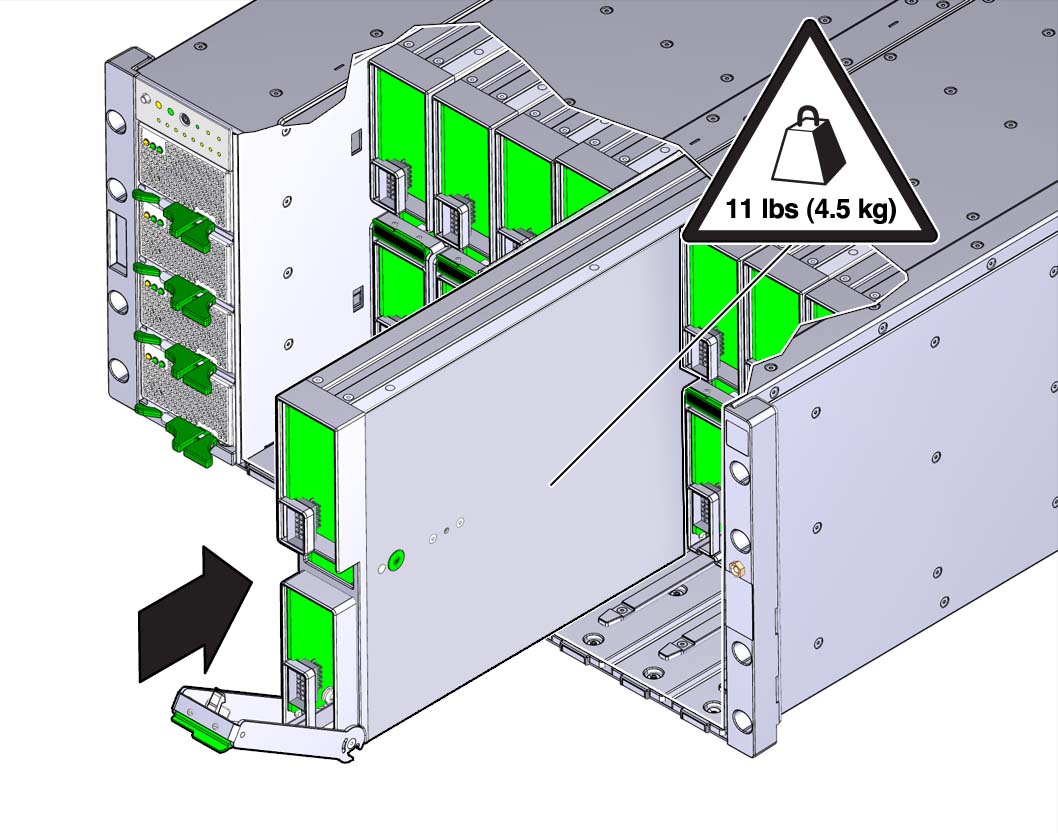
Slide the CMOD into the slot until it stops.
In this position, the pawl at the lever hinge is aligned with the slot in the server.
-
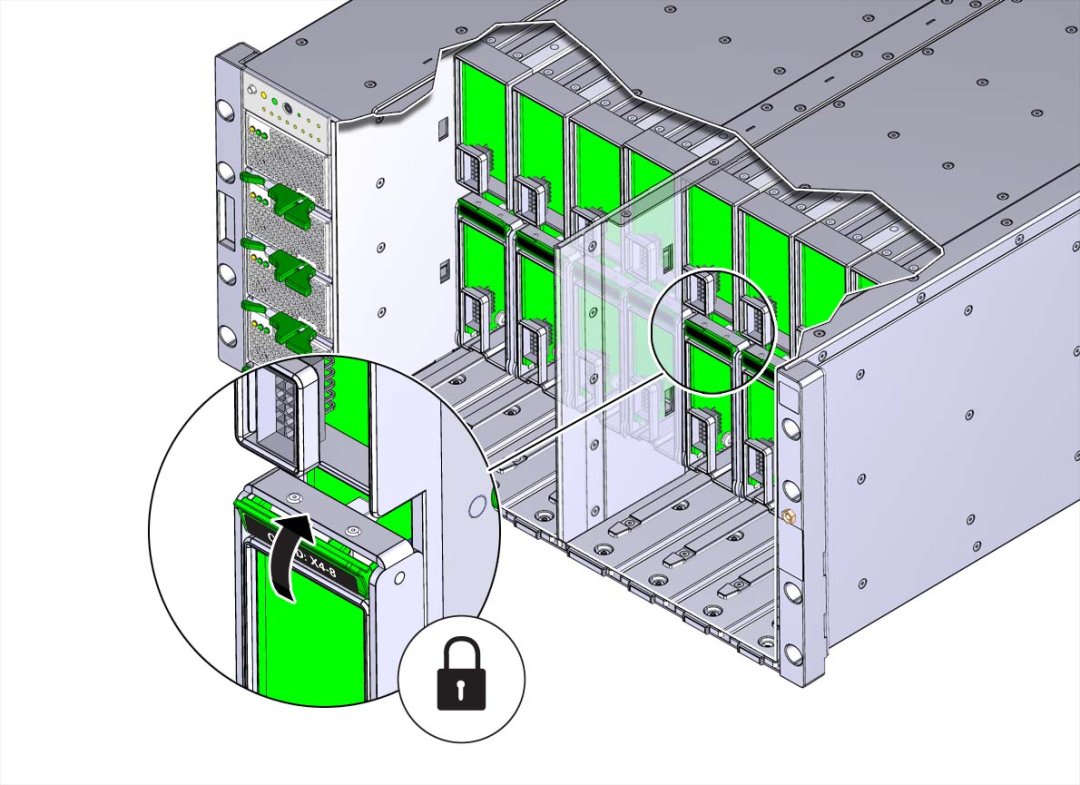
To install the CMOD, rotate the lever upward until it locks into place and
is flush with the front of the CMOD.

Caution - Pinch point. When operating the lever, keep your fingers clear of the back side and hinged end of the lever.
The action of rotating the lever upward draws the CMOD into the slot and engages the CMOD connector with the connector on the midplane.

- Install the fan frame. See Install a Fan Frame.
- Install the four fan modules. See Install a Fan Module.
- Prepare the server for operation. See Returning the Server to Operation.