

|
|
|
|
|
|
Matching Users with Content
This chapter describes how to set up rules that control how indexed content is matched to users.
This topic includes the following sections:
Creating Rules
In the chapter on "Working with User Profiles," you assigned a set of properties to a user, which included a property called AcmePoints. This property allows you to track the number of visits a user has made to the exampleportal site. In the chapter on "Working with Content," you loaded and indexed metadata and content, making it available to show to different types of users. In this chapter, you will combine those two pieces to match users with content.
You will create categories of users called user "segments" (as in segments of the population) that automatically classify users as infrequent visitors or frequent visitors based on the number of AcmePoints, or logins, they have accumulated. You will then create rules that map infrequent and frequent visitors to the metadata-and the content-you want to show them.
Launching the E-Business Control Center
You will use the BEA E-Business Control Center to create segments and content selectors. To launch the E-Business Control Center:
Windows Start --> Programs --> BEA WebLogic E-Business Platform --> BEA Campaign Manager --> BEA E-Business Control Center.
UNIX <install-dir>/E-BusinessControlCenter/bin/ebcc.sh
Three separate windows appear, including a Server Connection window.
Figure 5-1 Connecting to the E-Business Control Center
Display Name: An optional name to identify the server Hostname: The <wlhost> name, for example, localhost Port: The server <port> number, for example, 7501 Note: If you don't know the port number, or if it is different than the default of 7501, you can look at the bottom of the WebLogic Commerce Server startup window to see which ports are listed. Username: administrator Password: password Note: The Username and Password are the same defaults used to log into the Administration Tools Home page. Note: On subsequent logins, you can click the Previous Connections tab in the Server Connection window to select the server you want. You must also reenter the password.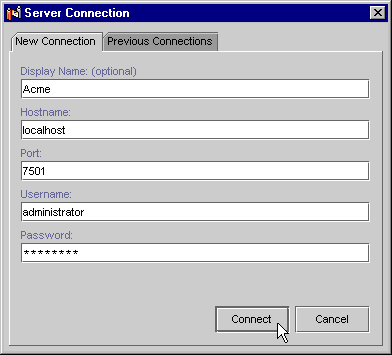
Creating User Segments
In this section, you will create two user segments that define frequent visitors and infrequent visitors. Later, you will map these segments to content by creating content selector rules.
Creating a FrequentVisitor Segment
The FrequentVisitor segment will identify frequent visitors as those who have logged in fewer than four times (have less than four Acme points).
Figure 5-2 Creating a segment
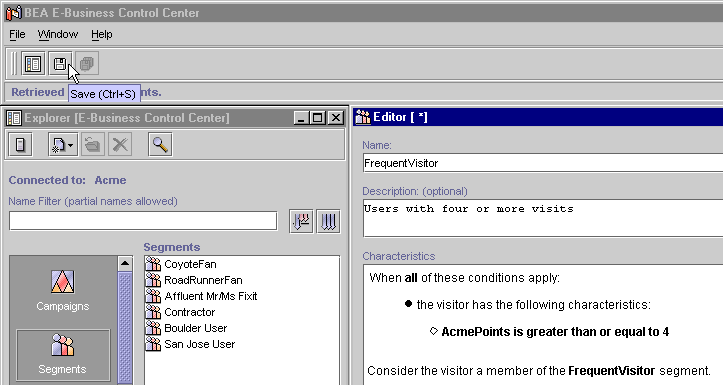
Name: FrequentVisitor (Make sure you type this exactly as shown.) Description: Users with four or more visits Figure 5-3 Assigning characteristics to a segment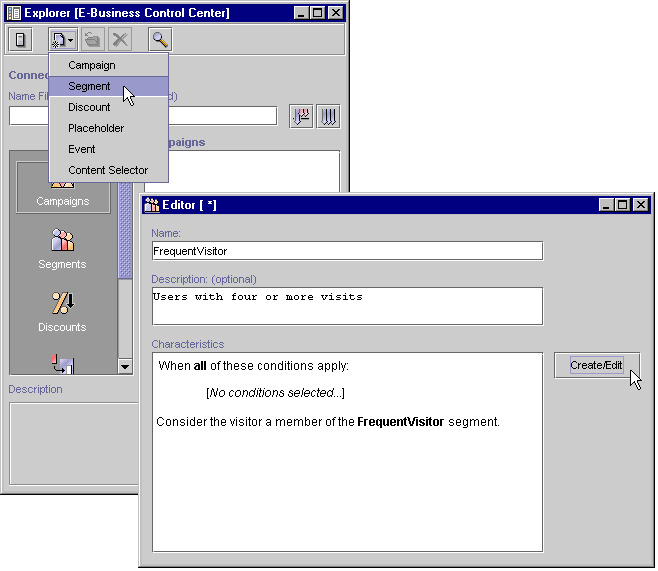
Note: In the "When all of these conditions apply" line, clicking the "all" link toggles it to an "any" link, and vice versa. This setting applies to the items you add to the Action pane. Figure 5-4 Using the AcmePoints property as a characteristic of the segment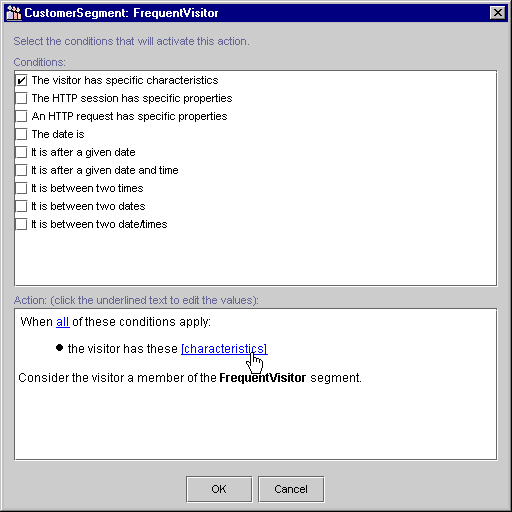
Figure 5-5 Setting the condition to compare itself to the number of AcmePoints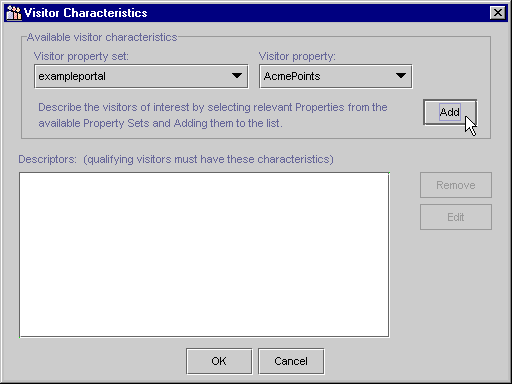
Figure 5-6 Viewing the completed characteristic in the Action pane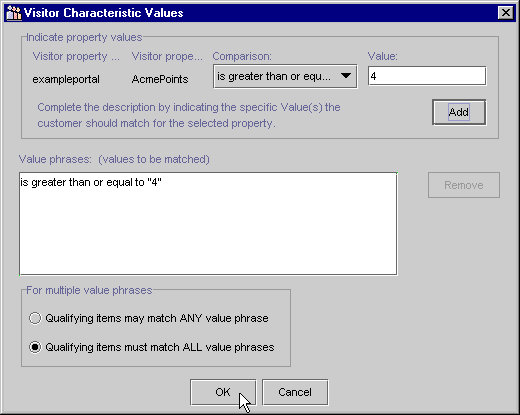
Note: The items in the Action pane are links that let you view, edit, or remove the actions. Note: The Save icon will not be active if the Explorer window has focus. Figure 5-7 Viewing the new segment in the Explorer window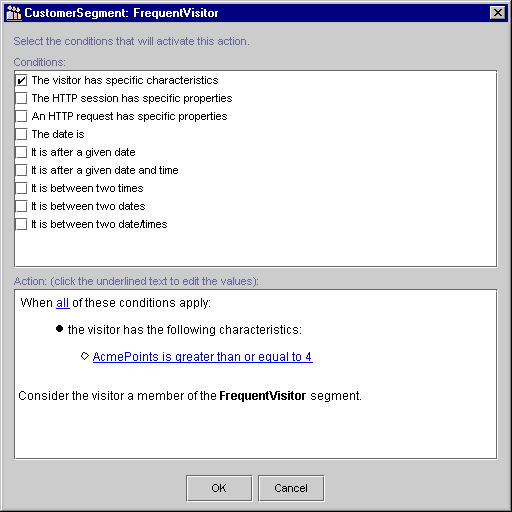
Creating an InfrequentVisitor Segment
The InfrequentVisitor segment will identify infrequent visitors as those who have logged in four times or more (have four or more Acme points).
Go back to Creating a FrequentVisitor Segment. Repeat the procedure, but this time create an InfrequentVisitor segment. Substitute the following field values for those in the existing procedure:
Name: Enter InfrequentVisitor (Make sure you type this exactly as shown.)
Description: Enter Users with less than four visits
Comparison: Select "is less than"
Value: Enter the number 4
Note: When you're finished, make sure that InfrequentVisitor shows up in the Segments list of the Explorer window.
Creating Content Selectors
You have created two segment rules that categorize users as frequent visitors or infrequent visitors. In this section, you will create two content selector rules that match infrequent visitors to one set of content and frequent visitors to another set of content.
Creating a Hints Content Selector
The hints content selector will match infrequent visitors to hints on how to use exampleportal's features.
Name: Hints (Make sure you type this exactly as shown.)
Description: Shows site usage hints to users in the InfrequentVisitor segment
Figure 5-8 Choosing a segment for matching content
Now that you have assigned the InfrequentVisitor segment to the Hints content selector, you will select the content that infrequent visitors will see when they visit the site. Note: LoadedData is made up of the metadata that was loaded when you ran the BulkLoader. If you use a different document management system, you will see different content types. Figure 5-9 Selecting content to show customers who belong to the segment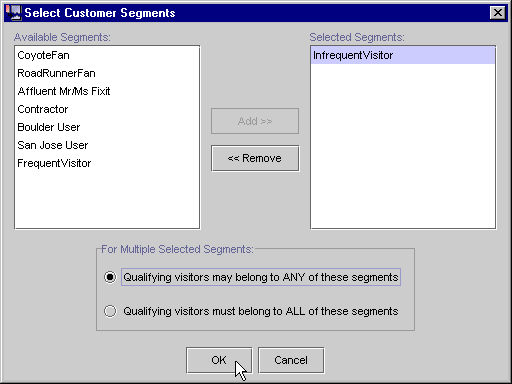
Note: Make sure you type this exactly. If it doesn't exactly match the name in the metadata, the messages won't be displayed. Note: The Save icon will not be active if the Explorer window has focus.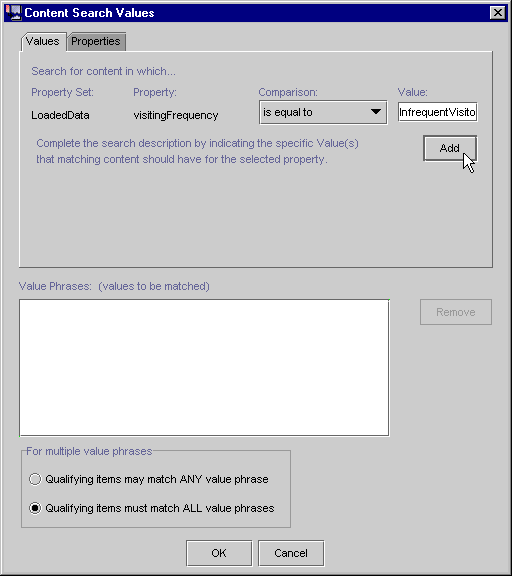
Creating a FrequentVisitorMessage Content Selector
The FrequentVisitorMessage content selector will match promotional messages to frequent visitors.
Go back to Creating a Hints Content Selector. Repeat the procedure, but this time create a content selector rule for frequent visitors. Substitute the following field values for those in the existing procedure:
Name: Enter FrequentVisitorMessage. (Make sure you type this exactly as shown.)
Description: Enter Selects a preview message for users in the FrequentVisitor segment.
Available Segments: Double-click "FrequentVisitor" to move it into the Selected Segments list.
Value: Enter FrequentVisitor. (Make sure you type this exactly as shown.)
Note: When you're finished, make sure that FrequentVisitorMessage appears in the Content Selectors list of the Explorer window.
You have completed creating rules that match content to users who log into the exampleportal. In the next section, you will add a JSP that displays the infrequent visitor or frequent visitor content based on the number of AcmePoints the visitor has accumulated.

|

|

|
|
|
|
Copyright © 2001 BEA Systems, Inc. All rights reserved.
|