|
|
|
|
|
|
Installing WebLogic Collaborate
This section provides the information you need to run the WebLogic Collaborate installation program on a Windows or UNIX system. It includes the following topics:
About the WebLogic Collaborate Installation Program
The WebLogic Collaborate installation program guides you through the process of installing WebLogic Collaborate 2.0 for WebLogic Server 6.0 with Service Pack 2.
Note: You must specify the Full Install (Server & samples/examples) option when you install WebLogic Server 6.0 with Service Pack 2.
The installation detects whether WebLogic Server 6.0 is installed and prompts you to specify an installation location and other information required to perform basic WebLogic Collaborate configuration. It then unpacks and installs the software.
The installation program requires a graphics (windowing) terminal or workstation. To install WebLogic Collaborate on a UNIX system that does not support a graphics terminal or workstation, see WebLogic Collaborate Console-Mode Installation.
After you verify that the Installation Prerequisites have been met, complete the following steps, which make up the installation procedure:
Step 1. Starting the Installation Program
Step 2. Reviewing the License Agreement and Prerequisites
Step 3. Specifying the BEA Home and Installation Location
Step 4. Selecting the Database for the Custom Domain
Step 5. Completing the Installation
Step 6. Installing Your Software License
Step 7. Creating the WebLogic Collaborate Tables
Step 8. Loading the System Data
Step 9. Verifying the WebLogic Collaborate Installation
Detailed instructions for each step are provided in the following sections.
Step 1. Starting the Installation Program
The following section provides instructions for installing WebLogic Collaborate on a Windows system from the WebLogic Integration CD-ROM. If you are installing WebLogic Collaborate on a UNIX system, skip the following section and go to Starting the Installation Program on a UNIX System.
Warning: If you are migrating from a previous version of WebLogic Collaborate, review Migrating BEA WebLogic Collaborate to Release 2.0 before proceeding with the installation. To migrate repository data from a previous release, you must perform several steps using the previous release. Do not install this release until you have performed those steps. See Migrating the Repository in Migrating BEA WebLogic Collaborate to Release 2.0.
Starting the Installation Program on a Windows System
To start the WebLogic Collaborate installation program on a Windows system:
The initial WebLogic Collaborate installation dialog box is displayed.
The Introduction dialog box is displayed.
Note: If the error message JDK 1.3 and up is required to start the installer is displayed, click Exit to exit the installation. You must add an entry for the JDK 1.3 bin directory, BEA_Home\jdk130\bin, to the beginning of your PATH environment variable before restarting the installation program.
The License Agreement dialog box is displayed.
Starting the Installation Program on a UNIX System
To start the WebLogic Collaborate installation program on a UNIX system:
Note: If the daemon /usr/sbin/vold is running, the CD should be mounted in the /cdrom directory. If vold is not running, see the instructions for mounting a CD in your UNIX administration documentation.
cd wlintegration2.0/unix/collaborate
install.bin
The initial WebLogic Collaborate installation dialog box is displayed.
The Introduction dialog box is displayed.
Note: If the error message JDK 1.3 and up is required to start the installer is displayed, click Exit to stop the installation. You must add an entry for the JDK 1.3 bin directory, BEA_Home/jdk130/bin, to the beginning of your PATH environment variable before restarting the installation program.
The License Agreement dialog box is displayed.
Step 2. Reviewing the License Agreement and Prerequisites
After you have clicked Next in the Introduction dialog box, the License Agreement is displayed, as shown in the following figure.
Figure 2-1 License Agreement Dialog Box
Complete the following procedure: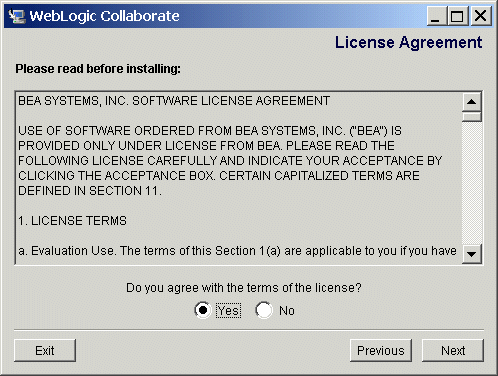
The Important Information dialog box is displayed, as shown in the following figure.
Figure 2-2 Important Information Dialog Box
The Choose BEA Home Directory dialog box is displayed.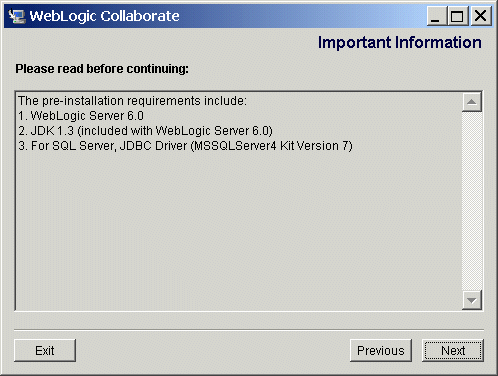
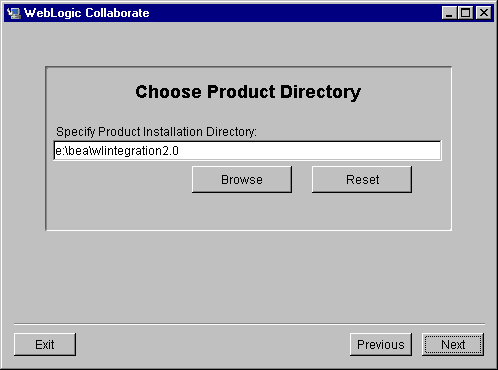
Step 3. Specifying the BEA Home and Installation Location
After you review the installation prerequisites, the Choose BEA Home Directory dialog box is displayed, as shown in the following figure.
Figure 2-3 Choose BEA Home Directory Dialog Box
The BEA Home directory serves as the central support directory for all the BEA products installed on your system. Although it is possible to create more than one BEA Home directory, we recommend that you avoid doing so. In almost all situations, a single BEA Home directory is sufficient. For a detailed description of how the BEA Home directory is used, see "BEA Home Directory" in the Preparing to Install the Server topic of the BEA WebLogic Server Installation Guide at the following URL: http://download.oracle.com/docs/cd/E13222_01/wls/docs60/install/instpre.html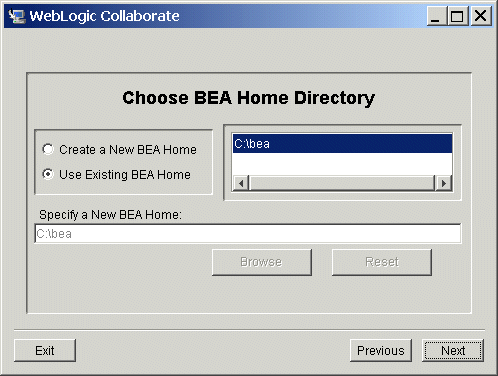
You must install WebLogic Collaborate in an existing BEA Home directory.
To specify the BEA Home directory and installation location:
Figure 2-4 Choose Product Directory Dialog Box
Step 4. Selecting the Database for the Custom Domain
After you have selected the BEA Home directory, the Database Selection dialog box is displayed, as shown in the following figure.
Figure 2-5 Database Selection Dialog Box
As described in "About the Preconfigured Domains" in Starting, Stopping, and Customizing WebLogic Collaborate in Administering BEA WebLogic Collaborate, the WebLogic Collaborate installation program configures two domains: a sample domain and a custom development domain: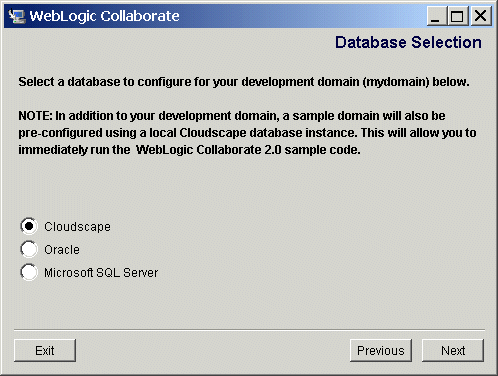
To promote integrated operation, a common database is used by the custom domain configured for each WebLogic Integration component. Therefore, you should specify the same database and provide the same access information that you provided for any previously installed component. To facilitate this, the information you provided when you installed any other WebLogic Integration component is carried forward to the WebLogic Collaborate installation.
If you have not already determined which database to use with the custom domain, you should consider the following:
Note: If, when you installed WebLogic Process Integrator, you specified a Sybase database for the custom domain, we recommend that you reinstall WebLogic Process Integrator, and select a database that is supported by WebLogic Collaborate. Click Exit, to exit the WebLogic Collaborate installation program. After you have reinstalled WebLogic Process Integrator, you may restart the WebLogic Collaborate installation program.
The sections that follow provide the information you need to configure a database for the custom domain. Refer to the section appropriate to your configuration:
Configuring the Custom Domain to Use Cloudscape
To configure the custom domain to use Cloudscape:
The Confirm Database Selection dialog box is displayed.
Configuring the Custom Domain to Use Oracle
To configure the custom domain to use Oracle:
The Oracle Access Configuration dialog box is displayed, as shown in the following figure.
Figure 2-6 Oracle Access Configuration Dialog Box
Note: The Oracle Server Port Number is preset to the Oracle default. The Confirm Database Selection dialog box is displayed.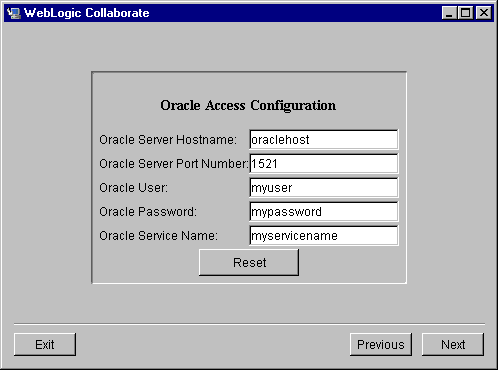
Configuring the Custom Domain to Use Microsoft SQL Server
To configure the custom domain to use Microsoft SQL Server:
The Database Configuration dialog box is displayed, as shown in the following figure.
Figure 2-7 Database Configuration Dialog Box
Note: The Database Port is preset to the Microsoft SQL Server default. The Confirm Database Selection dialog box is displayed.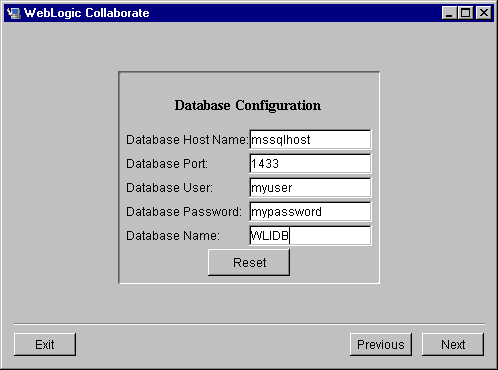
Step 5. Completing the Installation
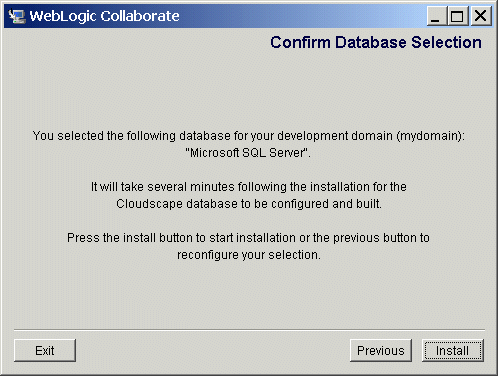
After you have provided the information required to configure the database for the custom domain, the Confirm database selection dialog box is displayed, as shown in the following figure.
Figure 2-8 Confirm Database Selection Dialog Box
The Installation Status dialog box is displayed, as shown in the following figure.
Figure 2-9 Installation Status Dialog Box
When the installation program has completed copying the required files, the Configuring dialog box is displayed, as shown in the following figure. Figure 2-10 Configuring Dialog Box
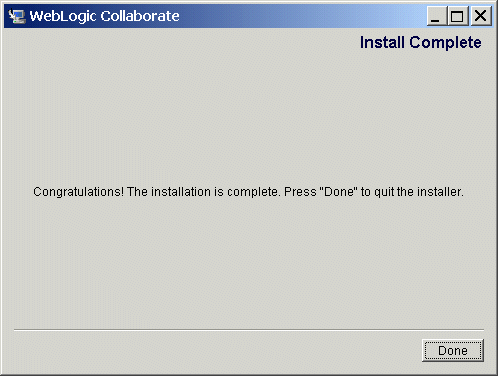
The installation program completes the setup of the WebLogic Collaborate environment and populates the default Cloudscape database with the tables and data required to run the samples provided. When the installation program has completed configuring the WebLogic Collaborate environment (this can take a couple of minutes), the Install Complete dialog box is displayed, as shown in the following figure. Figure 2-11 Install Complete Dialog Box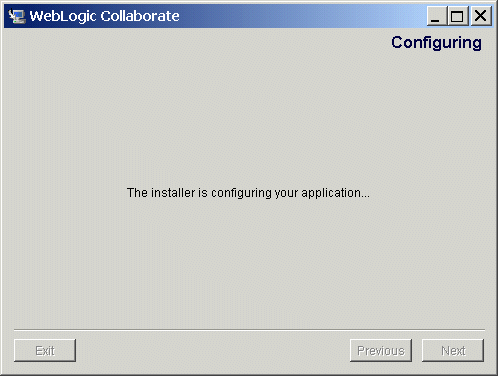
Step 6. Installing Your Software License
The components of WebLogic Integration cannot be used without a valid software license.
The license is provided to you in one of the following ways:
To install the WebLogic Integration software license:
Warning: Do not overwrite the existing license.bea file.
Although no one else can use your license file, you should save this information in a place protected from either malicious or innocent tampering by others.
Step 7. Creating the WebLogic Collaborate Tables
If you selected either Oracle or Microsoft SQL Server for your custom domain, you must create the tables required by WebLogic Collaborate on the database server before starting WebLogic Collaborate from that domain. Scripts that automate the table creation process have been provided.
As part of the installation process, the tables required are created in the Cloudscape database for the samples domain. If you selected Cloudscape for the custom domain, that domain has been configured to use the same Cloudscape database as the samples domain.
Table Creation Scripts
The following tables summarize the location of the scripts used to create the tables required by WebLogic Collaborate.
Review these scripts with your database administrator to determine whether your local machine has the appropriate tools and whether your database login has the appropriate permissions for running these scripts. When you have successfully created the tables required, go to Step 9. Verifying the WebLogic Collaborate Installation.
Note: If you selected Cloudscape for the custom domain, the tables required have already been created. The scripts used and the procedure required to manually create the tables in Cloudscape have been documented in the following section for your reference.
Table 2-1 Scripts to Create WebLogic Integration Common Tables
Each directory in the preceding table contains the following scripts. The scripts are specific to database type.
Note: As part of the installation process, the createDB.cmd (Windows) or createDB.sh (UNIX) file for the database you specified in Step 4. Selecting the Database for the Custom Domain is updated with the access information you provide in that step. If for some reason you change to a different database in the future, you will not be able to make use of the createDB file for the new database until you have modified the createDB file as required to access the database.
Table 2-2 Scripts to Create the WebLogic Collaborate Tables
Each directory in the preceding table contains the following two SQL scripts. The scripts are specific to database type.
In addition to the these scripts, a createDB.cmd (Windows) or createDB.sh (UNIX) command file resides in the BEA_Home/wlintegration2.0/collaborate/bin directory. This command can be used to execute both SQL scripts for a specified database. This command requires the following syntax:
createDB database
Here database is mssql, oracle, or cloudscape.
Note: As part of the installation process, the section of the createDB.cmd (Windows) or createDB.sh (UNIX) file applicable to the database specified in Step 4. Selecting the Database for the Custom Domain is updated with the access information you provide in that step. If for some reason you change to a different database in the future, you will not be able to make use of the createDB file to create tables in the new database until you have modified the file, as required, to access the new database.
Creating Tables and Updating Settings for Cloudscape
During the installation process, a default Cloudscape database was created and populated with the tables and schema required. This default database is located in the BEA_Home\wlintegration2.0\repository\cloudscape\db directory.
This section provides a procedure that can be used if, for some reason, you must use an alternate Cloudscape database with WebLogic Collaborate.
In order to use an alternate database, you must modify the config.xml file for the domain that will be set up to use the database must. See "Updating the JDBC Configuration" in Starting, Stopping, and Customizing WebLogic Collaborate and Sample WebLogic Configuration Files in Administering BEA WebLogic Collaborate.
To set up a Cloudscape database:
java -classpath c:\bea\wlserver6.0\samples\eval\cloudscape\lib\
tools.jar;c:\bea\wlserver6.0\samples\eval\cloudscape\lib\
cloudscape.jar COM.cloudscape.tools.cview
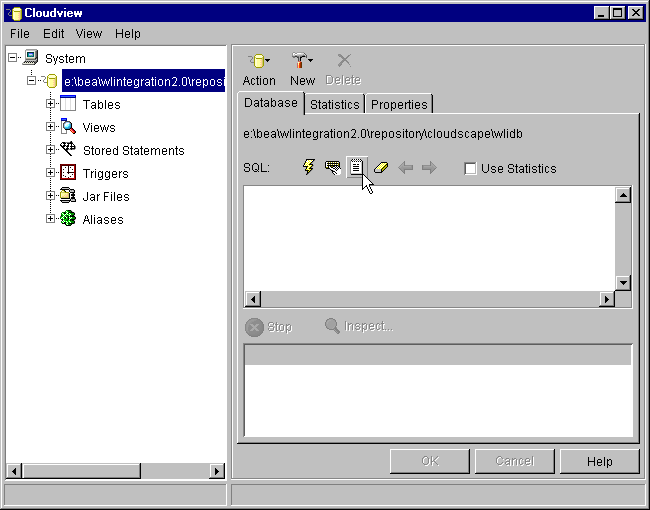
Figure 2-12 New Database
Figure 2-13 Running a Script in Cloudscape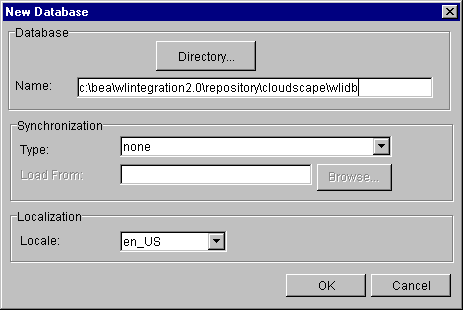
Step 8. Loading the System Data
Note: If you do not have a custom domain configured for an Oracle or Microsoft SQL Server database, skip this step.
Each business protocol supported by WebLogic Collaborate, requires the following:
These definitions constitute the WebLogic Collaborate system data. After you have loaded the required database tables, you are ready to import the system data.
You load the system data into the Cloudscape database for the samples domain when you load the samples data in Step 9. Verifying the WebLogic Collaborate Installation.
As noted in Step 4. Selecting the Database for the Custom Domain, if you select Cloudscape for the custom domain, the same Cloudscape database is used by both the samples and custom domains. If you select Cloudscape, you can skip this step entirely.
If you select either Oracle or Microsoft SQL Server for the custom domain, you must load the system data in either of two ways: You can bulkload the data or import the data from the WebLogic Collaborate Administration Console.
The information required for both methods is provided in the following sections:
Bulk Loader Configuration Files
Bulk Loader configuration files are provided which can be used to import the system data. The following table lists the names and locations of these files.
Note: The name and location of the Bulk Loader configuration file for Cloudscape is included in the following table for your reference.
Table 2-3 System Data Bulk Loader Configuration Files
Each Bulk Loader configuration file is an XML file that specifies:
Each of the files listed in the preceding table bulk loads the data found in the collaborate/bin/systemData/SystemRepData.xml file.
As part of the installation process, the Bulk Loader configuration file for the database you specified in Step 4. Selecting the Database for the Custom Domain is updated with the access information you provide in that step. If, for some reason, you use a different database in the future, you will not be able to use the Bulk Loader configuration to load the system data into the new database until you have made the changes required to access that database. For additional information about using the Bulk Loader, see Working with the Bulk Loader in Administering BEA WebLogic Collaborate.
Bulk Loading the System Data on a Windows System
To bulk load the system data on a Windows system:
cd BEA_Home\wlintegration\collaborate\bin
setEnv
cd systemData
The following is displayed as the Bulk Loader initiates:
===============================================================
Loading data from 'SystemRepData.xml' into database . . .
===============================================================
As the bulk loading process proceeds, messages are displayed, notifying you about which elements are being loaded. When the process is complete, the message Successfully done!!! is displayed.
Bulk Loading the System Data on a UNIX System
To bulk load the system data on a UNIX system:
cd BEA_Home/wlintegration2.0/collaborate/bin
. ./setEnv.sh
cd systemData
The following is displayed as the bulk loader initiates:
===============================================================
Loading data from 'SystemRepData.xml' into database . . .
===============================================================
As the bulk loading process proceeds, messages are displayed notifying you about which elements are being loaded. When the process is complete, the message Successfully done!!! is displayed, and you are returned to the command prompt.
Importing the System Data
To import the system data from the WebLogic Collaborate Administration Console, perform the following procedure.
Note: All references in the procedure are to Administering BEA WebLogic Collaborate.
Step 9. Verifying the WebLogic Collaborate Installation
Verify the configuration of the custom domain by starting WebLogic Collaborate in that domain, and then starting the WebLogic Collaborate Administration Console as described in Starting, Stopping, and Customizing WebLogic Collaborate in Administering BEA WebLogic Collaborate.
Verify the configuration of the samples domain by running the Hello Partner sample as described in Using BEA WebLogic Collaborate Samples. In order to run the Hello Partner sample, you will need to load the sample data and workflows into the WebLogic Collaborate repository as described in Getting Started in Using BEA WebLogic Collaborate Samples.
Note: Both domains are configured to use the 7001 listen port, therefore, you must shutdown a domain as described in "Stopping WebLogic Server and All Deployed Applications" in Starting, Stopping, and Customizing WebLogic Collaborate in Administering BEA WebLogic Collaborate before you can start WebLogic Collaborate from another domain.
Uninstalling WebLogic Collaborate
This section provides platform-specific procedures for uninstalling WebLogic Collaborate. See the section appropriate for your platform:
Uninstalling WebLogic Collaborate on a Windows System
To uninstall WebLogic Collaborate on a Window system:
The WebLogic Collaborate Uninstall dialog box is displayed, as shown in the following figure.
Figure 2-14 WebLogic Collaborate Uninstall Start Screen

Uninstalling WebLogic Collaborate on a UNIX System
The following procedure applies to graphics (windowing) terminals or workstations. See Using Console Mode to Uninstall WebLogic Collaborate for the text-only method which can be used to uninstall WebLogic Collaborate on a system that does not include a graphics terminal or workstation.
To uninstall WebLogic Collaborate on a UNIX system:
uninstall.bin
When the uninstallation process is complete, the message Uninstall Complete is displayed.
Troubleshooting the Installation
This section describes the problems that may occur during installation, and the symptoms, possible causes, and solutions for those problems.
The following problems are described:
Previous Installation Found
This section describes the problem, and discusses the possible causes and solutions to the problem.
Symptom
You have selected a BEA Home directory in the Choose BEA Home Directory dialog box and clicked Next. The Previous Installation Found warning is displayed, as shown in the following figure.
Figure 2-15 Previous Installation Found Warning
Solution The warning dialog box presents three options: Continue, Cancel and Exit: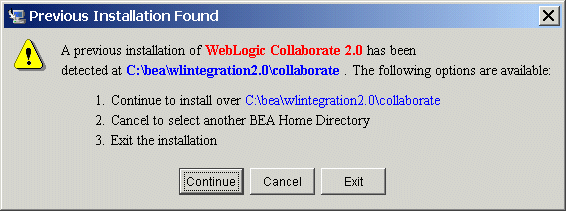
WebLogic Server 6.0 Not Detected
This section discusses describes the problem, and discusses the possible causes and solutions to the problem.
Symptom
The WebLogic Server 6.0 Not Installed warning (shown in the following figure) is displayed when you click Next after selecting the BEA Home directory.
Figure 2-16 WebLogic Server 6.0 Not Installed Warning
Possible Cause 1 Your WebLogic Server 6.0 installation has an expired evaluation license. Solution 1 You must purchase WebLogic Server and update the license. Information about purchasing licenses for BEA software can be found at http://www.beasys.com/buy. Possible Cause 2 You have more than one BEA Home directory configured and the selected directory does not correspond to a valid installation. Solution 2 Click Cancel to dismiss the dialog box and to return to the Choose BEA Home Directory dialog box. Select a valid BEA Home directory. For information about the BEA Home directory, see "BEA Home Directory" in the Preparing to Install the Server topic of the BEA WebLogic Server Installation Guide at the following URL: http://download.oracle.com/docs/cd/E13222_01/wls/docs60/install/instpre.html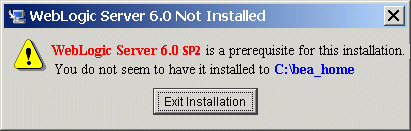
Possible Cause 3
You have not installed WebLogic Server 6.0 with Service Pack 2.
Solution 3
Click Exit to dismiss the dialog box and exit the installation. Install WebLogic Server 6.0 with Service Pack 2 before installing WebLogic Collaborate 2.0.
Note: You must select the Full Install (Server & samples/examples) option when you install WebLogic Server 6.0 with Service Pack 2

|

|

|
|
|
|
Copyright © 2001 BEA Systems, Inc. All rights reserved.
|