

|
|
|
|
|
|
Example of Customizing the Templates
In previous sections of the tour, when you clicked the Add to Cart link in the commerce templates, WebLogic Portal displayed shoppingcart.jsp to prompt you to check out. However, your business model may want to encourage customers to continue shopping by returning them to the product catalog after they click Add to Cart.
You can change the behavior of the Add to Cart link by modifying the Webflow associated with the wlcs Web application. Before you modify the Webflow, however, you need some background information. This section of the tour takes you along the following path:
Step 1: Understand the Add to Cart Link
Instead of specifying a static filename as a URL, link anchors in WebLogic Portal invoke the Webflow mechanism to determine the destination resource. The link anchor for the Add to Cart link (illustrated in Listing 6-1) is in the include file PORTAL_HOME/applications/wlcsApps/wlcs/commerce/catalog/includes/itemdetails.jsp. For more information on itemdetails.jsp, see "The Product Catalog JSP Templates" in the Guide to Building a Product Catalog.
Listing 6-1 Add to Cart Anchor
<%-- Add the 'Put in Cart' link --%>
<%
allParams = HttpRequestConstants.CATALOG_ITEM_SKU + "=" + productItem.getKey().getIdentifier();
%>
<td align="right" valign="top" width="5%"><a href="<webflow:createWebflowURL event="link.add" namespace="sampleapp_order" extraParams="<%= allParams %>" />">
<img src="<webflow:createResourceURL resource="/commerce/images/btn_addcart.gif" />" border="0" alt="Add to Shopping Cart"></a>
</td>
This step of the tour describes the following actions:
How the Link Anchor Invokes Webflow
The anchor uses the <webflow:createWebflowURL> JSP tag to pass data to Webflow.
Note the following three data items that the <webflow:createWebflowURL> JSP tag passes to Webflow:
For more information about the <webflow:createWebflowURL> JSP tag, see "Webflow JSP Tag Library Reference" in the Guide to Managing Presentation and Business Logic: Using Webflow and Pipeline documentation.
After sending this data through one or more Pipelines, Webflow returns a URL that resolves the link.
How Webflow Resolves the Link
Warning: All modifications to the .wf and .pln files (a few of which are shown in the following code listings) should be done using the Webflow and Pipeline Editors. These editors are used in the E-Business Control Center. For more information, see "Using the Webflow and Pipeline Editors" in the Guide to Managing Presentation and Business Logic: Using Webflow and Pipeline documentation. Failure to do so may cause unexpected results.
When the <webflow:createWebflowURL> JSP tag sends data to Webflow, Webflow searches the sampleapp_order.wf for the link.add event in the event list of the wild card presentation node, as shown in Listing 6-3.
Listing 6-2 The Add to Cart Link in sampleapp_order.wf
<wildcard-presentation-origin node-type="jsp">
   <event-list>
...
      <event event-name="link.add">
         <destination namespace="sampleapp_order"
          node-name="addProductItemToShoppingCartIP" node-type="inputprocessor"/>
      </event>
...
    </event-list>
</wildcard-presentation-origin>
The destination shown for the link.add event for this case is to invoke the addProductItemToShoppingCartIP Input Processor, which is in sampleapp_order. Therefore, Webflow locates the addProductItemToShoppingCartIP Input Processor in the list of processor node origins, as shown in Listing 6-3.
Listing 6-3 The addProductItemToShoppingCartIP Input Processor in sampleapp_order.wf
<processor-origin node-name="addProductItemToShoppingCartIP"
 node-type="inputprocessor">
   <node-processor-info
    class-name="examples.wlcs.sampleapp.catalog.webflow.GetProductItemIP"/>
   <event-list>
      <event event-name="success">
         <destination namespace="sampleapp_order"
          node-name="addProductItemToShoppingCart" node-type="pipeline"/>
      </event>
   </event-list>
...
</processor-origin>
If the addProductItemToShoppingCartIP Input Processor executes successfully, the Webflow invokes the addProductItemToShoppingCart Pipeline. Webflow searches sampleapp_order and locates the addProductItemToShoppingCart Pipeline, as shown in Listing 6-4.
Listing 6-4 The addProductItemToShoppingCart Pipeline in sampleapp_order.wf
<processor-origin node-name="addProductItemToShoppingCart" node-type="pipeline">
   		<node-processor-info pipeline-name="addProductItemToShoppingCart"/>
   		<event-list>
      			<event event-name="success">
         				<destination namespace="sampleapp_order"
          node-name="addProductItemToShoppingCartTracker" node-type="pipeline"/>
      			</event>
   		</event-list>
...
</processor-origin>
Similarly, if the addProductItemToShoppingCart Pipeline executes successfully, it sends data to another Pipeline named addProductItemToShoppingCartTracker. If the addProductItemToShoppingCartTracker Pipeline is successful, then Webflow invokes the refreshSavedList Pipeline. When the refreshSavedList Pipeline executes successfully, it reloads the shoppingcart.jsp.
Step 2: Modify Add to Cart
After understanding how the Webflow determines the user-visible behavior of the Add to Cart link, you can modify it to direct customers to the top level of the catalog.
Recall from New User Buys a Product, that the top level of the product catalog is displayed in main.jsp. However, changing the refreshSavedList Pipeline's success event to load main.jsp as a destination (rather than shoppingcart.jsp) would not produce desirable results. This is because main.jsp does not contain the standard HTML tags that Web browsers can render. Instead, the file contains JSP tags. If you were to change the output of the refreshSavedList Pipeline's success event to display main.jsp directly, the Web browser would display an empty page.
Instead, you must invoke an Input Processor named getTopCategoriesIP, which resides in the sampleapp_main namespace. This Input Processor gathers data about categories in the product catalog and displays it in main.jsp.
For more information on how WebLogic Portal populates main.jsp with data, see "The Product Catalog JSP Templates" in the Guide to Building a Product Catalog.
Directing the Output of the getTopCategoriesIP Input Processor
You can direct output from the refreshSavedList Pipeline to the getTopCategoriesIP Input Processor using the Webflow and Pipeline Editors.
Open the sampleapp_order.wf file using the Editor, then move the destination of the refreshSavedList Pipeline Node's success event by dragging the end connector from the shoppingcart.jsp Presentation Node to the sampleapp_main_getTopCategoriesIP Proxy Node. This will point the event destination to the correct namespace.
For more information about the Webflow and Pipeline Editors, see "Using the Webflow and Pipeline Editors "in the Guide to Managing Presentation and Business Logic: Using Webflow and Pipeline documentation.
Step 3: Verify the Modification
After you save your modifications to sampleapp_order.wf, you must synchronize the modifications to the WebLogic Portal server using the E-Business Control Center by choosing Tools
After you have synchronized, you can see the results by clicking the Add to Cart link from details.jsp (see Figure 6-1). You do not need to restart the WebLogic Portal server.
Figure 6-1 Click Add to Cart in details.jsp
When you click Add to Cart, WebLogic Portal displays the top level of the product catalog in main.jsp. However, to verify that WebLogic Portal added your item to the shopping cart, do the following from main.jsp: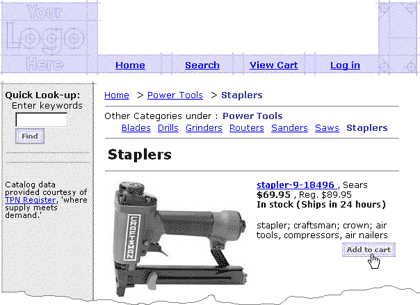
When you click View Cart, WebLogic Portal displays shoppingcart.jsp, which contains the item you added to the cart.
What's Next?
To continue the tour and learn about the campaign features that are used in the JSP templates, and how they were defined in the E-Business Control Center, see A Sample Campaign.
To learn more about the WebLogic Portal commere services JSP templates, the Webflow and Pipeline mechanisms, the Product Catalog, and the other concepts introduced in the tour, Commerce Engineers should see the following documents:

|

|

|
|
|
|
Copyright © 2001 BEA Systems, Inc. All rights reserved.
|