Using the UEFI Menu to Create a Bootable RAID Volume (x86)
This section describes how to use the UEFI Driver Control menu in the BIOS Setup utility to optionally set up a RAID volume on an x86 system. You can then install the operating system onto that RAID volume.
Note - If you want to install the OS on a non-RAID volume, you do not need to perform the steps in this section. Instead, during bootup, launch Oracle System Assistant and specify a bootable drive on which to install an OS. For more information, see the Oracle System Assistant documentation.
In order to configure a RAID volume, the HBA must have firmware version 11.05.02.00, at minimum, installed. Before performing the steps in this section, verify the firmware level on the HBA and perform any firmware updates, as necessary. For information about updating firmware, see HBA Software Installation.
Perform the following procedures, in the order listed below, to configure a RAID volume on an x86 system:
To Verify the Drives and Their Slots (x86)
This procedure helps you identify drives to be used in a RAID volume configuration.
- From the Integrated Lights Out Manager (ILOM) software or Video Graphics Array (VGA) video port, access the system console.
- Initiate a system boot.
During the boot process, the BIOS initialization banner lists information about the discovered SAS adapters and devices that are attached to the discovered HBAs in the system.
- Press F2 during the boot process, when prompted, to launch the BIOS Setup utility, and then use the right arrow key to navigate to UEFI Driver Control menu.
- From the list of controllers
that are displayed, use the up and down arrow keys to navigate to
the LSI SAS2 MPT Controller menu option and press Enter.
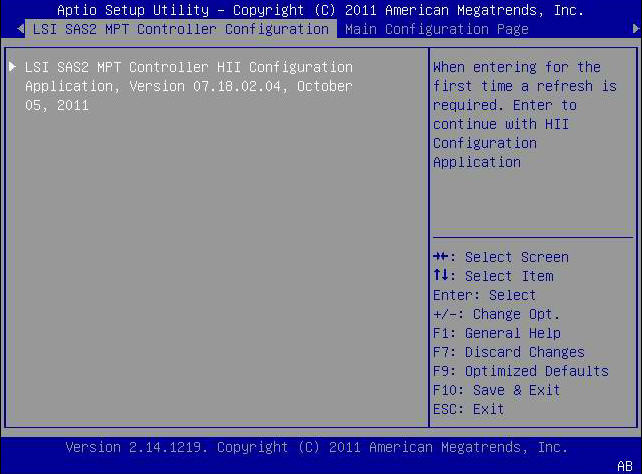
In the following example, the LSI SAS2 MPT Controller HII Configuration Application field is then displayed in the left tab of the utility.
Figure 3 LSI SAS2 MPT Controller HII Configuration Application Field
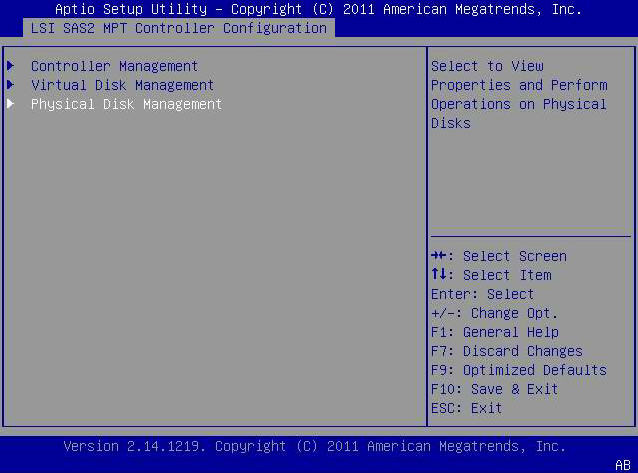
- Press Enter to display the Controller Management, Virtual Disk Management, and Physical Disk Management menu options.
- Use the arrow keys to navigate
to the Physical Disk Managment menu option and press Enter.
Figure 4 Selecting the Physical Disk Management Menu Option
- From the menu options that are
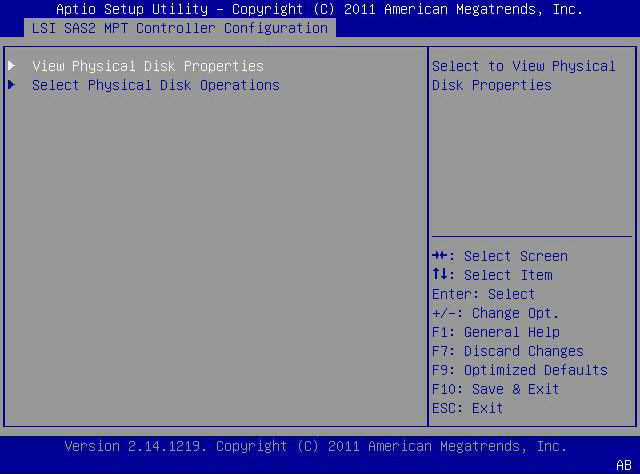
displayed, navigate to the View Physical Disk Properties menu option
and press Enter.
Figure 5 Selecting the View Physical Properties Menu Option
- On the properties page that is
displayed, navigate to the View Physical Disk Properties field and
press Enter.
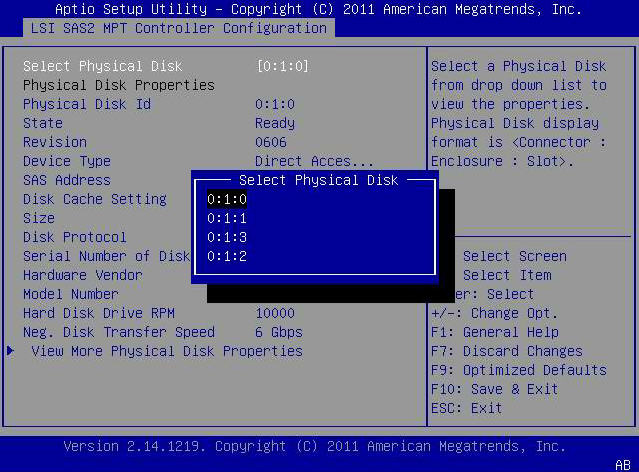
The Select Physical Disk pop-up window is displayed. In the following example, there are 4 drives in Slots 0, 1, 2, and 3.
Figure 6 Select Physical Disk Pop-up Window
- Review the physical disks and
note their respective slots for future reference.
You can use these disks to be part of your RAID volume configuration. See To Create a RAID Volume (x86).
To Create a RAID Volume (x86)
After you have verified which drives are available for RAID volume configuration, as described in To Verify the Drives and Their Slots (x86), you can use those drives to create a RAID volume. In the following procedure, drives 2 and 3 from Step 8 (0:1:2, 0:1:3) are being used to create a RAID 1 volume.
Note - Do not perform the steps in this procedure if you want to install the operating system on a non-RAID volume. Instead, use Oracle System Assistant.
Before You Begin
The HBA must have firmware level 11.05.02.00, at minimum, installed.
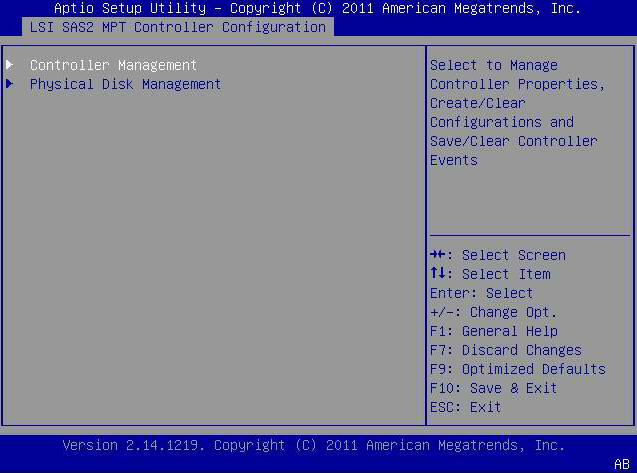
- From
the Select Physical Disk pop-up window (Figure 6), use the Esc key to return
to the Controller Management menu option, and press Enter.
Figure 7 Selecting the Controller Management Menu Option
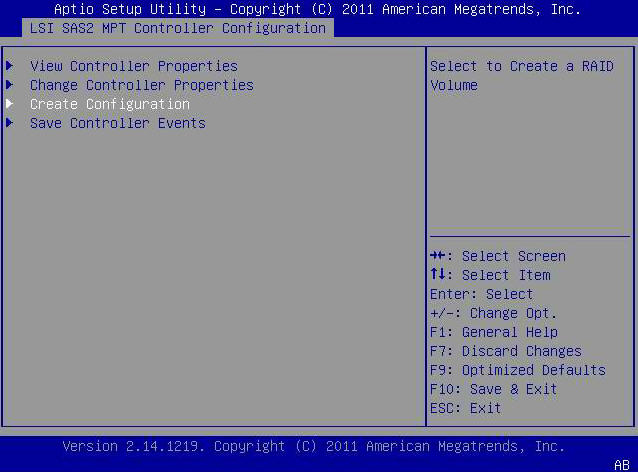
- From the menu options that are
displayed, use the arrow keys to navigate to the Create Configuration
menu option and press Enter.
Figure 8 Selecting the Create Configuration Menu Option
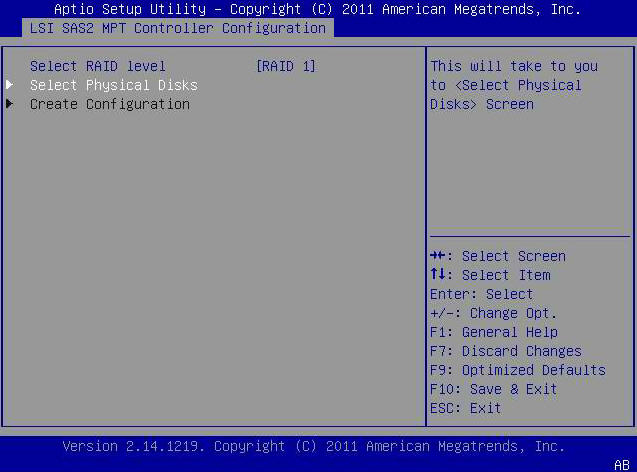
- From the menu options that are
displayed, use the arrow keys to navigate to the Select Physical
Disks menu option and press Enter.
In the following example, note that the RAID 1 level is selected. You might want to create a different level of RAID volume, based on your requirements.
Figure 9 Selecting the Select Physical Disks Menu Option
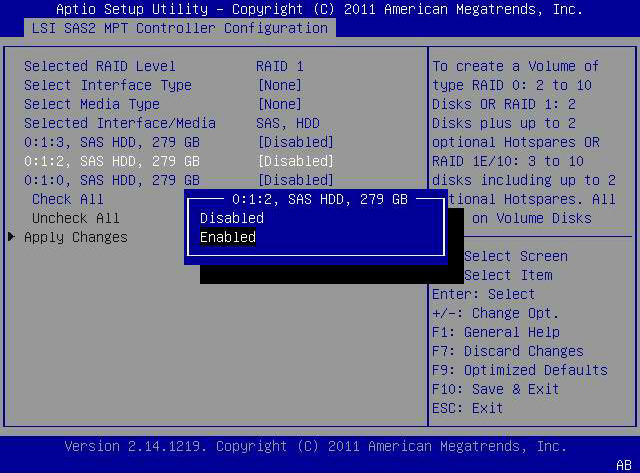
- For each drive that you want
in the RAID volume configuration, do the following:
- Use the arrow keys to navigate to the drive.
- Press Enter to launch the Enabled/Disabled pop-up window for that drive.
- In the pop-up window, navigate
to the Enabled field and press Enter.
The pop-up window closes and the drive is now listed as Enabled.
Figure 10 Enabling the Drives for RAID Volume Configuration
- After you have enabled all the
drives that you want to be part of the RAID volume, use the arrow
keys to navigate to the Apply Changes field on the same page, and
press Enter.
The RAID volume is now created with the drives that you enabled.
- Complete the steps in To Confirm the RAID Volume Creation (x86).
To Confirm the RAID Volume Creation (x86)
Before You Begin
Before performing this procedure, verify the drives and their slots (To Verify the Drives and Their Slots (x86)) and create a RAID volume (To Create a RAID Volume (x86)).
- Use
the Esc key to return to the Create Configuration menu option (Figure 9) and press Enter.
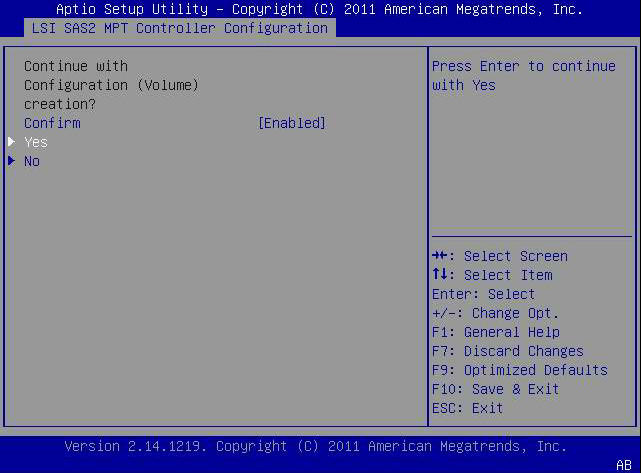
A page is displayed that asks if you would like to continue with the volume creation.
- Confirm the volume creation by
doing the following:
- Use the arrow keys to navigate to the Confirm field.
- Change the value of the Confirm
field to Enabled and press Enter.
Yes and No fields are displayed.
- Use the arrow key to navigate
to the Yes field and press Enter.
This completes the RAID volume creation process.
Figure 11 Confirming the RAID Volume Creation
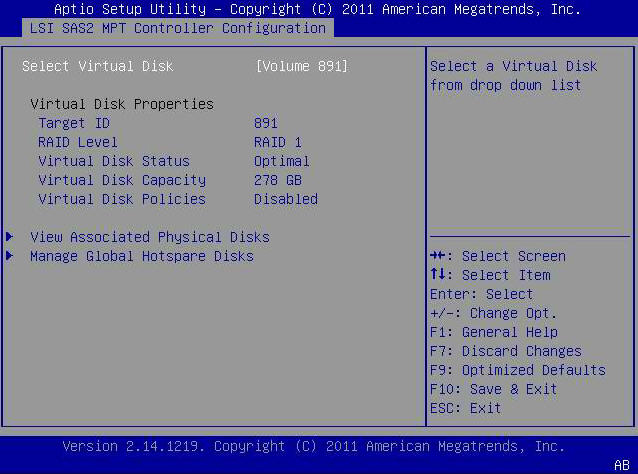
- To verify that the RAID volume
(logical volume) was created, use the arrow keys to navigate to
the Virtual Disk Management menu option (Figure 4), press Enter, and review
the RAID volume information on the page that is displayed.
In the following example, a RAID 1 volume is created with a target ID of 891.
Figure 12 Viewing the Newly Created RAID Volume
- Exit the Setup utility and reboot into the Oracle System Assistant utility to install an OS on that RAID volume or manipulate the boot drive.
- You can now nstall the OS on the volume, as described in Installing the Oracle Solaris OS.