Steps to Create the BPEL Project
The following procedures are used to create the sample Scheduler Project:
 Create a New BPEL Project
-
Choose File -> New Project (Ctrl-Shift-N).
The New Project Wizard appears.
-
Select SOA in the Categories list, and BPEL Module in the Projects list. Click Next.
-
Name the project SayHello, and click Finish.
The SayHello Project is added to the Projects tree.
 Create a Scheduler Binding Component
-
From the Project tree, right-click the SayHello node and select New -> WSDL Document.
The WSDL Document Wizard appears.
-
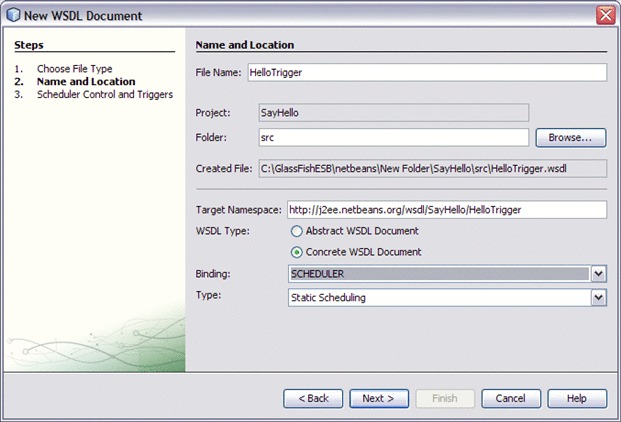
Enter HelloTriggers as the file name.
-
Select Concrete WSDL Document as the WSDL type, and select SCHEDULER as the binding.
-
Click Next.
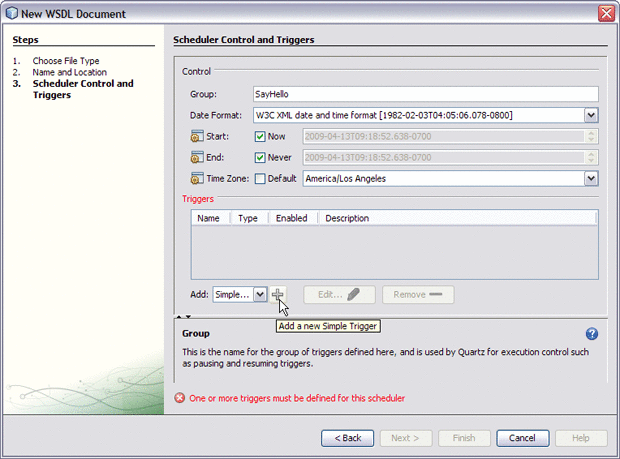
The Scheduler Control and Triggers Wizard appears.
-
From the Scheduler wizard's Add field, select Simple. Click the plus sign next to the Add field to open the Add New Simple Trigger dialog box.
-
From the Add New Simple Trigger dialog box, add the following values:
-
Name: SimpleTrigger1
-
Description: Say Hello first 20 seconds
-
Repeat: 4
-
Interval: 5
-
Message: Hello first 20 seconds
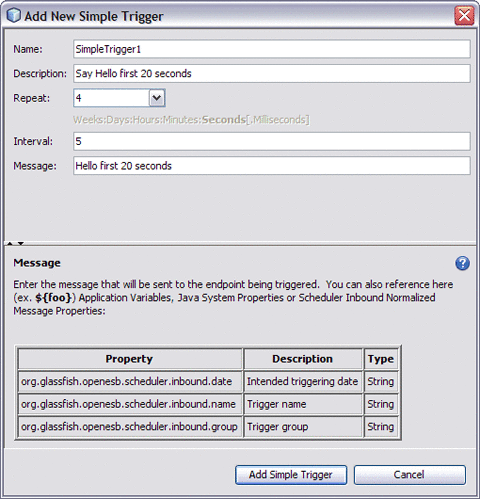
This creates a trigger that sends the message “Hello first 20 seconds” and repeats it four times in five second intervals for a total of five messages.
-
-
Click Add Simple Trigger.
SimpleTrigger1 is added to the Triggers field.
-
Now create a Cron trigger. Change the Add field value to Cron and click the plus sign next to the Add field.
The Add New Cron Trigger dialog box appears.
-
From the Add New Cron Trigger dialog box, add the following values:
-
Name: CronTrigger1
-
Description: Say Hello at the bottom of each minute
-
From the Second (1) tab, select Just on Second: and select 30 as the value. Leave remaining tabs at their default values.
-
Message: Hello at the bottom of each minute
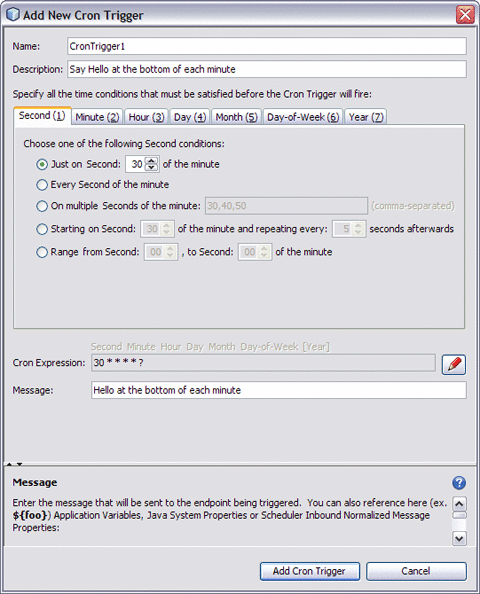
This creates a trigger that sends the message “Hello at the bottom of each minute” every minute at second 30, indefinitely.
-
-
Click Add Cron Trigger.
CronTrigger1 is added to the Triggers field.
-
Now create a Hybrid trigger. Change the Add field value to Hybrid and click the plus sign next to the Add field.
The Add New Hybrid Trigger dialog box appears.
-
From the Add New Hybrid Trigger dialog box, add the following values:
-
Name: HybridTrigger1
-
Description: Say Hello for the last 20 seconds of each minute
-
From the Second (1) tab, select Just on Second: and select 40 as the value. Leave remaining tabs at their default values.
-
Duration: 20 Seconds
-
Repeat: Indefinite
-
Interval: 5
-
Message: Hello for the last 20 seconds of each minute
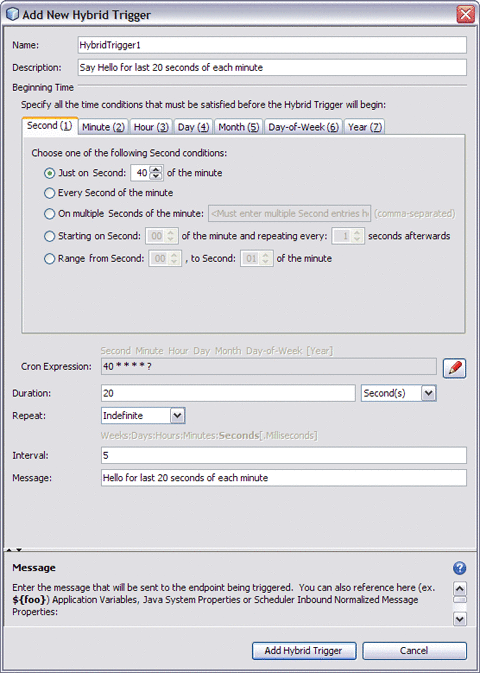
This creates a trigger that sends the message “Hello for the last 20 seconds of each minute” every five seconds, from second 40 through 59 of each minute, indefinitely.
-
-
Click Add Hybrid Trigger.
HybridTrigger1 is added to the Triggers field.
-
Click Finish to create the new WSDL document.
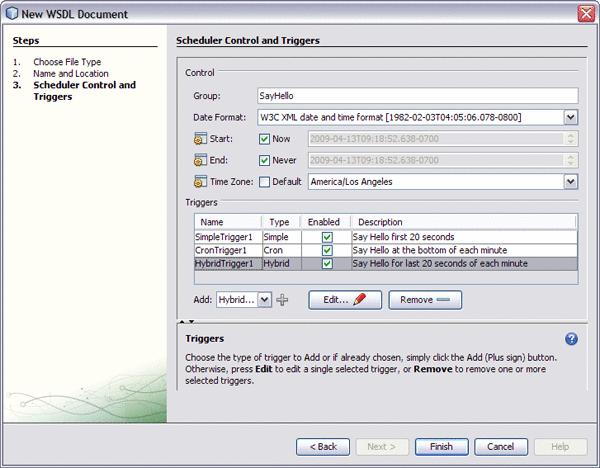
The HelloTriggers WSDL document is added to the SayHello Project's process files.
 Create a File Binding Component
-
From the Project tree, right-click the SayHello Project and select New -> WSDL Document.
The WSDL Document Wizard appears.
-
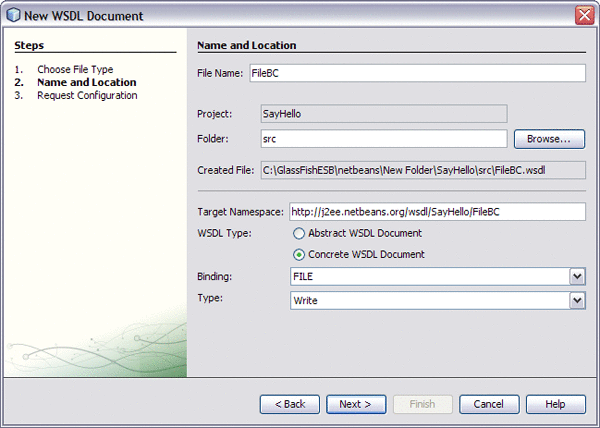
Enter the following values:
-
Name: FileBC
-
WSDL Type: Concrete
-
Binding: FILE
-
Type: Write
-
-
Click Next
-
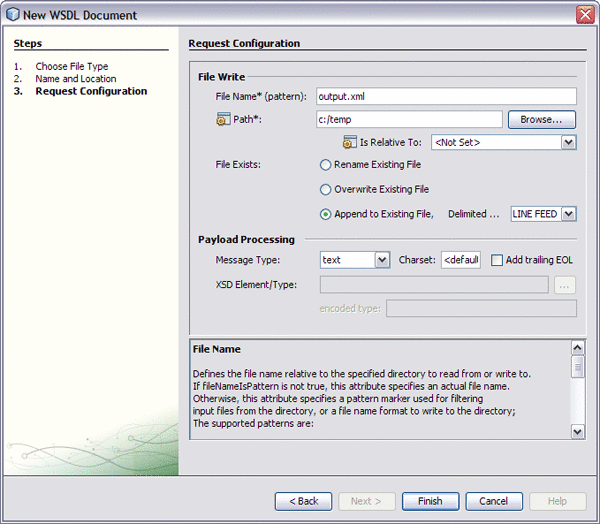
On the Request Configuration page of the New WSDL Document wizard, enter the following values.
-
File Exists: Append to Existing File
-
Payload Processing: Text
-
-
Click Finish.
The new WSDL file is added to the SayHello Project's process files.
 Create a BPEL Process
-
From the Projects window, double-click newProcess.bpel under your projects Process Files.
The BPEL Designer opens to the new file.
-
From the projects tree, drag and drop HelloTriggers.wsdl to the middle of the Ports column on the left side of the BPEL Designer. A “drop-zone” appears, as a prompt.
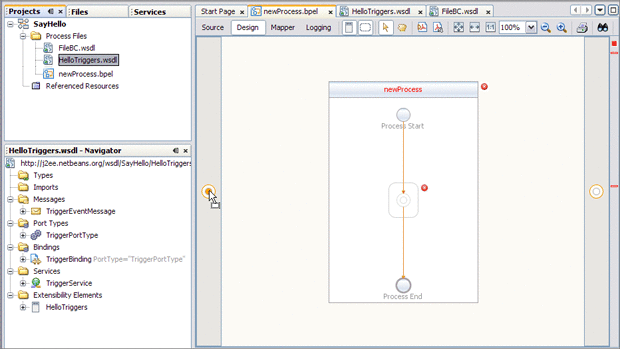
A Partner Link is created.
-
In the same way, drag and drop the FileBC.wsdl file to the drop-zone in the right column of the BPEL Designer.
Another Partner Link is created.
-
Create a Receive web service.
-
From the BPEL Designer Palette, drag and drop a Receive web service to the drop-zone between Process Start and Process End in the middle of the BPEL Designer.
-
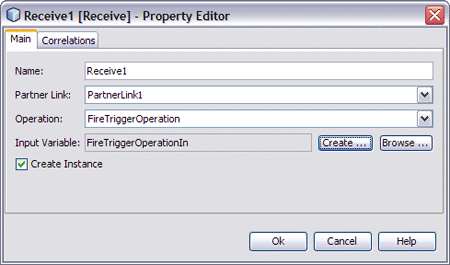
Click the Receive activity's Edit icon.
The Receive1 Property Editor appears.
-
Select PartnerLink1 as the Partner Link value.
-
For Input Variable, click the create button. The New Input Variable dialog box appears. Click OK to accept the current values.
-
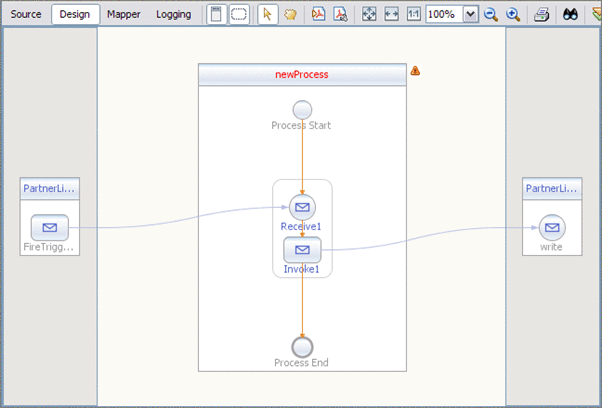
Click OK. The BPEL Designer now displays the Receive activity associated with PartnerLink1
-
-
Create an Invoke web service.
-
From the BPEL Designer Palette, drag and drop an Invoke web service to the drop-zone just below the Receive Activity in the middle of the BPEL Designer.
-
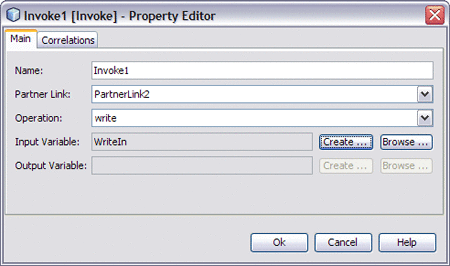
Click the Invoke activity's Edit icon.
The Invoke1 Property Editor appears.
-
Select PartnerLink2 as the Partner Link value.
-
For Input Variable, click the create button. The New Input Variable dialog box appears. Click OK to accept the current values.
-
Click OK. The BPEL Designer now displays the Invoke activity associated with PartnerLink2
-
-
Drag and drop an Assign activity to the drop-zone between the Receive activity and Invoke activity.
-
Double-click the Assign activity to open the BPEL Mapper.
-
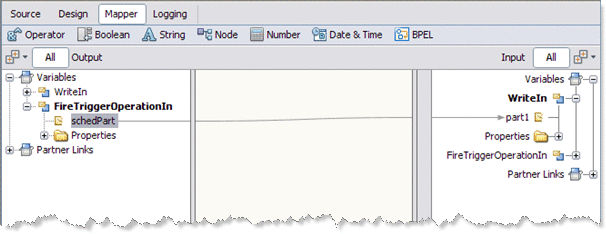
Map SchedPart, under FireTriggerOperationIn in the Output pane of the Mapper, to part1, under WriteIn in the Input pane of the Mapper. To do this, click the SchedPart node in the left pane of the Mapper, and drag it to WriteIn in the right pane of the Mapper. A line now associates the two nodes.
-
Click Save All.
 Create a Composite Application
-
To create the new Composite Application, choose File -> New Project.
The New Project Wizard appears.
-
Select SOA as the Category, and Composite Application as the Project, and click Next.
-
Name the project SayHelloCA, and click Finish.
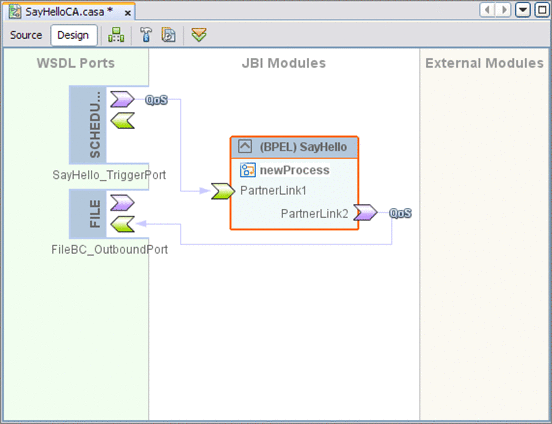
The SayHelloCA Composite Application is added to the Projects tree, and the Composite Application Service Assembly (CASA) Editor opens to the SayHelloCA.casa file.
-
Drag and drop the SayHello BPEL Project from the Projects tree to the JBI Modules column of the CASA Editor.
-
Build the Composite Application project. To do this, click the Build (hammer) icon in the CASA toolbar.
-
Click Save All
 Build and Deploy the Project
-
From the Projects window, right-click the SayHelloCA Composite Application Project and choose Clean and Build from the popup menu.
The NetBeans IDE Output window message reports Build Successful when complete.
-
Right-click SayHelloCA again and select Deploy from the popup menu.
Again, the NetBeans IDE Output window message reports Build Successful when complete.
-
Open your project's output file, for this example C:\TEMP\output.xml. The output appears similar to the image below, depending on when the project is started.
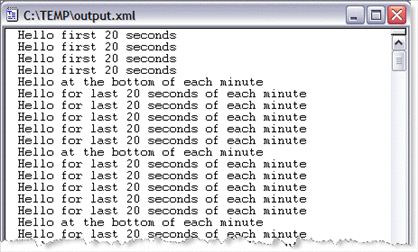
As you can see from the output, the Simple trigger fired for 20 seconds only, producing the first messages, the Cron trigger fires once at the bottom of each minute, and the Hybrid trigger fires the last 20 seconds of each minute.
-
To stop your project, right-click the SayHelloCA Project in the Projects window, and choose Undeploy from the popup menu.
- © 2010, Oracle Corporation and/or its affiliates
