| Skip Navigation Links | |
| Exit Print View | |

|
Oracle Solaris Studio 12.3: Performance Analyzer MPI Tutorial Oracle Solaris Studio 12.3 Information Library |
| Skip Navigation Links | |
| Exit Print View | |

|
Oracle Solaris Studio 12.3: Performance Analyzer MPI Tutorial Oracle Solaris Studio 12.3 Information Library |
1. Performance Analyzer MPI Tutorial
About MPI and Performance Analyzer
MPI Software for Oracle Solaris 10 and Linux
MPI Software for Oracle Solaris 11
Prepare the Sample Source Code
Sample Code for ClusterTools and Open MPI
Sample Code for Oracle Message Passing Toolkit in Oracle Solaris 11
Compile and Run the Sample Program
Collecting Data on the ring_c Example
Viewing Function Details and Application Source Code
Make a Chart to Show Where Messages are Being Sent
Make a Chart to Show Which Ranks Waited Longest to Receive a Message
Look for Slow Message Effects on Time Spent in MPI Functions
The filtering facility lets you select different views of the collected messaging data. You can remove and reapply the filters using the filtering controls in either the MPI Chart Controls tab or the MPI Timeline Controls tab.

The first control filters the data by removing everything that is not currently in view.
The second control is the Remove button which provides an associated drop down list for removing filters. Clicking this button removes the last filter applied. Clicking the down arrow presents a list of the filters applied, in the order they were applied, with the most recent at the top of the list. When you select a filter in this list, the selected filter and all filters above it on the list are removed.
The third control is the Reapply button, and it also has an associated drop down list for reapplying filters. Clicking the button reapplies the last filter that you removed. Clicking the down arrow opens a list of all the filters that have been removed, in the order in which they were removed. When you select a filter in this list, the selected filter and all filters above it on the list are reapplied.
You can remove and reapply the filters by using the arrows, similar to going backward and forward in a web browser. You can even remove and reapply more than one filter in one click by using the down arrows next to the filter buttons.
The following steps explain how to use a filter to focus on the steady state portion of the program by filtering out the MPI_Init and MPI_Finalize functions.
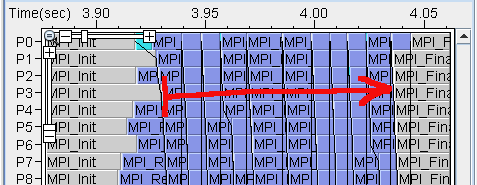
On the timeline, drag the mouse horizontally to select a region such that MPI_Init and MPI_Finalize are no longer visible. In the example below, drag from t=3.93 to 4.03.

Click the Filter button in the MPI Timeline Controls tab.
It may look line nothing happened because the filtering is not evident until you change your view by zooming out or by looking at a chart.
Click the Revert to Previous Zoom button to go back out to the previous zoom.

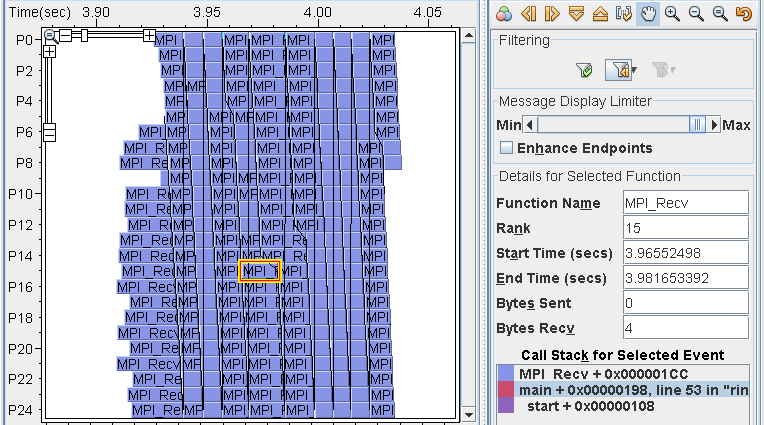
The display now shows white areas in place of the MPI_Init and MPI_Finalize functions. White areas indicate that there is no MPI data collected for that area or the data has been filtered out.

Click the Remove drop down arrow to reveal a list of applied filters.

This list lets you choose which filters to remove. It works like a stack: if you select No filters applied, everything on top of it will be taken off, which means there will be no filters applied.
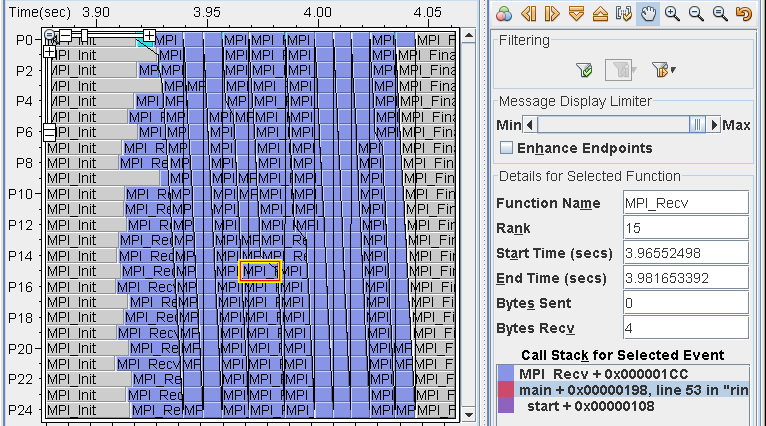
Select No filters applied from the Remove list. The timeline should now look similar to the following.

Restore the previous filter using Reapply.

Before moving on to the next section, verify that MPI_Init and MPI_Finalize are filtered out and white areas are displayed as before.